
Managing updates on your Windows 11 device is essential for maintaining control over your system’s behavior and ensuring it aligns with your preferences. While automatic updates turned on by default, and can be convenient, there are situations where you might want to turn them off temporarily or permanently. In this guide, we’ll explore 5 different solutions to turn off automatic updates on Windows 11.
Page Contents
Why to Turn off Automatic Updates on Windows 11?
- Timing Control: Automatic updates can disrupt your schedule. Disabling them lets you update at your convenience.
- Avoid Surprises: Updates may change your system unexpectedly. Disabling automatic updates lets you choose when to update.
- Stability Assurance: Turn off automatic updates to avoid new bugs or compatibility issues until they’re resolved.
- Data Savings: For users with limited internet, disabling updates can save bandwidth.
- Manual Control: Some prefer manual updates to ensure everything works as expected.
Disabling Automatic Updates can be beneficial but it is important to stay alert about keeping your system up-to-date to ensure security and performance improvement are applied regularly.
Turn on or off Automatic Updates on Windows 11
Automatic updates are turned on by default. Here are the top 5 solutions to disable automatic updates on Windows 11:
- Using Registry Editor
- Using Local Group Policy Editor
- Using Network Settings
- Using Windows Services
- Using Windows Settings
Method 1: Turn off Automatic Updates on Windows 11 using Registry
You can disable Automatic Updates using the Registry Editor, which might seem a bit complex. However, don’t worry! Below, I’ve outlined simplified steps to guide you through the process of turning off updates:
1. Press the Windows key + R and type regedit.exe to open the registry editor.
2. Navigate the following path:
HKEY_LOCAL_MACHINE\SOFTWARE\Policies\Microsoft\Windows
3. Click on “WindowsUpdate“. But, if you don’t have then you have to create it.
To create WindowsUpdate folder, right-click on Windows => New => Key.

A prompt box will appear. Type “WindowsUpdate” and press OK.
4. Now, to create AU(Automatic Update) folder, right-click on WindowsUpdate => New => Key.

5. Now, right-click on AU => New => DWORD (32-bit) value.

A prompt box will appear. Type “NoAutoUpdate“.
6. In the right panel, right-click on “NoAutoUpdate” and click “Modify“.

Set the value to 1. Click OK.
Now, close the registry editor window and restart your PC to apply the changes.
Method 2: Turn off Automatic Updates on Windows 11 using the Local Group Policy Editor
Group Policy Editor can be used to configure a wide range of Windows settings. Follow the below steps to configure the automatic updates settings using Local Group Policy Editor:
1. Press the Windows Key + R and type “gpedit.msc“. Click OK.
2. Navigate to the following path:
Computer Configuration => Administrative Templates => Windows Update
3. Search for “Windows Update” and click to open it.
4. Now, go to “Manage end user experience“.

5. Here, double-click the “Configure Automatic Updates” option.

5. A prompt box will appear.
Select the “Disable” option and click OK.

Close the Local Group Policy Editor Windows and restart the PC to apply the settings.
Once you have made these changes, Windows 11 will no longer automatically download and install updates. You will need to manually check for updates and install them yourself.
Method 3: Turn off Automatic Updates on Windows 11 using Network Settings
Another way to turn off automatic updates on Windows 11 is to set your Wi-Fi network as a metered connection. This will prevent Windows 11 from automatically downloading and installing updates over your Wi-Fi connection.
To set your Wi-Fi network as a metered connection, follow these steps:
1. Open the Settings app and go to “Windows Update“.
2. Now, select “Advanced options“.

3. Turn off the toggle next to the “Download updates over entered connections” option.

4. Now, click on “Wi-Fi” in “Network & Internet“.
5. Click on “Wi-Fi Properties“.
6. Finally, turn off the toggle for the “Metered connection” option.

Method 4: Using Windows Services
To turn off automatic updates on Windows 11 using Windows Services, follow these steps:
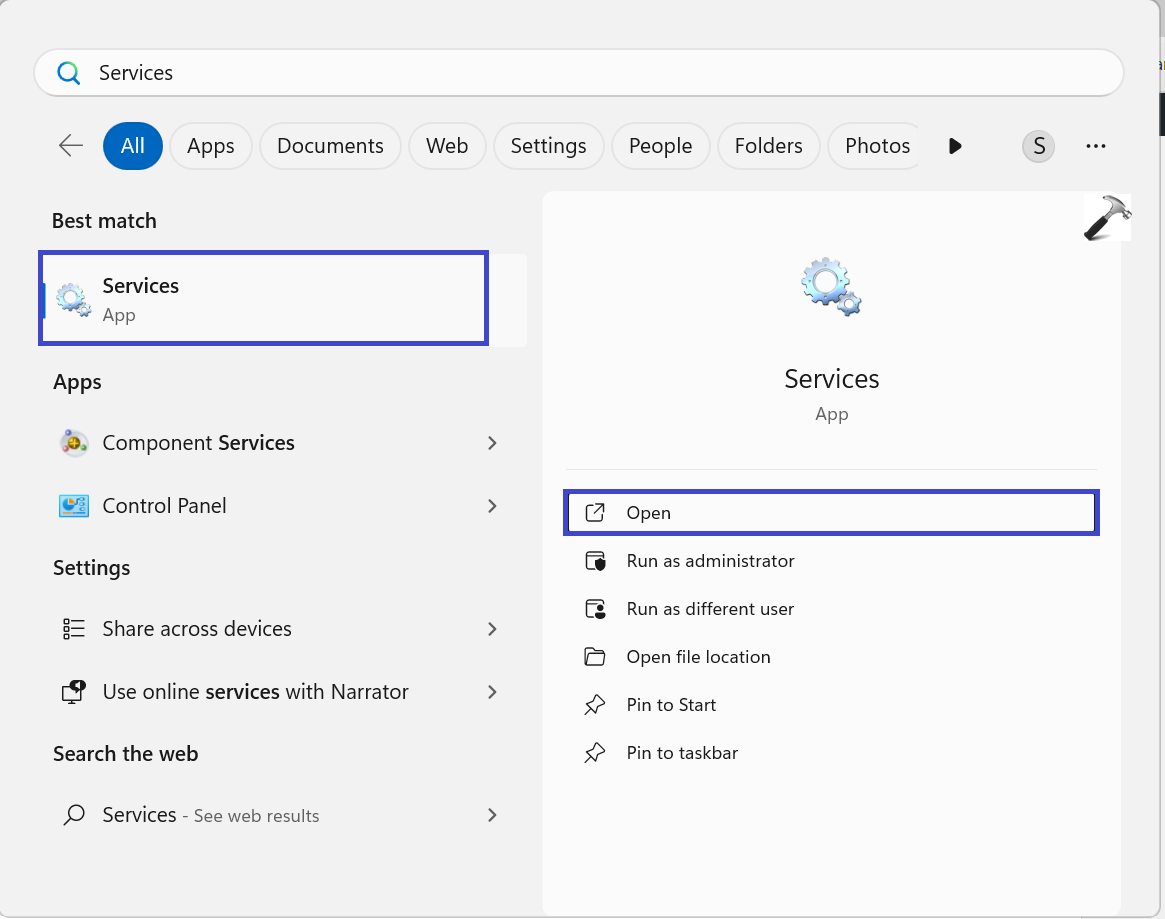
1. Open the search box and type “Services”. Click on “Services“.
2. Now, search for the “Windows Update” option from the list.
3. Right-click on the “Windows Update” option and select “Properties“.

4. Under the “Startup type“, select “Disable“.

5. Click OK followed by Apply.
If you want to enable the Automatic Updates on Windows 11, then you can follow the same steps and select “Enable” under the “Startup type” option.
Method 5: Using Windows Settings
You can turn off automatic updates on Windows 11 using the Windows Settings app. This is a relatively easy way to disable automatic updates, and it is reversible.
1. Press the Windows key + I to open the Settings app.
2. Now, go to “Windows Update“.
3. Click on the “Pause for 1 Week” option which is next to the “Pause updates“.

This is a temporary solution to turn off Automatic updates on Windows 11. Windows 11 will eventually resume updates automatically. If you want to permanently disable automatic updates, you can use one of the other methods described above.
Video guide
You can also refer this video guide for better assistance:
That’s It!


![[Latest Windows 11 Update] What’s new in KB5089549?](https://www.kapilarya.com/assets/Windows11-Update-768x651.png)