Administrator Protection is a security feature in Windows 11 that keeps admin accounts in a safer state. When you try to run something that needs admin rights, Windows asks for confirmation or Windows Hello. Once the task finishes, the elevated access is removed. This helps prevent unwanted changes or silent elevation by apps, and that is why it is important to enable Administrator Protection on Windows 11.

Page Contents
Enable Administrator Protection on Windows 11
Below are three methods to enable Administrator Protection that covers across various Windows 11 editions. Always create a System Restore point before making changes to policies or the registry.
Method 1: Enable using Windows Security
Some builds of Windows 11 include a direct toggle inside Windows Security.
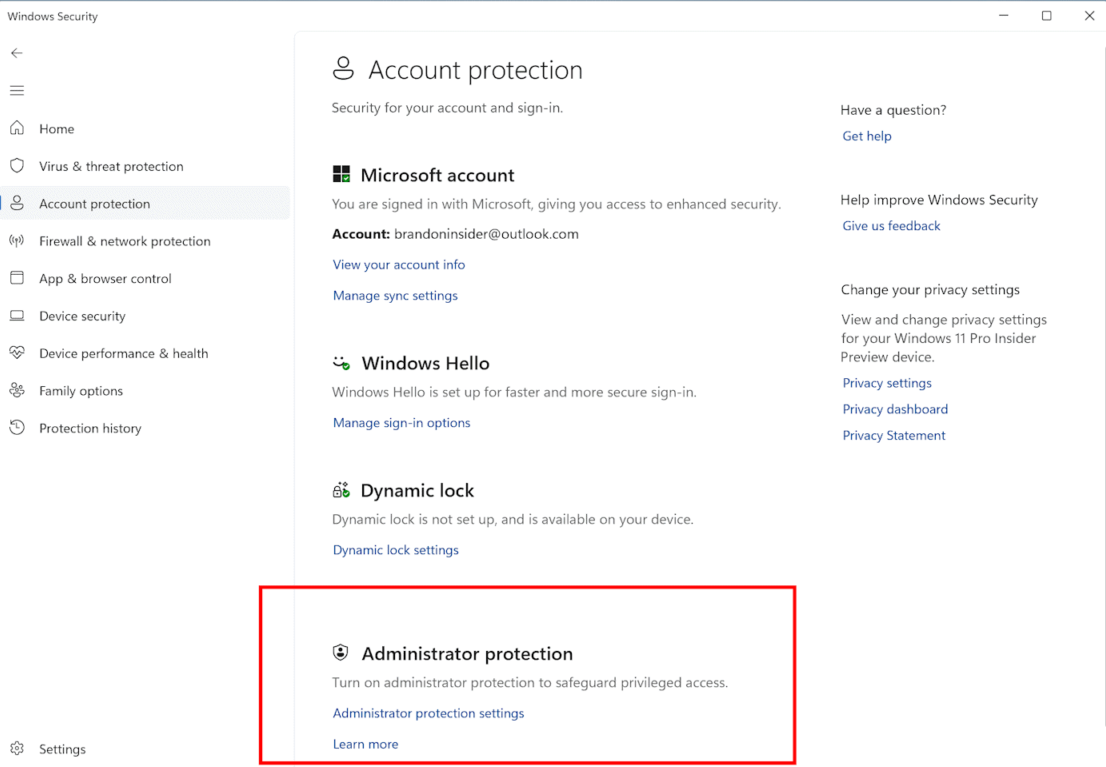
1. Open Windows Security from the Start menu.
2. Select Account Protection and look for an Administrator Protection setting.
3. If the toggle is present, turn it on and then restart the PC.
4. If the toggle is not visible, install available Windows updates or use Group Policy/Registry methods.
Method 2: Using Registry
Note: Works in all Windows editions.
If Group Policy is not available, you can enable the feature through the Registry.
1. Open Start, type regedit and press Enter to open Registry Editor.
2. Browse to
HKEY_LOCAL_MACHINE\SOFTWARE\Microsoft\Windows\CurrentVersion\Policies\System
3. In the right pane, find the DWORD named TypeOfAdminApprovalMode. If it does not exist, create a new DWORD (32-bit) value and name it TypeOfAdminApprovalMode.
4. Double-click TypeOfAdminApprovalMode and set its value data to 2 to enable Administrator Protection.
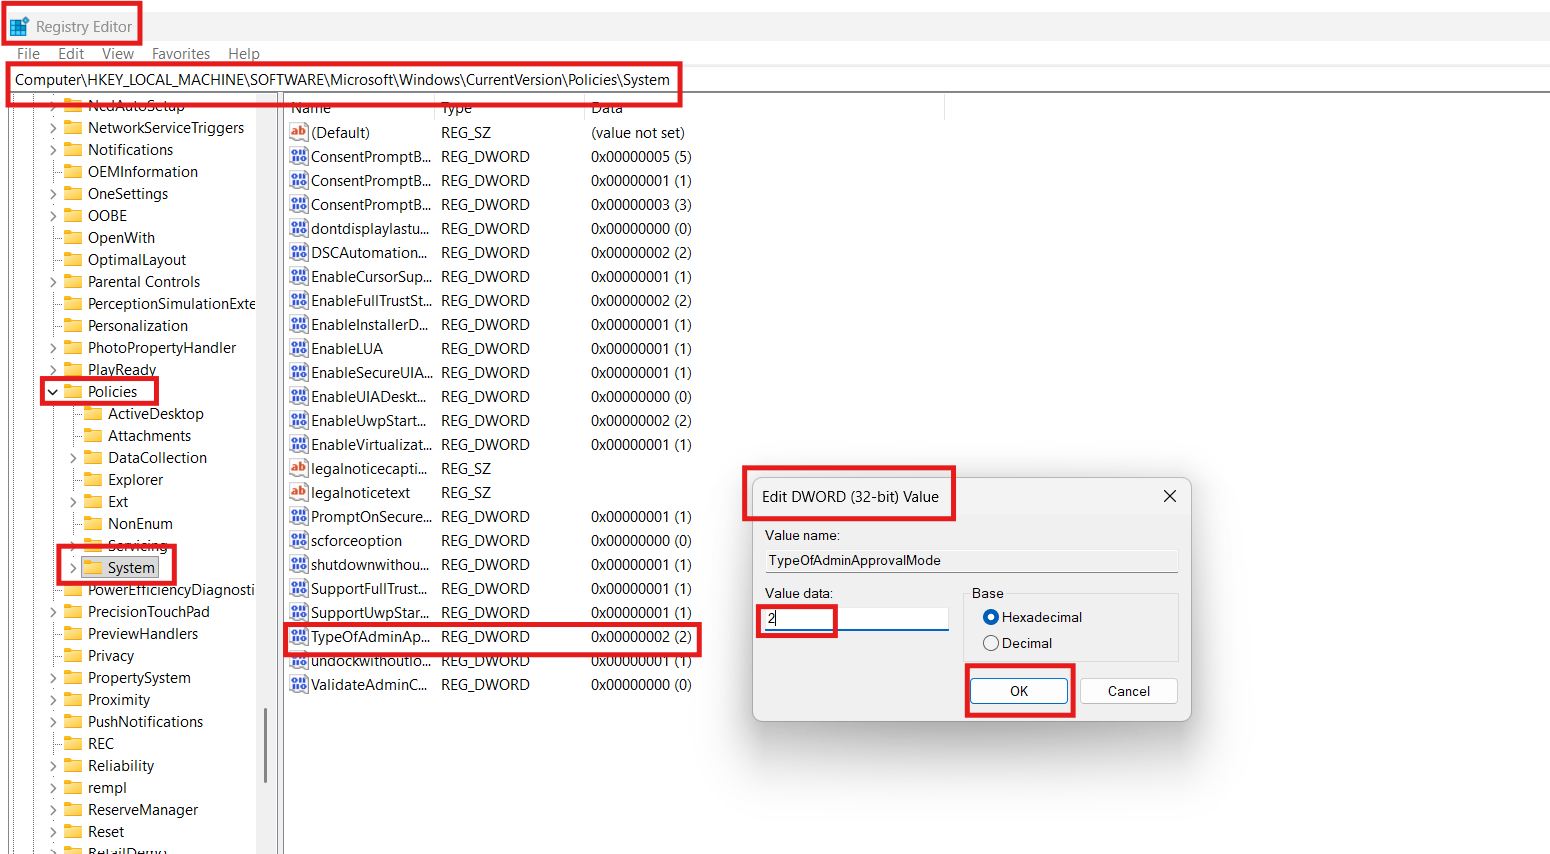
5. Click OK, close Registry Editor, and restart the PC. To revert, set the value to 1 and restart.
Method 3: Turn it on using Group Policy
Note: Works in Windows 11 Pro and Enterprise editions.
Group Policy provides a straightforward way to control administrative behaviour across the system.
1. Open Start, type gpedit and press Enter to open the Local Group Policy Editor.
2. Go to Computer Configuration, then Windows Settings, Security Settings, Local Policies, and then Security Options.
3. Find the setting named “User Account Control: Configure type of Admin Approval Mode” and open it.
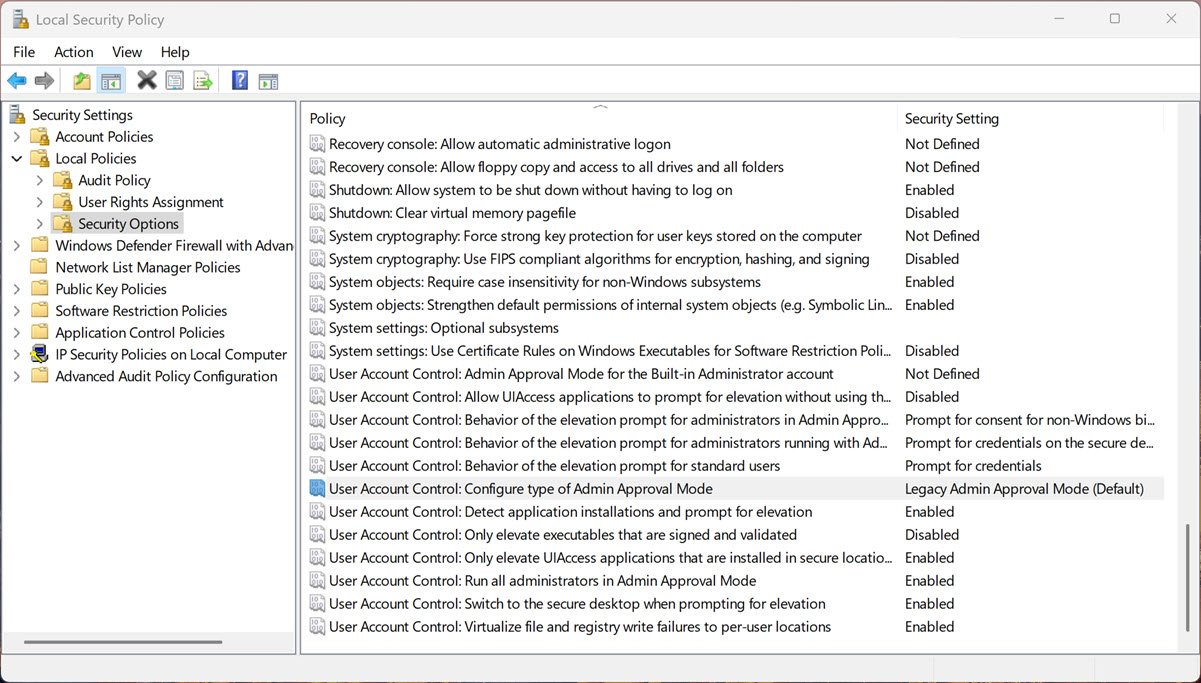
4. Select the option for Admin Approval Mode with Administrator Protection and click Apply.
5. Restart your system.
Quick tips
1. Expect more elevation prompts after enabling this feature; legitimate admin apps will ask for approval.
2. If any app stops working after enabling, revert the change in Group Policy or the Registry and restart.
3. Only enable this if your system has the update that adds Administrator Protection. If you do not have that update, the Group Policy or Registry change may not appear or may not work.