

Previously, we have seen how you can connect your Windows 11 to work or school account, i.e. organization. When you connect to work/school account, Windows registers your device to your work or school network, letting you access your resources using your personal account. After your device is registered, Windows then joins your device to the network, so you can use your work or school username and password to sign in and access restricted resources. Based on your organization’s choices, you might be automatically enrolled in mobile device management, such as Microsoft Intune. Now your organization can apply policies and manage settings for your device. This guide will show you how to disconnect Windows 11 from work or school account.
There may be anonymous reasons for why you want to disconnect from your work or school account. When you disconnect from your work or school account, it will remove your access to resources like email, apps, network, and all the associated content. Also the data stored by your organization for your device may also be removed.
Here’s how you can disconnect from work or school account in Windows 11.
Page Contents
Disconnect Windows 11 from work or school account
Manual steps
1. Log into the alternative local account or Microsoft account on your system, not work or school account. This account must be an administrator account. If you do not have any administrator account on the system, create one using work or school account.
2. Press  + I keys to open Settings app.
3. Go to Accounts > Access work or school. In the right pane, click on Disconnect button for your work or school account.
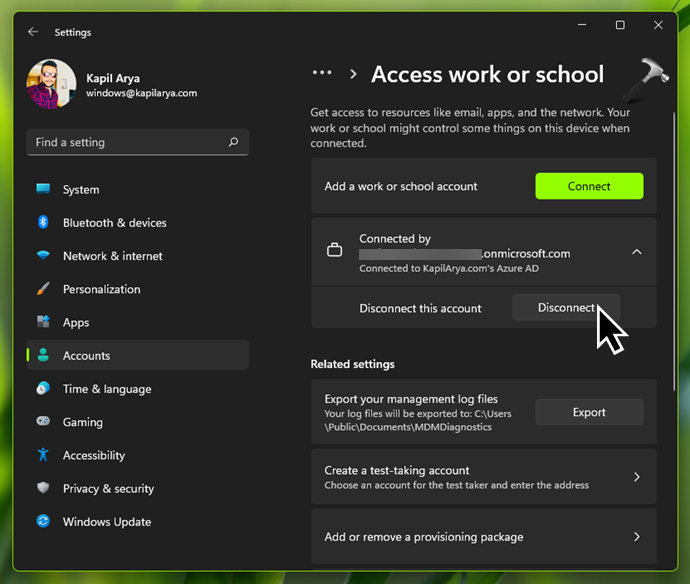
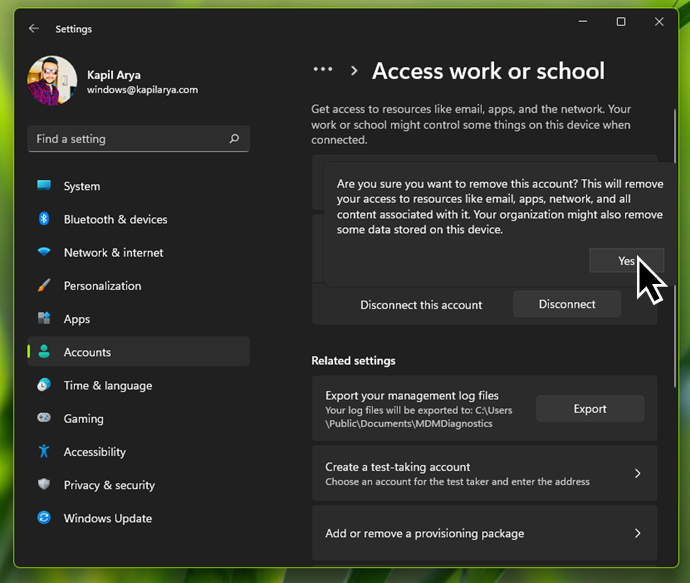
4. A pop-up will now appear asking you to confirm this action. Once you select Yes here, you provide the consent to remove all the associated organizational data from your system for the connected account. When you are very sure about this, then only click Yes.
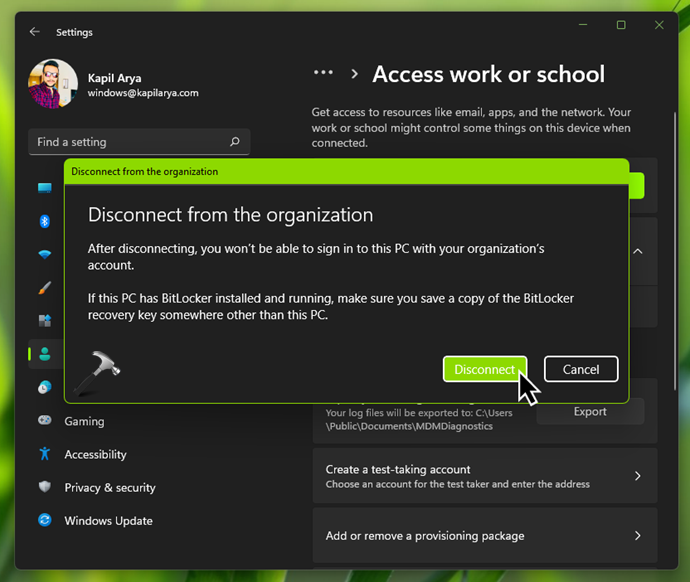
5. Under Disconnect from the organization, click on the Disconnect button to continue.
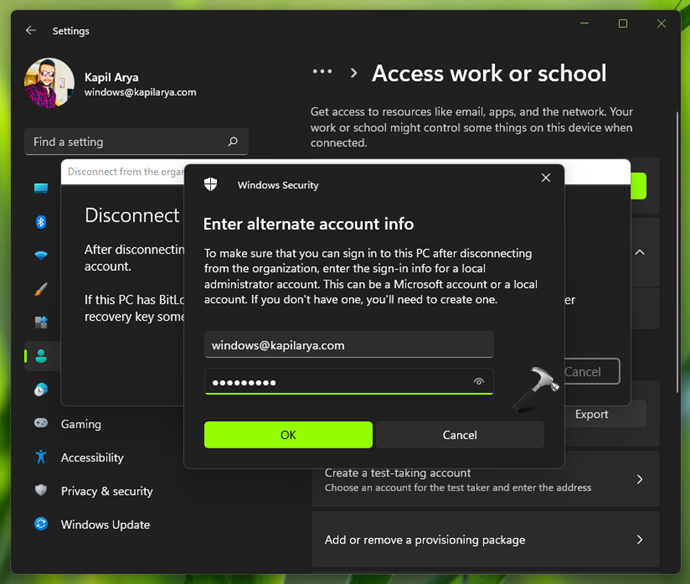
6. Now you will be asked to enter the alternate account information which you will be using after this device is connected from your work or school account. Basically Windows here wants you to confirm that there is another account on the system which you can use and you won’t get locked out after disconnecting from the organization. So here you can enter the information for the same local account or Microsoft account which you signed in at step 1. Click OK.
7. After the previous step, you will receive a pop-up to restart your system. Click on Restart now.

Once you restart the system, it will be completely disconnected from the work or school account. You can now use the alternate local or Microsoft account you specified at step 6.
Video guide
You can check out this video for live demonstration of above guide:
That’s it!







This does not work if the account is managed only by the organization. The account I want to get rid of only has a manage button which takes me to their website. While there I am able to delete the device from their end but it does nothing to remove the account from my machine.
^^ In that case, refer to your IT admin instructions to remove the account.
Hello,
Thanks, but this doesn’t work for me.
In the “Disconnect from the organization” Request I click “Disconnect” – it won’t doe anything but add a yellow line below the heading: “PC is not a member of a domain”. (translated by me). Its true, I only have a workgroup. But why does it stop me from disconnecting from an organization?
I searche for hours, I can only find variations of this but no source mentions, how I can override this problem… :(
Can you help?
I am “not really” part of an organization. I somehow created an organization using the same e-mail I use for my microsoft accouunt. I have no idea how that happened, I just want to get rid of it.
I tried deleting my device from the auzure AD, that worked, but now I cannot even connect to the Organization from my computer, still can’t disconnect, though :(
Thanks for any input on this…
– Oliver
I was a Microsoft employee recently terminated in the layoffs. On my personal laptop I have disconnected from my Microsoft work email/alias (AD).
My Microsoft work account is no longer on my laptop (Setting->Accounts->Access work or school), but for some reason when I try to load/run MS Teams, it thinks I still have the Microsoft “work” account tied to my laptop.
I’ve done several re-installs of Teams. But it still shows “Microsoft” in my Teams Settings->Accounts and has me connected to the Microsoft Org.
^^ Even if you sign in with your Microsoft account, it shows ‘Microsoft’ label. You should have been disconnected from Microsoft’s server AD.
So I did this with a domain connected device, making sure to create a local admin account first. From the AD OU I can see the device is still part of AD, and when logged in with the local admin account I can see that I am connected to work and school, but the device will no longer let me login to Windows sign on with my domain creds. It says my password is incorrect(It’s not). Is there anyway to make it so the device will accept my domain creds at the windows login screen?
I am truly grateful for your assistance, my friend. Your solution was exceptional and it resolved the issue with the school account that was causing problems with MS Teams. I had been struggling to find a way to remove it, but your expertise made it seem effortless. Thank you.
^^ Glad to help Christian!
Thanks it helped me to remove my old work account.
^^ Glad to help 😎
In the case of Windows 11, it doesn’t look like this. You have to select the account in the list on the Work and School Accounts page, then you will see the disconnect button.
thank you ever so much i really do apricate it
^^ Thanks 😎
hey – I have a local account- but it isnt a microsoft (email) account –
It’s jus t alocal user named bob –
How do I enter that – it’s asking for an emaila ddress.
I tried
bob
.\bob
What should I do?
^^ You can simply type the local username.