
If you’re facing multiple issues in your Windows 11 operating system and you want to get rid of all of them at once, then this article is for you. Microsoft has already included a recovery option in Windows 11 for this. The recovery option is called Fix problems using Windows Update. Using this recovery option, you can perform a repair install/upgrade via Windows Update feature.
Page Contents
Fix problems using Windows Update in Windows 11
The Fix problems using Windows Update recovery option is most helpful in case of issues you are facing with Windows update. This recovery option will basically reinstall Windows 11 current version. With respect to this feature, the repair version which is a download of current version – is installed.
Using this feature:
- Reinstalls the same version of Windows which is already installed on your PC
- It will repair system files and components
- It won’t make any changes to your apps, files, and settings and they’ll be preserved.
Manual steps
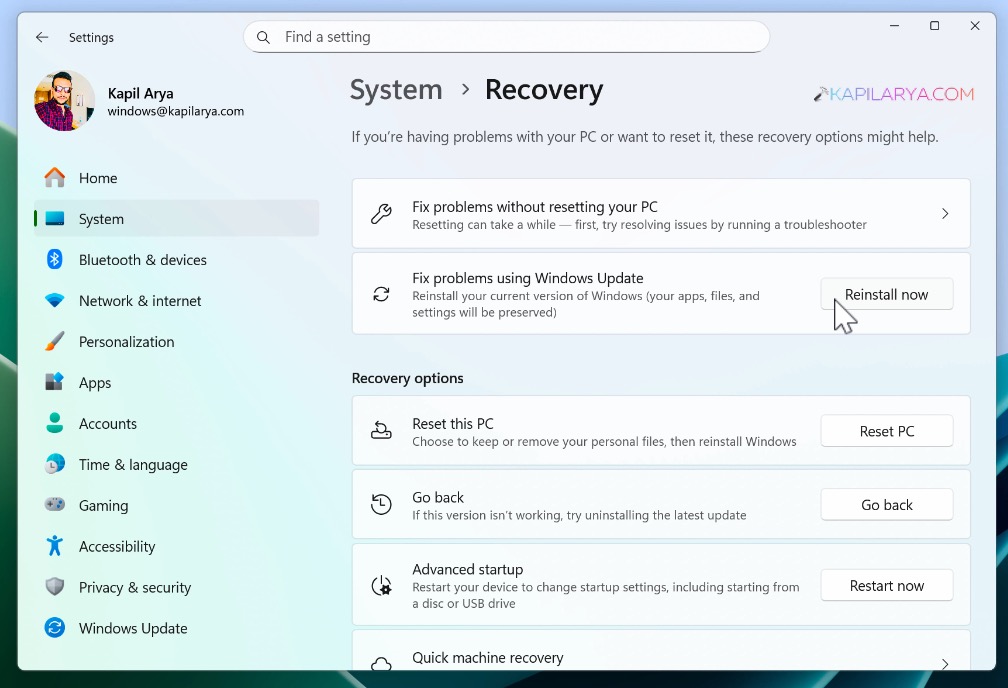
1. Open the Settings app and go to System then Recovery. Here you will be able to locate Fix problems using Windows Update. Click on the Reinstall now button next to it.
2. Then you will receive the confirmation prompt. Just acknowledged the information shared on this prompt. If you like, you can check Automatically restart my PC 15 minutes after installation. Click OK.

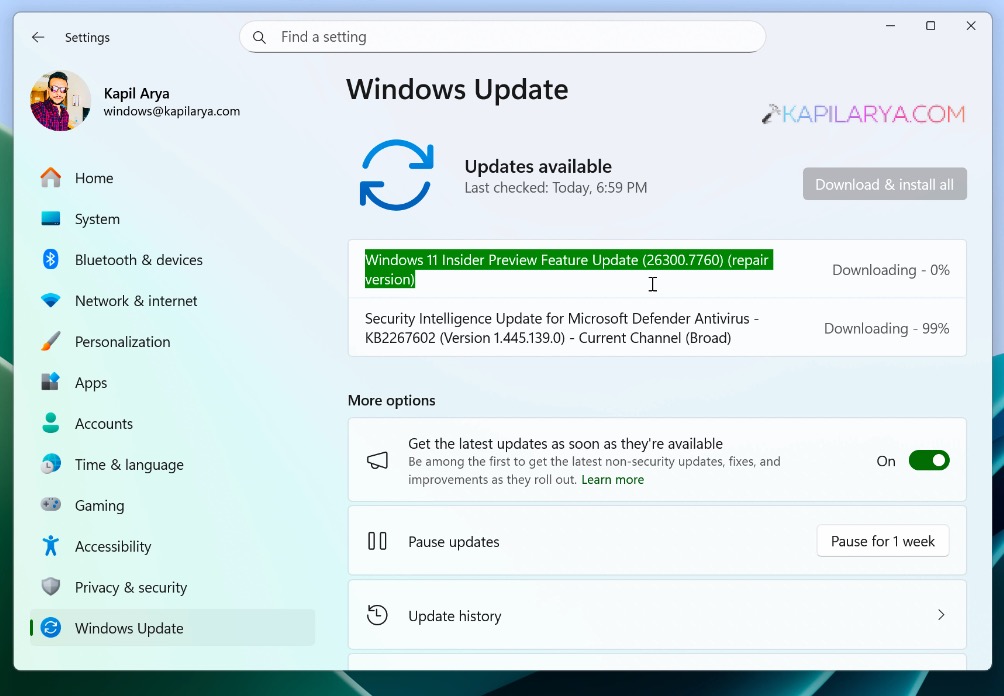
3. As soon as you hit OK in the previous step, Windows will automatically start searching for the repair version of the current installed version. In case it says the repair version not found, you can check out this fix. If it found the repair version, let it be downloaded and moved to the pending install phase.
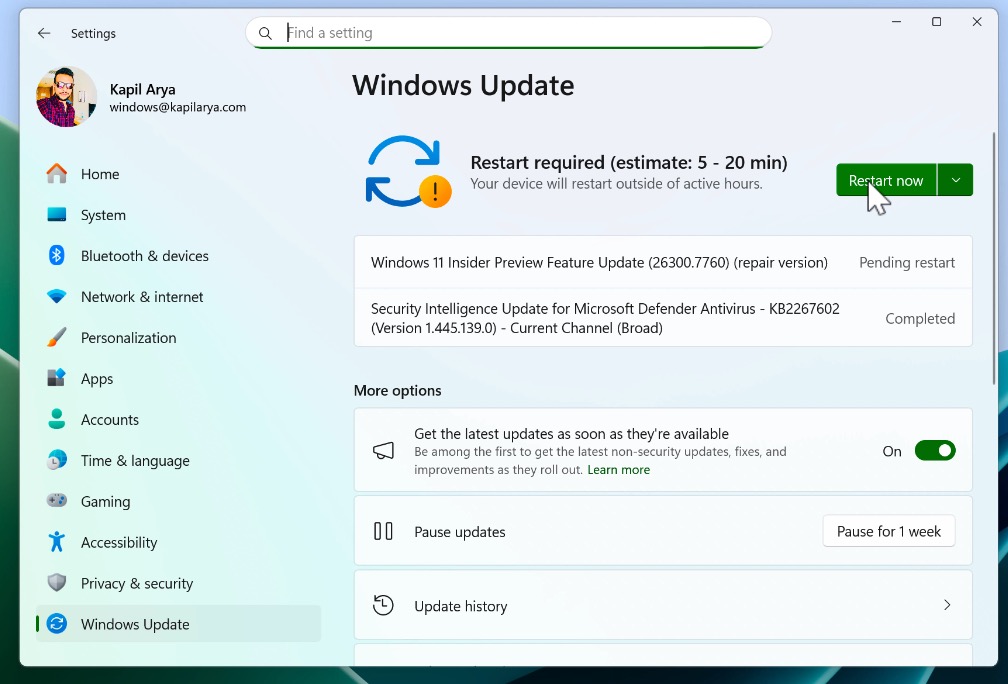
4. Once the pending install phase is over, you should have the Restart now button. Click on the Restart button, to complete the repair version update installation.
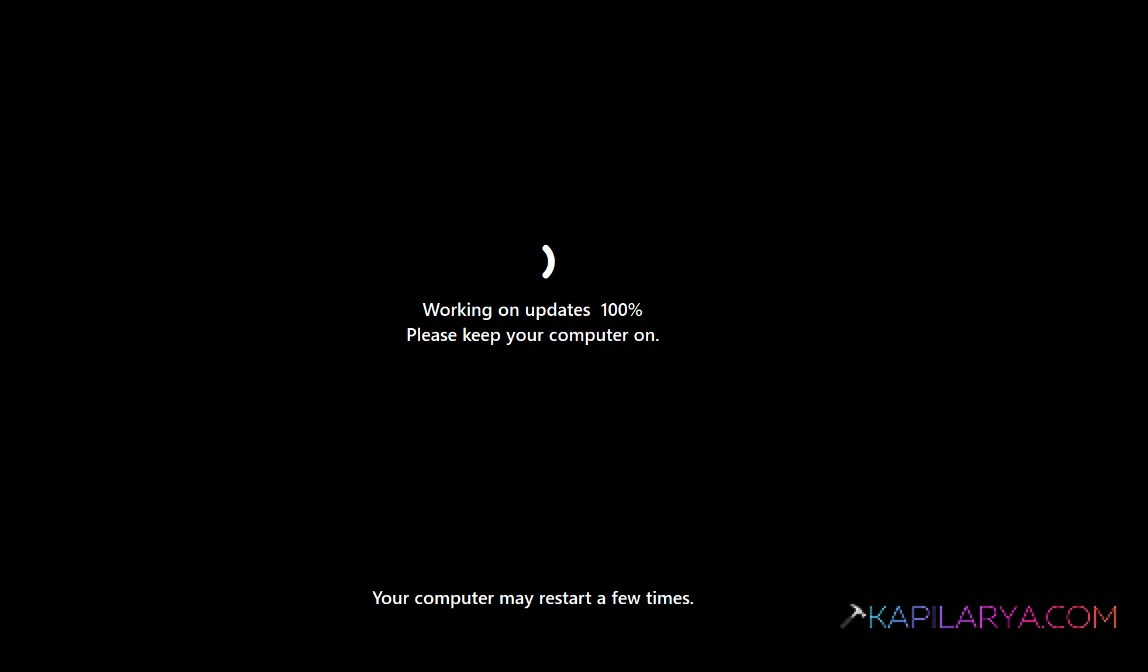
5. In order to complete the updates your system may start multiple times. Let the screens be completed to 100%.
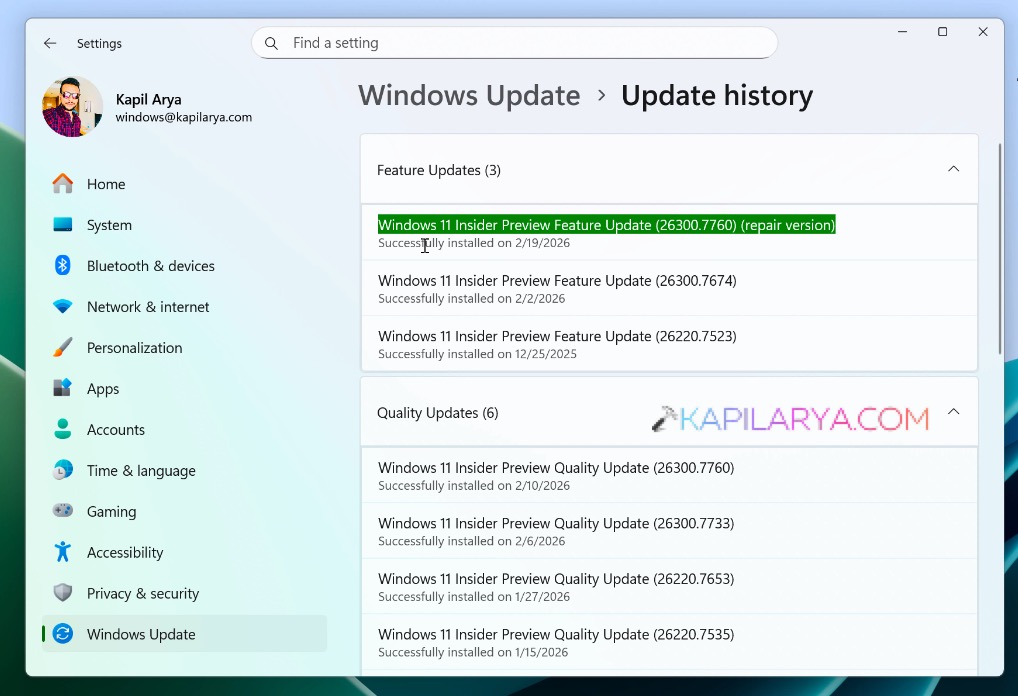
6. Once the repair version has installed successfully, the problems you are facing earlier should be resolved. You can also check the entry for repair version installation. In the Settings app you can go to Windows Update > Update history, and there you will find the repair version installed.
Video guide
To illustrate above mentioned steps, you can also check out this detailed video guide:
That’s it!


![[Latest Windows 11 Update] What’s new in KB5089549?](https://www.kapilarya.com/assets/Windows11-Update-768x651.png)