
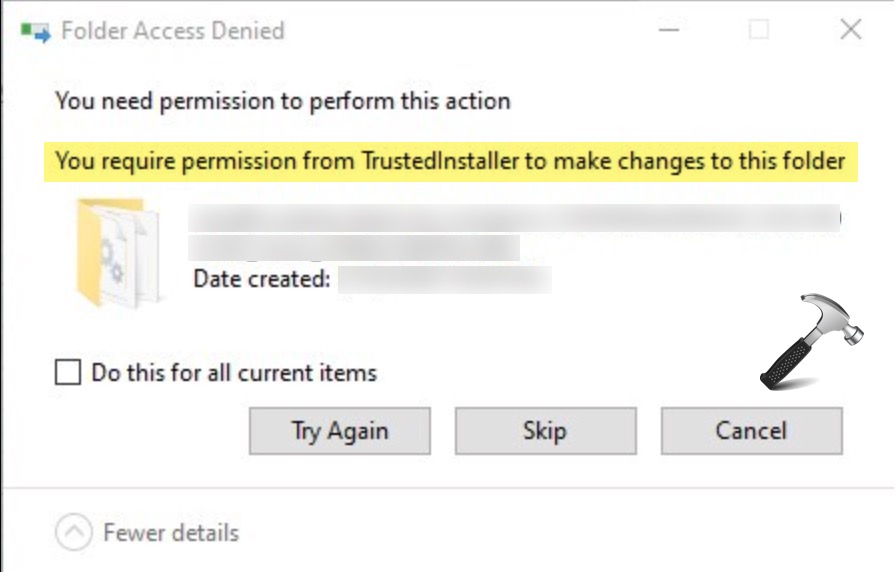
If you see the message You require permission from TrustedInstaller to make changes to this folder – when trying to delete, modify, or install files on Windows 11, it means core system protection is preventing access. TrustedInstaller is a built-in Windows service that owns key system files and folders to protect them from accidental changes or malware.
Page Contents
Fix: You require permission from TrustedInstaller in Windows 11
While this safeguard is useful, it can be frustrating when you legitimately need to adjust files or folders.
Below are some effective ways to resolve this permission issue. Work through each solution carefully and always back up important data before later altering ownership or permissions.
Fix 1: Change File or Folder Ownership
One of the most common causes of this error is that TrustedInstaller still owns the item you are trying to edit.
1. Right-click the file or folder and choose Properties.
2. Go to the Security tab and click Advanced.
3. Next to Owner, choose Change.
4. Enter your user account name and click Check Names.
5. Ensure you check Replace owner on subcontainers and objects.
6. Apply the changes and close the windows.
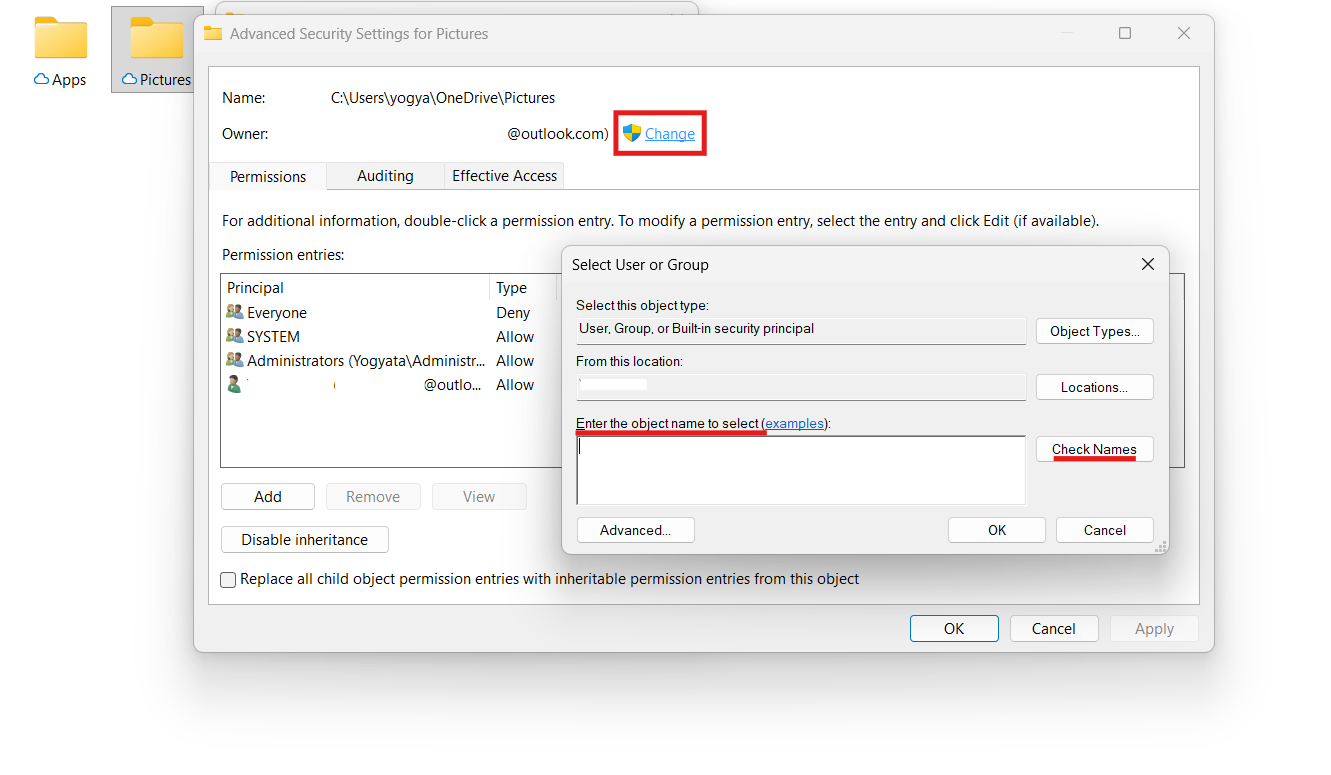
After taking ownership, you should have enough access to delete or edit the file.
Fix 2: Grant Full Control to Your Account
Changing ownership often needs an accompanying grant of full permissions.
1. Open Properties of the file or folder again and select the Security tab.
2. Click Advanced, then Add a new permission entry.
3. Select your user as the principal and tick Full control.
4. Also, choose Replace all child object permission entries.
5. Apply all changes and confirm any prompts.
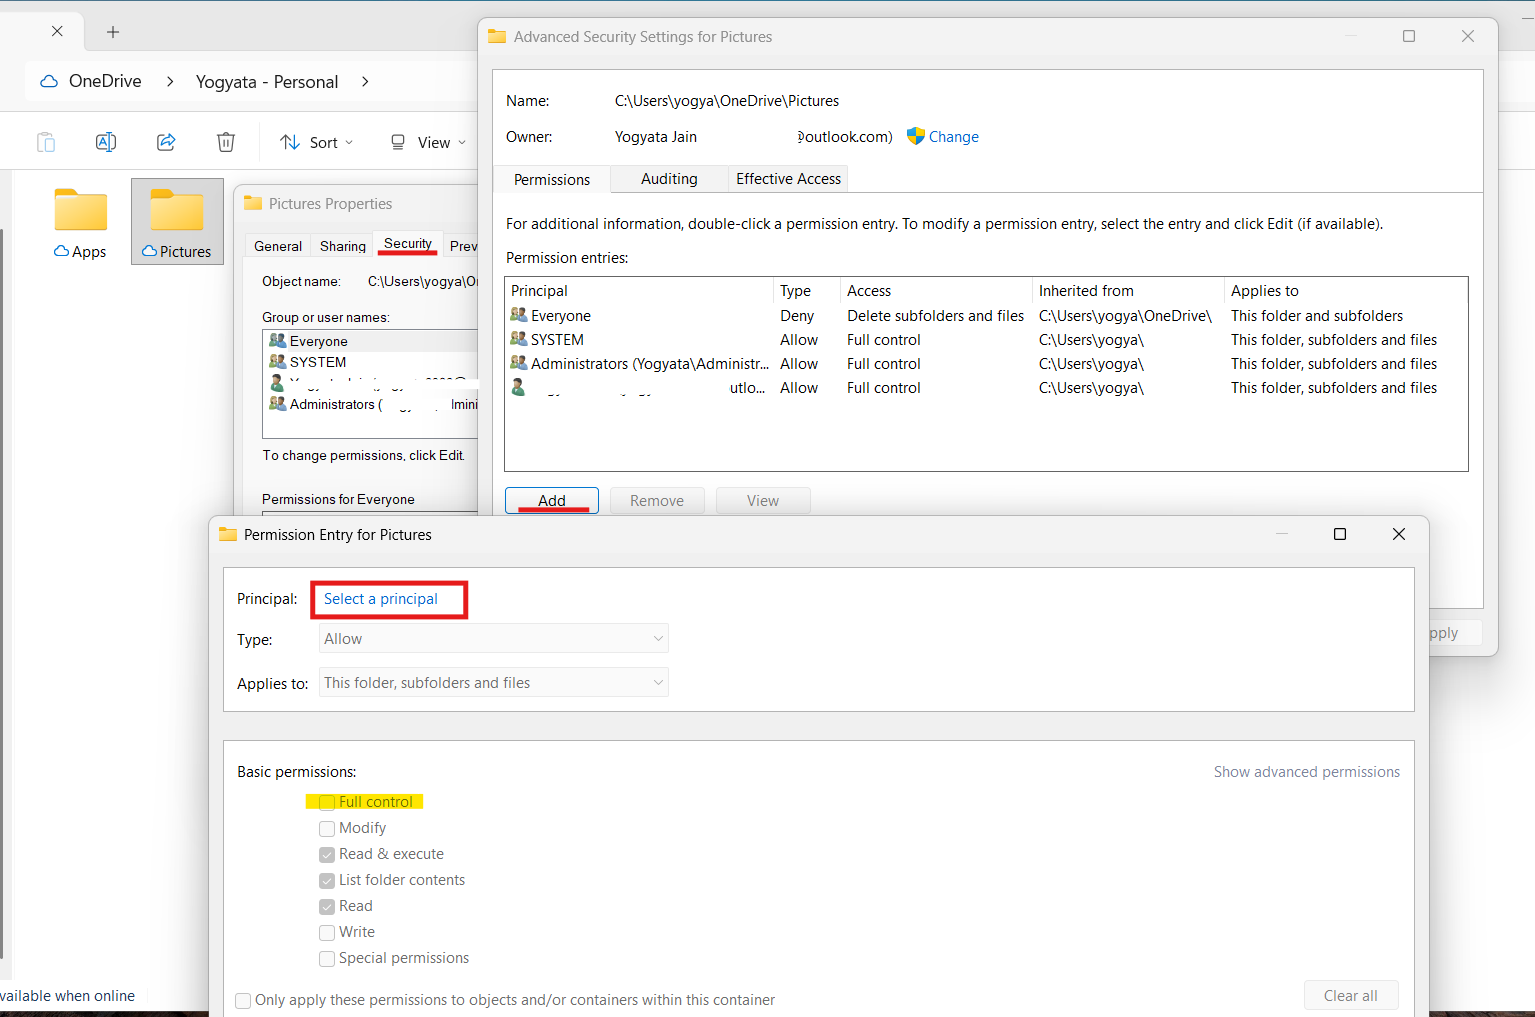
This ensures your user account has complete access.
Fix 3: Use Command Prompt to Take Ownership
For advanced users, the elevated Command Prompt can take control of stubborn files.
1. Open Command Prompt as administrator.
2. Use takeown /f "C:\Path\To\File_or_Folder" /r /d y to claim ownership of the target.
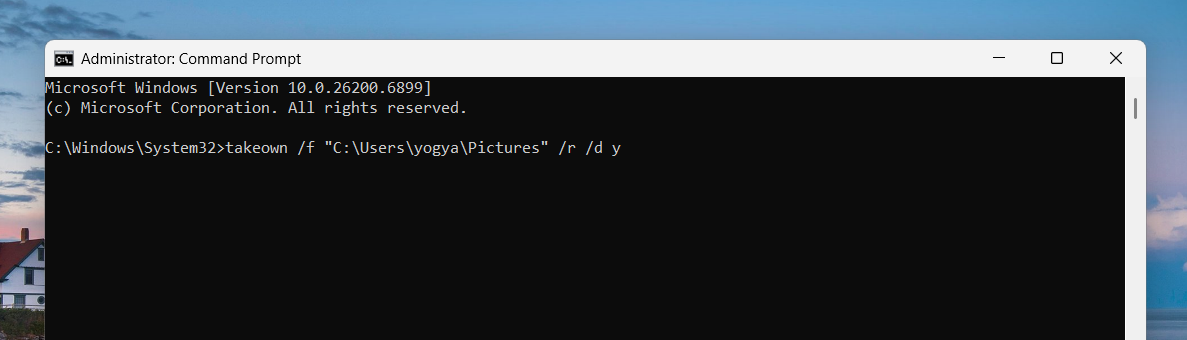
3. Then, grant full control using icacls "C:\Path\To\File_or_Folder" /grant YourUsername:F /t
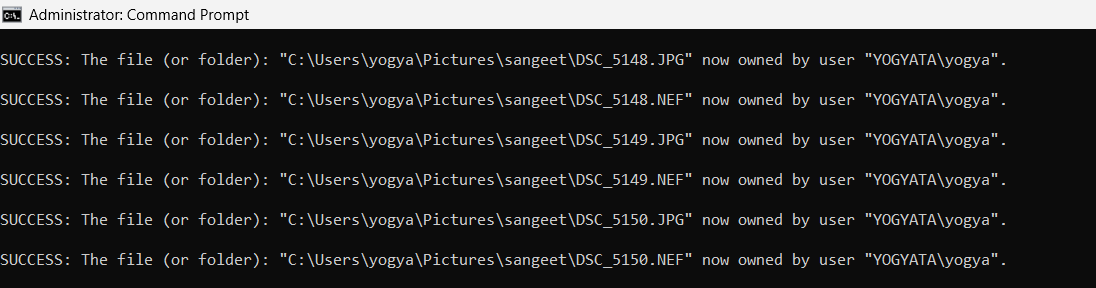
This bypasses TrustedInstaller ownership and gives your account full access.
Fix 4: Restore Ownership to TrustedInstaller
In some cases, after fixing permissions, you may want to return ownership to TrustedInstaller after making the necessary changes.
1. Open Properties and go to Security, then click on Advanced.
2. Under Owner, click Change and enter NT SERVICE\TrustedInstaller.
3. Confirm and apply.
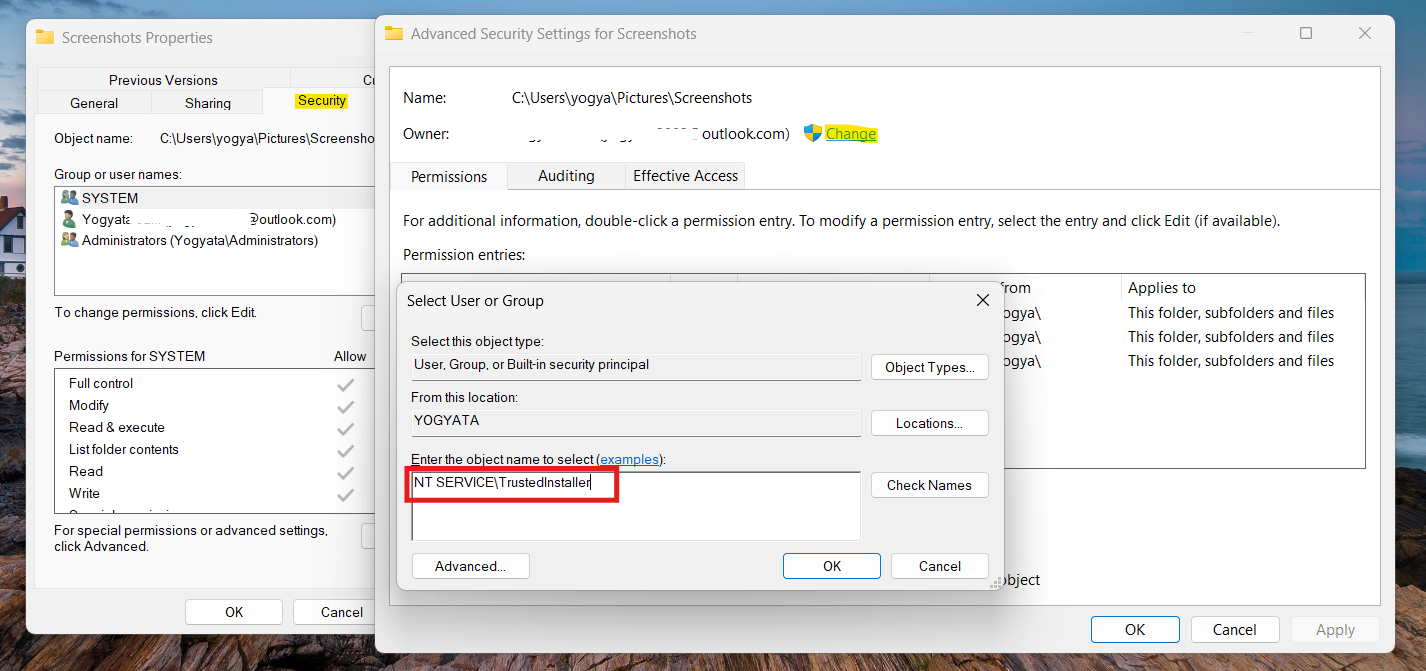
This guards system files against further unintended changes.
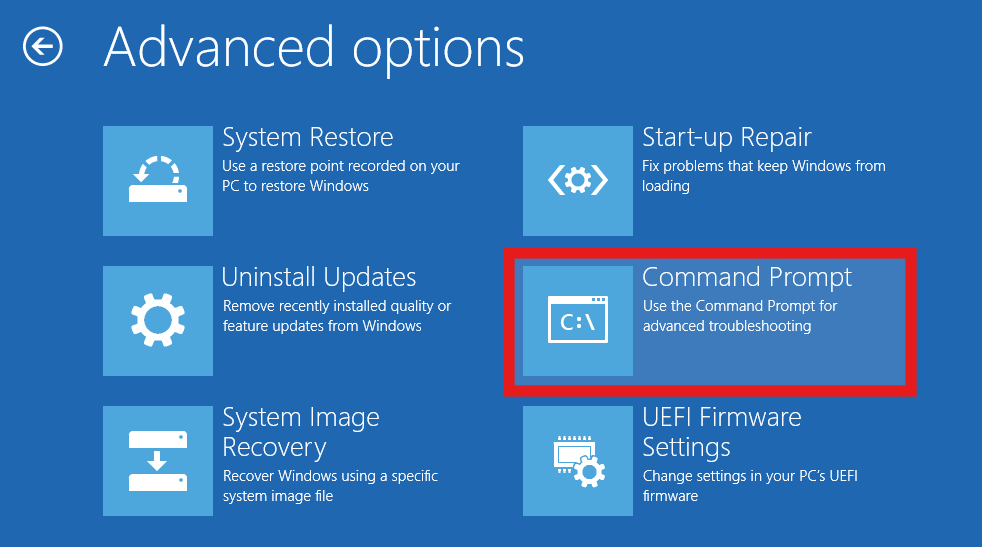
Fix 5: Remove or Change Protected Files from Recovery Command Prompt
When TrustedInstaller blocks access to a file or folder, you can work around it by using the Windows Recovery Command Prompt. In this environment, system protection services are not running, so you can delete or rename items that are otherwise locked.
1. Hold the Shift key and click Restart on your PC.
2. Navigate to Troubleshoot and then Advanced options, then Command Prompt.
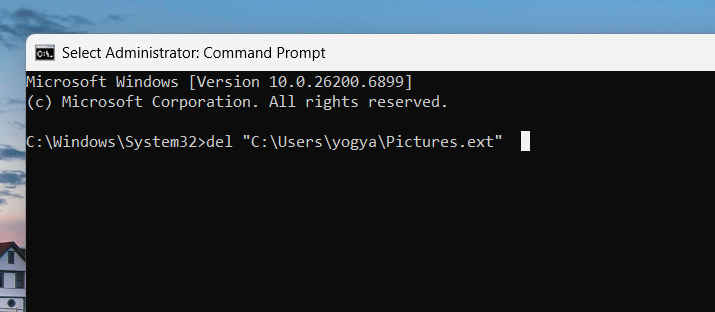
3. In the Command Prompt window, type a file command such as:
del "C:\Path\To\File.ext"
to delete a file, or:
ren "C:\Path\To\OldName.ext" "NewName.ext"
to rename it.
4. Close the Command Prompt and restart your PC normally.
5. Check that the file has been removed or renamed as you intended.
Note: Users must verify the drive letter (e.g., by typing dir C: or dir D:) before running delete commands, or they might target the wrong location.
By following these steps, you can resolve the TrustedInstaller permission error on Windows 11 and regain control over files or folders you need to manage. Always double-check the path before deleting or renaming to avoid unintended changes.


