
Whenever you download anything from the Internet, your Windows saves those files in the ‘Downloads’ folder by default. You are probably most familiar with this folder and its location. Although it is not a requirement for many people, did you know that you can change this default download location? Here’s a complete guide on how to change default download location in Windows 11.
Page Contents
Change Default Download Location in Windows 11
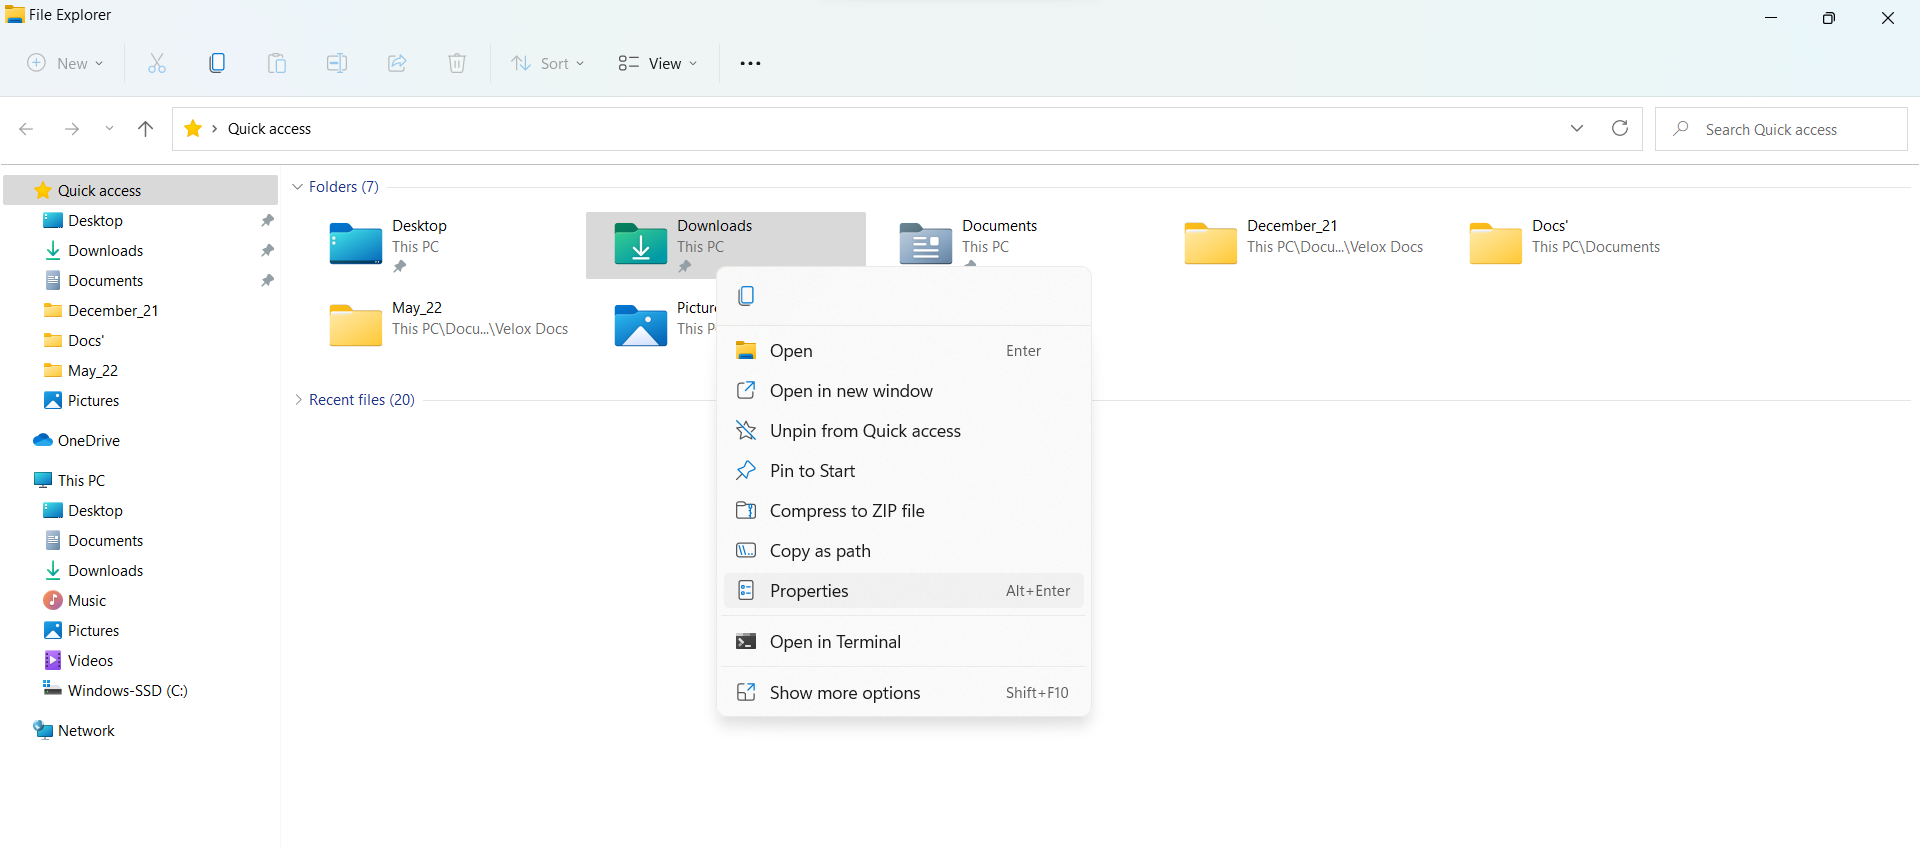
Step 1 – Press shortcut keys ‘Win + E’ to open File Explorer. Right click on the Downloads folder and select Properties.
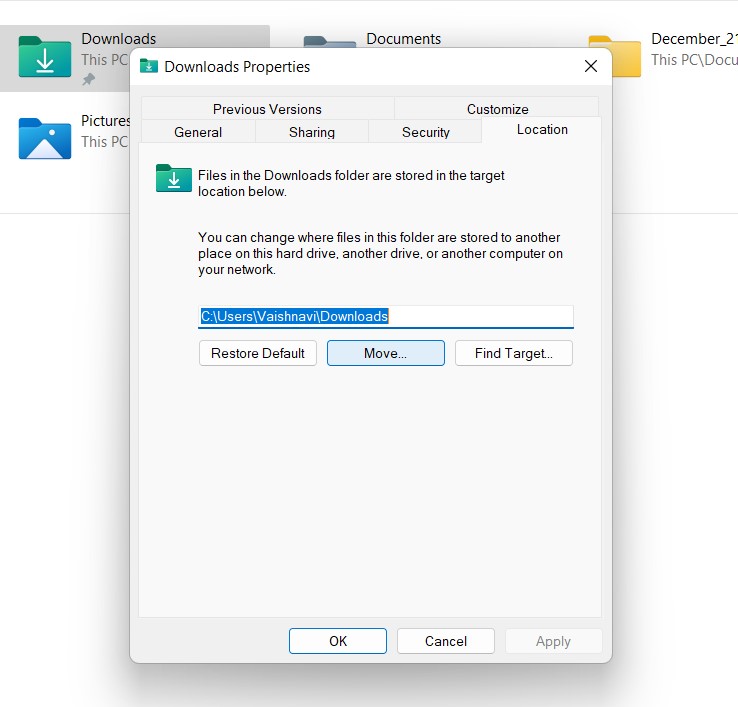
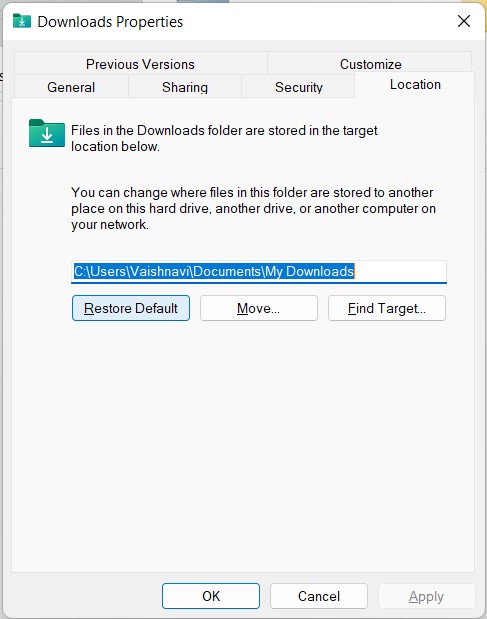
Step 2 – Go to the Location tab and click on Move… in there to choose your custom location for downloads.
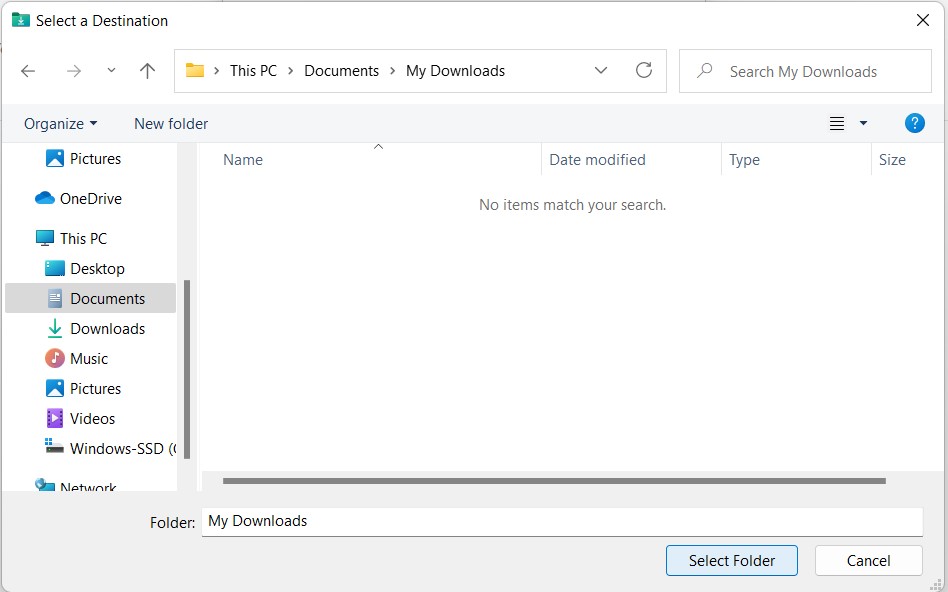
Step 3 – Select the folder you want to choose now and click on Select Folder.
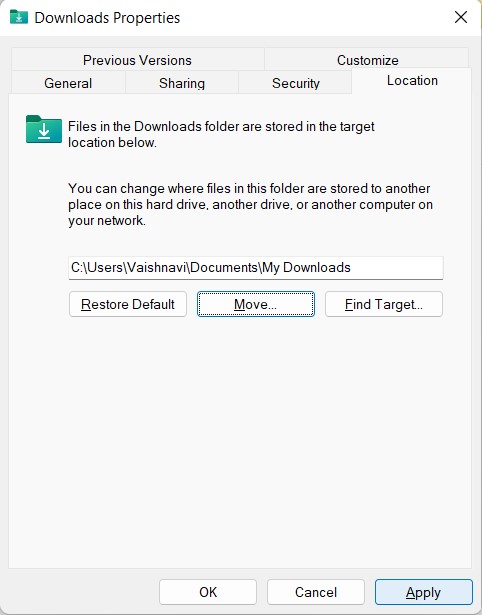
Step 4 – Click on Apply in order to confirm and save the changes you made.
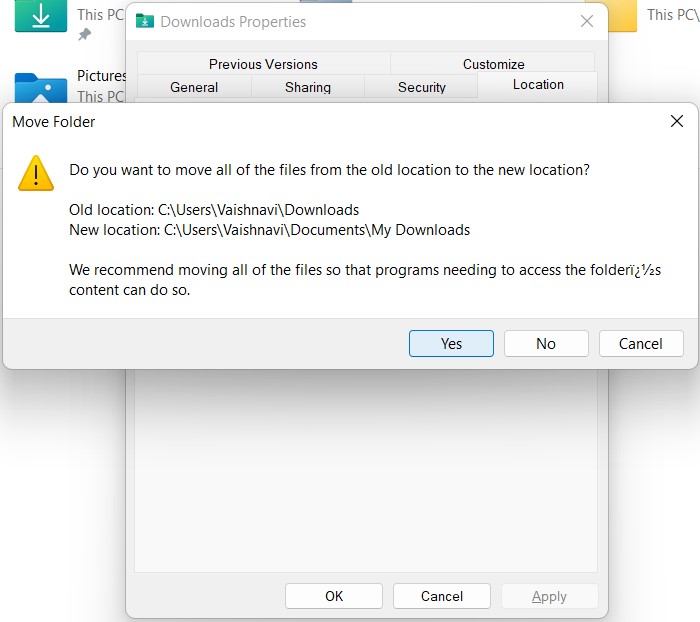
Step 5 – Once you apply the changes, the windows will ask you whether you wish to move all the downloaded files to this new selected folder. You can click on Yes if you want to see all your downloads in one folder. Or else, you can skip this as well by clicking on No.
Step 6 – If you wish to restore the previous default location for your downloads, you can simply go to the same Location tab in the Properties and select Restore Default as shown in the screenshot below.
That about covers how you change the downloaded files’ location in your windows 11. Moreover, you can also change the default location where all the applications you download from the Microsoft Store App. Here’s how you do it.
Change default location for downloaded Apps from Microsoft Store
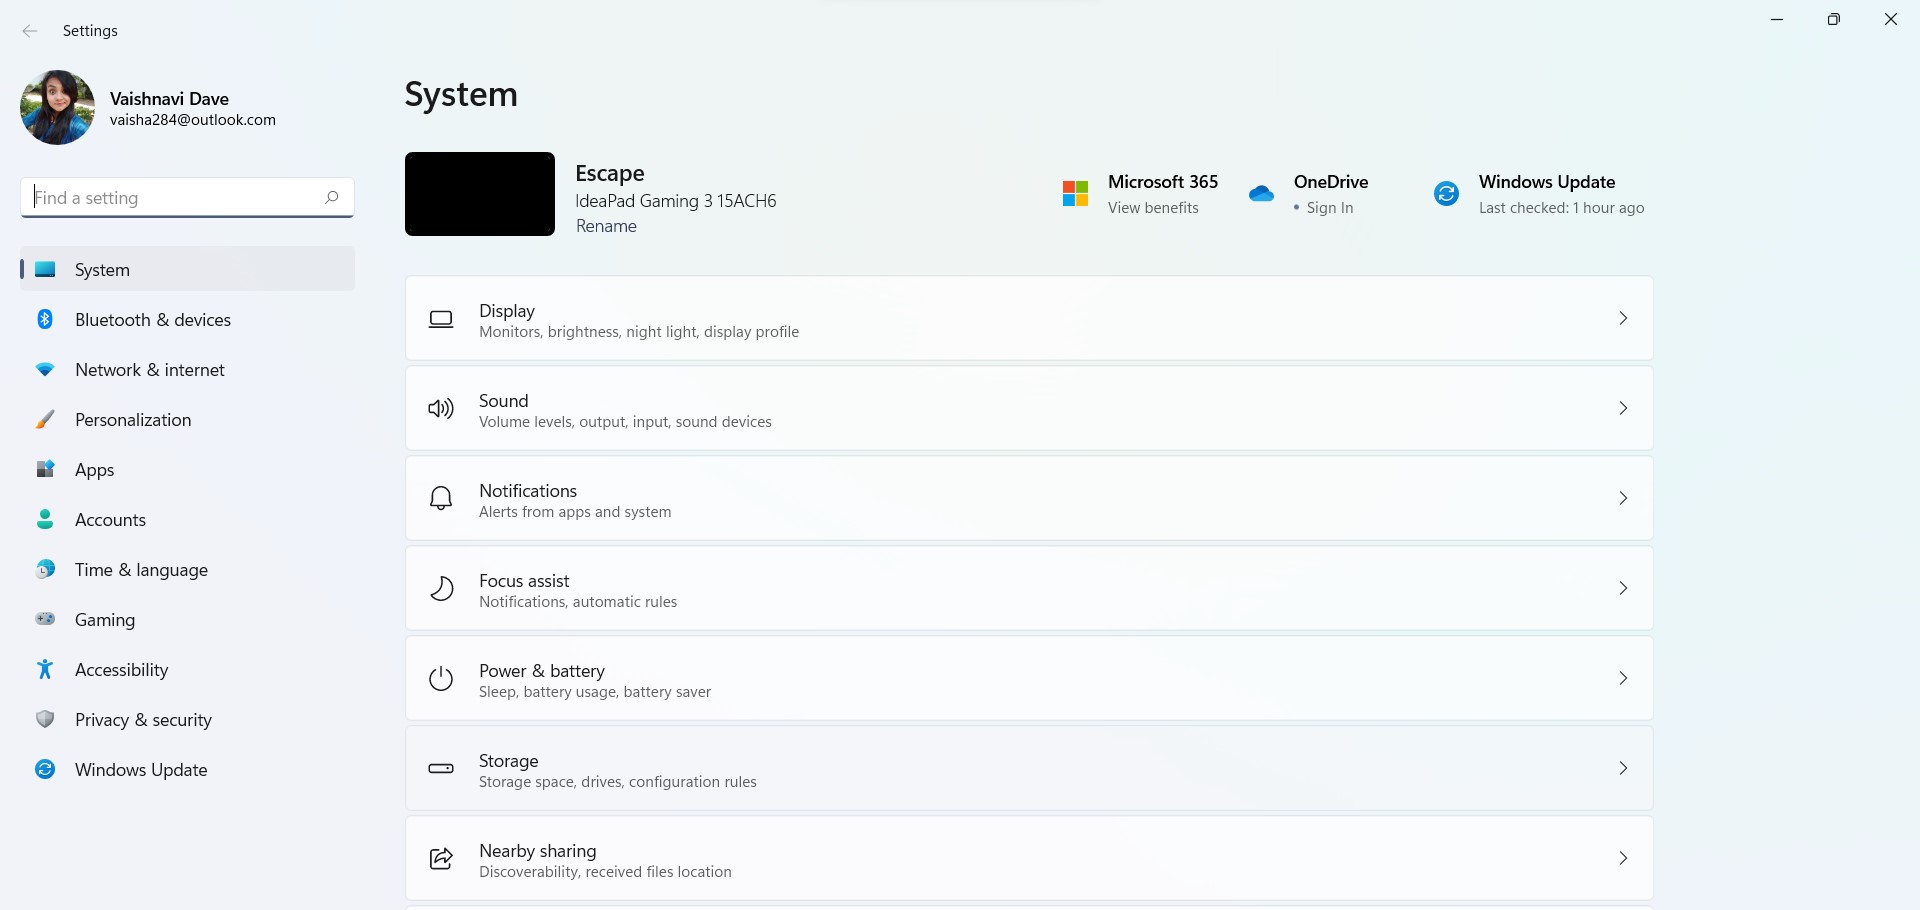
Step 1 – Open the Settings App in your Windows and in the Systems tab, Find Storage and click on it to open storage settings.
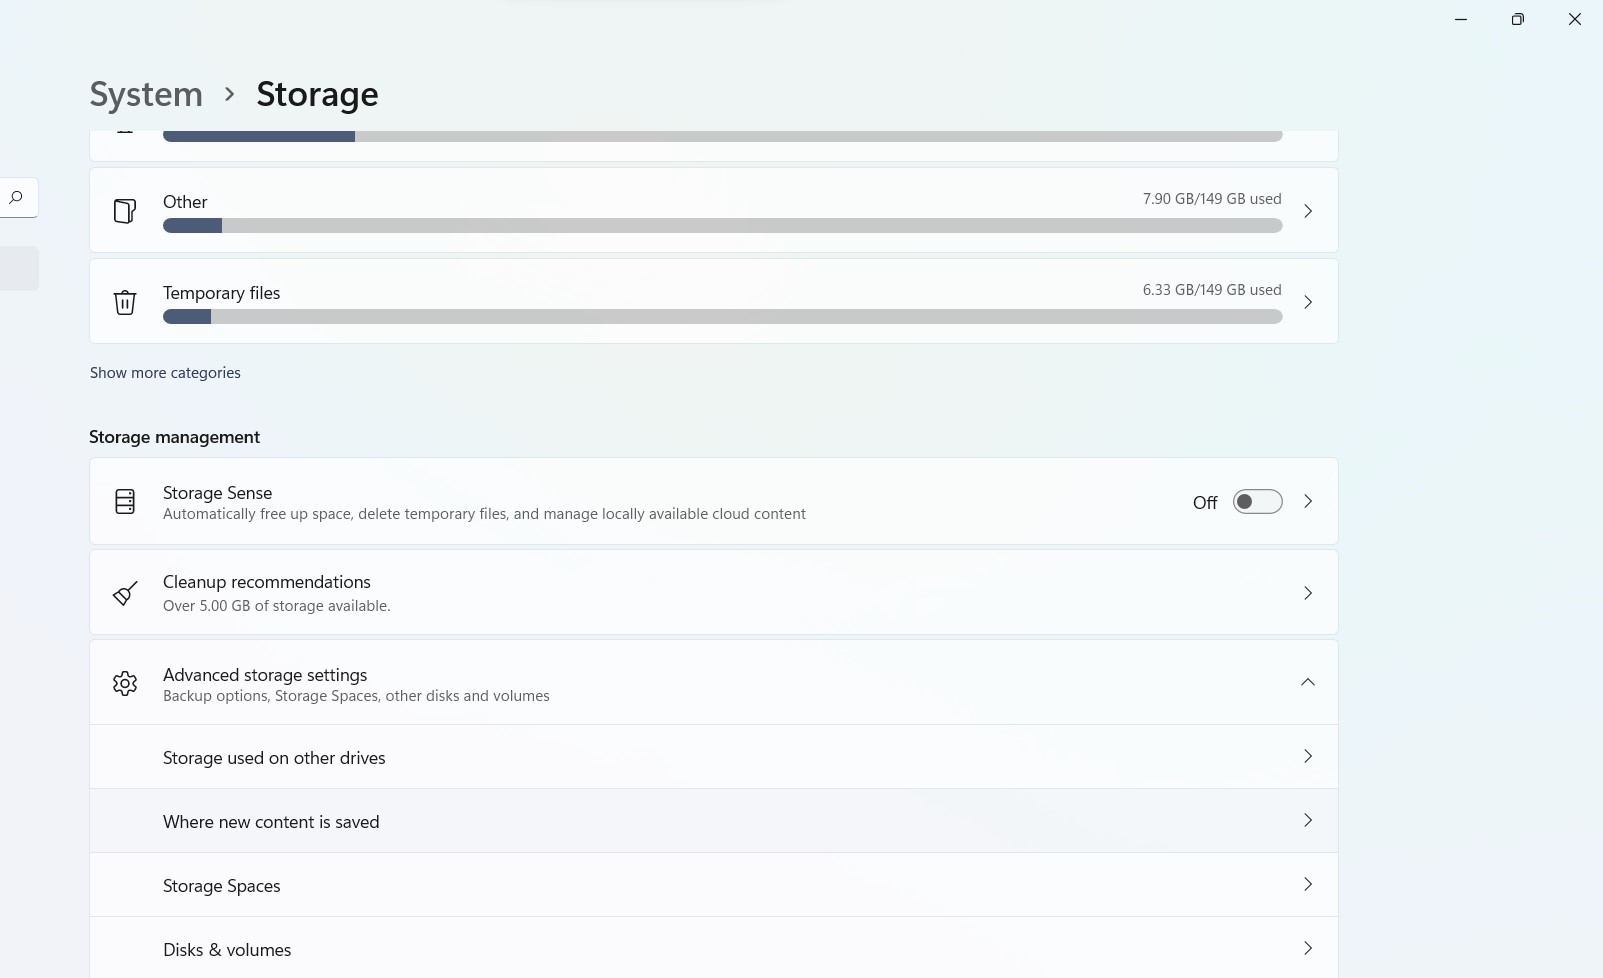
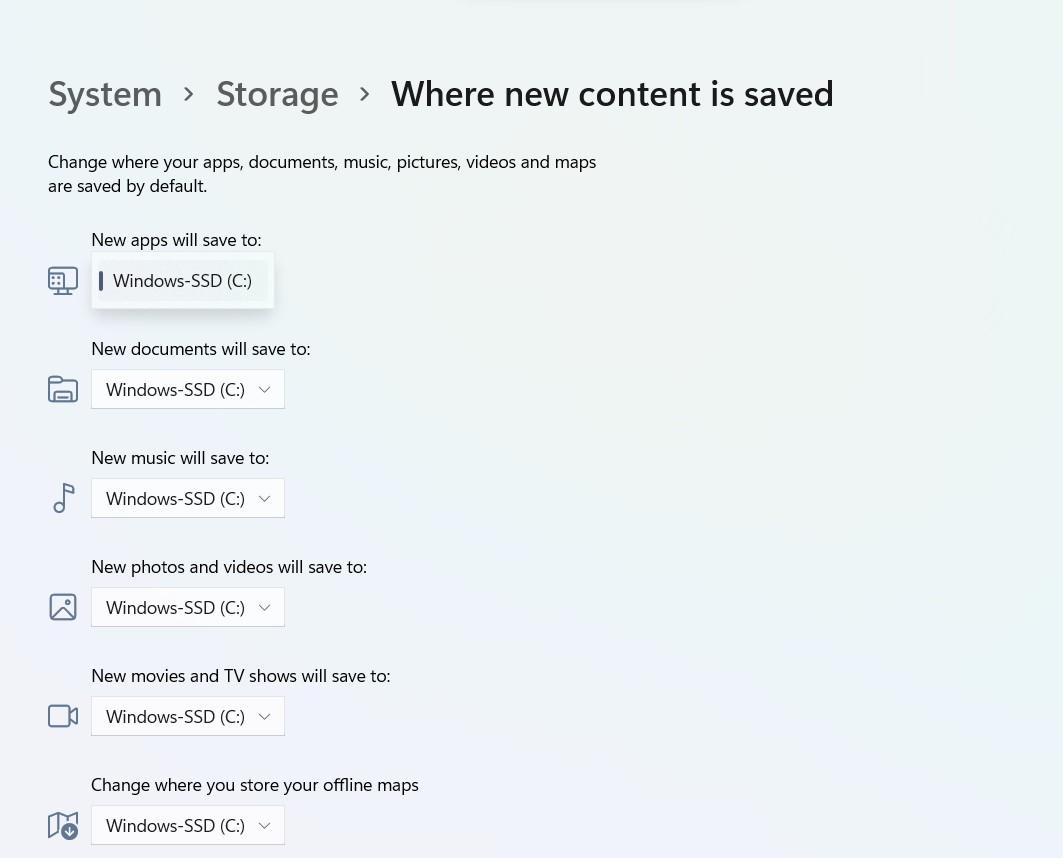
Step 2 – In the Storage Management, click on Advanced Storage Settings to open the drop-down menu. Select Where new content is saved in it.
Step 3 – In the menu that opens, there is an option New apps will save to with a drop-down list below. Click there and choose a new location for your downloaded applications.
And that is how you change the default location to store your downloaded applications.


