
There are times when the users of Windows 11 face the issue of MSVCP140.dll missing on Windows 11. It is a component of Microsoft Visual C++ Redistribution package. Various applications and games do not run without it. This article delves into the main fixes which will allow the users to solve the issue.
Page Contents
Fix: MSVCP140.dll missing on Windows 11
The main fixes for solving the issue are stated below. Using them, the users can easily solve the issue of MSVCP140.dll missing on Windows 11
Fix 1: Installing Visual C++ Manually
Installing Visual C++ manually can help the users in fixing the issue. Thus, let us check the steps for installing it.
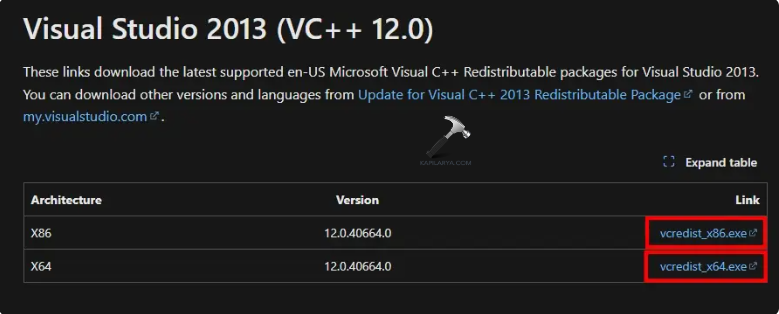
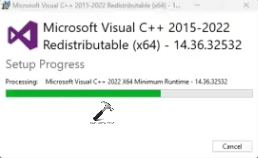
Step 1- Firstly, visit Microsoft’s Website. Then, press the link for both x86 and x64 versions of VCRedist for downloading the setup files.

Step 2- Now, go to the folder which has the downloaded Visual C++ redistributable setup files.
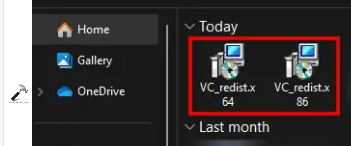
Step 3- Next, double-click for opening the vc_redist.x64.exe and vc_redist.x86.exe and then download them. Certain programs and games need both x86 and x64 versions for proper functioning.
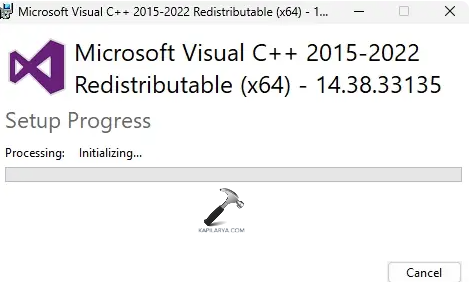
Step 4- Next, follow the on-screen prompts for installing the package. However, if some version of Visual C++ Redistributable is previously installed in the PC, you will be asked for repairing the installation.
Step 5- Reinstall the Visual C++ Redistributable on the PC. This should solve the issue.
Fix 2: Reinstalling or Repairing the Application
Another fix which the users can try for fixing the issue is reinstalling or repairing the application which consists of the issue of MSVCP140.dll. For doing the same, follow the steps below.
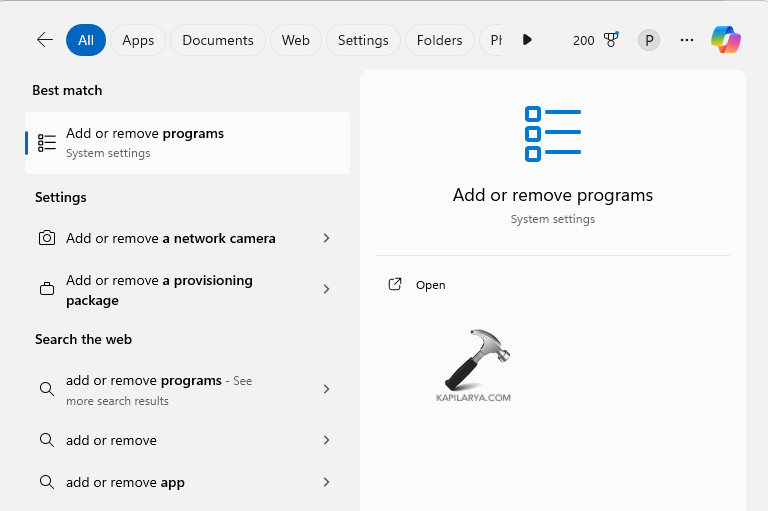
Step 1- At first open Add or Remove Programs
Step 2- Now locate the application which contains the error of MSVCP140.dll.
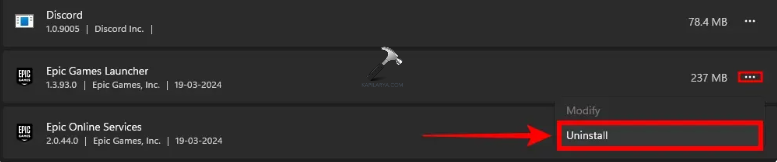
Step 3- Select the three dots, located on the right side of the application. Thereafter, select Uninstall for removing the app from the PC.
Step 4- Lastly reinstall the program.
Fix 3: Installing VCRedist Package
Installing VCRedist Package using the steps below can too help the users in solving the issue.
Step 1- At first, open the application or the installation files of the game. For instance, on Epic Games Launcher, press the three dots located next to the name of the game. Then, press Manage. This will open it.
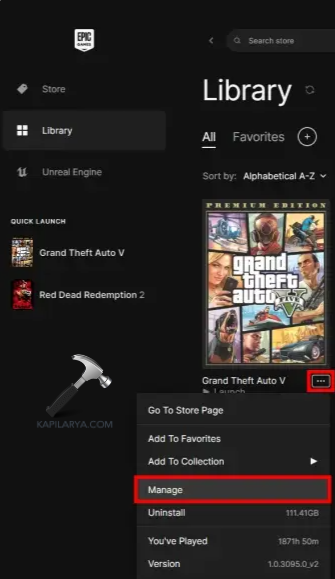
Step 2- Now, locate the folder which contains VCRedist setup. For example, for fixing MSVCP140.dll issue in GTA 5, go to Redistributables > VCRedist in the game files.

Step 3- After finding the VCRedist setup files, download the Microsoft Visual C++ Redistributable for solving the mentioned issue.
Fix 4: Running SFC and DISM command
Bugs in system image files may also lead to the occurrence of the issue. Therefore, running System File Checker and the DISM tool will help in scanning and repairing these system files. Let us now take a look at how to run these tools.
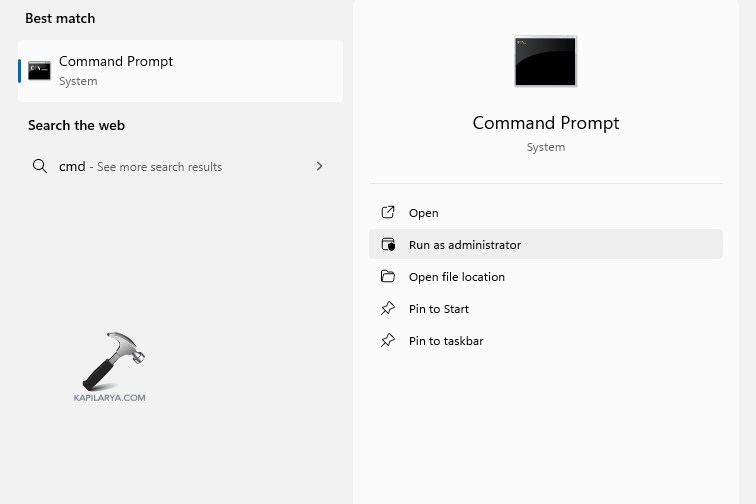
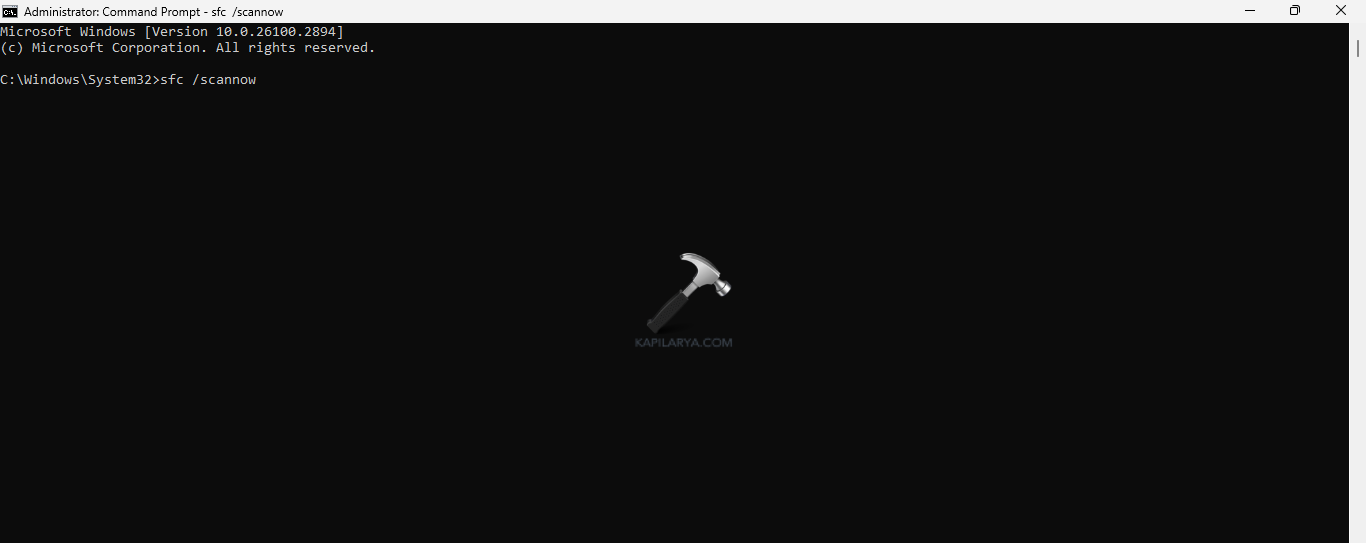
Step 1- Firstly, go to start and type cmd. Next, right-click on Command Prompt and press Run as administrator.
Step 2- Next, in the command prompt window, type the command given below to run the SFC scan and press Enter.
sfc /scannow
Step 3- Again, to run the DISM tool scan, type the commands given below one by one and press Enter after each command:
Dism /Online /Cleanup-Image /ScanHealth

Dism /Online /Cleanup-Image /CheckHealth

Dism /Online /Cleanup-Image /RestoreHealth

Fix 5: Performing System Restore
Creating a System Restore Point or using an already created one will aid in restoring the computer to its starting point. This will also ensure the proper working of the apps consisting of the issue. Now, complete the given steps to perform System Restore-
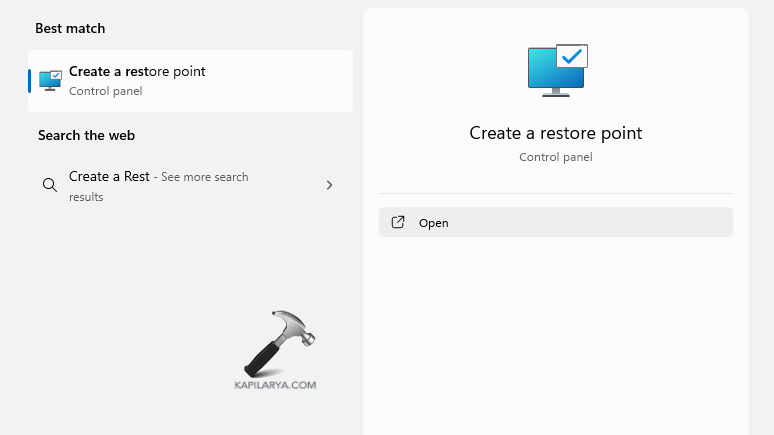
Step 1- Go to the Start menu. Next, type create a restore point and open the result.
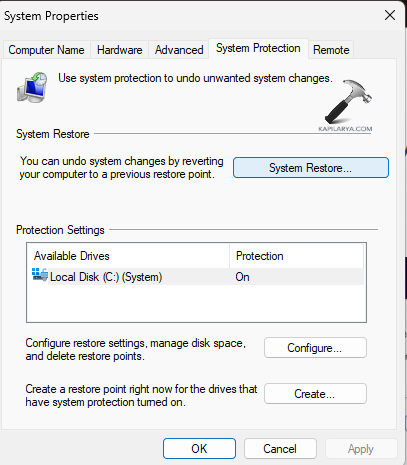
Step 2- From the System Properties window, select the System Restore option.
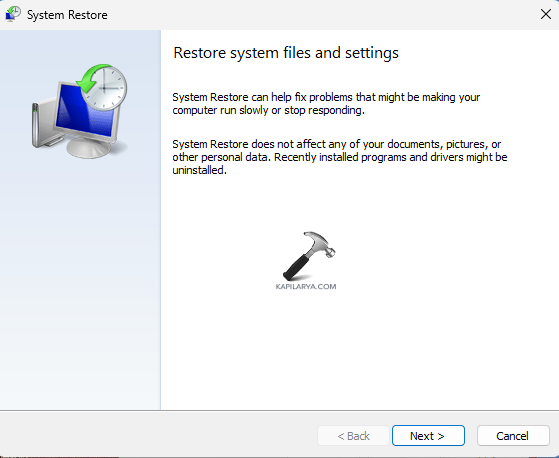
Step 3- Select Next on the System Restore Window.
Step 4- A list of all the previously created Restore points will appear on the screen. Choose the required restore point.
Step 5- Furthermore, choose the Restore point and select Next as per the date, name and time. Moreover, if the desired restore points are not visible, select Show more restore points.
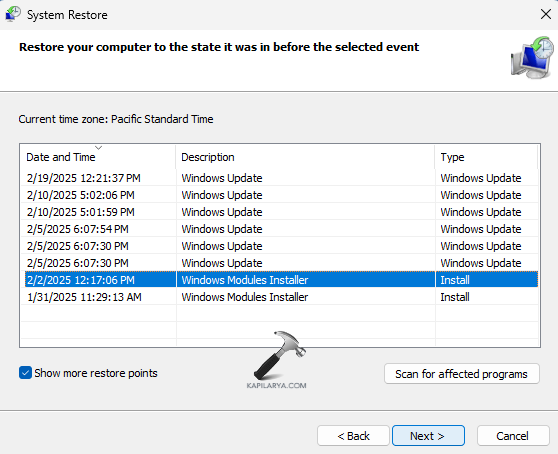
Step 6- Choose the desired drive that is to be restored and click Next.
Step 7- A final pop-up window will appear. It will consist of the selected restore point, the to-be affected drive. It will also contain a warning telling to create a password reset disk.
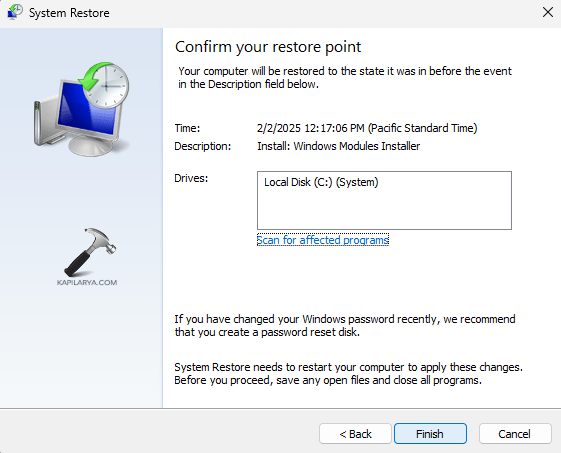
Step 8- Finally, select the Finish button. This will restart the Windows 11 PC and begin the process of System Restore. After the restoration process, see if the issue is resolved.
Apart from the fixes mentioned here, updating Windows 11 and running a virus scan will ensure that the PC has no internal issue and is properly functioning. Hoping that this helps!


