Windows Spotlight is a feature introduced in Windows 10 and continued in Windows 11, designed to bring dynamic and engaging wallpapers to your desktop background. While it may be visually appealing for some users, others find it distracting or simply prefer a static background. In this guide, we will walk you through the steps to disable Windows Spotlight on your Windows 11 desktop, allowing you to set a fixed background image of your choice.
Page Contents
What is Windows Spotlight?
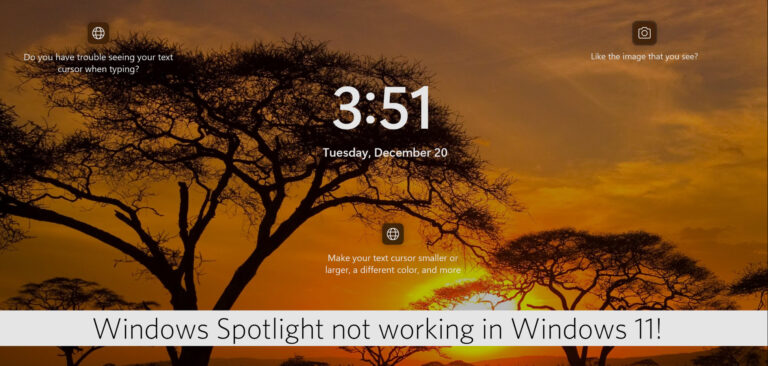
Windows Spotlight is a feature in Windows 11 that automatically downloads and displays new images as your desktop background. The images are sourced from Bing and are often accompanied by fun facts or trivia.
There are a few reasons why you might want to disable Windows Spotlight:
- To save data: Windows Spotlight downloads new images every day, which can use up a significant amount of data if you have a limited data plan.
- To improve performance: Some users have reported that Windows Spotlight can slow down their computer, especially if they have a lot of other programs running.
- To protect your privacy: Windows Spotlight sends data back to Microsoft about the images you view and whether you like them or not. Some users may not be comfortable with this data collection
Disable Windows Spotlight on Windows 11 Desktop
You can disable Windows Spotlight on your Windows 11 desktop through three straightforward methods:
- Using the Settings app
- Employing the Registry Editor
- Utilizing the Local Group Policy Editor
Method 1: Disable Windows Spotlight on Windows 11 Desktop using Settings App
Follow the below steps to disable Windows Spotlight using the Settings app:
1. Open the Settings App and go to “Personalization“.
2. Now, click on “Lock screen“.
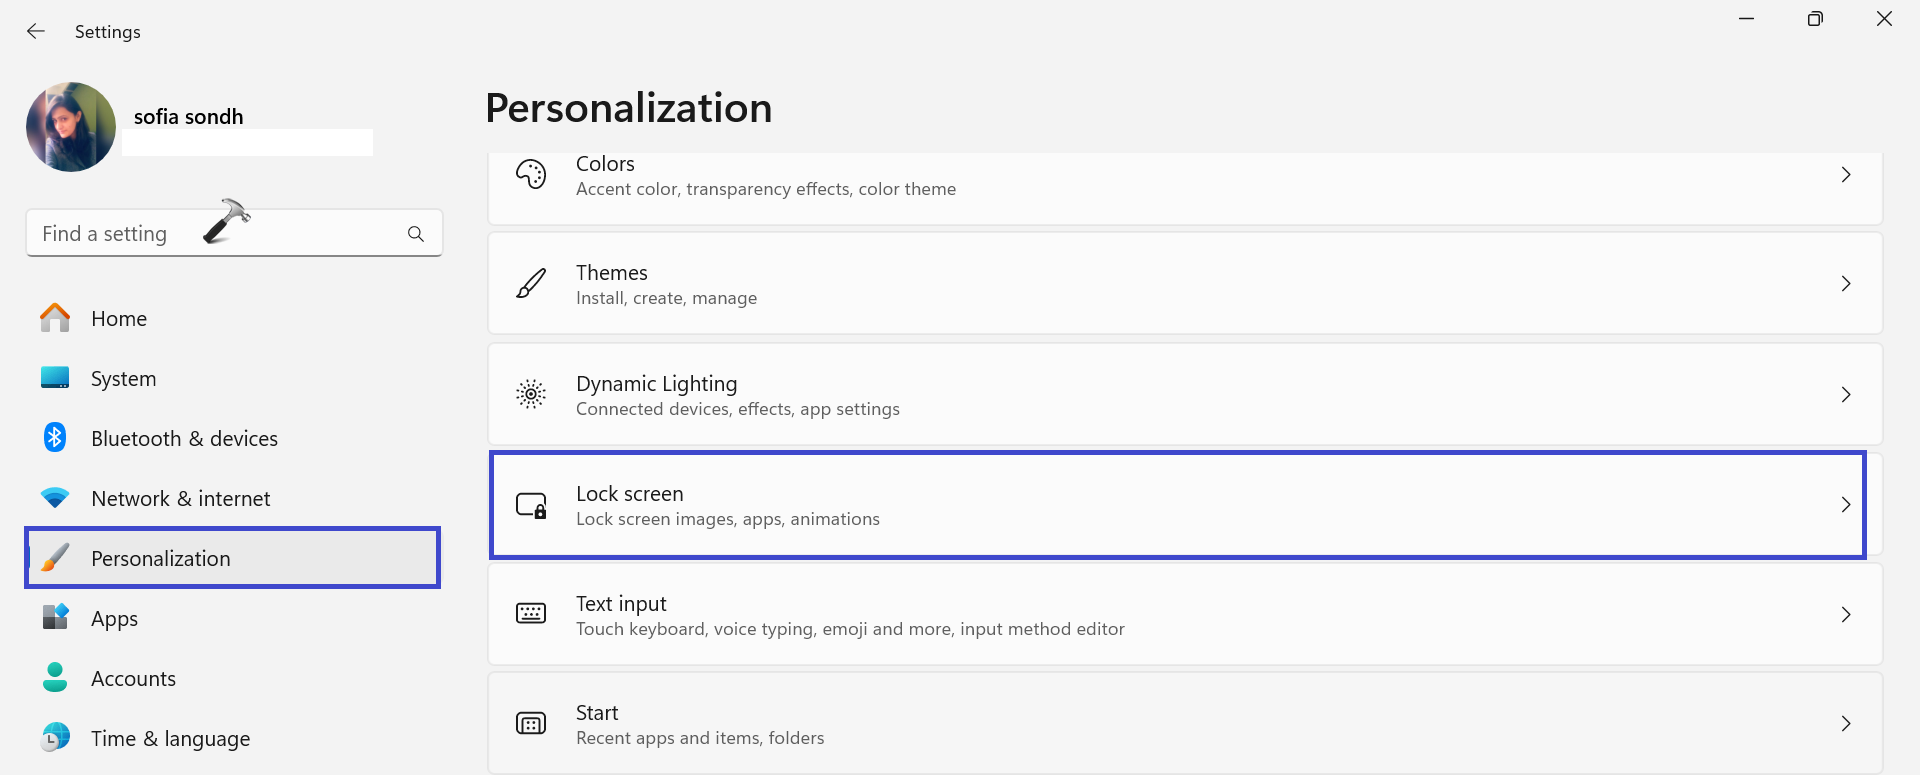
3. Click the drop-down menu of “Personalize your lock screen” and then select “Windows spotlight“. This will enable the Windows spotlight feature.

4. To disable the feature, select “Picture or slideshow” from the drop-down menu list.
5. Close all the Windows and restart the PC to save the settings.
Method 2: Disable Windows Spotlight on Windows 11 Desktop using Registry Editor
Here are the steps to disable Windows Spotlight using Registry Editor:
1. Press the Windows key + R. Type “regedit.exe” and click OK.
2. Navigate to the following path:
HKEY_CURRENT_USER > Software > Policies > Microsoft > Windows > CloudContent
3. Now, right-click on “CloudContent” and select “New => DWORD (32-bit) Value“.

A prompt box will appear. Type “DisableWindowsSpotlightFeatures“.
4. Now, double-click on the “DisableWindowsSpotlightFeatures” option.
Set the value to 1 to disable spotlight images.

If you want to enable spotlight images, then set the value to 0.
5. Close the Registry Editor Windows and restart the PC to save the changes.
Method 3: Disable using the Local Group Policy Editor
Follow the steps to disable using the Local Group Policy Editor:
1. Press the Windows key + R. Type “gpedit.msc” and click OK.
2. Navigate to the following path:
User Configuration > Administrative Templates > Windows Components > Cloud Content
3. Now, double-click on the “Turn off all Windows spotlight features” option.

4. A prompt box will appear.
Select “Enable” to get spotlight images on the lock screen.

Select “Disable” to get spotlight images on the lock screen.
5. Click OK after selecting the option followed by Apply.
That’s It!