In Windows 10, Windows Defender Antivirus is built-in antimalware solution that protects your system against security threats. This antivirus is part of Windows Security app in Windows 10 V1703 or later. Prior to Version 1703, the Windows Defender client app and security settings were separately available.
So with Windows 10 V1703 onwards, Windows Security app comes with Windows Defender Antivirus settings incorporated. If you plan to use third-party security software, you can turn off real-time protection in Windows Security. However, if you want to keep using third-party AV software for long time, you may need to disable Windows Defender Antivirus.
Here’s how to enable/disable Windows Defender Antivirus as per your need.
NOTE: You must have Tamper protection turned off in Windows 10 V1903 or later, in order to disable Windows Defender Antivirus.
How To Enable/Disable Windows Defender Antivirus In Windows 10
Registry Disclaimer: The further steps will involve registry manipulation. Making mistakes while manipulating registry could affect your system adversely. So be careful while editing registry entries and create a System Restore point first.
1. Press  + R and put
 regedit in Run dialog box to open Registry Editor (if you’re not familiar with Registry Editor, then click here). Click OK.

2. In left pane of Registry Editor window, navigate to following registry key:
HKEY_LOCAL_MACHINE\SOFTWARE\Policies\Microsoft\Windows Defender
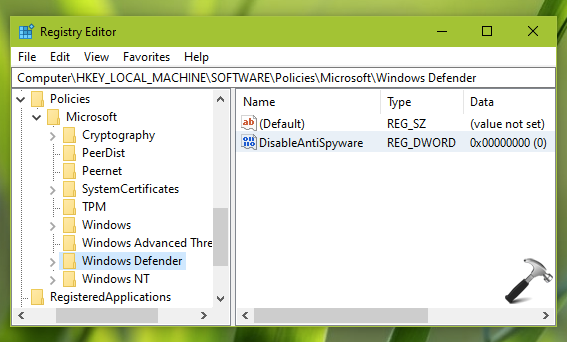
3. In the right pane of Windows Defender sub-key, create a registry DWORD (REG_DWORD) named DisableAntiSpyware. Double click on the registry DWORD to modify its Value data:
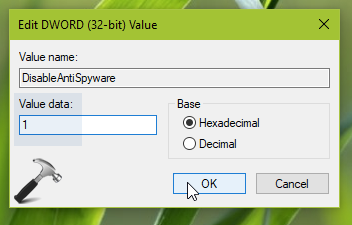
4. Finally, set the Value data to 1 to disable Windows Defender Antivirus. Click OK and close Registry Editor, reboot to make changes effective.
After restarting your system, Windows Defender Antivirus should be disabled.
To re-enable Windows Defender Antivirus later, simply restore DisableAntiSpyware registry DWORD to Value data as 0 or delete it and restart system.
That’s it!