
Microsoft considers Windows 11 as the safest operating system of Windows family. This operating system comes with many security features. Additionally, it comes with free Windows Security app that can help you to manage your system and safeguard it from security threats. With Windows security, you get industry-best security threat protection. We’ve already seen how you can enable Memory integrity to avoid malicious app from tampering core processes. Now in this article, we’ll see how you can enable Local Security Authority Protection in Windows 11, which an additional Core isolation feature.
As per Microsoft, you can enable and use Local Security Authority (LSA) process to prevent code injection that could compromise credentials. This is a must-use feature IT admins to safeguard their clients and security attacks.
Here’s how you can enable Local Security Authority Protection on your system.
Page Contents
Enable Local Security Authority Protection in Windows 11
Method 1: Using Windows Security
1. Open Windows Security.
2. Go to Device Security > Core isolation > Core isolation details.
3. In the next window, you will be able to locate Local Security Authority Protection named option, which is turned Off by default. All you need to do is just set it to On and the feature is then enabled.
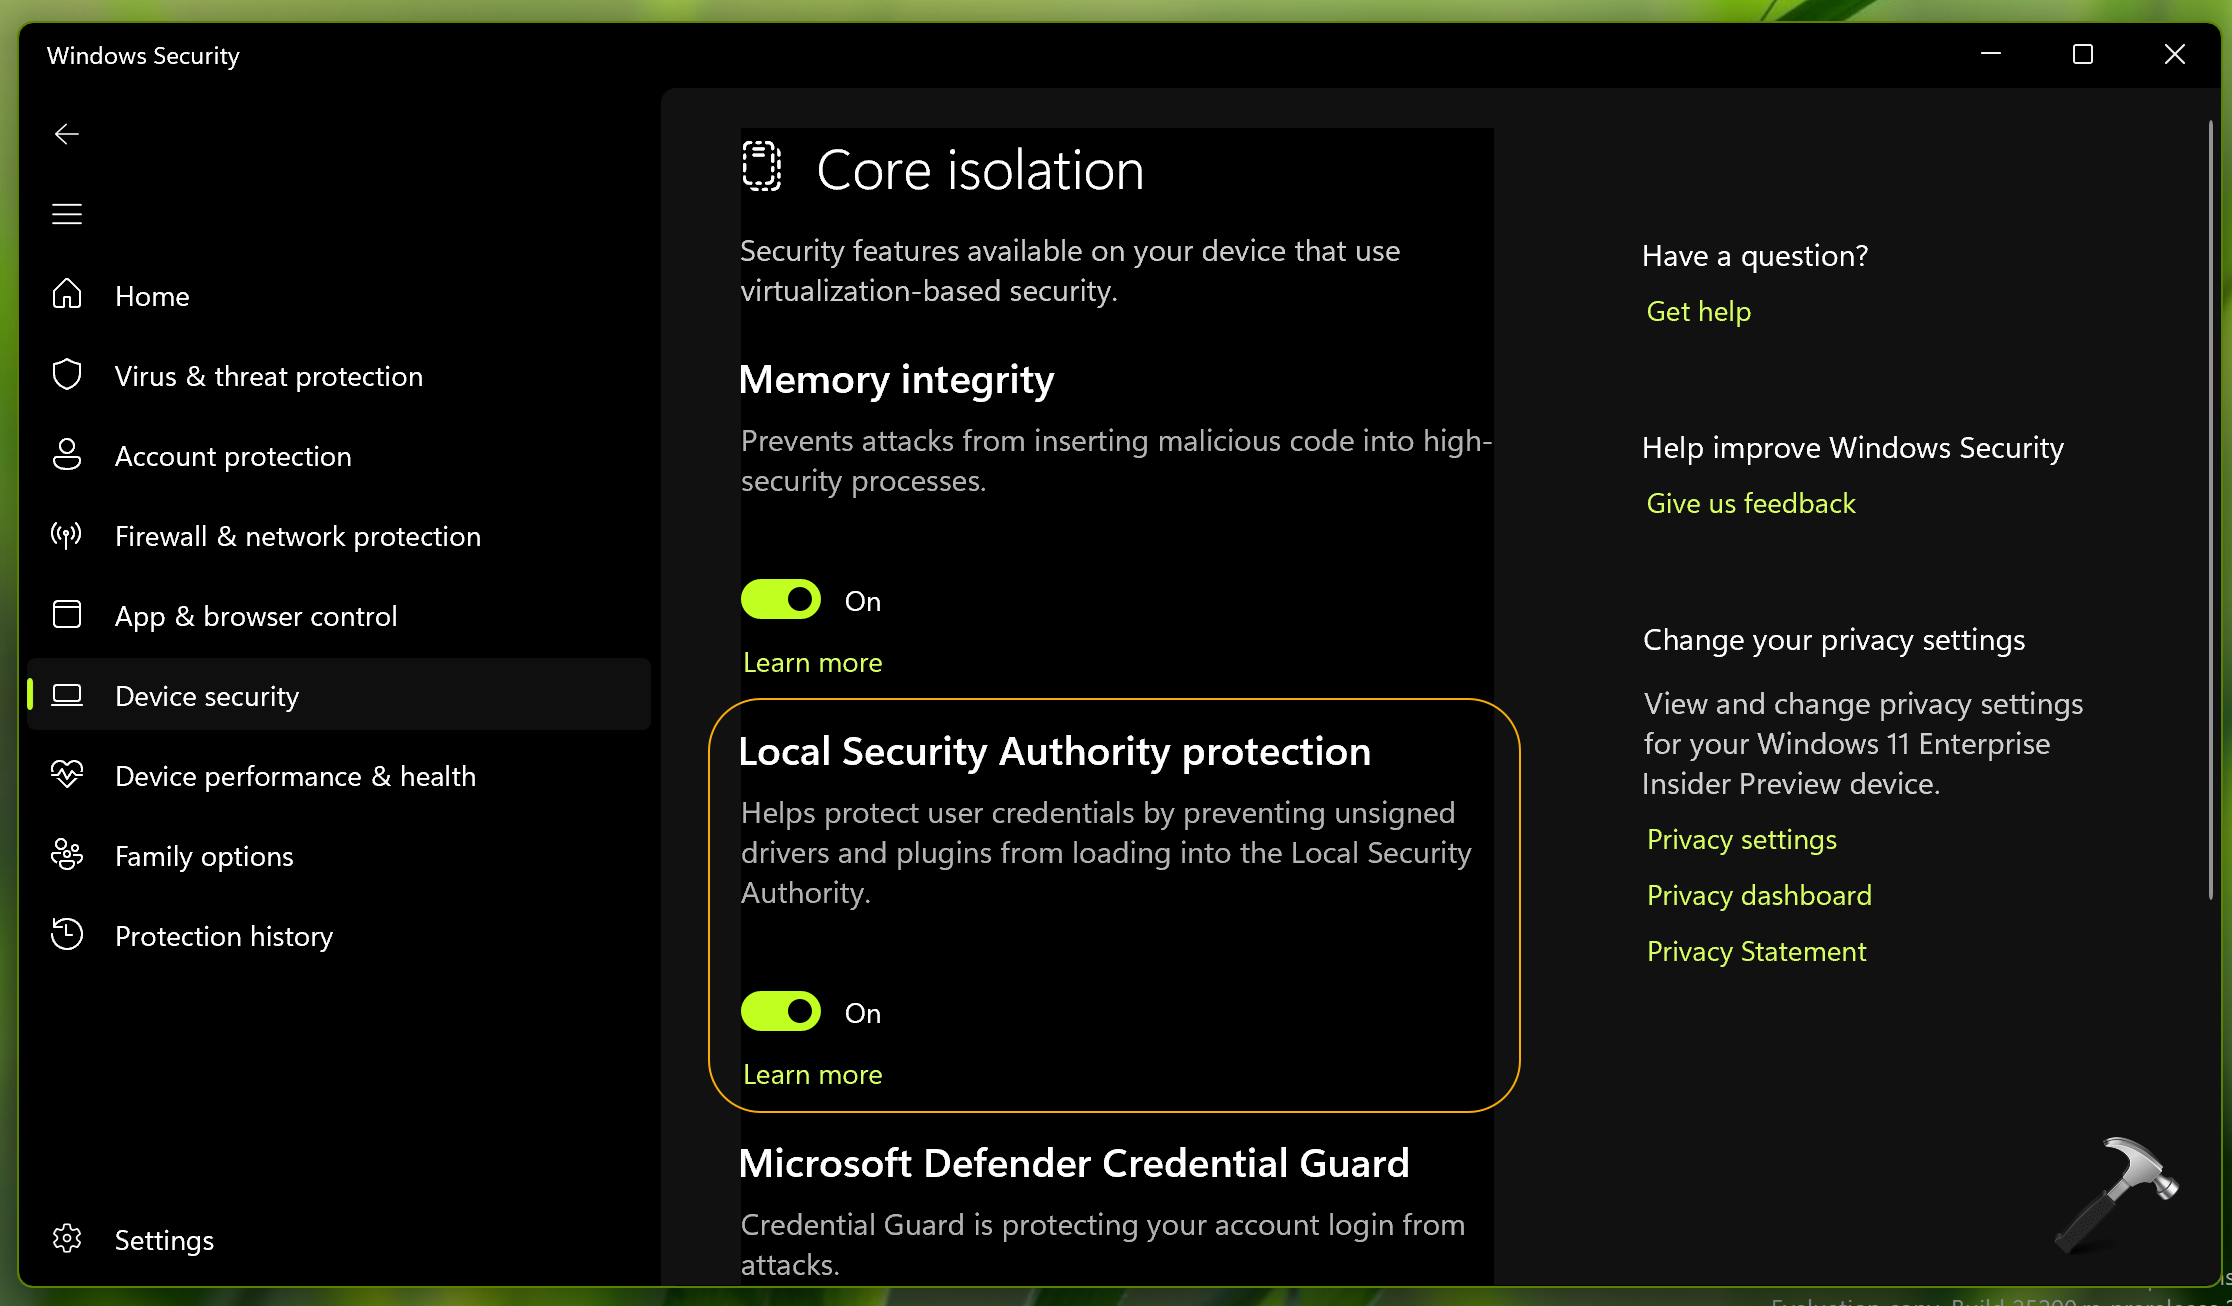
4. You can now close Windows Security.
Method 2: Using Registry
You can configure this feature using below registry tweak.
 Registry Disclaimer: It is recommended to create a System Restore point first, if you’re not familiar with registry manipulation.
1.Run regedit command to open Registry Editor.
2.In left pane of Registry Editor window, navigate to:
HKEY_LOCAL_MACHINE\SYSTEM\CurrentControlSet\Control\Lsa
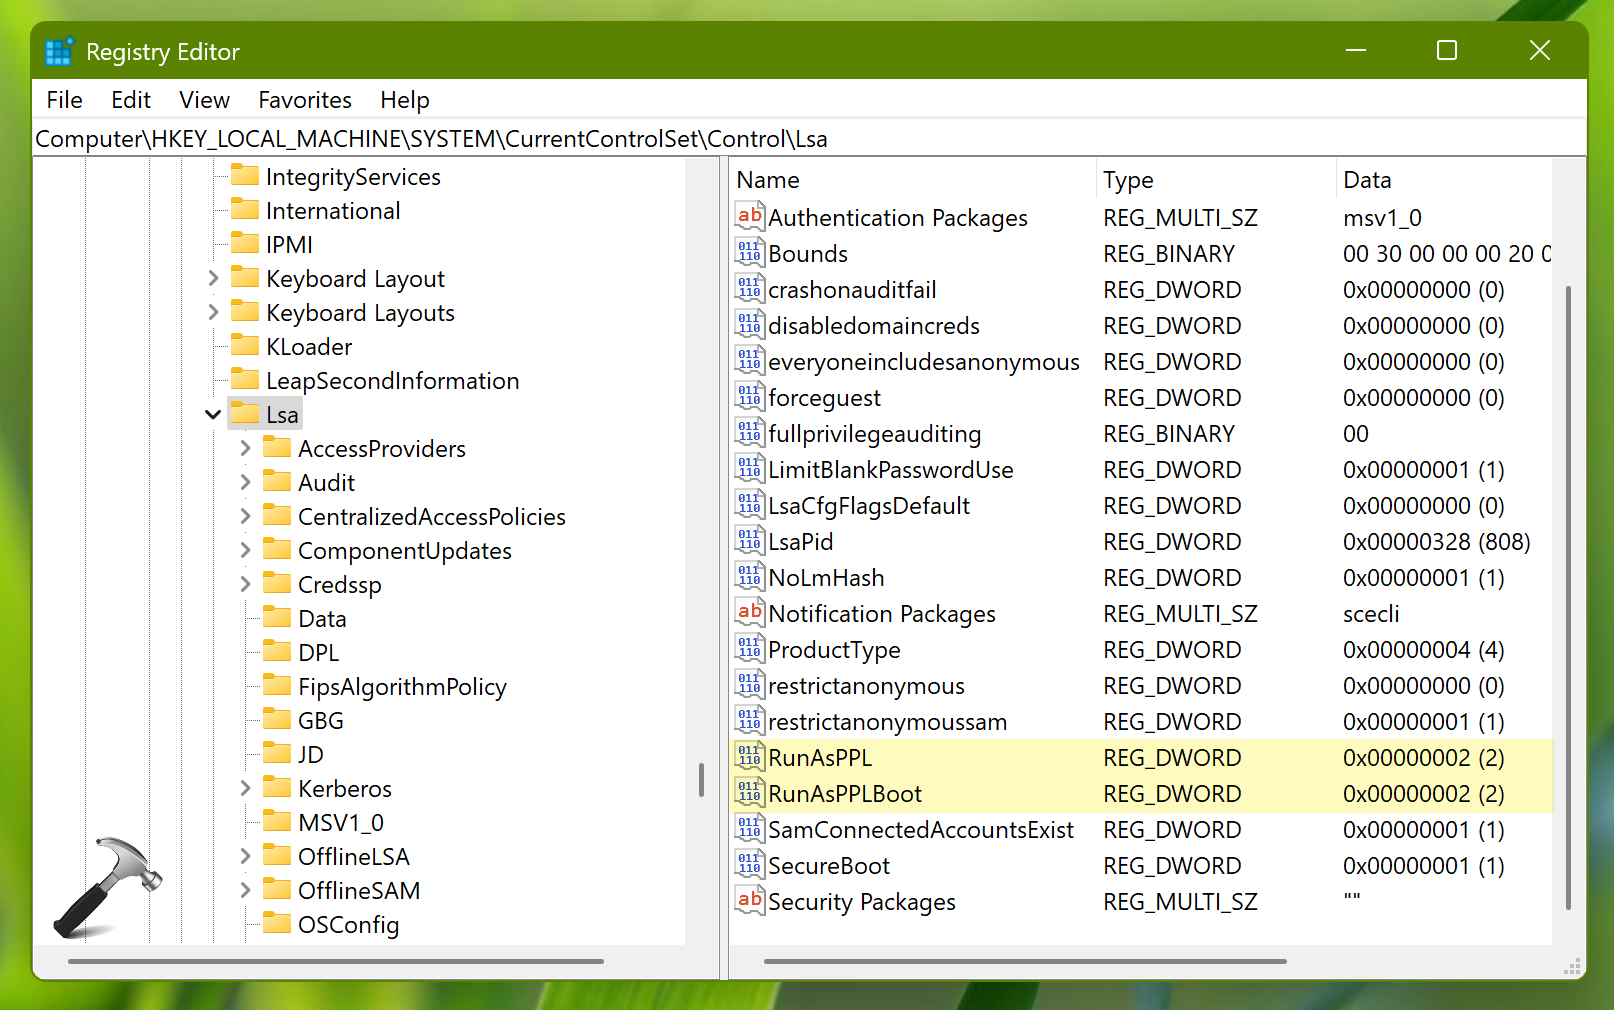
3. In the right pane of this registry location, you will find two registry DWORD values. These are RunAsPPL and RunAsPPLBoot. By default, they’re set to 0. To enable this feature, you need to set them to 2.
4. Close Registry Editor and restart your system to make changes effective.
Method 3: Using Group Policy
IT Pros and system administrators can use this method to enable Local Security Authority Protection for their clients.
1. Press  + R and put
 gpedit.msc in Run dialog box. Click OK to open Group Policy snap-in.
2. Go to following location:
Computer Configuration > Administrative Templates > System > Local Security Authority
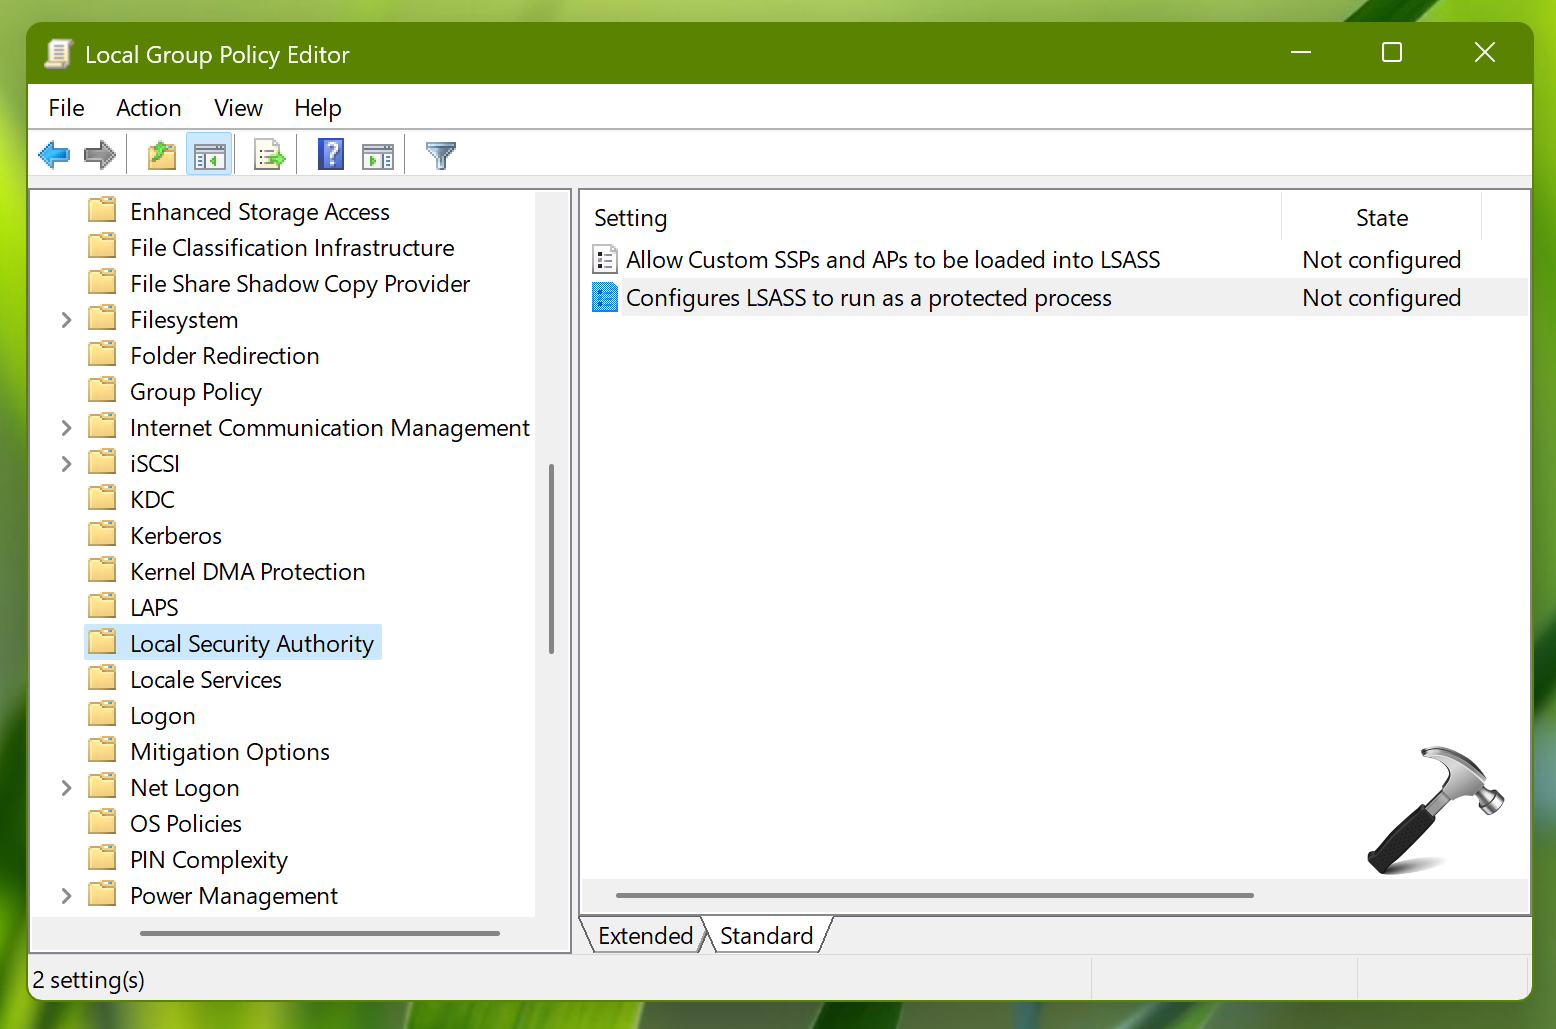
3. In the right pane of local security authority folder, you should be able to locate the policy setting named Configures LSASS to run as a protected process. Policy setting to modify its status.
4. Now set the policy status to Enabled and for Options, for the Configure LSA to run as a protected process option, choose your desired option. Click Apply, OK.
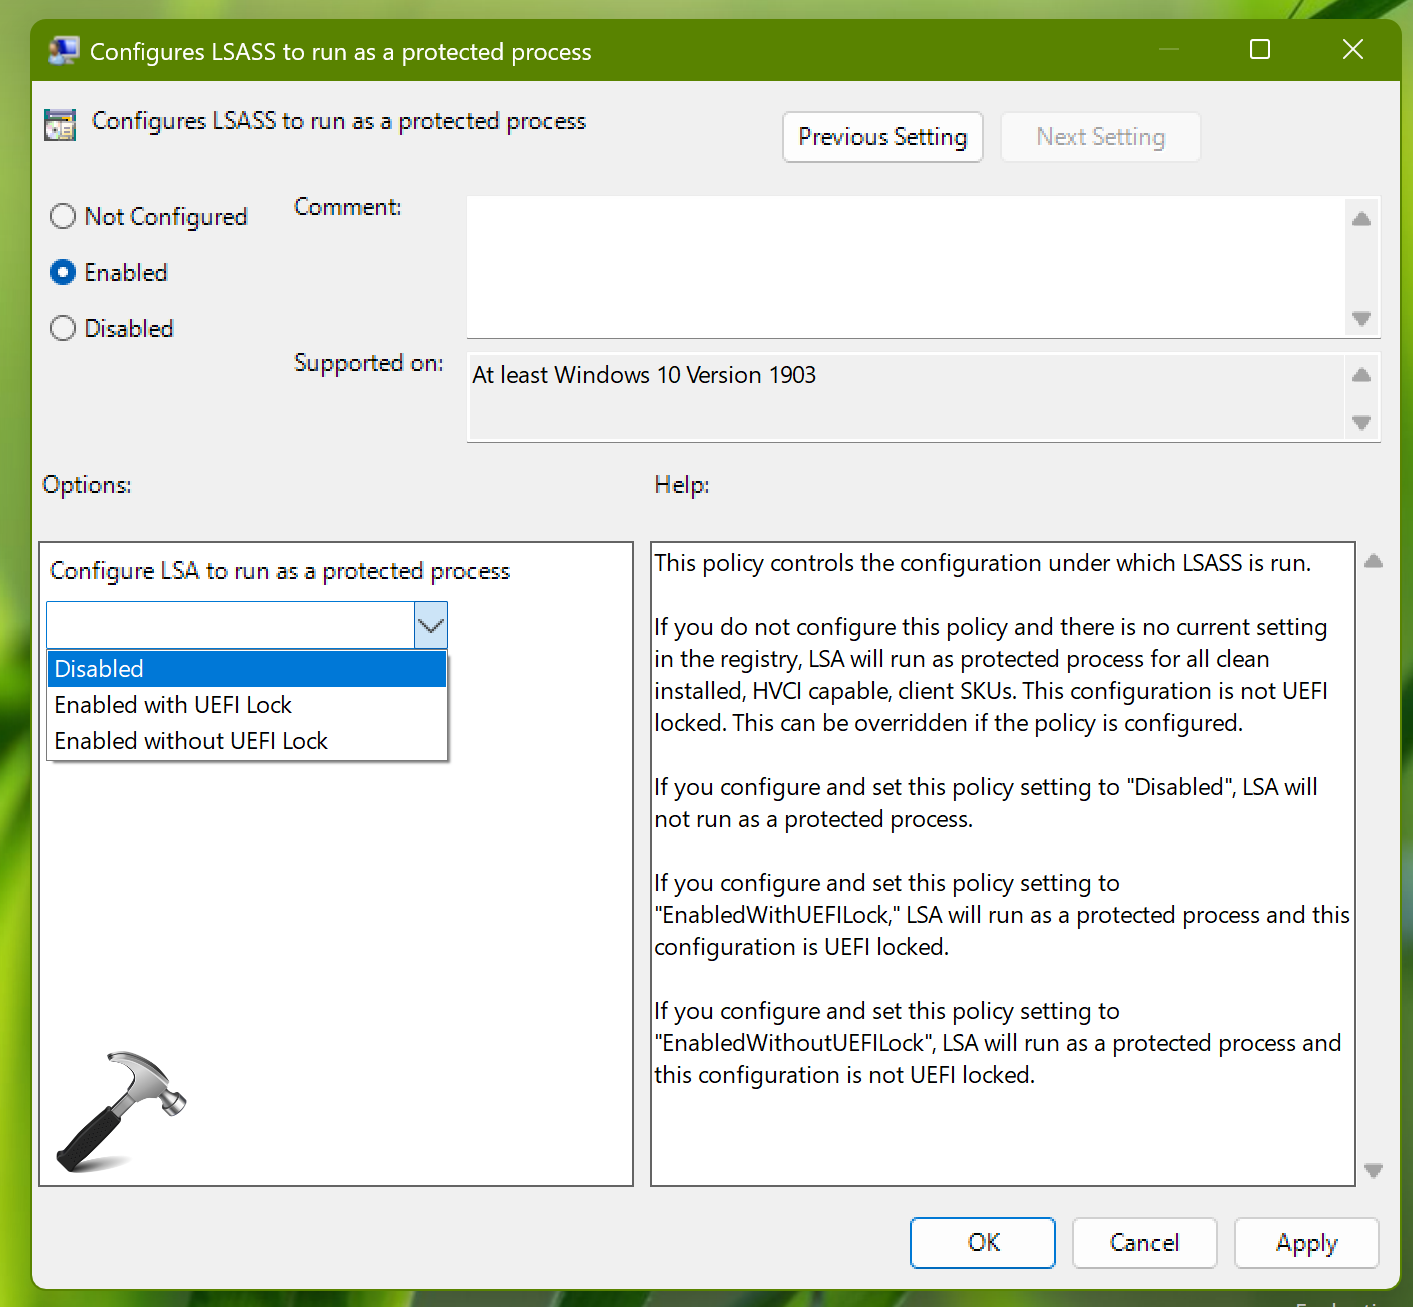
5. Close Group Policy Editor and update the GP engine to make changes effective.
That’s it!


Hello!
I would just like to know… what is the difference between the key value 1 and 2?
Or in the GPEdit, the Enabled with or without UEFI lock?
Thank you :D