
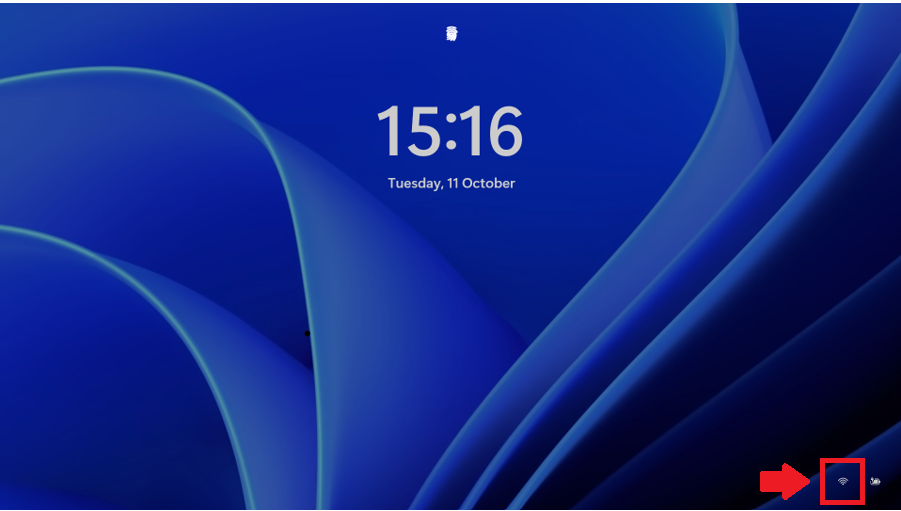
By default, the network icon (Ethernet or Wi-Fi icon) is visible on both the sign-in screen and the lock screen for all users in Windows 11. Any user can use that icon to disconnect a network and switch to some other network. In this article, we will show you how to enable or disable network icon on login screen in Windows 11.
The available network UI available in the lock and sign-in screen allows any user to disconnect the PC from the network or can connect the PC to other available networks without signing into Windows.
Page Contents
Enable or Disable Network icon on Login Screen in Windows 11
Below are three options using which we can Enable or Disable the Network icon on login screen, which are:
Option 1: Enable or Disable the Network icon on Login Screen using Local Group Policy Editor
1. Press Windows Key + R. Type gpedit.msc and click OK.

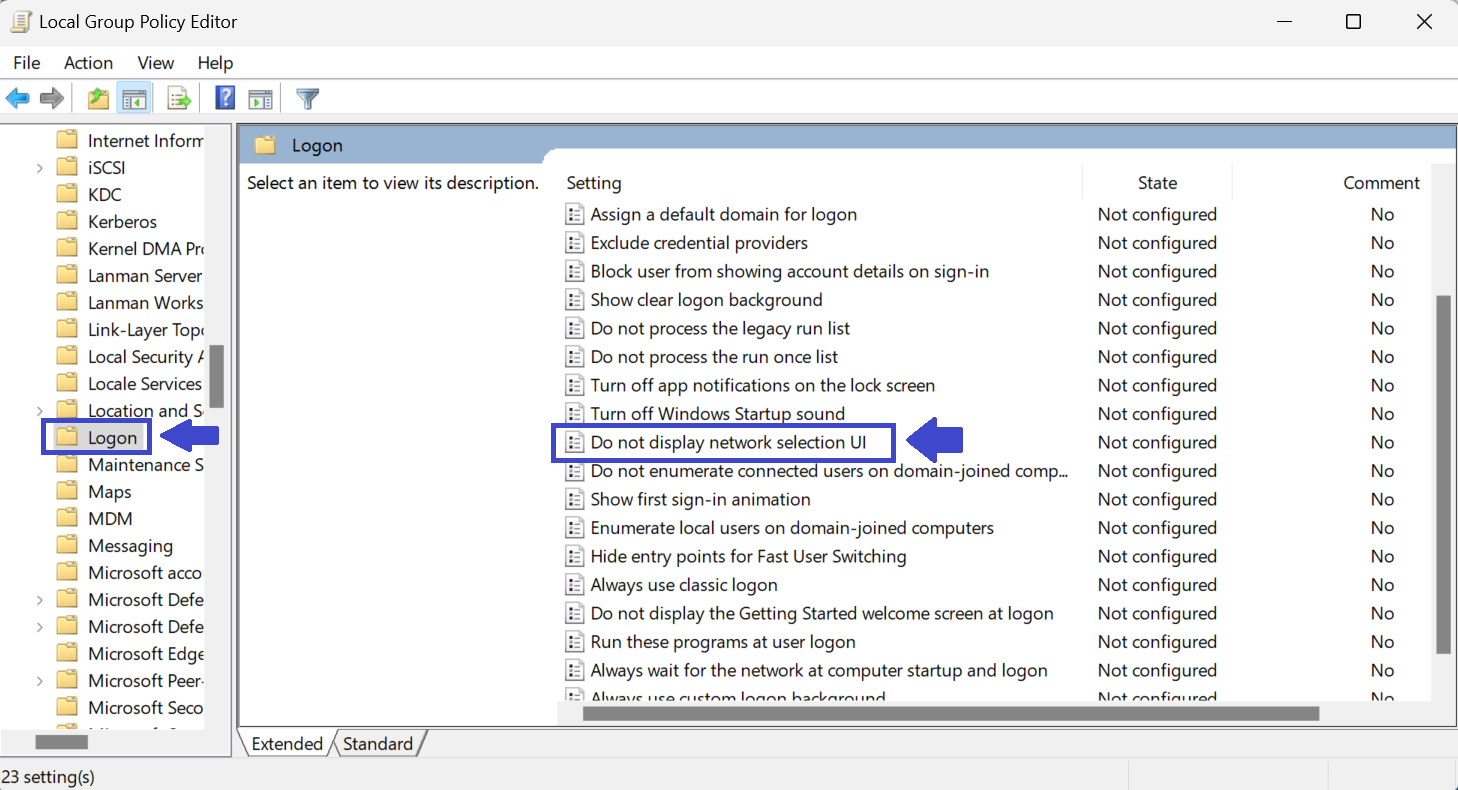
2. Navigate the following path:
Computer Configuration > Administrative Templates > System
3. In System, select Logon.
4. In the right pane, double-click on “Do not display network selection UI”.
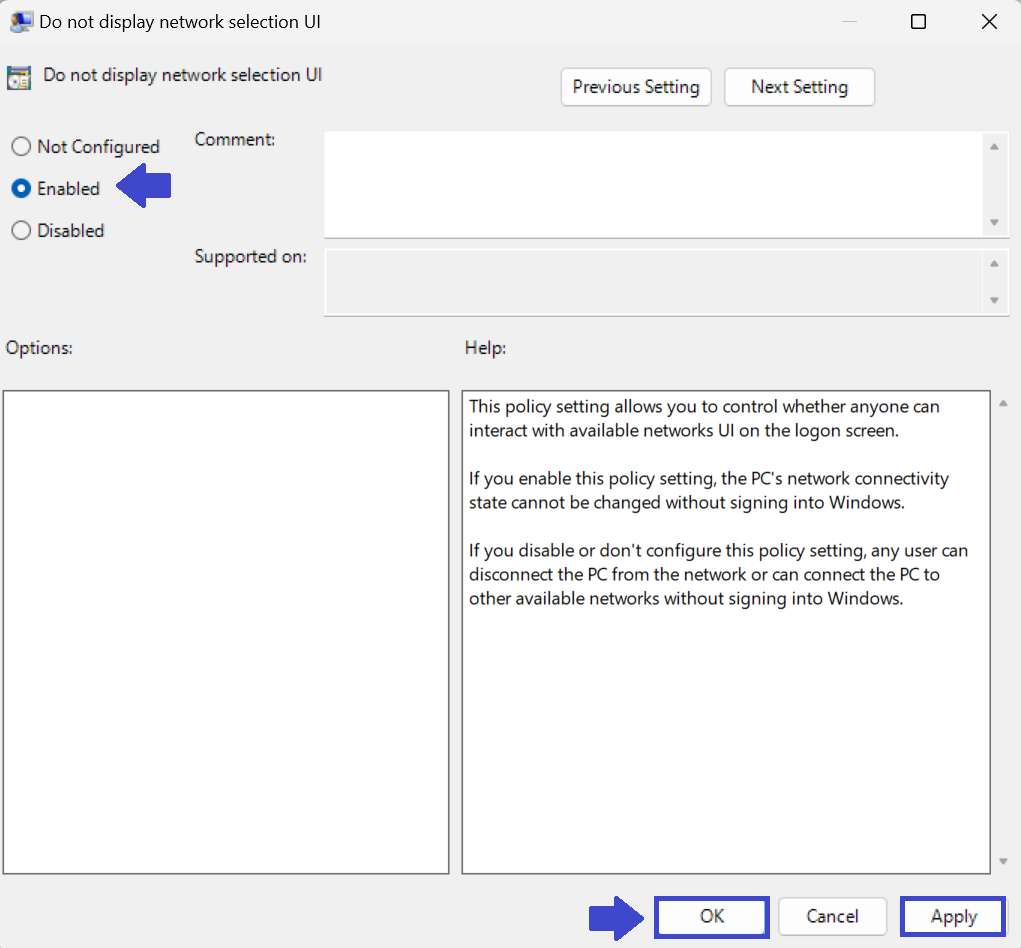
5. Prompt box will appear.
6. Select Enabled to Enable or to show the network icon. Then click OK followed by Apply.
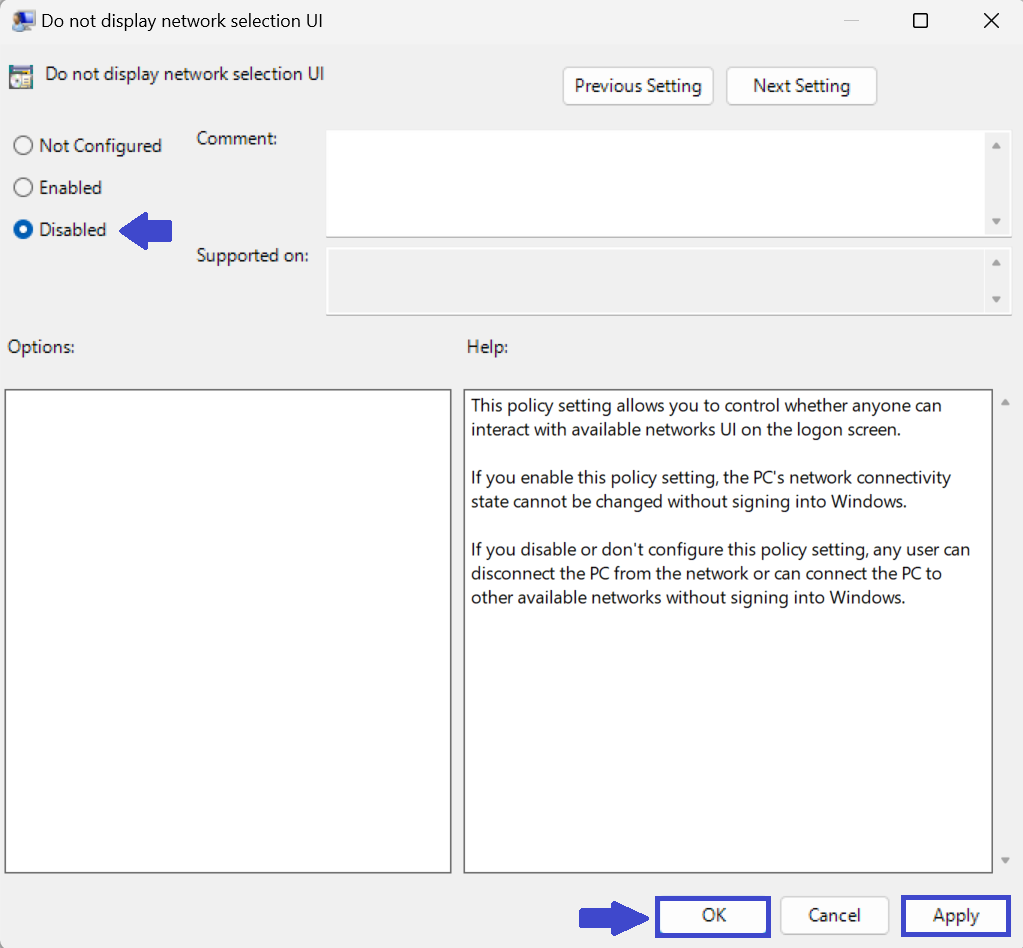
7. Select Disabled to Disable or hide the network icon. Then click OK followed by Apply.
8. Close the Group Policy Editor Window and restart your computer to apply the settings.
Option 2: Enable or Disable the Network icon using REG File
1. Press Windows key + R. Type regedit.exe and click OK.

2. Navigate the path:
Computer\HKEY_LOCAL_MACHINE\SOFTWARE\Policies\Microsoft\Windows\System
3. Select the registry key “DontDisplayNetworkSelectionUI”.
4. If you don’t have the key, you can create it.
5. To create the registry key, right-click on System => New => DWORD (32-bit) value. Prompt box will appear and type “DontDisplayNetworkSelectionUI” and click OK.

6. When key is created, double-click on “DontDisplayNetworkSelectionUI”.
7. Enter the value 1 to hide or disable and 0 to show or enable the network icon. The click OK.

8. Close the registry editor window and restart your computer to apply the settings.
Option 3: Enable or Disable the Network icon using Command Prompt
Since adding the registry value manually may lead an issue as well it will be a time taken process for system admin. You can also copy the below command and create a batch file to automate the settings.
1. Open Command Prompt and select Run as Administrator.

2. To Disable the network icon, type the following command:
REG ADD "HKLM\SOFTWARE\Policies\Microsoft\Windows\System" /V DontDisplayNetworkSelectionUI /T REG_DWORD /D 1 /F

3. To Enable the network icon, type the following command:
REG ADD "HKLM\SOFTWARE\Policies\Microsoft\Windows\System" /V DontDisplayNetworkSelectionUI /T REG_DWORD /D 0 /F

4. Close the Command Prompt and restart your computer.
That’s It!


Thanks for the tutorial, however I think it’s dangerous to hide/disable the network icon from lock screen (sign in screen) which prevents user from signing in to Windows through new (or public) wireless networks if your login type is Microsoft Account (without PIN) which requires to connect and save the network at least for once.
Has anybody paid attention to that?
^^ Yes, one must hide network icon, only if it is badly required.