Public Folder Sharing provides a simple way to share files with others on a shared network. One can even share files on the same computer with this feature. These folders contain subfolders to organize your files in a better way. They are organized by content type, such as Public Documents, Public Downloads, Public Videos, Public Music, or Public Pictures.
By default, this feature is disabled in Windows 11. In this post, learn how to enable or disable Public Folder Sharing in Windows 11.
Page Contents
Enable or disable Public Folder Sharing in Windows 11
Method 1: Enable or disable Public Folder Sharing Through Settings
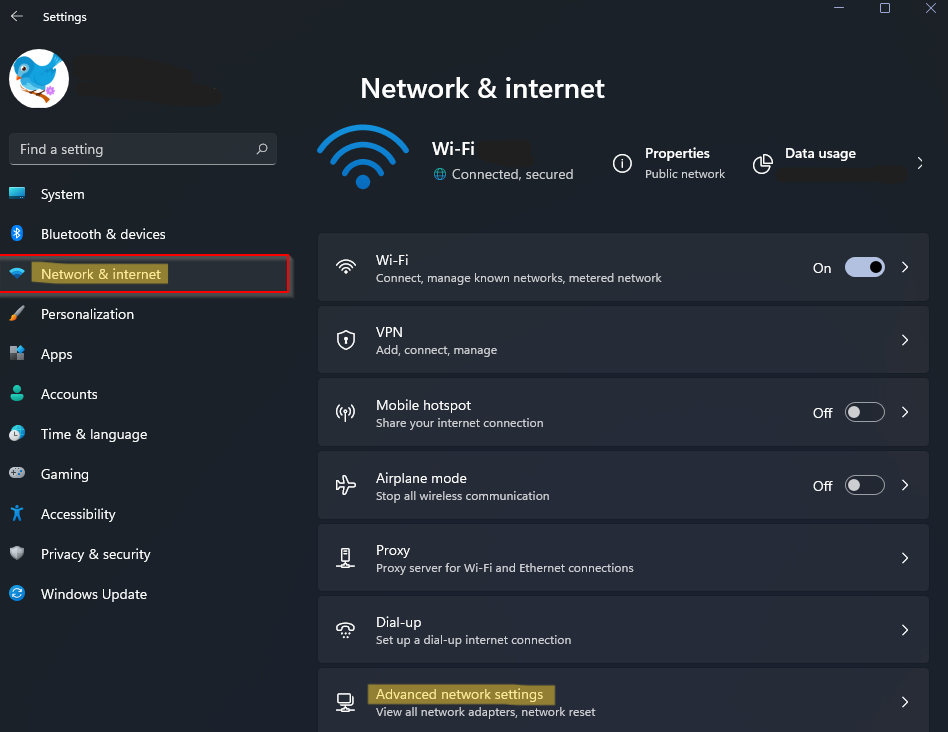
1. Open Settings and go to the Network & internet tab. Next, click on Advanced network settings.
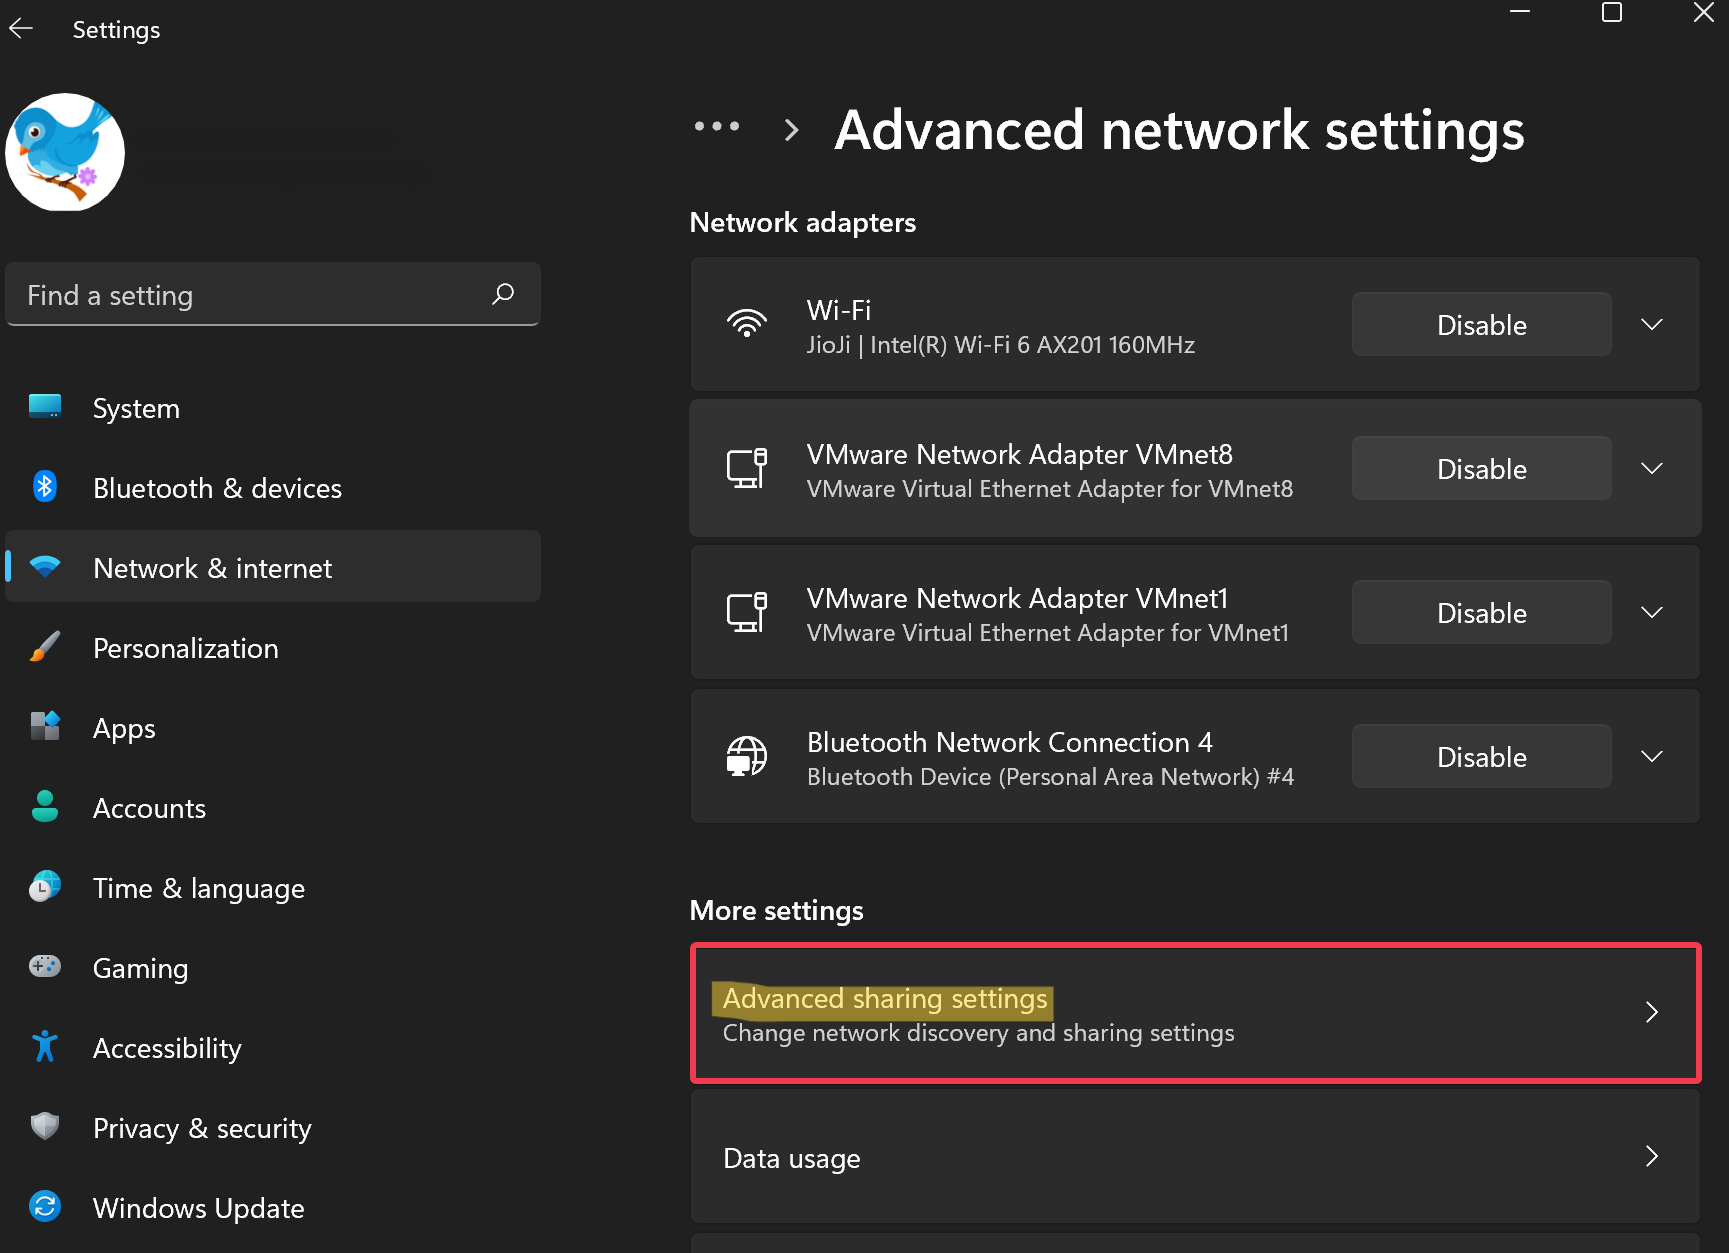
2. Once there, select the Advanced sharing settings.
3. Under All networks, toggle the switch to On or Off Public folder sharing to enable or disable Public Folder Sharing.
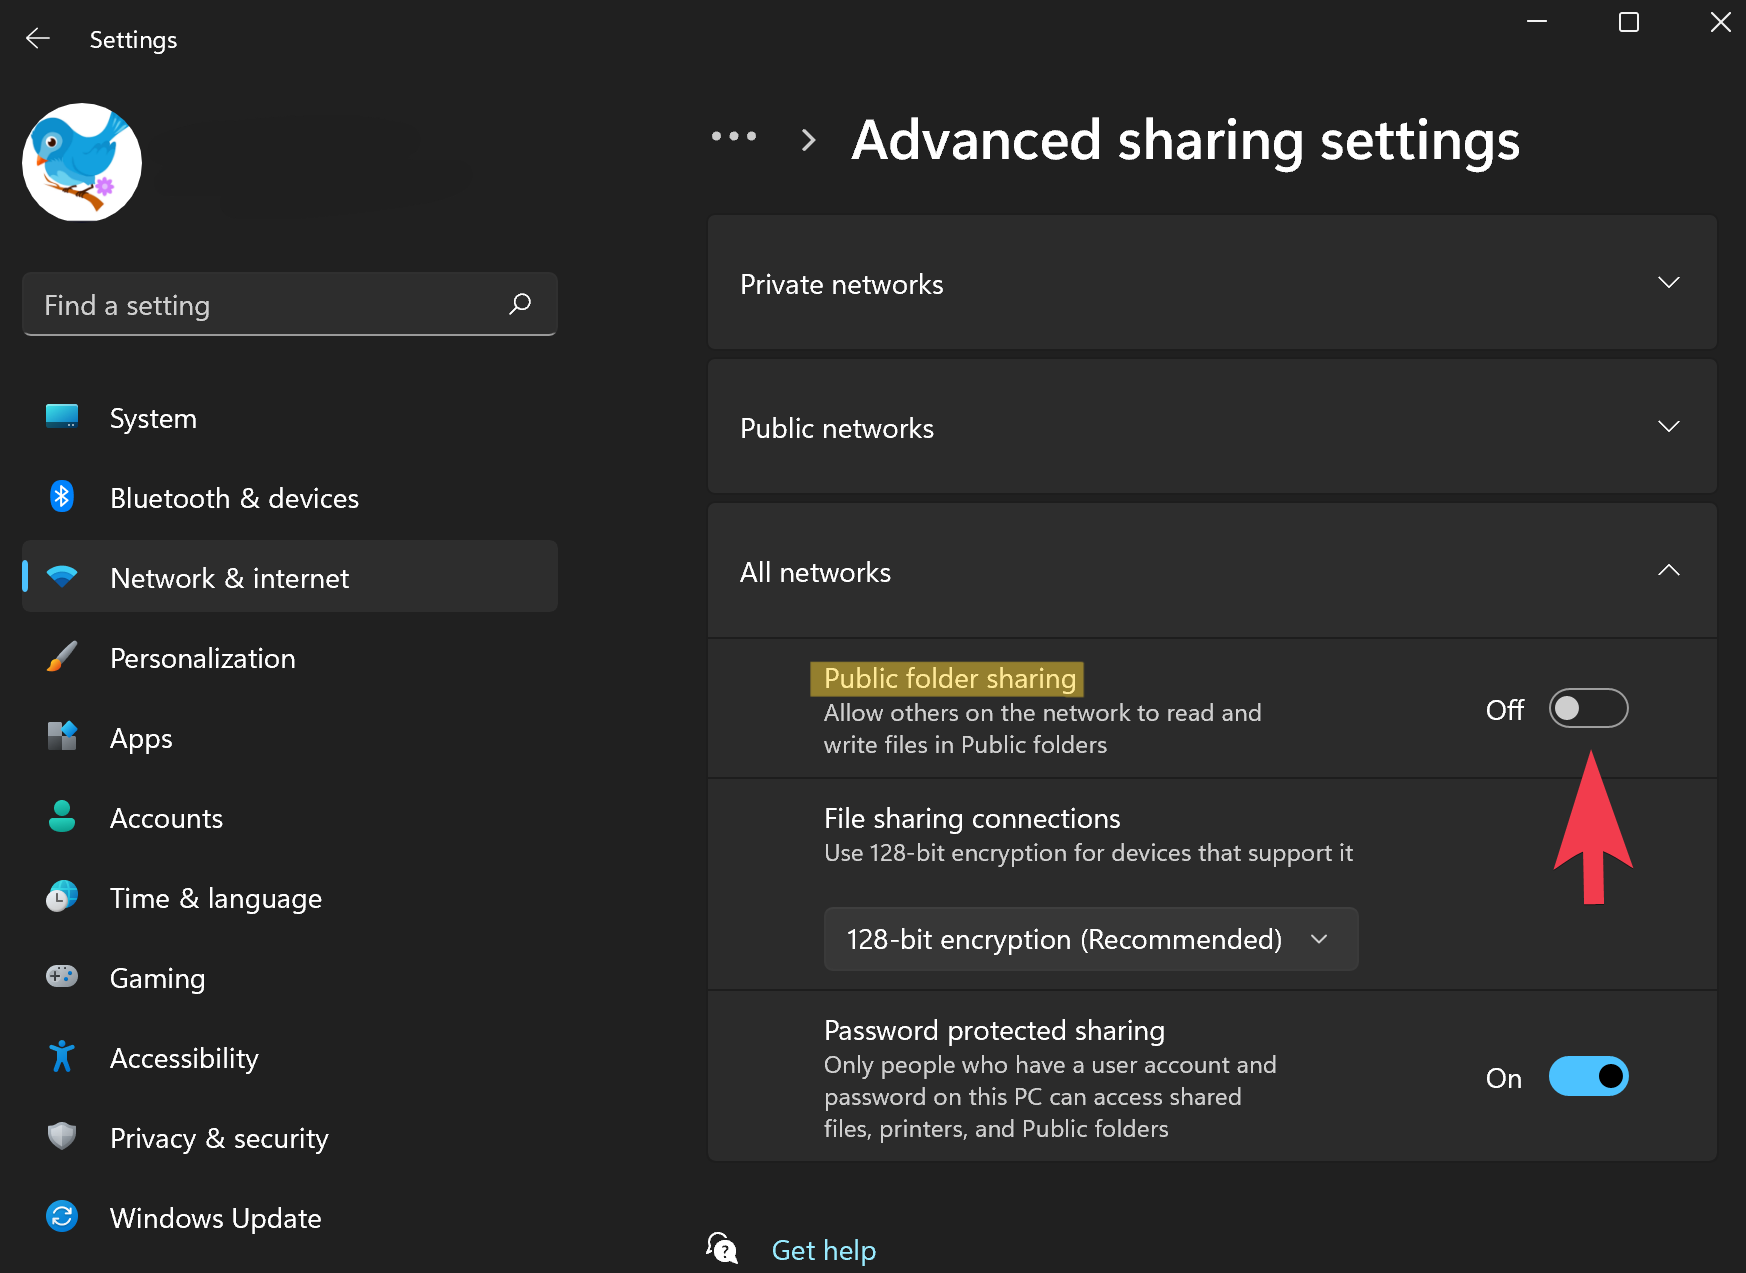
4. Now, close Settings.
Method 2: Enable or disable Public Folder Sharing Through Control Panel
1. Open Control Panel on your system and select Network and Internet.
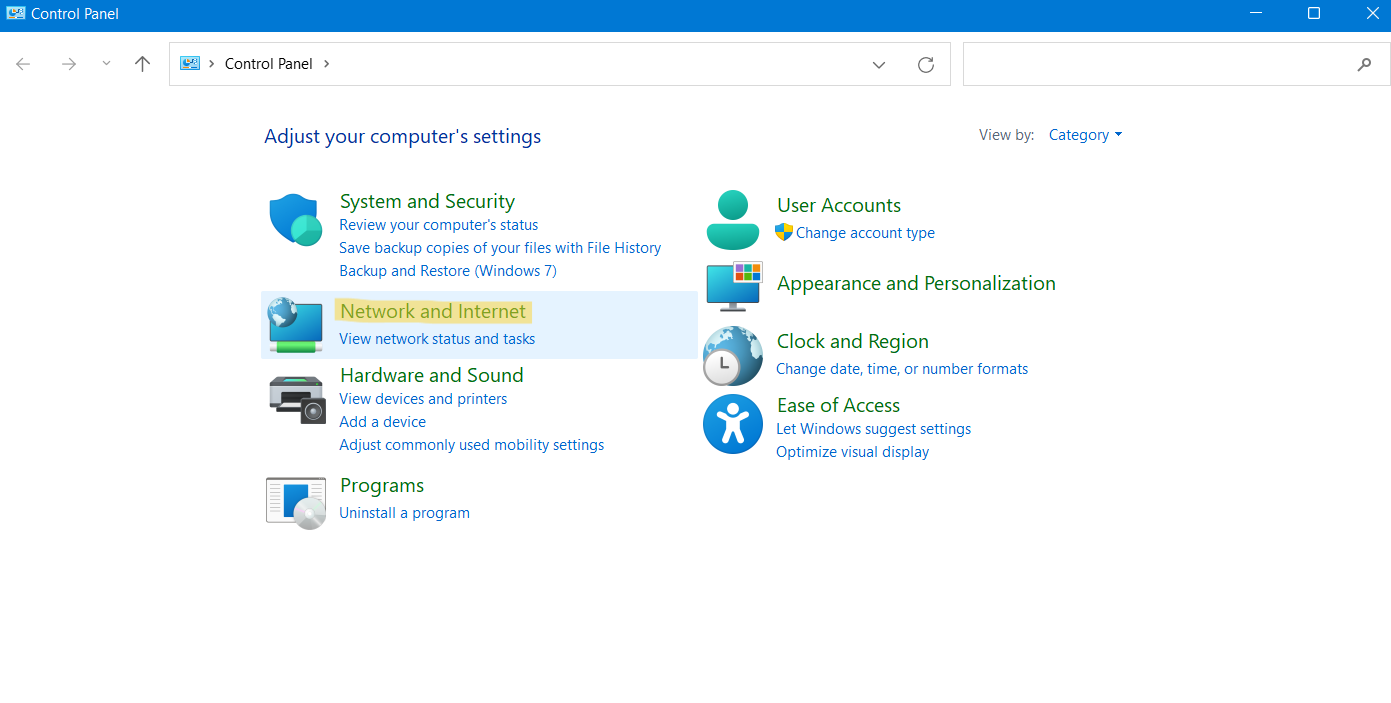
2. After that, choose Network and Sharing Center.
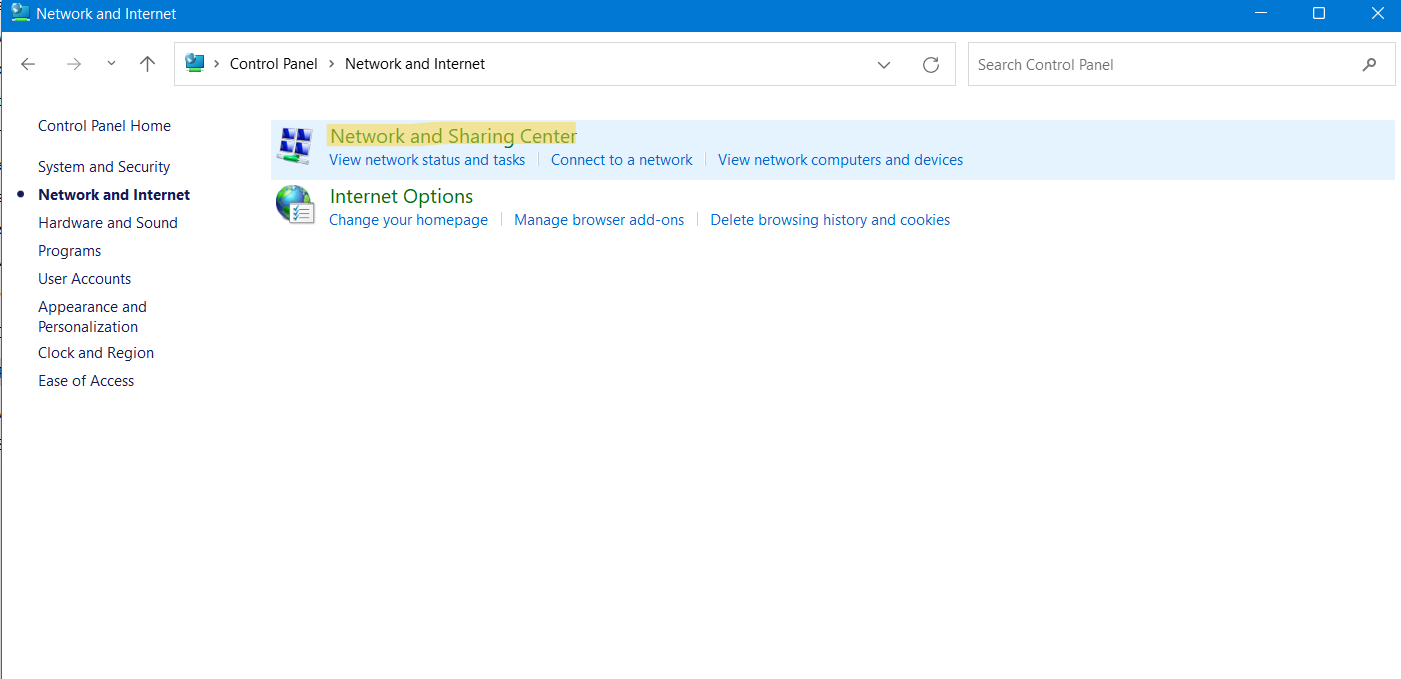
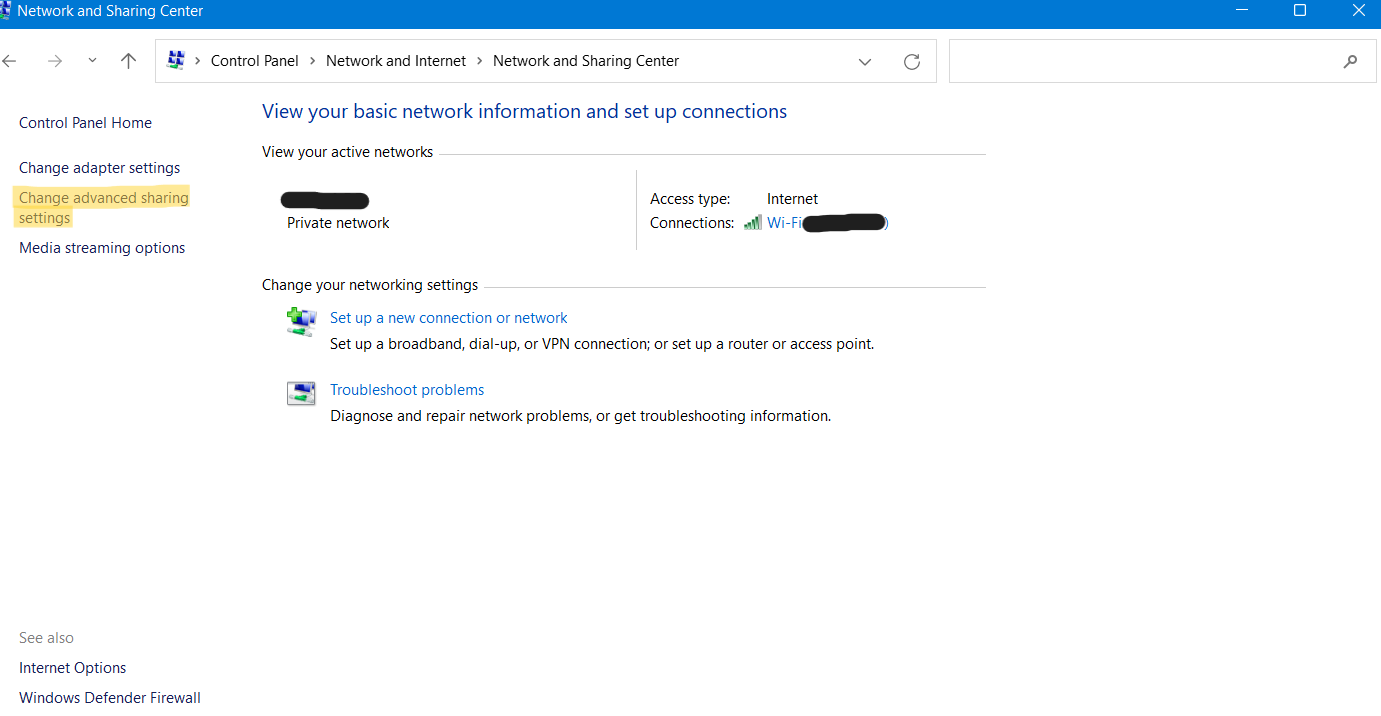
From there, click on Change advanced sharing settings present on the left.
3. Now, expand the All Networks tab and select Turn on sharing so anyone with network access can read and write files in the Public folders to enable the feature. Otherwise, choose Turn off Public folder sharing (people logged on to this computer can still access these folders) to disable it.
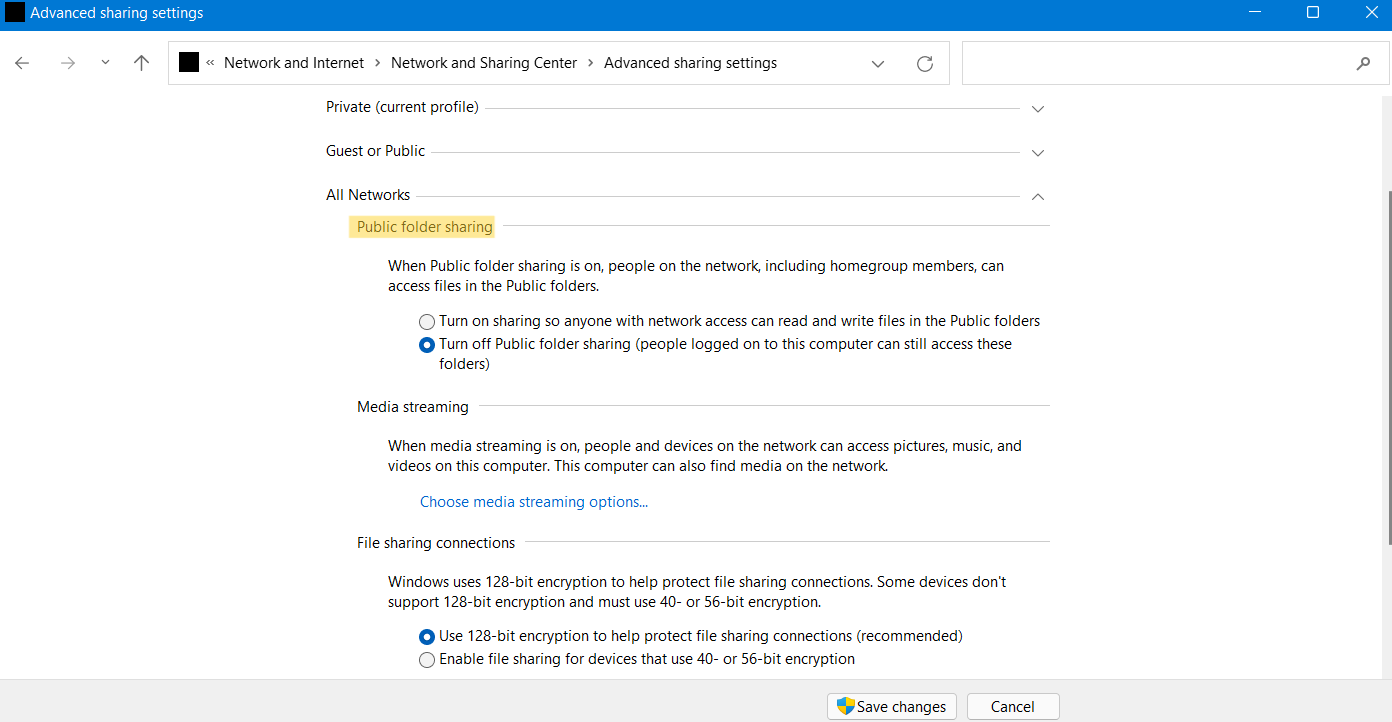
4. Once selected, click on Save changes and exit Control Panel.
So, these are two simple ways to enable or disable Public Folder Sharing in Windows 11. If you could not find the Public folder sharing option in your Settings app, then choose the method using Control Panel. It is very easy to turn on or off the Public folder sharing feature through any of these methods. Now, try them out and change these settings hassle-free.