When it comes to security, Windows operating systems are a way ahead. Windows 11 comes with many security features implemented. One of these security features is the secure sign-in feature. Using this feature, you can securely sign into Windows 11 and avoid false or mimic login screens. When secure sign-in is enabled, users would be required to press CTRL+ALT+DEL before logging on to the Windows operating system (unless they’re using a smart card for signing in). In this article, we’ll see how to enable disable secure login Windows 11.
Microsoft developed secure sign-in to make it easier for users with certain types of physical impairments to sign in to a device running the Windows operating system; however, not having to press the CTRL+ALT+DELETE key combination leaves users susceptible to attacks that attempt to intercept their passwords. Requiring CTRL+ALT+DELETE before users sign in ensures that users are communicating through a trusted path when entering their passwords.

Now let us see how you can enable or disable this feature. So by default, this feature is disabled on Windows. But you can easily enable this feature using either of the methods mentioned below.
Page Contents
Enable or disable secure login in Windows 11
Method 1: Using User Accounts (netplwiz)
1. Press  + R and type netplwiz and click OK.
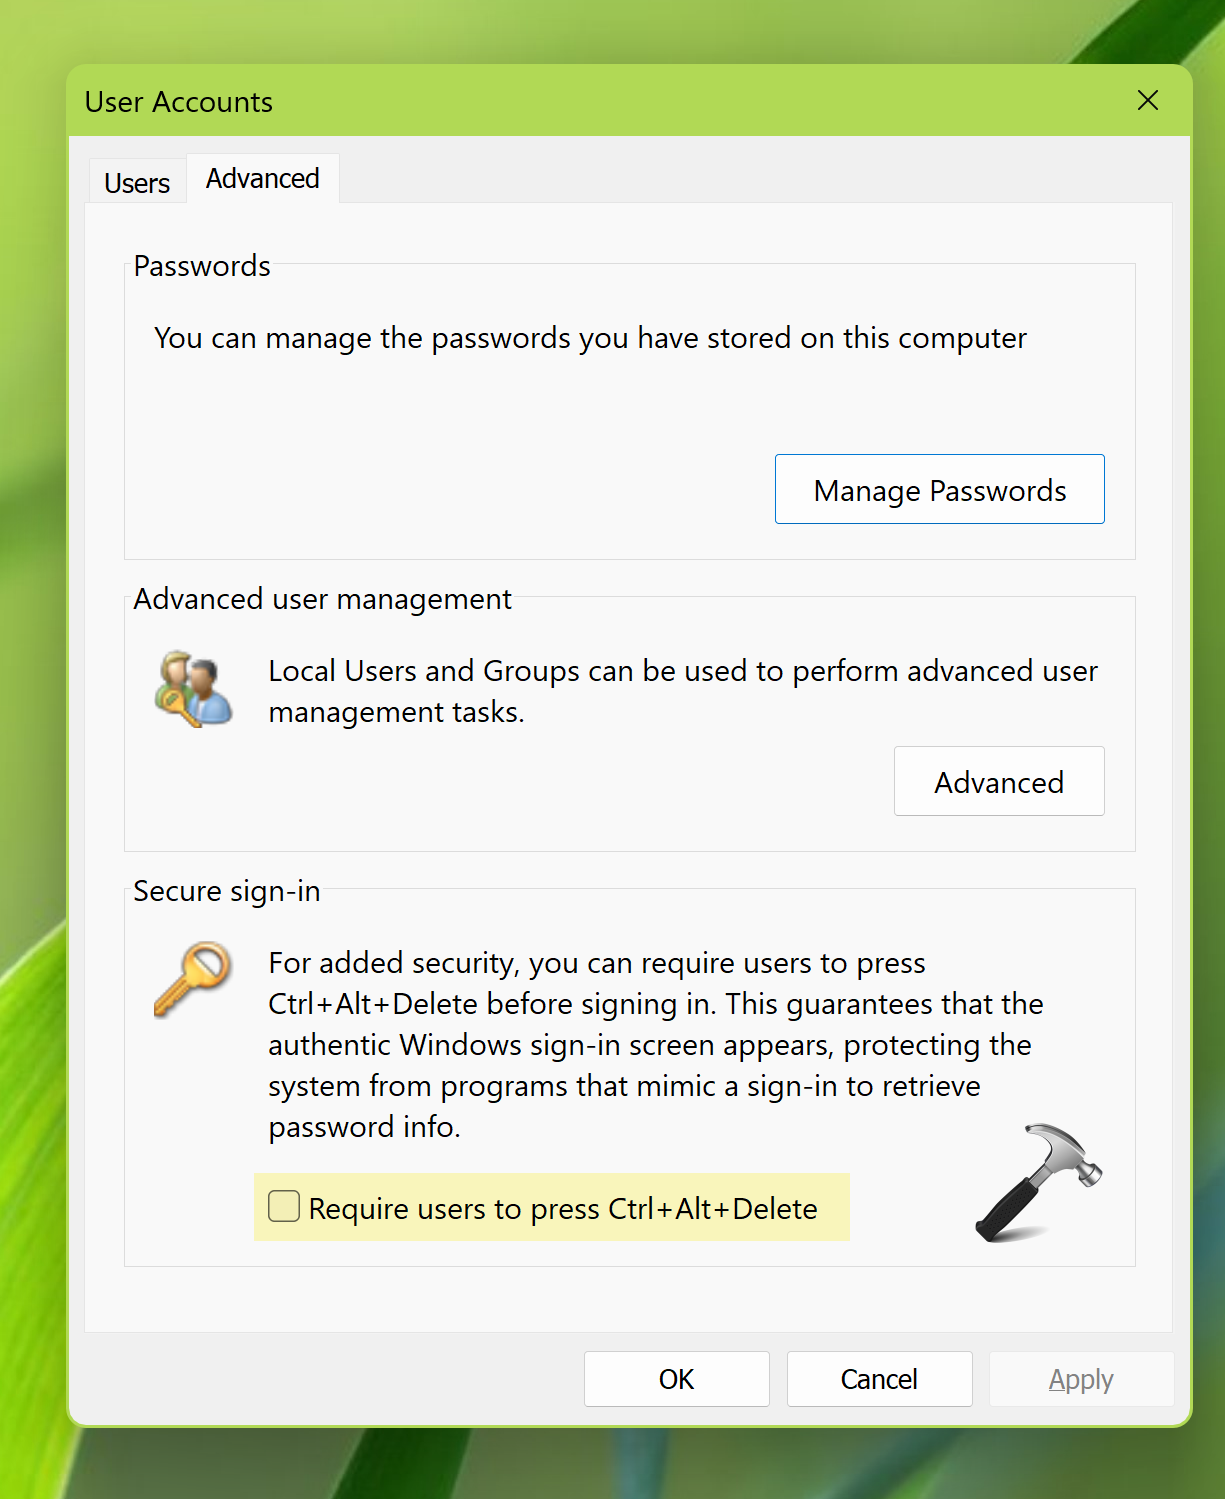
2. In User Accounts window, click Advanced.
3. Under Secure sign-in, check the option Require users to press CTRL+ALT+DEL. Click Apply, OK.
Now when you reach the login screen, you need to make secure sign-in by first pressing CTRL+ALT+DEL and then enter your credentials.
Method 2: Using Security Policy (secpol)
1. Press + R and type secpol.msc in Run.
2. In the Local Security Policy window, go to Security Settings > Local Policies > Security Options.
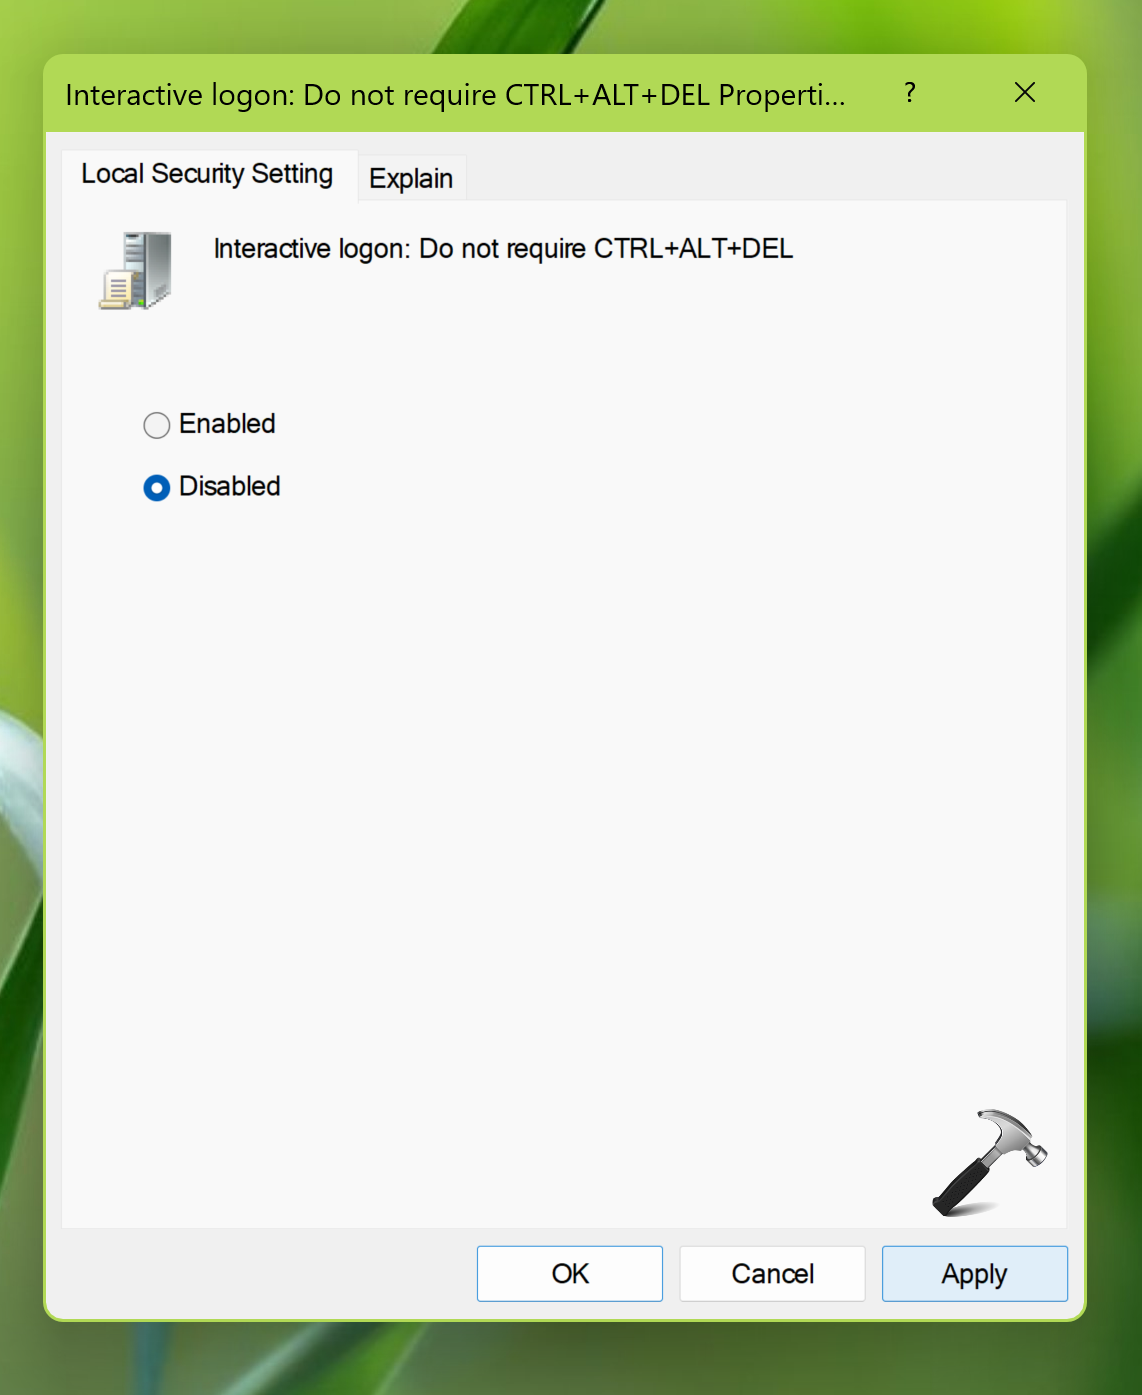
3. In the right pane, scroll down and locate Interactive Logon: Do not required CTRL+ALT+DEL policy setting named. By default, it should be Not Defined.

3. Double click on the policy setting to modify its status. In the policy configuration window, select Disabled and click Apply, OK.
Once done, update the Group Policy engine using gpupdate /force command to make changes effective.
Video guide
Checkout this video guide for more information:
That’s it!