While opening some Windows application programs, the users can face the error code of 0xc0000142. This code appears in the form of the error message, “The application was unable to start correctly (0xc0000142)”. This causes difficulty while opening the affected application. Thus, this blog provides solution that can help in fix error code 0xc0000142 when encountered by the users of Windows 11.

Page Contents
Fix Error code 0xc0000142 in Windows 11
The main fixes which the users can adopt to fix error code 0xc0000142 in Windows 11 are stated below in detail.
Fix 1: Setting the Right System Locale
When the System Locale us not set right, it could cause the issue of error code 0xc0000142. Thus, follow the steps below for setting the correct system locale.
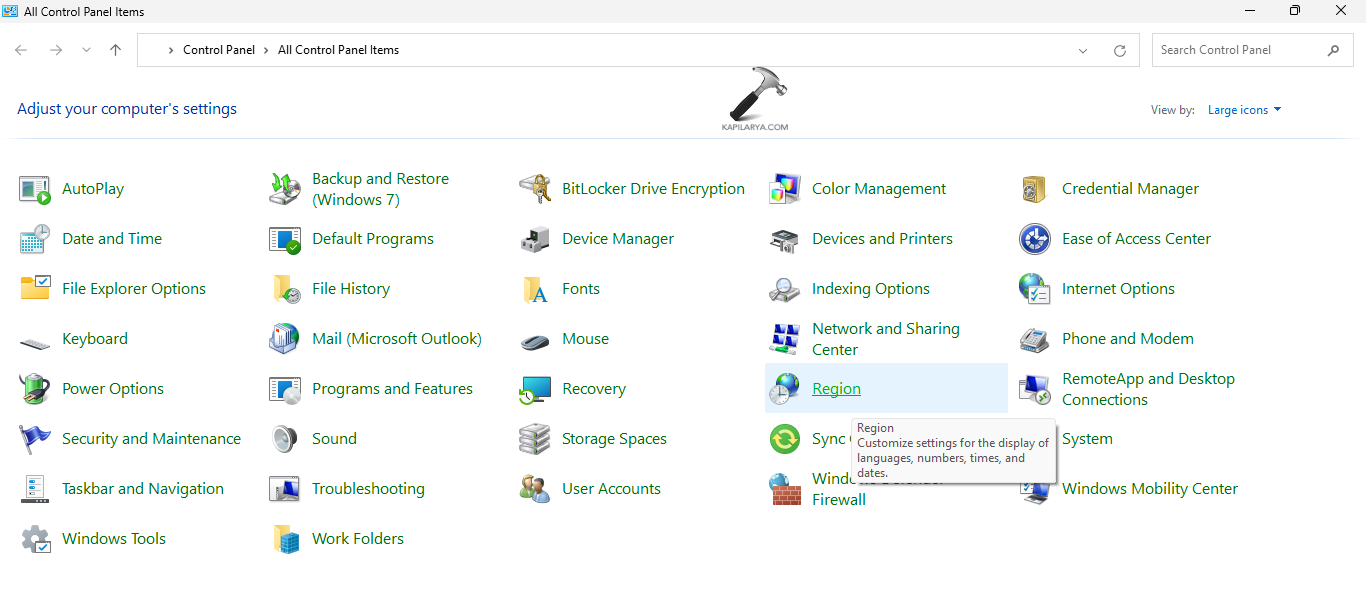
Step 1- At first, open Control Panel.
Step 2- Next, go to Region > Administrative.

Step 3- Now, select Change the system locale. Then, select the right region for the PC and press OK.
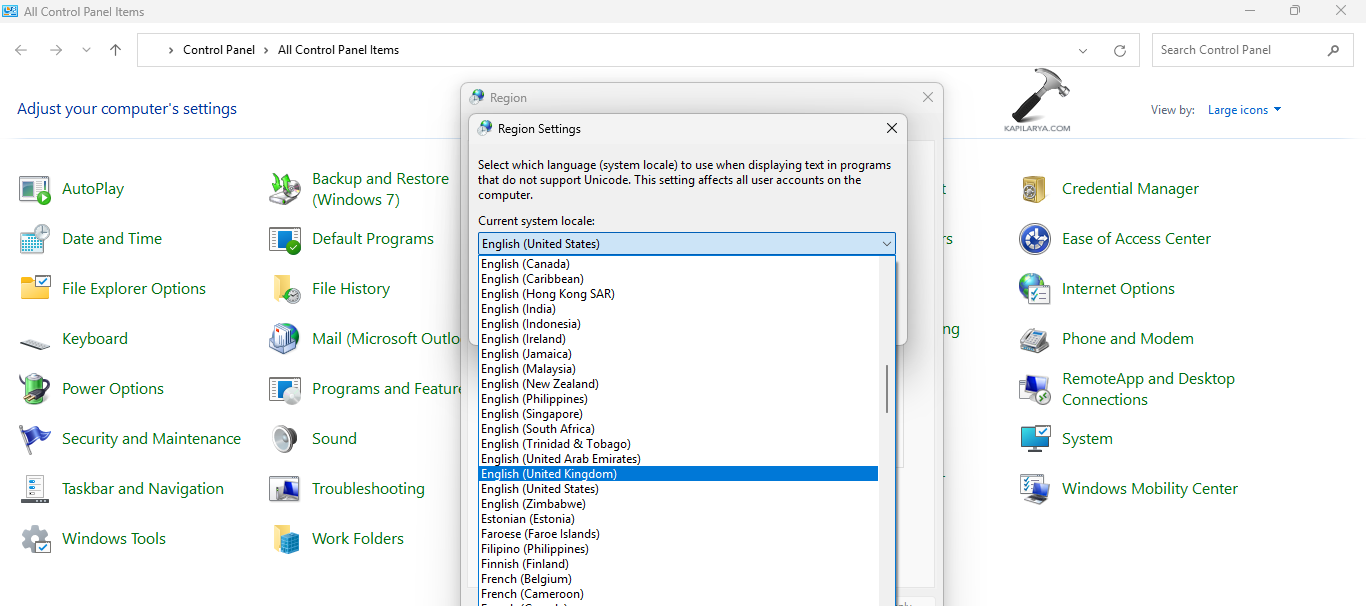
Step 4- Lastly select Apply and OK for saving all the changes.
Fix 2: Updating Graphics Driver
Updating the graphics driver too can help in fixing the issue. Hence, let us take a look at the steps to do that.
Step 1- At first, go to Device Manager > Display Adapters.
Step 2- Next, right-click on the graphics driver and open Properties.

Step 3- Now, visit Driver and select Update Driver.

Step 4- Further, select Search Automatically for Drivers. Thereafter, look for any graphic driver that needs update and install it.

Step 5- Lastly, restart the PC.
Fix 3: Re-Registering DLL Files
Corrupted or missing DLL files of the respective application is one of the main causes for occurrence of the error. Now, for re-registering the files, follow the steps.
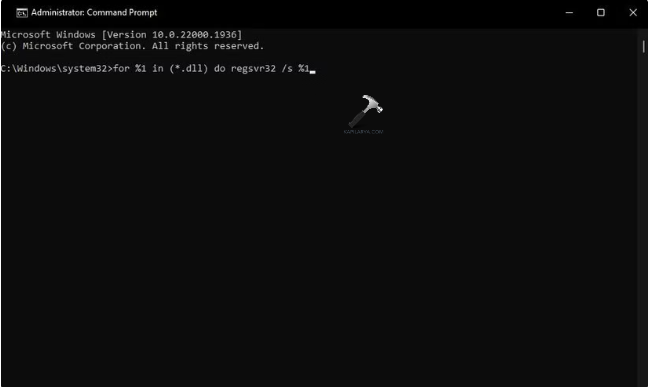
Step 1- Run command prompt as an administrator.
Step 2- Now, copy and paste the prompt below and press Enter.
for %1 in (*.dll) do regsvr32 /s %1
Fix 4: Running System File Checker
If the above fixes do not work, then running a system file scan and can help the users in solving the aforementioned issue easily. Therefore, follow the steps given below to run the SFC solve the issue.
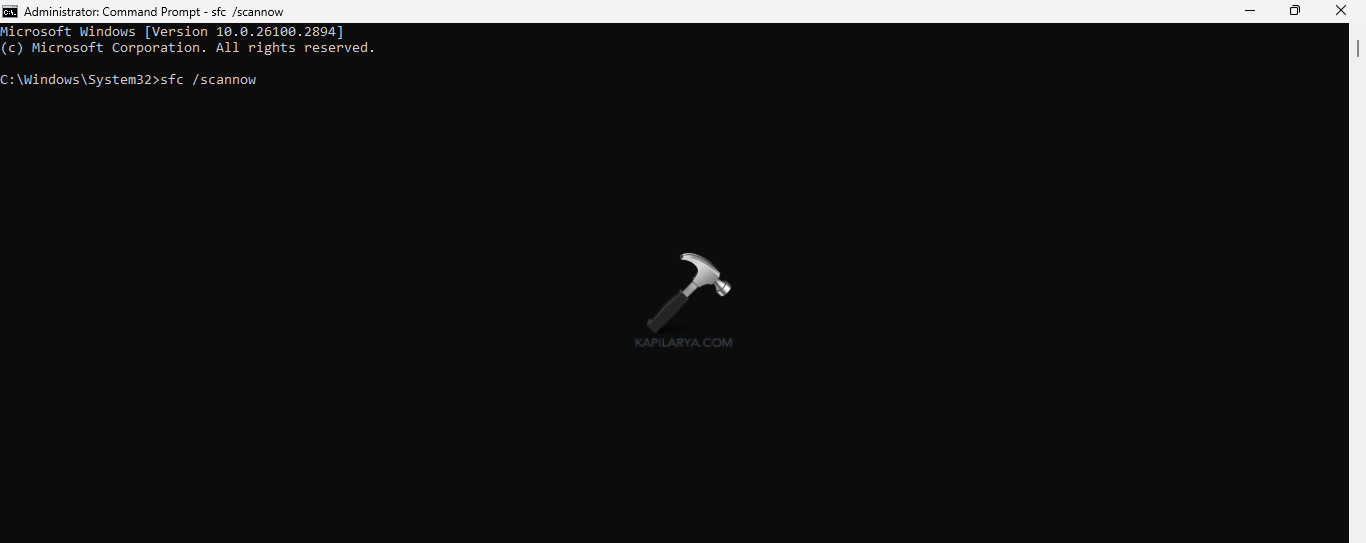
Step 1- At first, open Command Prompt and run it as an administrator.
Step 2- Next, copy and paste the prompt given below for running a SFC scan and select Enter.
sfc /scannow
Apart from the SFC scan, the users can also run the DISM for solving any existing problem in the Windows system image.
Fix 5: Running in Compatibility Mode
Running the application with the error in compatibility mode with older version of Windows should also help in fixing the problem.
Step 1- Right-click the application and select Properties.

Step 2- Next, navigate to Compatibility. Then, check the box of Run this program in compatibility mode for and choose any older version of Windows from the drop-down menu.
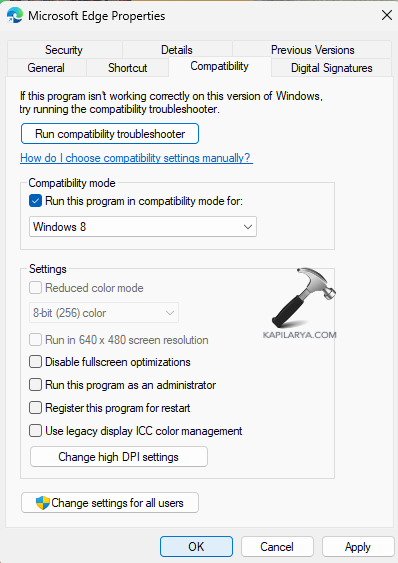
Step 3- Lastly, select Apply > OK for saving all the changes.
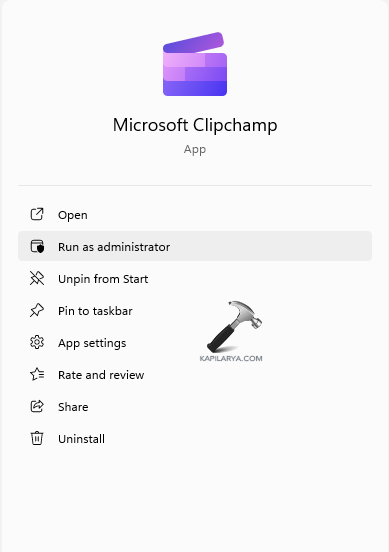
Fix 6: Running the Application as an Administrator
The users should try running the application as an administrator for solving the problem. This will allow the application to access file locations which might be restricted otherwise.
Fix 7: Editing the Registry Key of Windows
The users can even edit the registry key of Windows to avoid the issue. For doing the same, follow the steps.
Step 1- Open Registry Editor.
Step 2- Now, navigate to the path given below.
HKEY_LOCAL_MACHINE\SOFTWARE\Microsoft\Windows NT\CurrentVersion\Windows
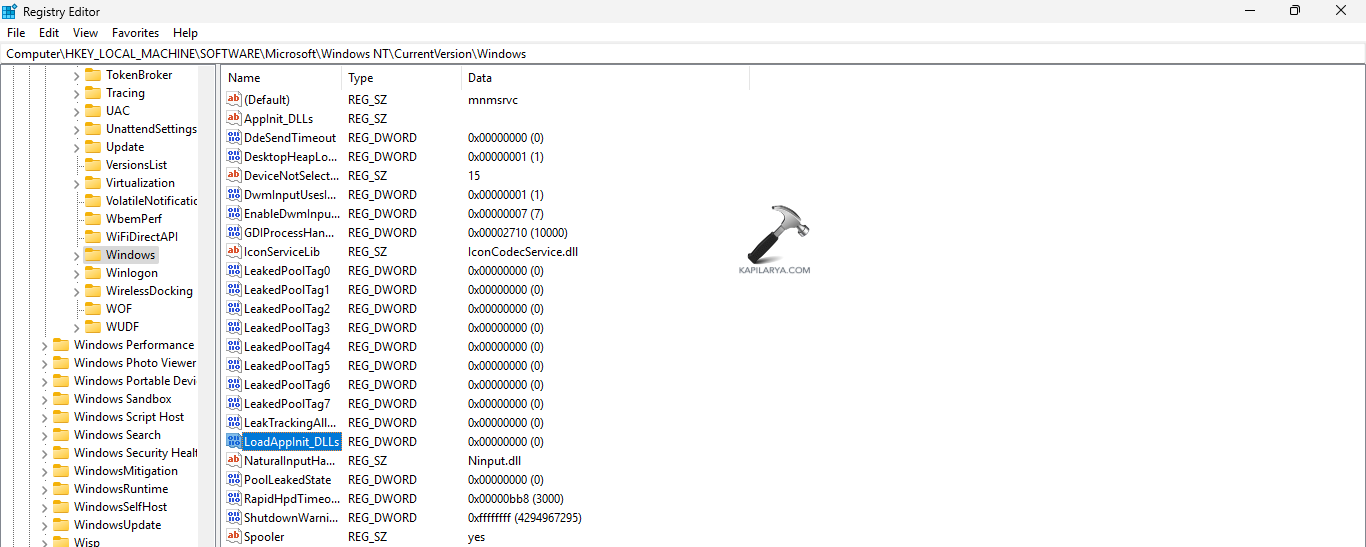
Step 3- Next, double-click the DWORD of LoadAppInit_DLLs and enter the Value data as 0.
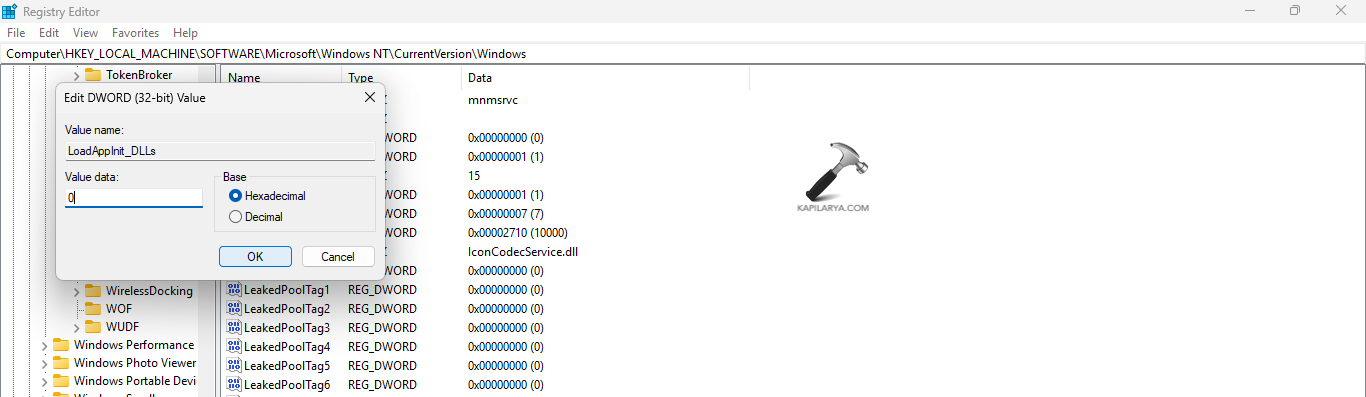
Step 4- Lastly, press OK for saving the changes and restart the PC.
Fix 8: Running CHKDSK scan
Damaged disks may too cause the issue. Thus, for checking and repairing the errors of the drive, we need to run the CHKDSK command. Follow the steps given below to do the same-
Step 1- Primarily, run the Command Prompt as an administrator.
Step 2- Now, copy and paste the prompt given below to run the CHKDSK command and press Enter.
chkdsk /r C:
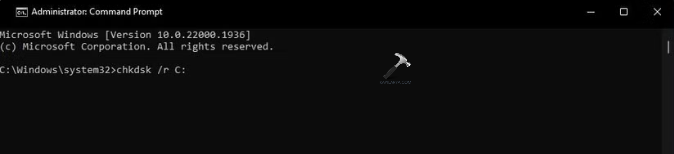
Step 3- Now, the CHKDSK command will scan any error in the system and repair it. Again, if it asks for scheduling a disk check next time, press Y on the keyboard. Thereafter, press Enter and reboot the PC to allow the CHKDSK command to run.
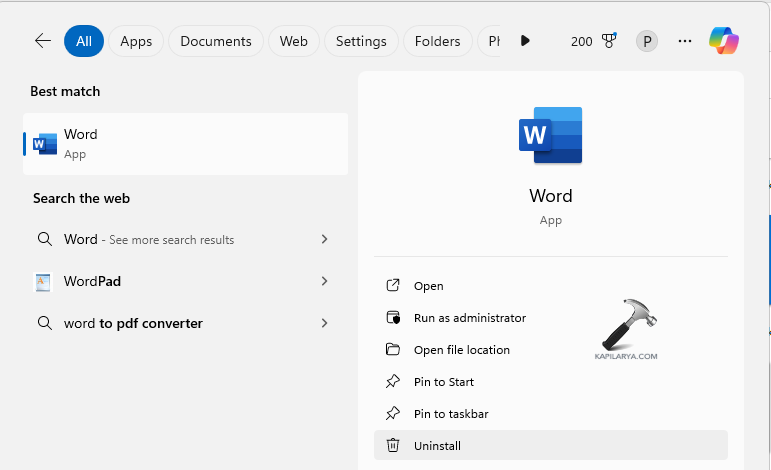
Fix 9: Reinstalling Affected Programs
Another potential fix for solving the error is uninstalling the affected software and reinstalling it. This will help in repairing and updating the software and remove any kind of corruptions existing in the software.
Fix 10: Enabling the .NET Framework 3.5 Feature
The last potential fix which the users should try is enabling the .NET Framework 3.5 feature as some applications might require the older versions of .NET Framework. Follow the steps provided below for doing that.
Step 1- Firstly, go to Control Panel.

Step 2- Next, go to Programs > Programs and Features > Turn Windows Features on or off.
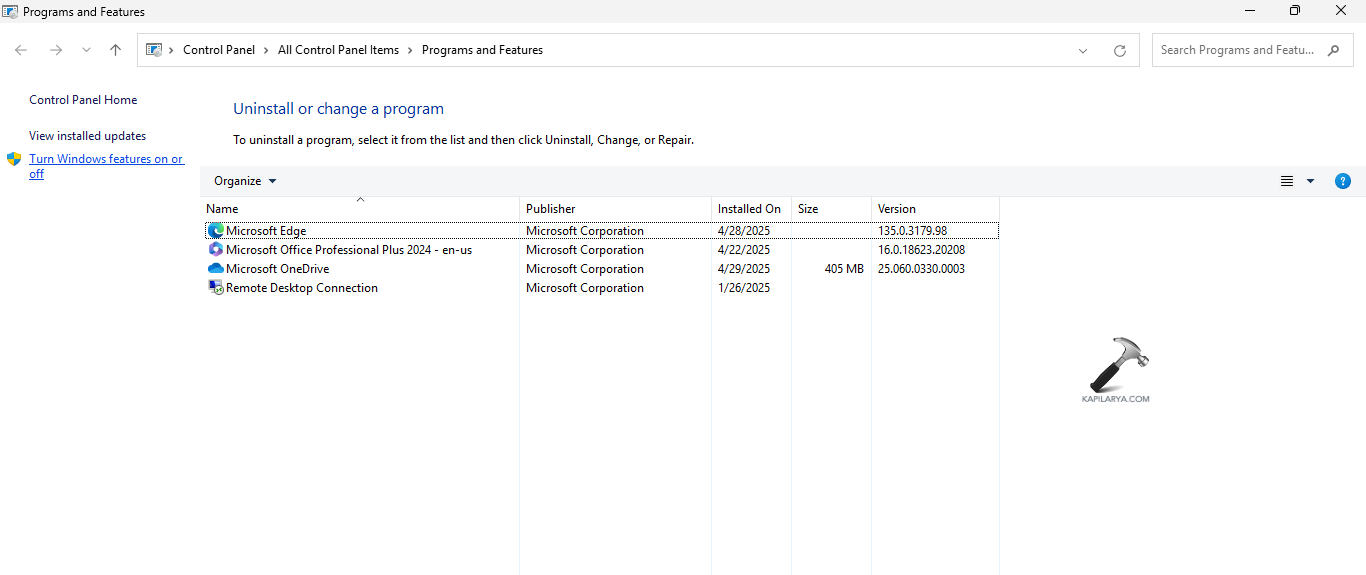
Step 3- Now, check if the NET Framework 3.5 feature is enabled. If not, then enable it.
 Hoping that this fixes the issue!