
You can easily get tired of staring at the same wallpaper all the time. Setting a new one is a great way to personalize a new computer and make it feel like your own. But, it can be really annoying when you can’t change the desktop wallpaper on your computer. In this article, we’ll explore several different ways to fix this problem on Windows 11.
Page Contents
Fix: Can’t change Desktop Wallpaper on Windows 11
Method 1: Reset Transcoded Wallpaper Cache
1. Press Windows + R to open the Run dialog box. Then, type the following command, and click OK:
%USERPROFILE%\AppData\Roaming\Microsoft\Windows\Themes

2. Once the Themes folder opens up, rename or delete the “Transcoded Wallpaper” file. Right-click the file, and select “Rename“. Change the name to “Transcoded Wallpaper.bak” or something else.

3. Next, open the “slideshow” file by double-clicking on it. Once the file opens in Notepad, select all the text and delete it.

4. After completing these steps, try changing the wallpaper again.
Method 2: Disable Slideshow Feature in Settings
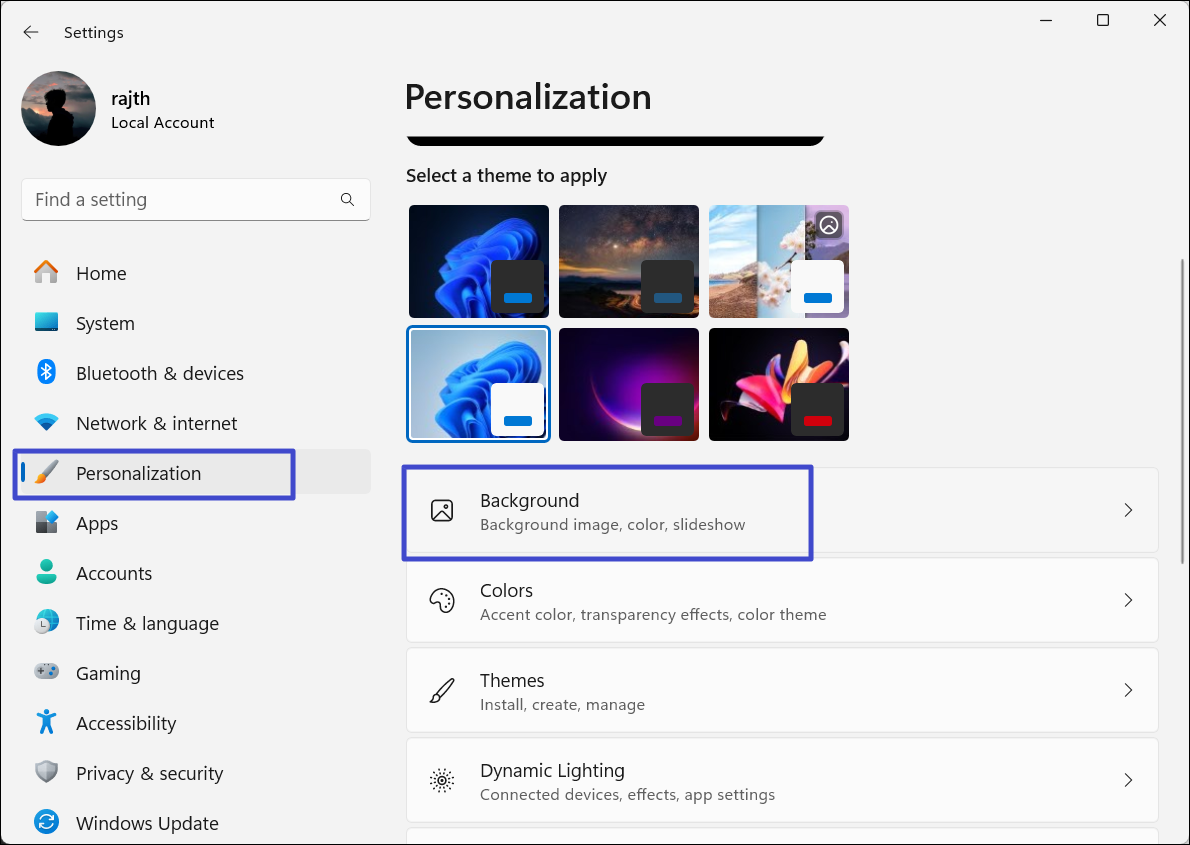
1. Open Windows Settings, and navigate to “Personalization” > “Background“.
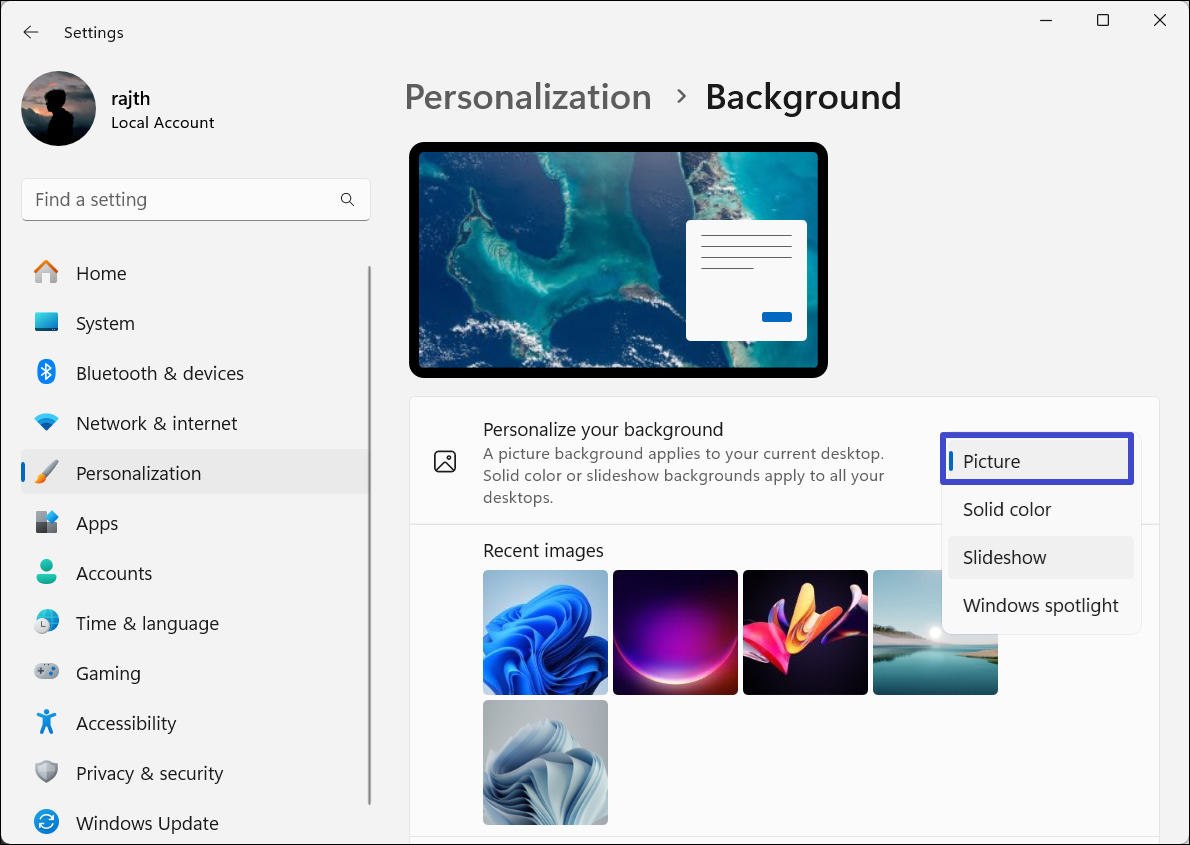
2. Click the drop-down menu next to Personalize your background and select “Picture“.
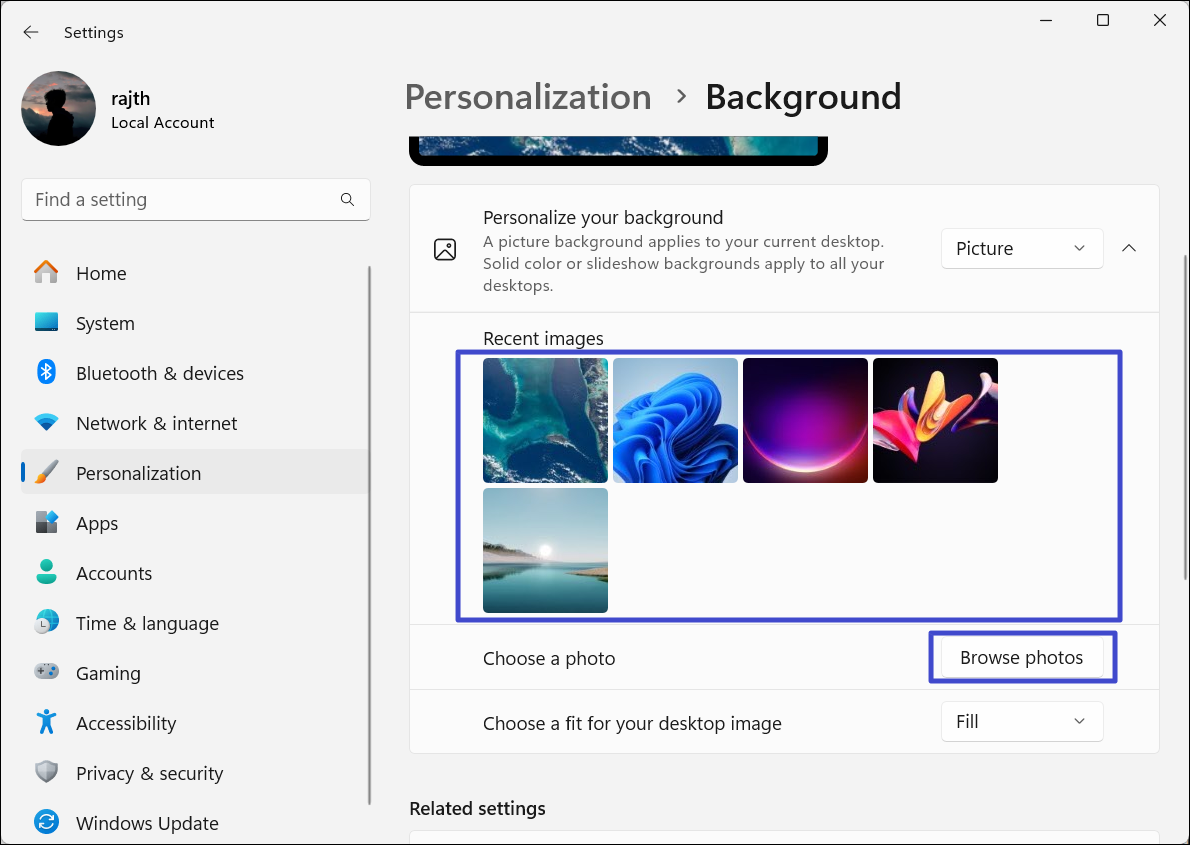
3. Then, choose a picture below or use the “Browse photos” option to select an image from your computer.
Method 3: Change Desktop Background using File Explorer
You can’t change the wallpaper on Windows 10 and 11 if your Windows is not activated or if the trial period is over. But if you want to change the wallpaper on your unactivated Windows 11 system, follow this easy trick:
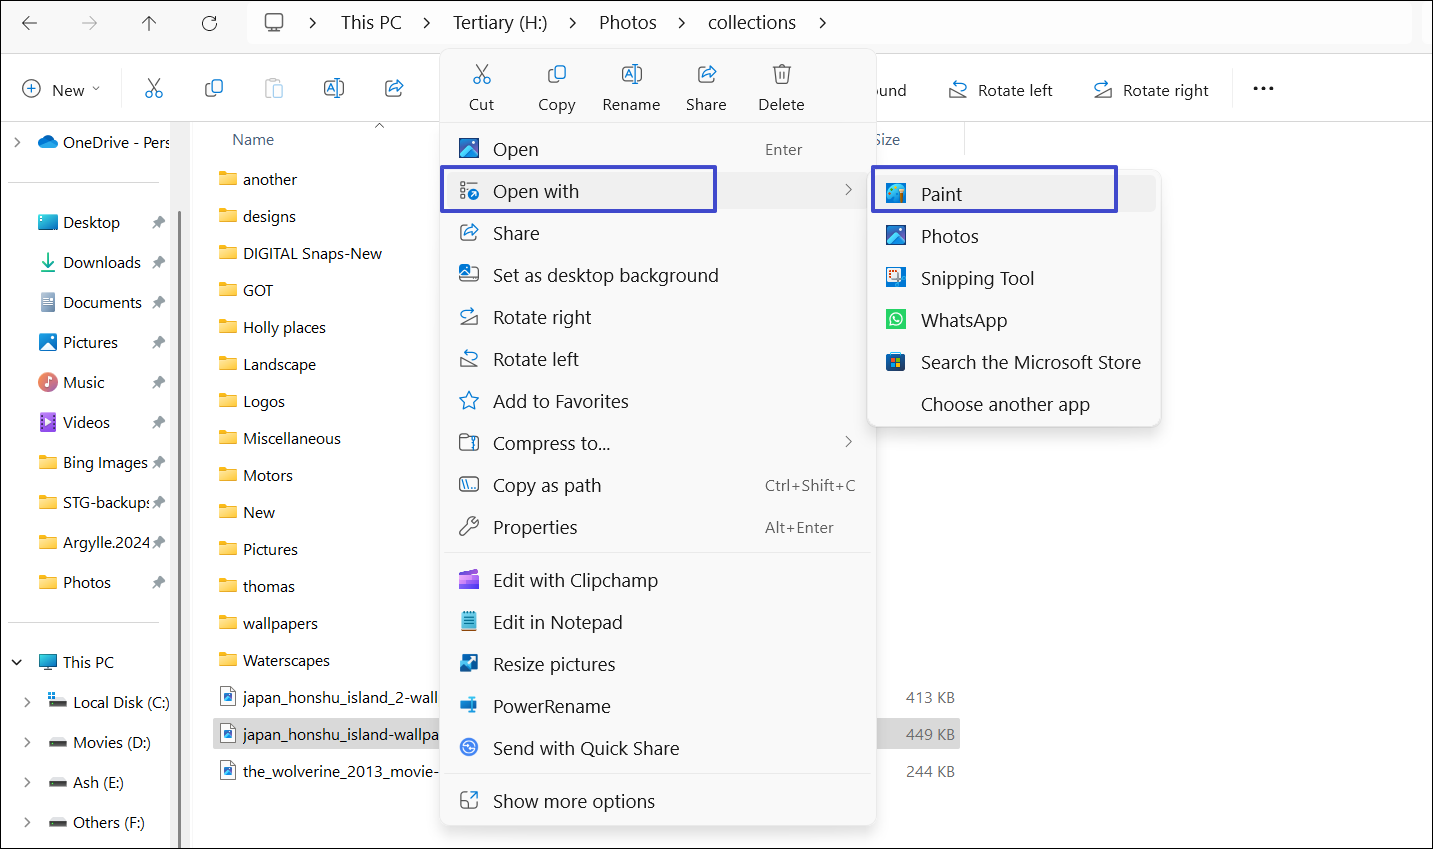
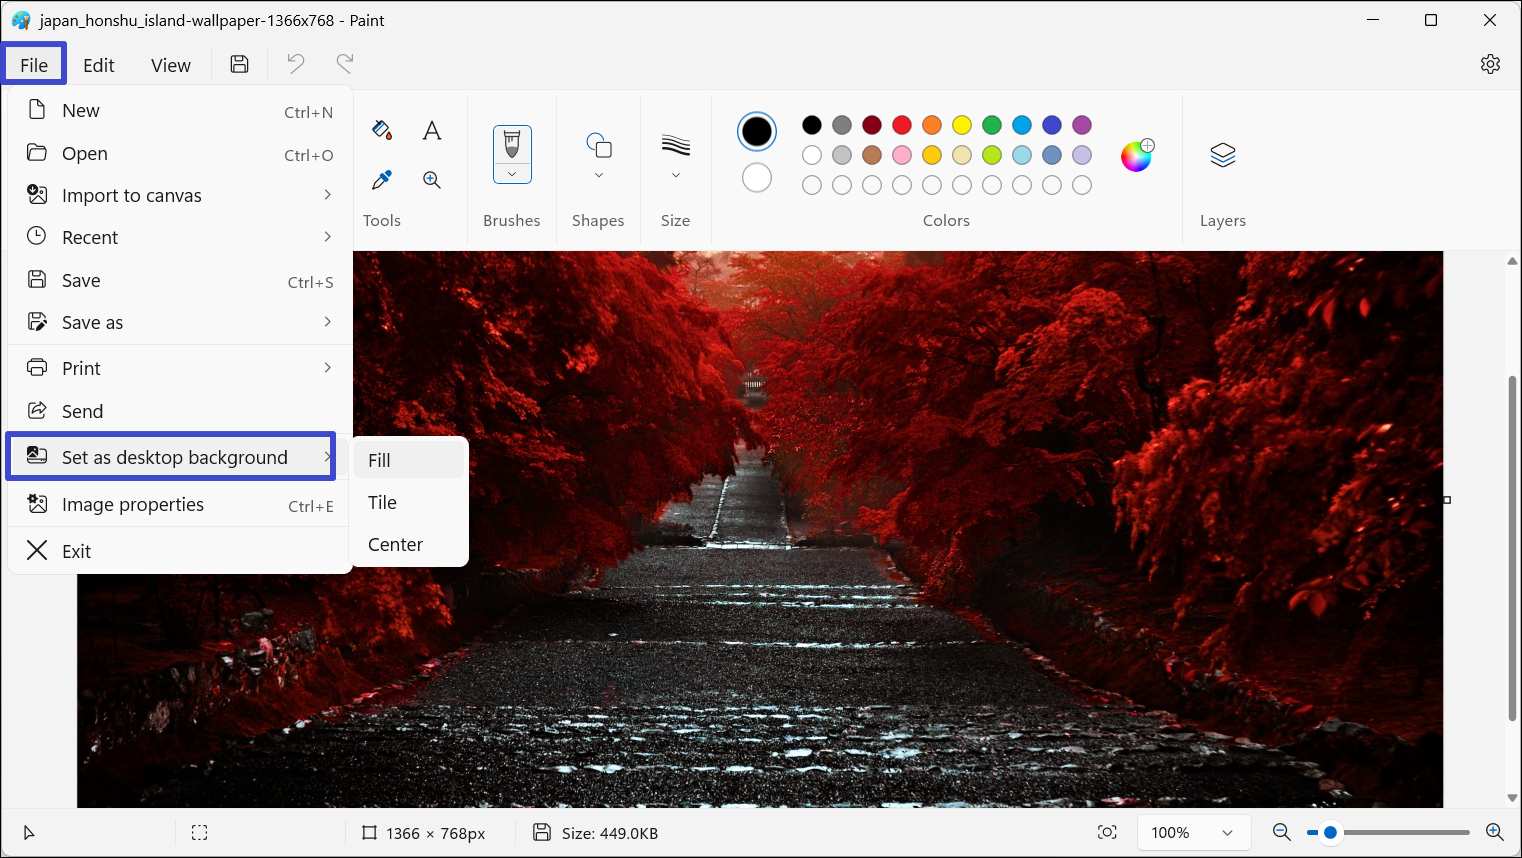
1. Right-click the image you want to set as the wallpaper, select “Open with“, and click “Paint“.
2. In the Paint app, click the “File” menu, hover over the “Set as desktop background” option, and choose a fit.
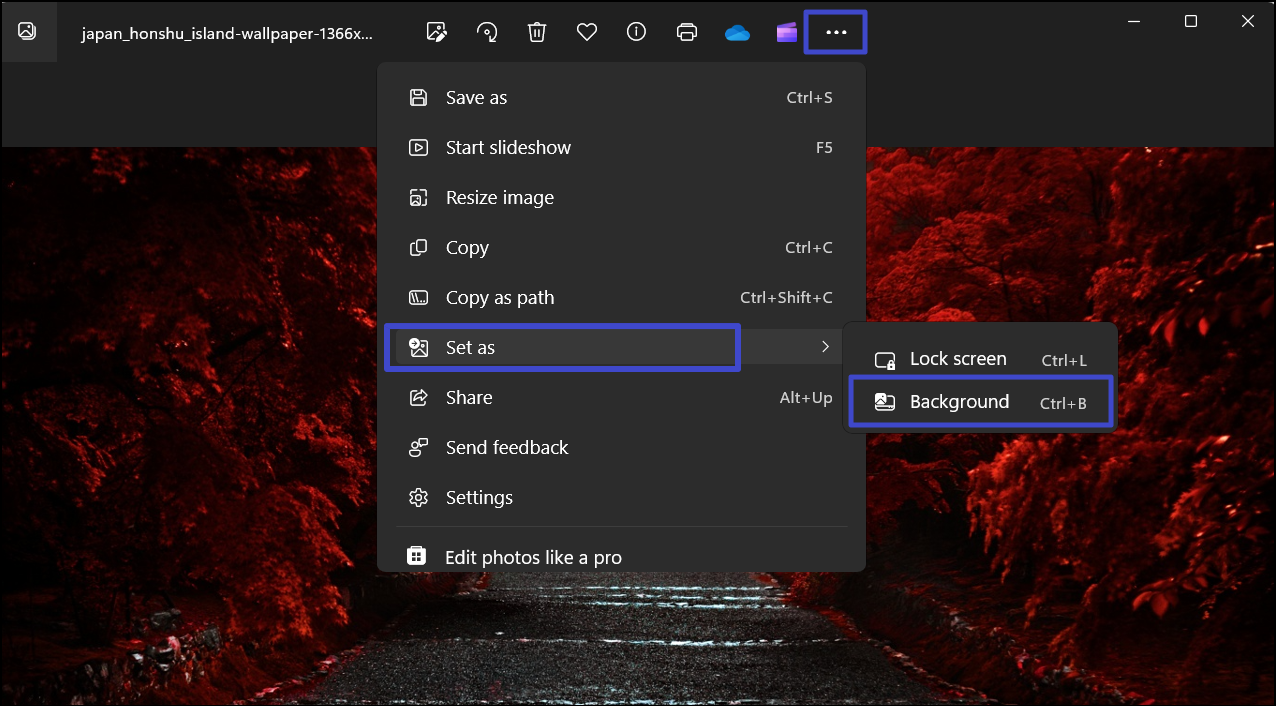
3. Alternatively, double-click the image to open it in the Photos app.
4. Click the three dots button, hover over “Set as“, and select “Background“.
Method 4: Turn Off Remove Background Settings
1. Open the Control Panel, change the “View by” to “Large icons“, and click “Ease of Access Center“.

2. Under Explore all settings, click on “Make the computer easier to see“.

3. Uncheck the “Remove background images (where available)” and click “Apply”. Then, click “OK“.

Method 5: Make Changes to the Windows Registry
1. Press Windows + R, type “regedit” in the Run dialog box, and hit Enter.

2. In the Registry Editor, copy-paste the following path in the address bar and hit Enter:
HKEY_LOCAL_MACHINE\SOFTWARE\Microsoft\Windows\CurrentVersion\Policies

3. Under Policies, select “ActiveDesktop“. If you don’t have this key, create it.

4. On the right, right-click an empty area and select “New” > “DWORD (32-bit) Value”.

5. Then, rename the newly created DWORD to “NoChangingWallPaper”.

6. Double-click the DWORD and make sure the value is set “0″.

7. Then, restart your PC to apply the changes.
Method 6: Modify Group Policy Editor
1. Open the Run Command, type “gpedit.msc“, and click “OK“.

2. Once the Local Group Policy Editor opens, go to the following location:
User Configuration > Administrative Templates > Control Panel > Personalization

3. On the right-pane, find and double click the “Prevent changing desktop background” setting.

4. On the new window that appears, select “Not Configured” or “Disabled“, and click “Apply“. Then, click “OK“.

Video fix
For further assistance, checkout this video fix demonstrating above solutions:
That’s it.


thanks so much. the “ease of access” setting is what got my background picture back. You list was only one of many that I found in trying to solve this problem. Yours was the only one with the tip about the “ease of access” control panel setting. I am very grateful.
^^ Glad it helped 😎