In this troubleshooting guide where we will address a common issue encountered by Windows 11 users and it is DISM error 0x800f081f. DISM (Deployment Image Servicing and Management) is a powerful command-line tool used to service Windows images, including repair operations. However, when attempting to run DISM and encountering error code 0x800f081f, it indicates that the tool is unable to locate the necessary files to complete the operation. In this article, we will provide step-by-step solutions to help you fix it.
Page Contents
Fix: DISM error 0x800f081f on Windows 11
Fix 1: Run Windows Update Troubleshooter
1. Press the Win + I keys to open Settings.
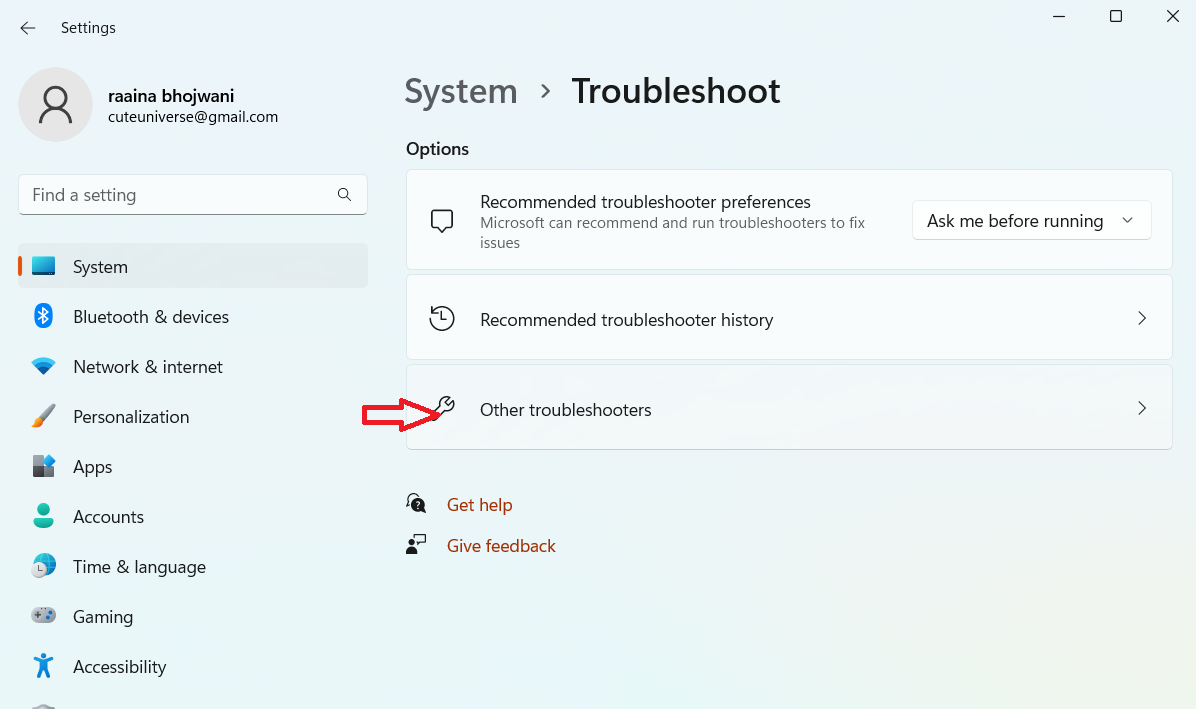
2. Click System > Troubleshoot.

3. Click on Other troubleshooters.
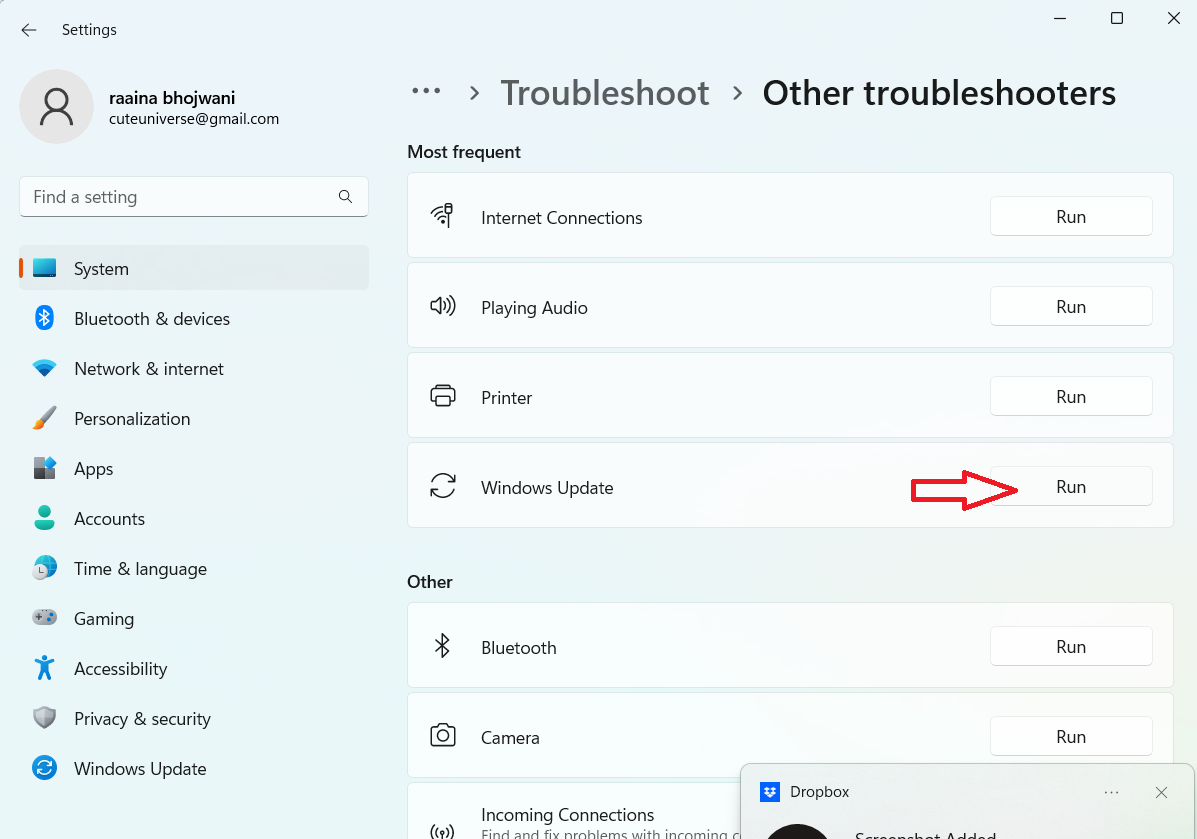
4. Click on the Run button next to Windows Update.
Fix 2: Perform an In-place Upgrade to latest version
1. Download Windows 11 Media Creation Tool on your computer and execute/run it as an administrator.
2. Accept the license terms and choose the “Upgrade this PC now” option when prompted.
3. Then execute DISM command in Command Prompt to check if DISM error 0x800f081f is resolved.
Fix 3: Get source from Windows Image to fix DISM error 0x800f081f on Windows 11
Part 1
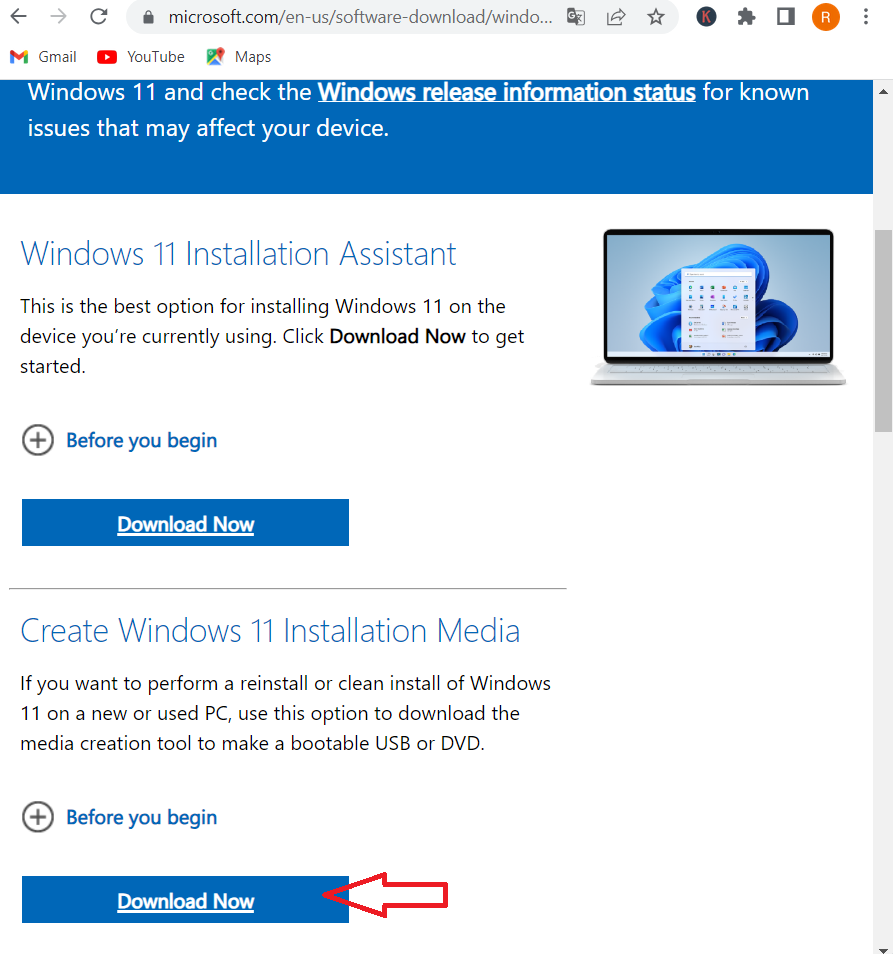
1. Go to the Microsoft Software Download website (https://www.microsoft.com/en-us/software-download/windows11) and click on Create Windows 11 installation media.
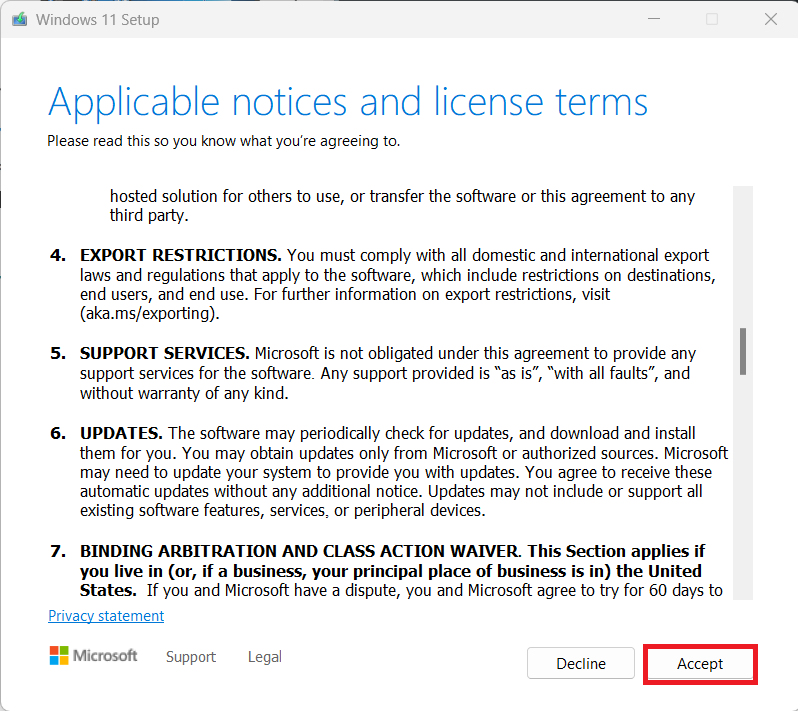
2. Click on Accept to agree with the license terms.
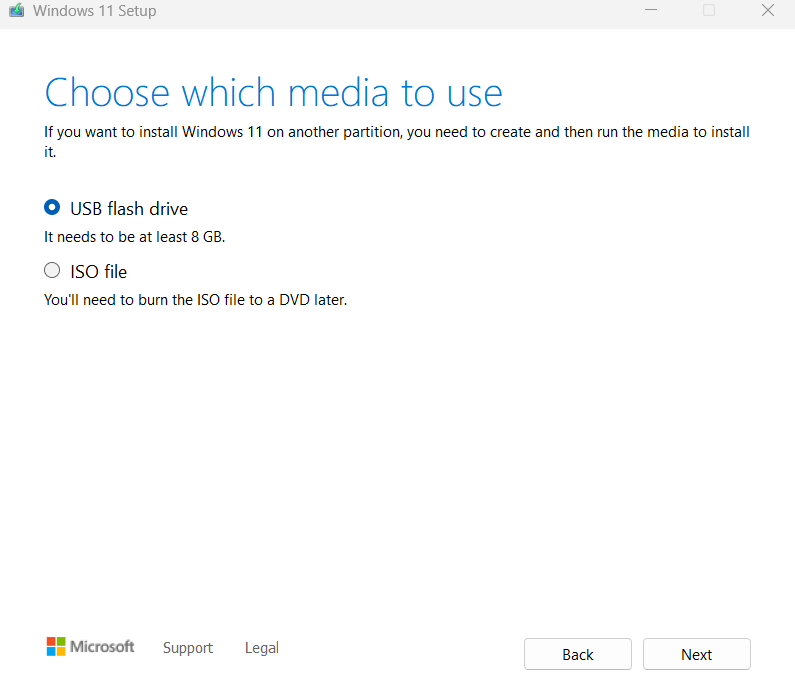
3. Choose the media – USB flash drive or ISO file > click Next.
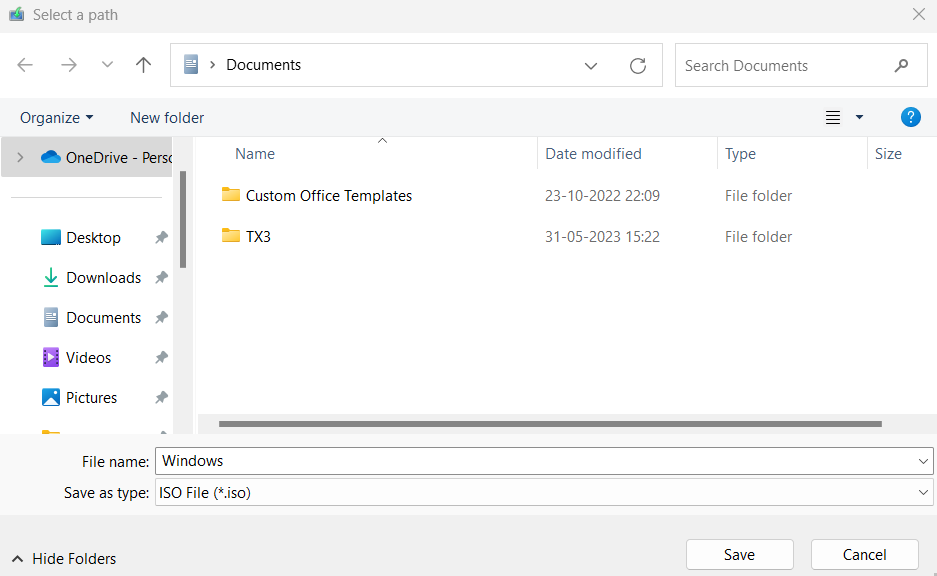
4. Select the download location on your computer > click Save.
5. Open Windows Explorer and find Windows 11 ISO image file.
6. Right-click on the file and choose Mount in the menu.
You can now see a virtual drive on This PC.
Part 2
1. From the mounted Windows ISO file, right-click on the install.esd file from the source folder to copy it to the root folder of drive C:
2. Open Command Prompt as administrator.
3. Type cd\ and press Enter.
4. Then type:
dism /Get-WimInfo /WimFile:install.esd
5. Press Enter.
6. Note down the index number as per the Windows 11 installed version.
7. Execute this command (replace the IndexNumber with the number you just noted down):
dism /export-image /SourceImageFile:install.esd /SourceIndex:IndexNumber /DestinationImageFile:install.wim /Compress:max /CheckIntegrity
Step 3:
1. Open Command Prompt as an administrator.
2. Run the two commands below and hit Enter.
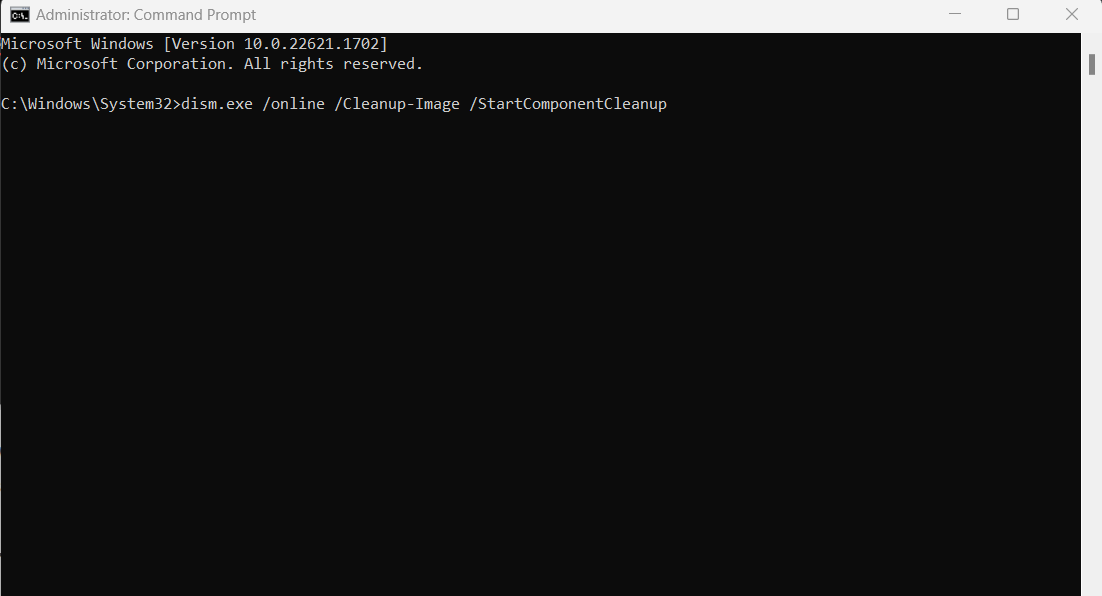
DISM /Online /Cleanup-Image /StartComponentCleanup
DISM /Online /Cleanup-Image /AnalyzeComponentStore
3. Run the following command to specify the C:\install.wim as the source of the known good files.
DISM /Online /Cleanup-Image /RestoreHealth /Source:WIM:c:\install.wim:1 /LimitAccess
4. After this process completes, type sfc /scannow and hit Enter.
Fix 4: Perform a Component Cleanup
1. Run Command Prompt as administrator.
2. Execute the following commands. Press Enter after each command.
dism.exe /online /Cleanup-Image /StartComponentCleanup
sfc /scannow
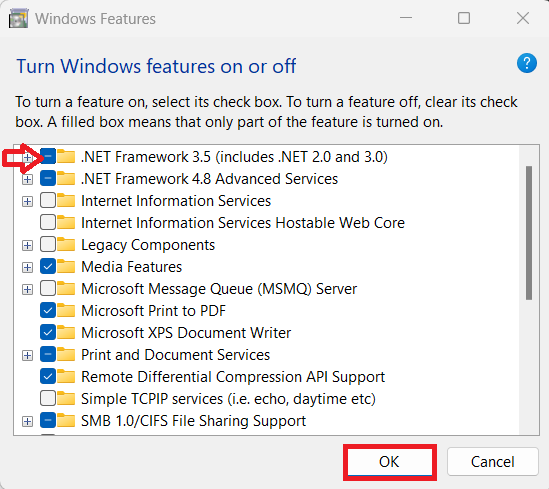
Fix 5: Reinstall Microsoft .NET Framework 3.5
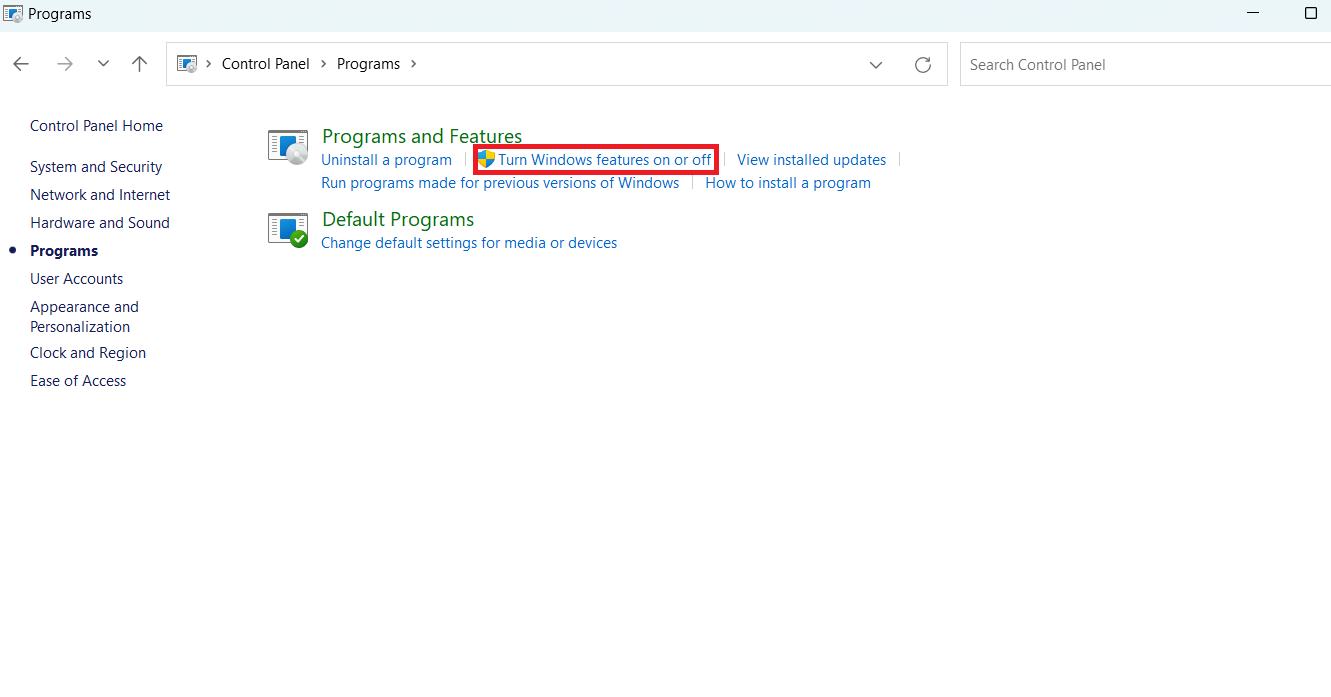
1. Open Control Panel.
2. Click on Programs > “Turn Windows features on or off” in Programs and Features.
3. Uncheck .NET Framework 3.5 (includes .NET 2.0 and 3.0) and click OK.
4. Restart your system and check the same option we unchecked in step 3.
That’s it!