
Context Menu or Right-click menu in Windows is a quick way to do important things. Each time the context menu opens, it has to hook into all the commands it has. If any command is not responding, then right-click menu slows down. If you are facing the issue then this tutorial will help you to fix slow Right-click menu in Windows 11.
Page Contents
Fix: Slow Right-Click Menu in Windows 11
You can fix or remove this issue by trying the below methods:
Method 1: Use Registry Editor
You should delete the unnecessary registry files to improve the speed of the right-click menu. Follow the below steps to do so:
1. Press the Windows Key + R. Type regedit.exe and click OK.
2. Navigate the following path:
Computer\HKEY_CLASSES_ROOT\Directory\Background\shellex\ContextMenuHandlers
3. In the left panel, expand the ContextMenuHandlers.
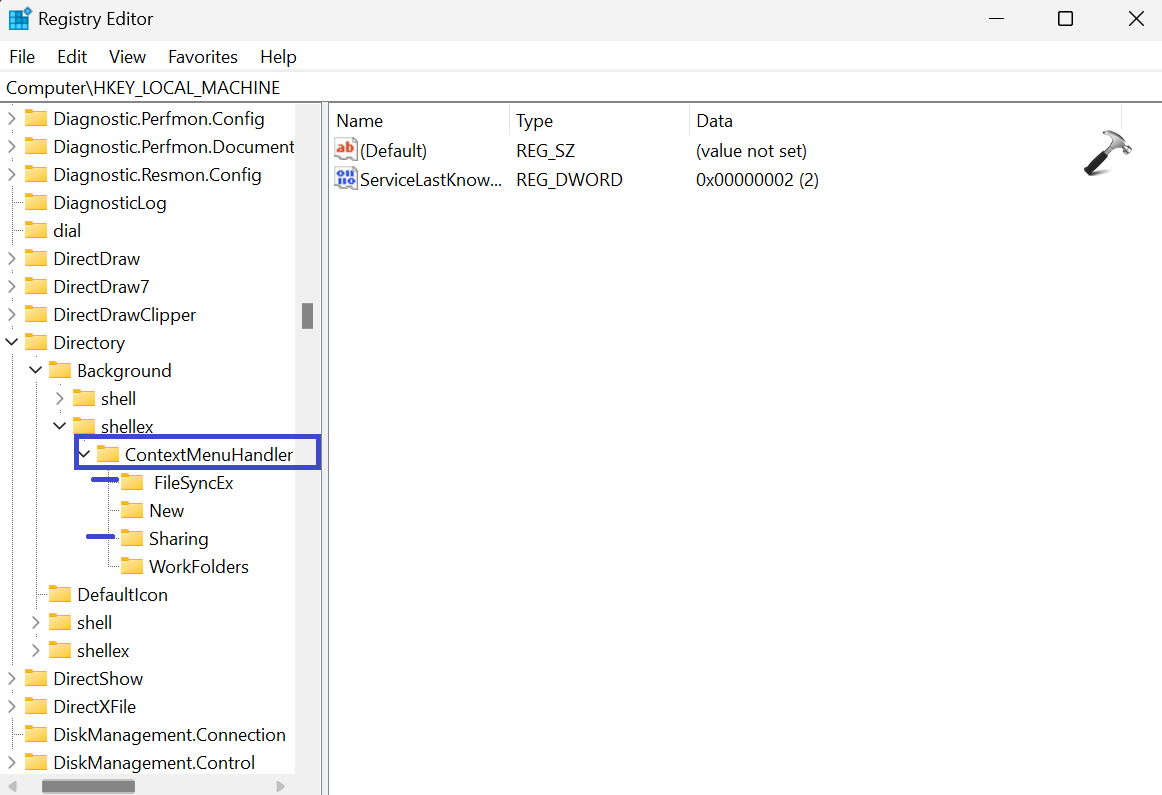
Delete the subkeys except “New” and “WorkFolders”.
4. Close the Registry Editor Window and restart the PC. Check whether the right-click menu speed is improved or not.
Method 2: Update Display Drivers
Outdated Drivers can be the cause. You can try updating the Display Drivers by following the below steps:
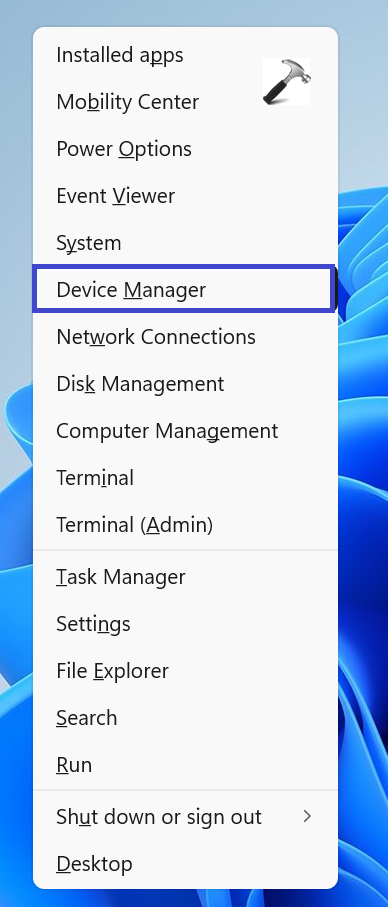
1. Press the Windows Key + X. Select Device Manager.
2. Expand the “Display adapters”.

3. Now, right-click on the driver and click on Update driver.
4. Follow the On-screen instructions to finish the update.
Restart the PC and check if the right-click menu speed has improved or not. If not, then try the next solution.
Method 3: Run SFC (System File Checker) Scan
Corrupted system files can degrade the performance of your PC. SFC scanner will help you to repair such damaged system files. Follow the below steps:
1. Open Command Prompt and select “Run as administrator”.
2. Copy and paste the below command:
sfc /scannow
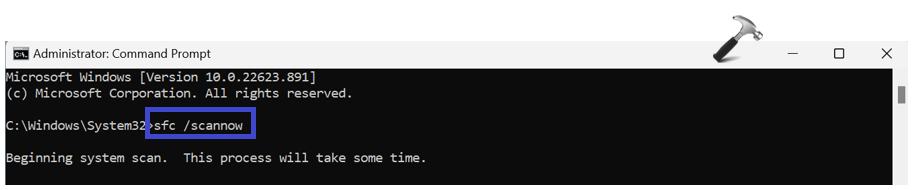
3. Hit Enter.
4. Let the system check and repair your corrupted files. It will take some time.
5. Close the Command Prompt Window and restart your PC.
Method 4: Run Microsoft Safety Scanner
Microsoft Safety Scanner is a malware detection and removal tool for Windows. Running the Microsoft Safety Scanner can solve your issue:
1. Download Microsoft Safety Scanner tool.
2. Double-click the executable file and click Next.
3. Select the type of scan you want to perform and click Next.
4. After the scanning, it will remove the corrupted files and software from your PC.
Method 5: Try Clean Boot
Third-party apps or services can interfere your system and cause the slow right-click menu issue. Boot your PC in clean boot mode by following the steps:
1. Press the Windows Key + R. Type msconfig and click OK.
2. Under the Services, check the “Hide all Microsoft services” box.

3. Now, click on “Disable all” button.
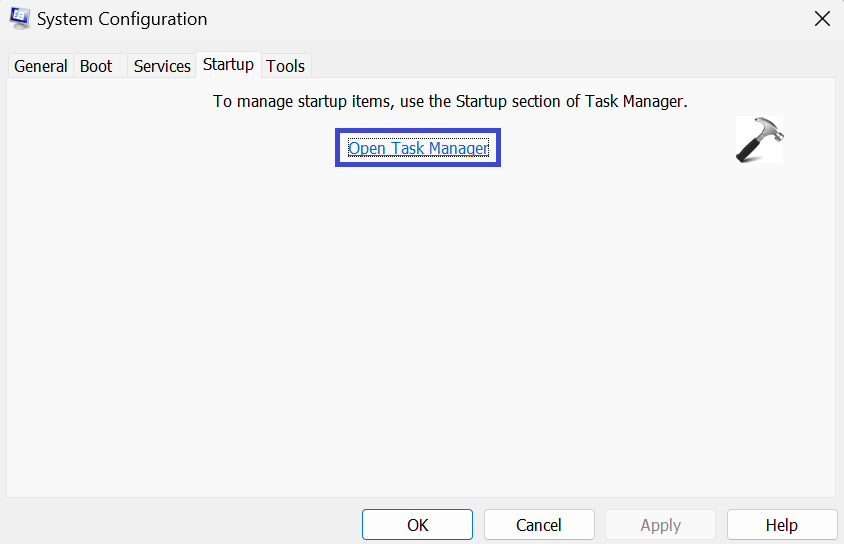
4. Under Startup, click on “Open Task Manager”.
5. Here, disable all the third-party apps.

6. Close the Window and restart your PC. Check whether the right-click menu speed has improved or not. Otherwise, try the next solution.
Method 6: Tweak Performance Options
1. Open Search menu. Type “adjust the appearance and performance of Windows” and hit Enter.

2. Under the Performance Options, select “Adjust for best performance”.
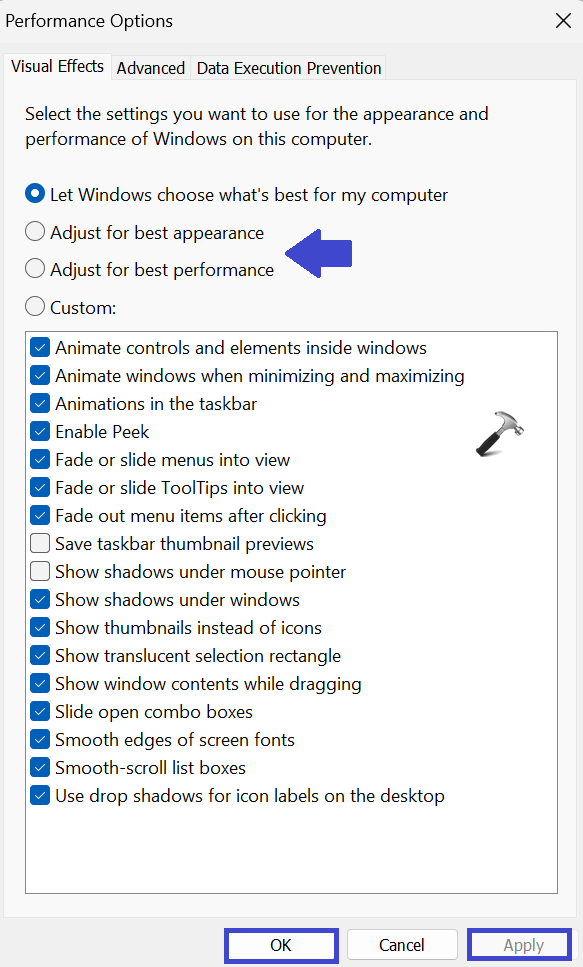
3. Click OK followed by Apply.
Method 7: System Maintenance Troubleshooter
1. Press the Windows Key + R. Type msdt.exe -id MaintenanceDiagnostic and click OK.
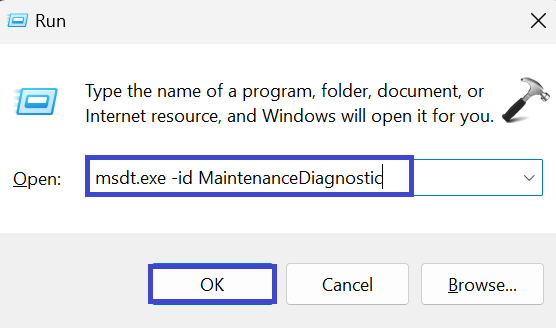
2. Now, click Next and follow the On-screen instructions to run the troubleshooter.

That’s It!


Its not a tweak, its new laggy menu.