
Right-clicking is an essential function on any Windows operating system, allowing users to access a variety of options and settings with just a simple click. However, some users have reported issues with the right click not working in Windows 11 systems, which can be frustrating and hinder productivity. Fortunately, several potential solutions like those provided in this article can help users restore their right-click functionality and get back to their work.
Page Contents
Fix: Right click not working in Windows 11
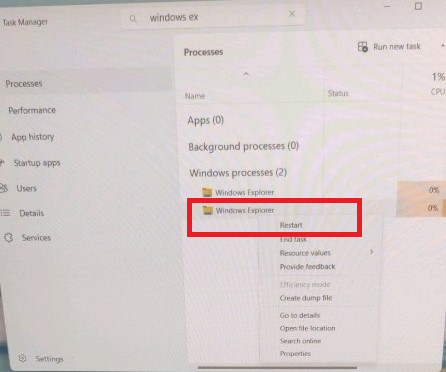
Fix 1: Restart File Explorer
Press the Ctrl+Shift+Esc keys together. You will see the Task Manager window. Right-click on Windows Explorer, and select Restart.
Fix 2: Check your mouse
Try checking your mouse clicks on other apps/files. You can also remove your mouse from the current system and connect it to another to check whether it works.
Fix 3: Update mouse driver
a. Open the Device manager by searching it on a search text box in the taskbar.
b. Double-click on Mice and other pointing devices.

c. Double-click on the HID-complaint mouse.

d. Select the Driver tab and click on Update Driver.
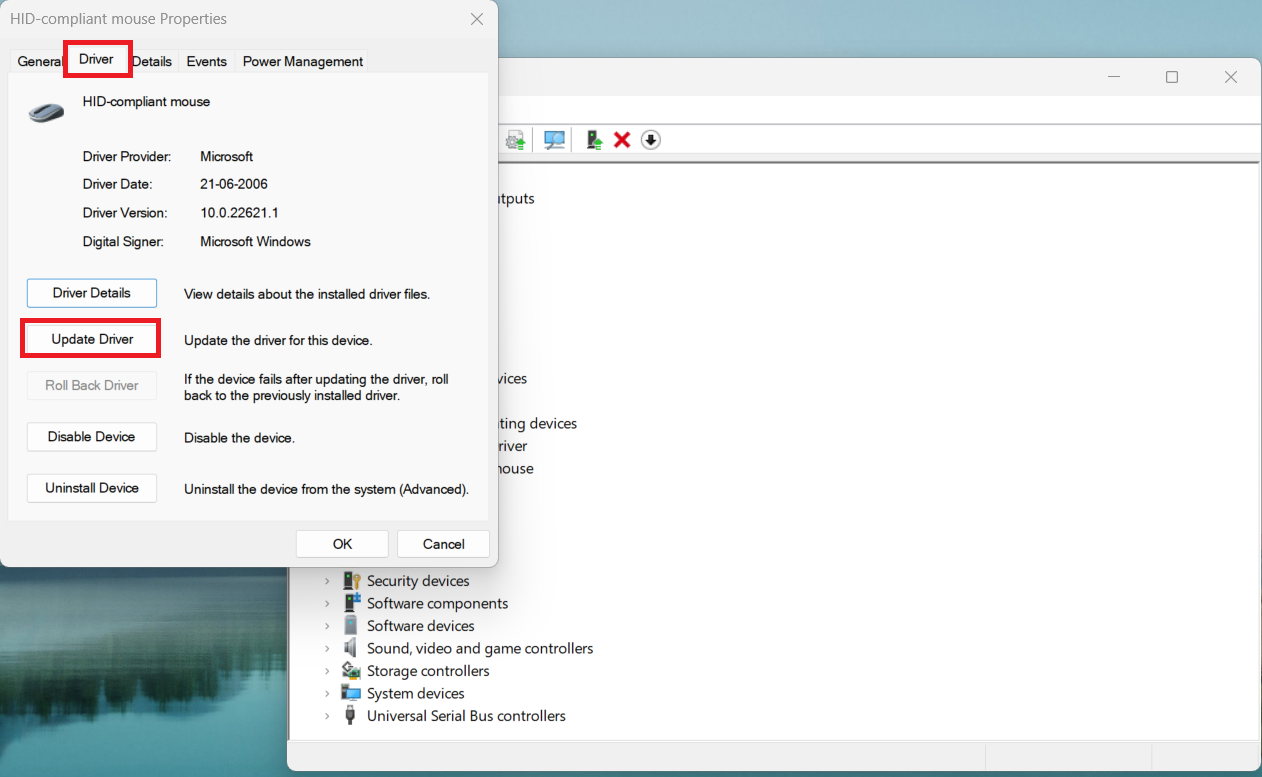
e. Follow instructions and restart your system.
Fix 3: Run SFC scan
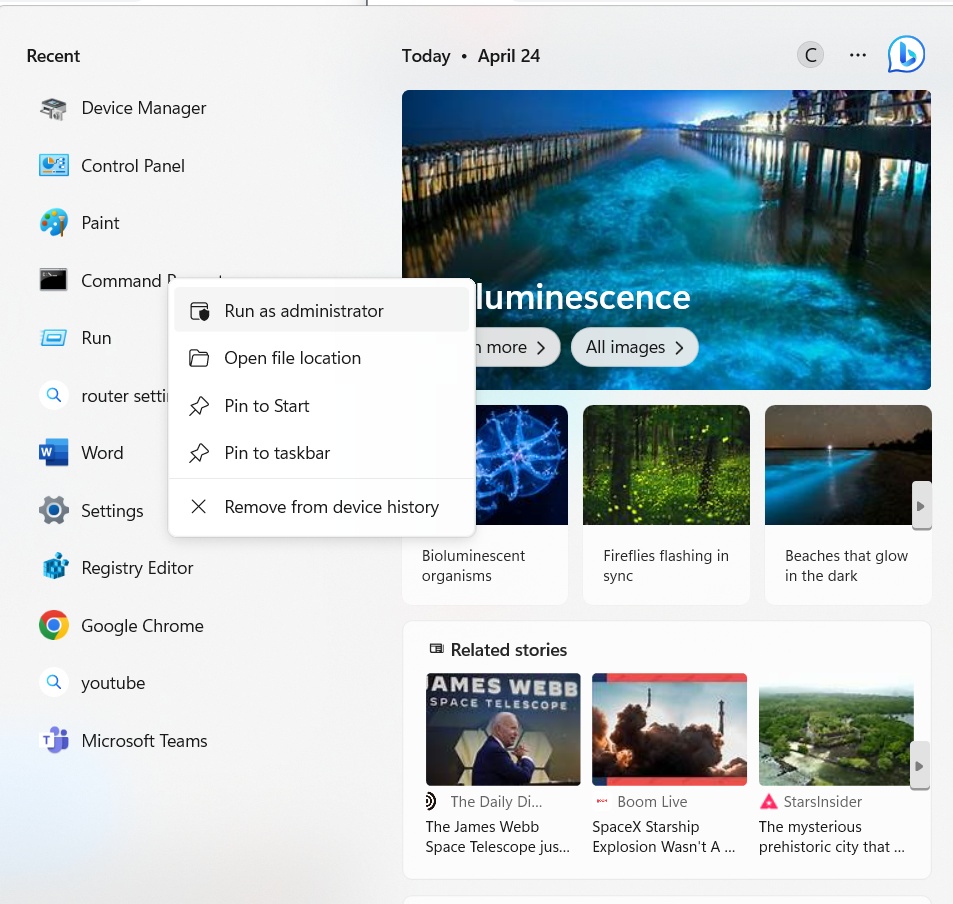
- Type Win+S keys together.
- Right-click on the Command prompt and select Run as administrator.
- Type sfc /scannow in the command prompt and press Enter to execute the command.
Fix 4: Enable the context menu
- Press Win+R keys together.
- Type regedit and click OK.
- Navigate to path Computer\HKEY_LOCAL_MACHINE\SOFTWARE\Microsoft\Windows\CurrentVersion\Policies\Explorer.
- Right click on blank screen towards right > New > DWORD(32-bit) value > name it as NoViewContextMenu.
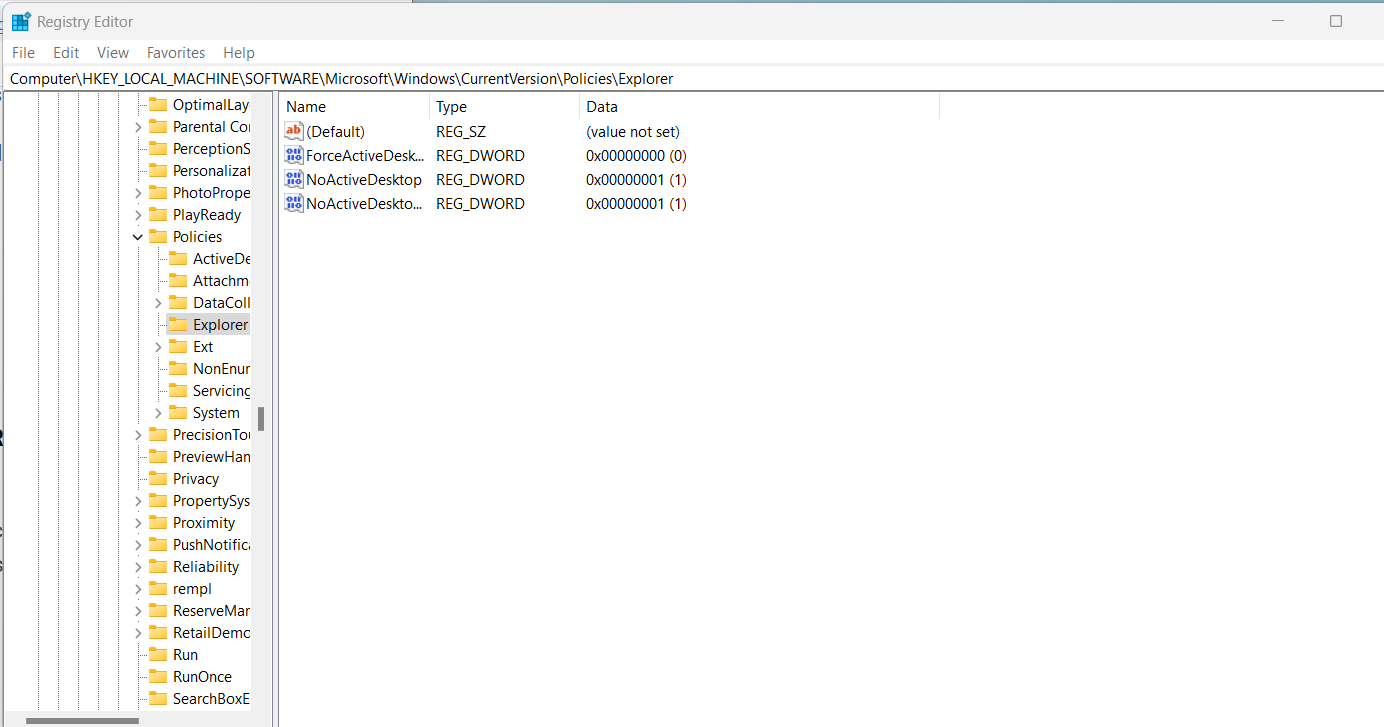
Change the value date to 0. Click ok and restart your PC.
Fix 5: Disable tablet mode
- Click on the “Start” button in the taskbar, and select “Settings” (the gear icon).
- In the Settings app, click on “System” and then “Tablet mode.”
- Under “When I sign in,” select “Use desktop mode.”
- Under “When this device automatically switches tablet mode on or off,” make sure the toggle switch is set to “Don’t ask me and don’t switch.”
- Close the Settings app and try using the right-click function again.
Fix 6: Remove recently installed apps or software
- Click on the “Start” button in the taskbar, and select “Settings” (the gear icon).
- In the Settings app, click on “Apps” and then “Apps & Features.”
- Look for the software that you recently installed and click on it to select it.
- Click on the “Uninstall” button and follow the on-screen instructions to uninstall the software.
- Once the software is uninstalled, restart your computer.
- Try using the right-click function again.
Fix 7: Update your OS to the latest version
- Click on the “Start” button in the taskbar, and select “Settings”.
- In the Settings app, click on “Windows Update.”
- Click on the “Check for updates” button.
- If there are updates available, click on the “Download and Install” button to start the update process.
- Wait for the updates to download and install. This may take some time depending on the size of the updates.
- Once the updates are installed, restart your computer.
- Try using the right-click function again.
Video fix
For further assistance, you can checkout this video fix:
That’s it!


thanks, after trying to bring back the old context menu in win 11, it disappeared altogether. This registry fix helped.
ˆˆ Glad it helped 😎