In Windows 11/10, the Transparency effect is pretty strategically embedded. This effect adds an aesthetic touch to the entire system. Unfortunately, some users report that it is not working properly. So, how to fix Start Menu Transparency not working in Windows 11/10?
Now, this issue could arise due to a faulty configured registry or corrupted system files. No matter what the reason could be, you can fix this issue in different ways. In this post, learn about different methods to fix this issue hassle-free. So, let’s get started without further ado!
Page Contents
Fix: Start Menu Transparency not working in Windows 11/10
Fix 1 – By turning on the Transparency effect
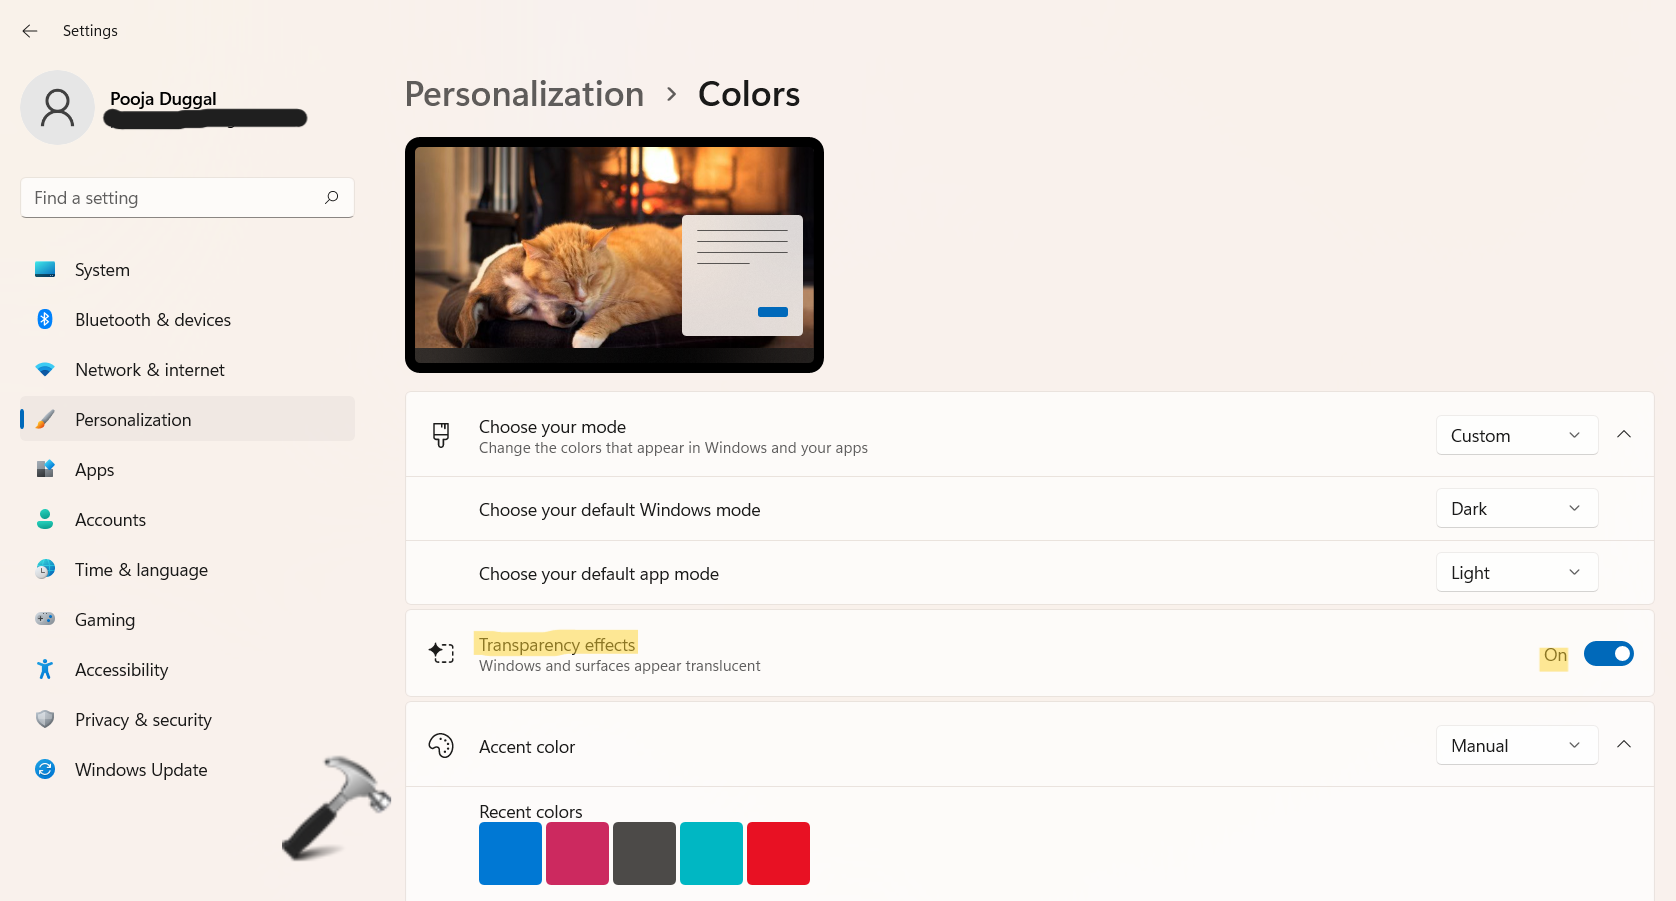
1. Open the Settings app by pressing the Windows + I tabs simultaneously on your keyboard. After that, go to the Personalization tab and then, select Colors present on the right.
2. From there, enable Transparency effects by toggling the switch towards On.
Fix 2 – By updating the Graphic Driver
1. Firstly, open Device Manager by right-clicking on Windows Start.
2. Once opened, expand Display drivers and right-click on the graphic driver you like to update. Now, choose Update driver from the menu.

3. Next, select Search automatically for drivers.
Now, the system will look for the driver automatically and install it on your system.
Fix 3 – By turning off the Battery Saver Mode
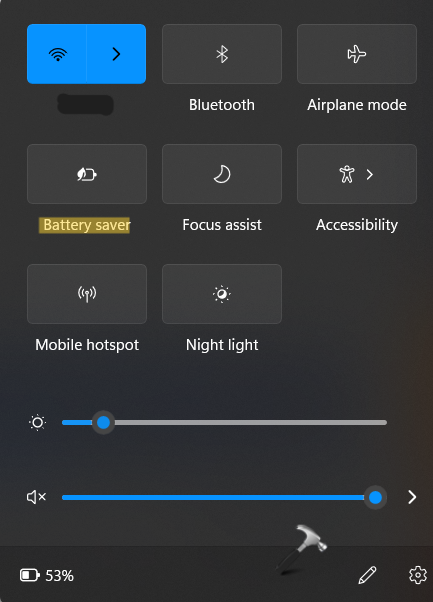
1. In the first place, open the Quick Setting panel by pressing the Windows + A keys together on your keyboard.
2. After that, check if the Battery saver mode is off. If not, switch off this mode.
Fix 4 – By running SFC and DISM
1. Open Command Prompt with admin privileges.
2. In the elevated Command Prompt, execute the following command:
sfc /scannow

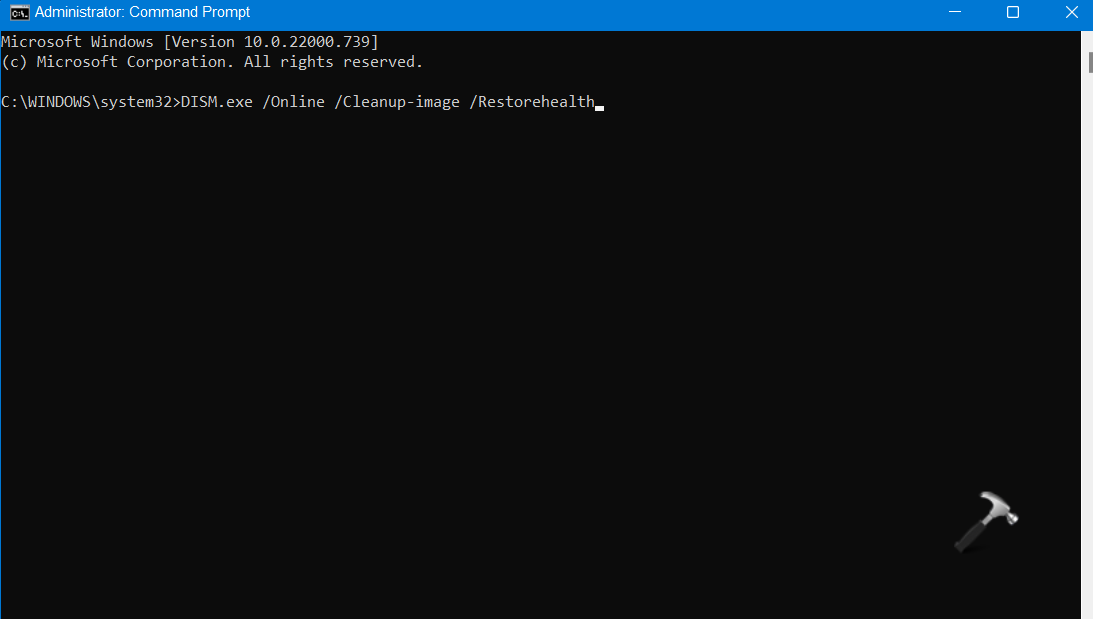
3. If it does not work, then try the following command:
DISM.exe /Online /Cleanup-image /Restorehealth
4. Once executed, reboot your system and try now.
Fix 5 – By changing the Registry setting
1. Firstly, you need to open the Run dialog box. For this, press the Windows + R keys simultaneously on your keyboard. Once opened, type regedit in the Run dialog box and hit Enter to open Registry Editor.
2. After that, navigate to the following location:
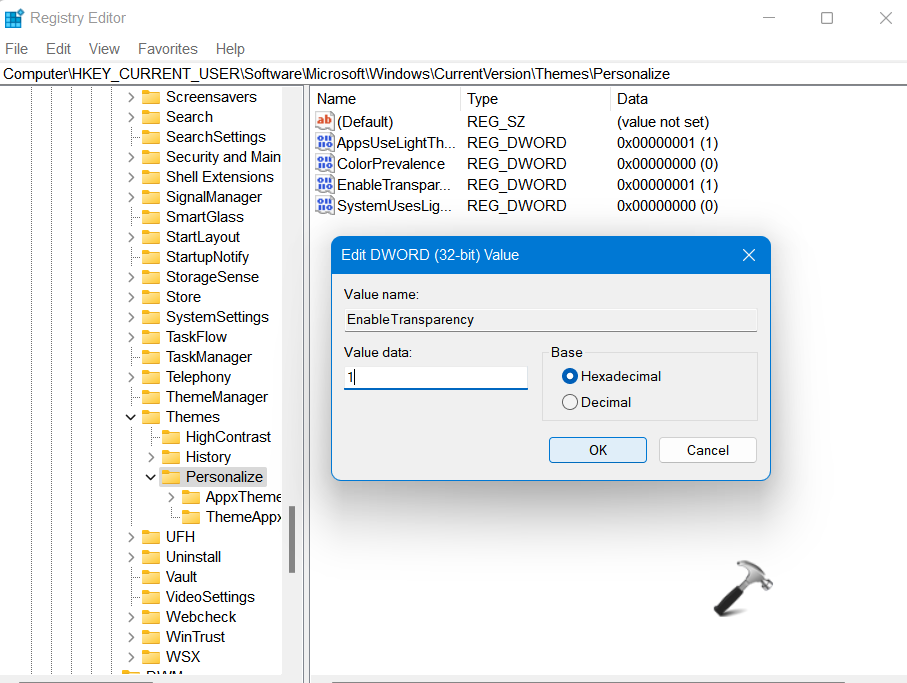
HKEY_CURRENT_USER\Software\Microsoft\Windows\CurrentVersion\Themes\Personalize
3. Once there, double-click on the EnableTransparency REG_DWORD and change its value data to 1 to enable the transparency effect in Windows 11.
4. After that, go to the following location:
HKEY_LOCAL_MACHINE\SOFTWARE\Microsoft\Windows\Dwm
5. Now, right-click on any empty space and choose DWORD (32-bit) Value. Rename it to ForceEffectMode and change its value data to 2.

6. Lastly, close Registry Editor and restart your system.
Fix 6 – By reinstalling Start Menu through PowerShell
1. Open Windows PowerShell with admin privileges.
2. Now, execute the following command:
Get-AppXPackage -Name Microsoft.Windows.ShellExperienceHost | Foreach {Add-AppxPackage -DisableDevelopmentMode -Register "$($_.InstallLocation)\AppXManifest.xml"}

3. Once executed, the Start Menu will be deleted and reinstalled on your system automatically. Restart your system and check if the issue has been resolved.
So, this is how to fix Start Menu Transparency not working in Windows 11/10.
Related: Start Menu not working in Windows 11.