
Recently, I faced a wired issue with Windows 11 virtual machine under VMware Workstation Pro. In this case, the Windows Insider preview build installed on this virtual machine was not able to update to latest version. Whenever a new build arrives, it is detected via Windows Update. Then I proceed to download the preview build. The build downloads fine and then system prepares to install. But when finally I reboot the system to complete installation of preview build, it goes to UNSUPPORTED_PROCESSOR stop code. After this the installation process is reverted and in this way I’m not able to upgrade to newer build. If you are also getting UNSUPPORTED_PROCESSOR stop code in Windows 11, this article will surely help you.

To resolve the problem I tried to update VMware Workstation disable Hyper-V, made different edits to processor entry in virtual machine settings to no avail. Finally, I was able to resolve the issue with the help of below mentioned solutions.
Page Contents
Fix: UNSUPPORTED_PROCESSOR stop code in Windows 11
While at the moment it looks like the bug in VMware workstation. Until VMware fixes it, you can try these things as a workaround.
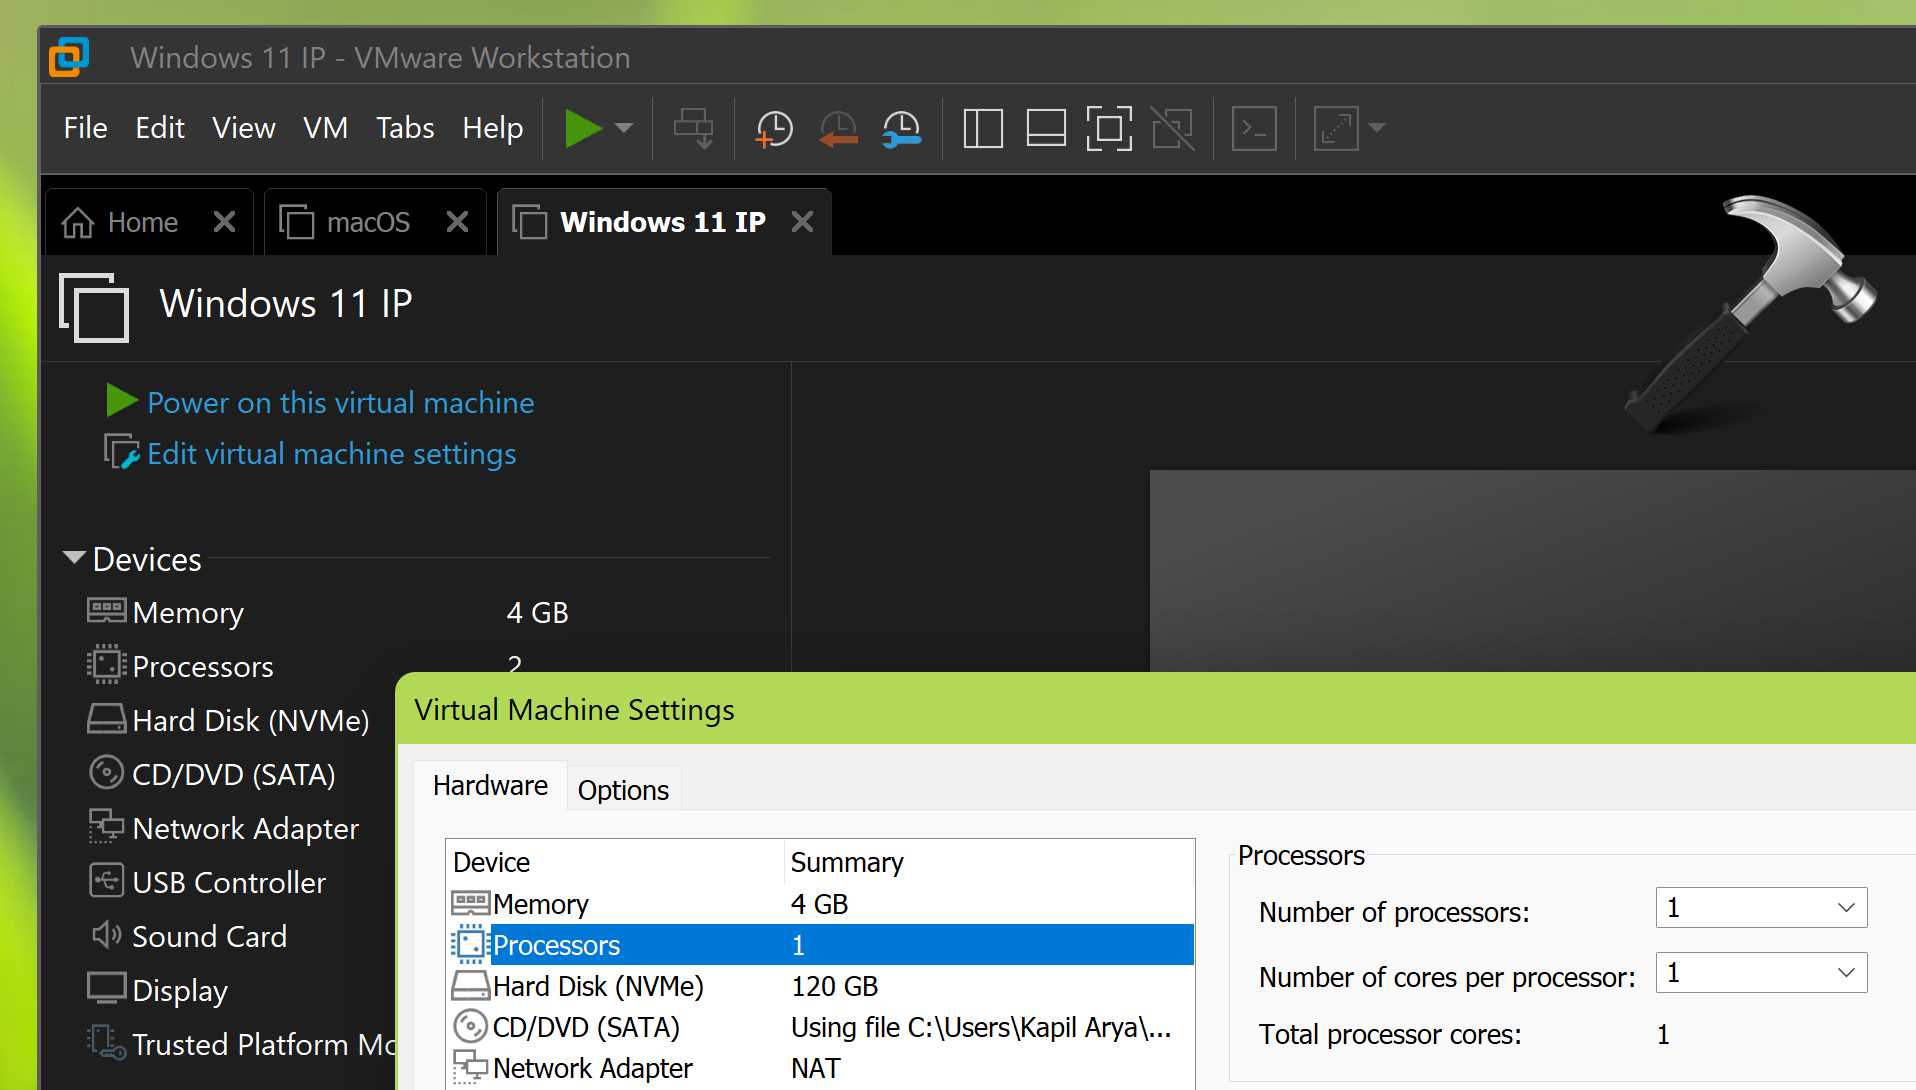
FIX 1 – Set Number of Processor to 1
While I was facing the problem, the number of processors was set to 2. Usually, with Windows 11 virtual machine installation, two processors are common. But if you set it to 1 core, this problem can be resolved. Note that, I tried also for 4 but it only worked with 1.
Simply click on Edit virtual machine settings, go to Processors, set Number of processors to 1 instead of 2.
Then try restarting the virtual machine and this time the UNSUPPORTED_PROCESSOR stop code will not occur.
FIX 2 – Enable VMware Hypervisor
With FIX 1 mentioned above, the problem is that after setting the number of processor to 1, the virtual machine is insanely slower. For some, this can be OK OK but for others, this could be another problem. So we can try this alternative fix which fixes the root cause for this problem. This problem is expected to occur when you are in User Level Mode (ULM) where VMware can’t use its own hypervisor as Windows Hypervisor is enabled.
You can easily disable Windows Hypervisor by running this simple command in administrative Command Prompt on the host:
bcdedit /set hypervisorlaunchtype off
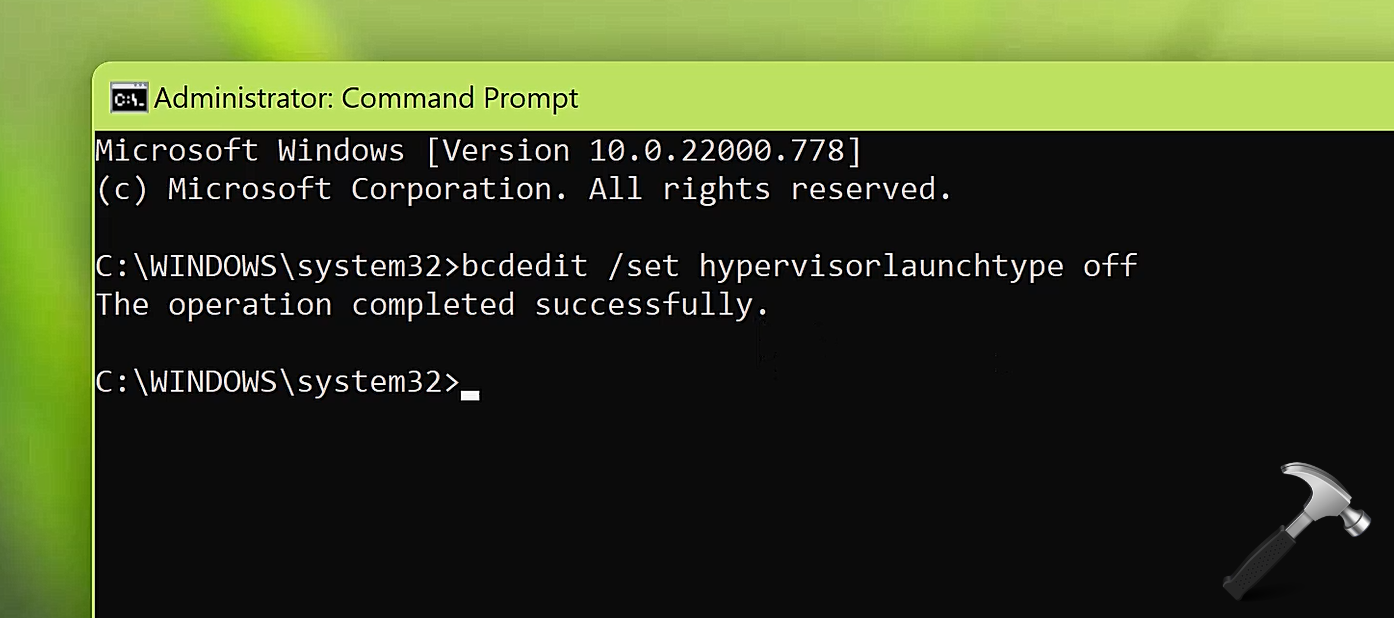
You need to essentially reboot after executing the above command successfully. After reboot, Windows Hypervisor is disabled and VMware can use its own hypervisor, ultimately fixing the problem.
If you want to enable or restore Windows Hypervisor again, you can easily with this command:
bcdedit /set hypervisorlaunchtype auto
For more information and live demonstration of above fixes, checkout this video:
That’s it!


Thank you for this. You’ve saved my hide.
Looks like Microsoft let this update out to mainstream, and VMware hasn’t got a solution yet. I just had the same problem after a Windows update (KB5019959 Failed to install on 9/11/2022 – 0x800f0845). I was first able to confirm the hypothesis by reducing the CPU to 1, then I disabled the MS Hypervisor (and increased the CPU). I suppose I just broke my WSL2 (and docker), but these host demo environments, so I can live with the reboot.
^^ Glad to help 😎
Solved my Windows 11 demo machine issue. Thanks!
^^ Glad to help 😎
honestly thank you. You are my new hero
^^ Glad to help 😎
I did what you said and it still doesn’t solve the problem, it’s too much of a headache. I can only set the processor to 1 core for now.