The Windows 11 Settings app crashing can happen due to a variety of reasons. Some common causes of the Settings app crashing include corrupt system files, outdated or incompatible device drivers, conflicting software, and malware or viruses. In some cases, the issue may be related to a specific Windows update that was installed on the system. Additionally, if the Windows 11 Settings app is running low on memory or if there are other system issues, it may crash or freeze. To diagnose and fix the issue, users can try various troubleshooting steps, such as running a virus scan, updating device drivers, and resetting the Settings app or the entire Windows system. It’s also important to ensure that the computer meets the minimum system requirements for running Windows and that enough disk space and memory are available.
Let’s look at the troubleshooting techniques you may use to address the issue permanently now that we know it’s possible causes.
Page Contents
FIX: Windows 11 Settings App Crashing
1. Fix Windows 11 Settings app crashing with a simple restart of your PC
This might seem too easy to be true, but occasionally restarting the computer can get rid of any transient flaws or corruption problems, fixing the problem in the process.
For this reason, we advise executing one of the methods to restart Windows before beginning your troubleshooting process. After shutting down all running processes, restart the computer and see if the Settings app functions properly.
Go to the next method down if the problem doesn’t go away.
2. Update Windows
The operating system should then be updated to the most recent build that is available. Installing the pending updates will resolve any compatibility issues that an older system may be causing.
1. Select the Windows Updates option from the left pane after launching the Settings app.
2. In the next box, click the Check for Updates button as shown in Fig below, and then wait while the system searches for any available updates.
3. Install the updates one at a time by clicking the Download & Install button when they have been presented.
4. Restart the computer after the updates have been installed. Check if the issues have been resolved.
3. Update your drivers
The problem might also be brought on by a corrupted or out-of-date graphics driver that was previously installed on your computer. In this situation, upgrading the driver is the simplest fix.
For this, we’ll make use of the Device Manager tool.
- To launch Windows Search, press Win + S.
- Click “Open” after entering Device Manager in the search box.
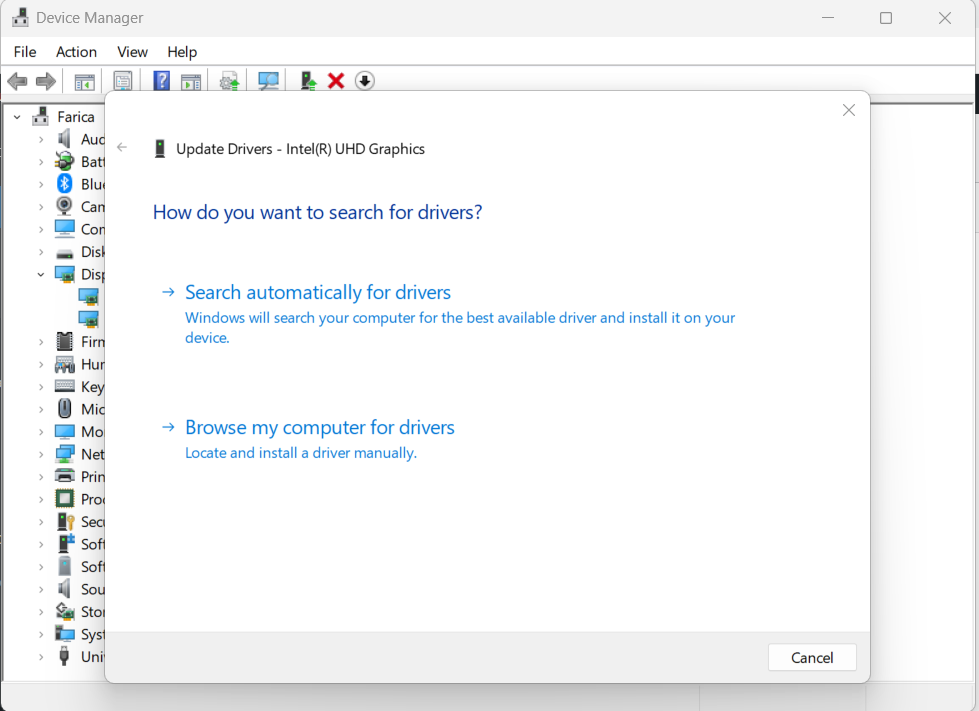
- Expand the Display adapters area now, then select your graphics driver with the right click.
- click on “Update driver” and then select “Automatically search for drivers”. The system will now start being checked by the Device Manager tool for new driver versions.

- Follow the instructions and restart the computer to implement the changes.
4. Reset or re-register the Settings app
Resetting the programs to their default settings or re-registering them are two more simple ways to solve the corruption problems within the apps.
The next thing you may do is to reset the Settings app or re-register it via the Command Prompt if the system and the graphics driver are both current. If the Settings app doesn’t open right away, you can choose the Reset option. Continue with re-registering the app if you are unable to access it at all.
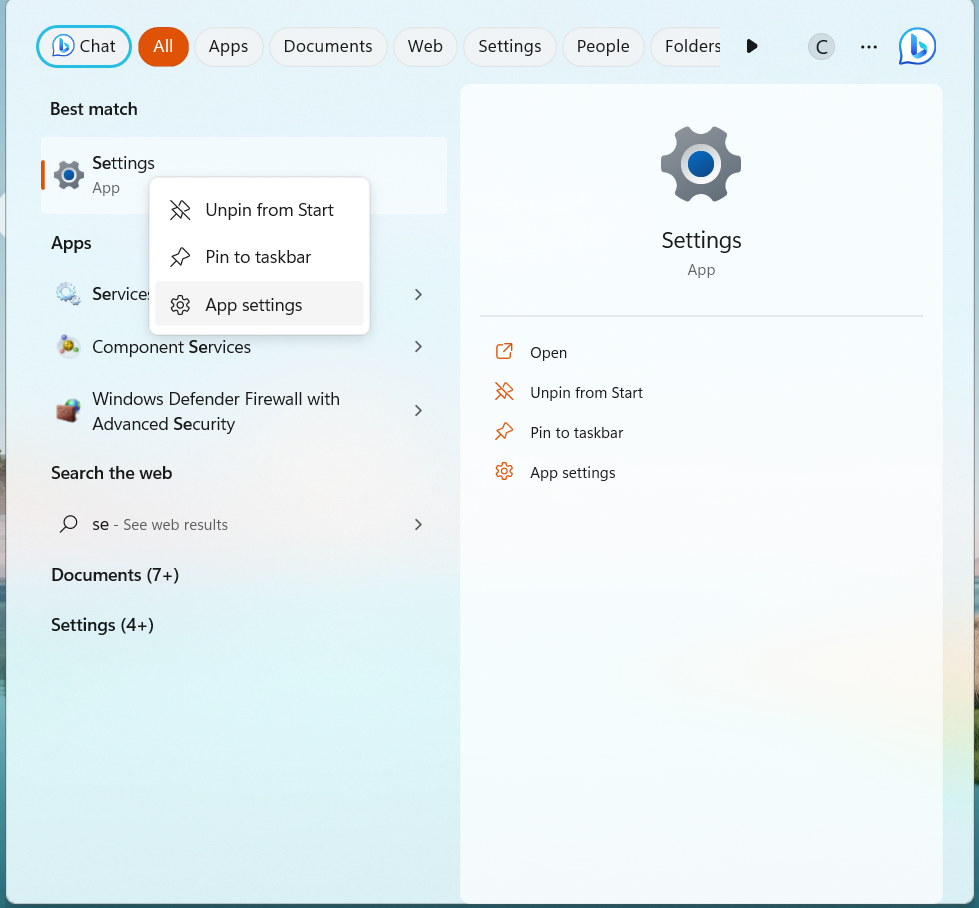
1. Right-click on the “Settings” icon by selecting Windows from your taskbar.
2. “App settings” can be selected via the context menu.
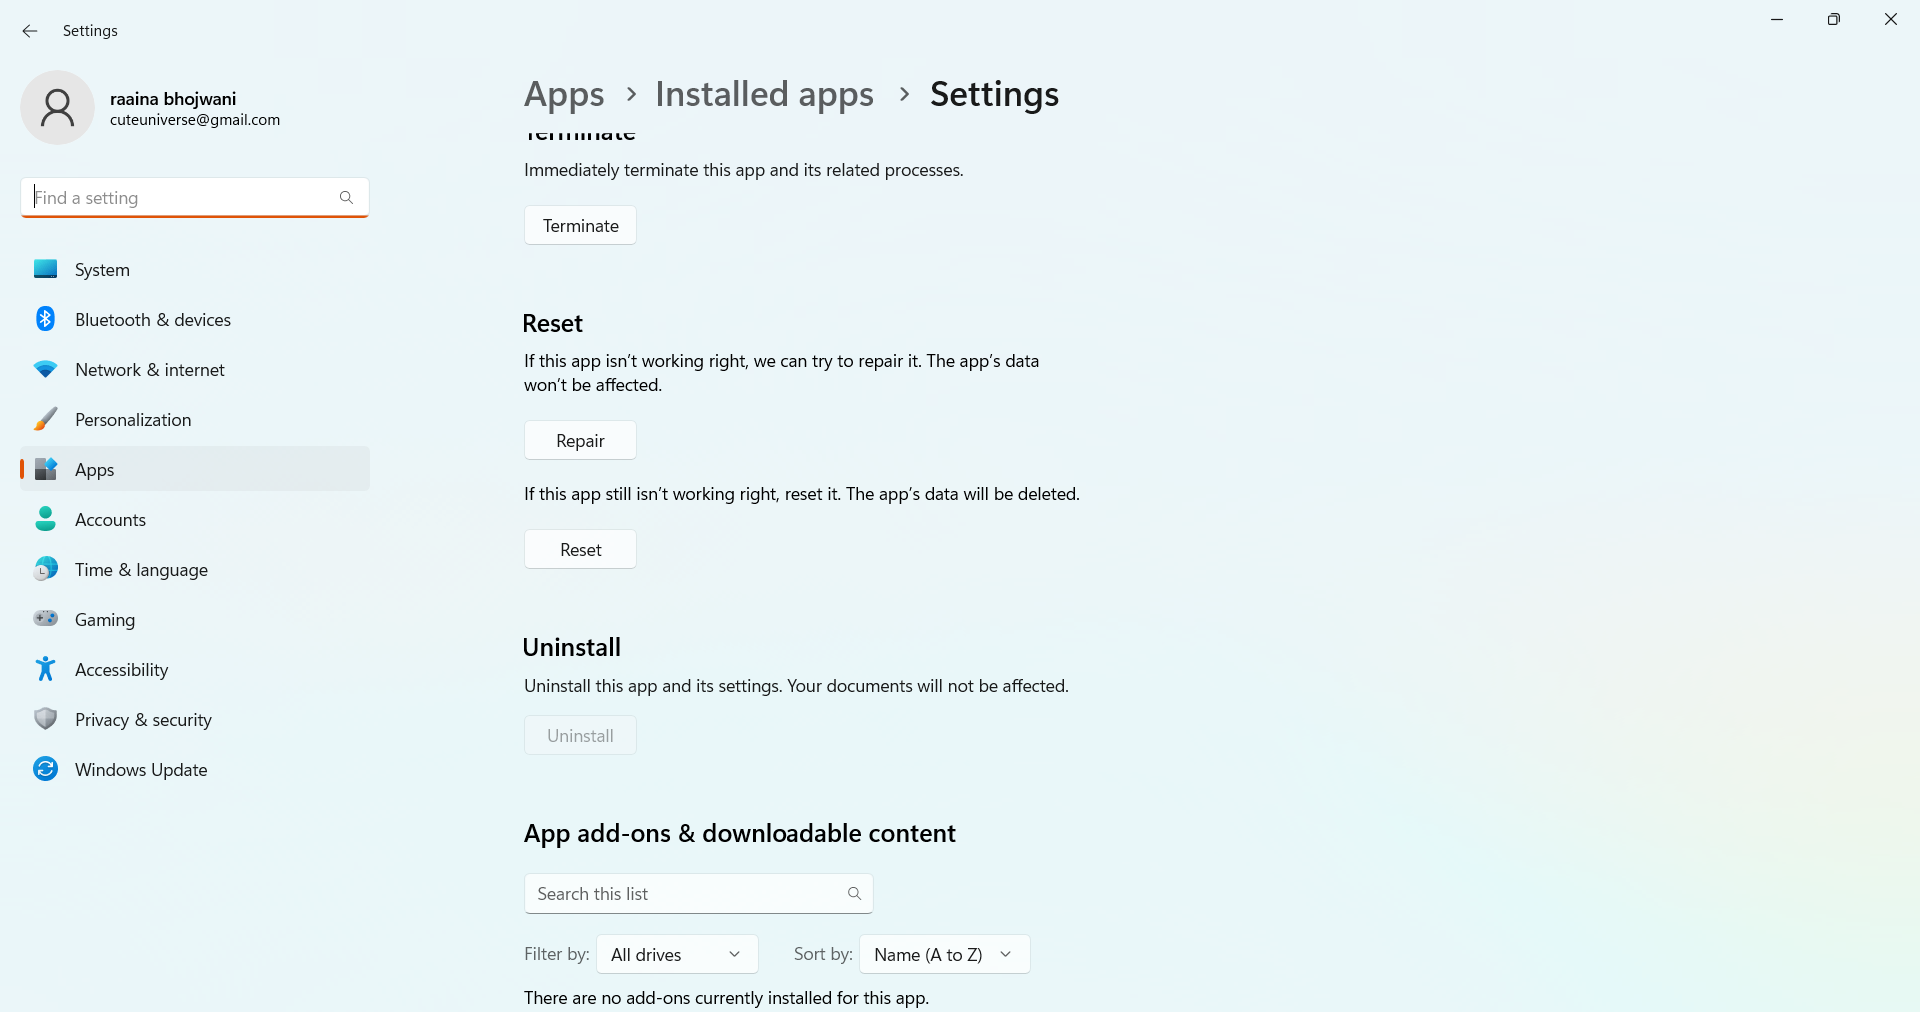
3. Go to the Reset section in the window that appears after that. There are two choices available here: Repair and Reset.
4. Before checking to see if the issue has been resolved, select Repair first.
5. If not, click Reset and proceed as directed by the screen.
Observe these procedures to re-register the app:
1. Open Windows Search, type Powershell, and select Run as administrator.
2. In the User Account Control window, select Yes.
3. Then, enter the following command into PowerShell.
Get-AppxPackage *windows.immersivecontrolpanel* | Reset-AppxPackage
4. Close the PowerShell window and restart your computer.