If you want to operate Windows 10 in multiple languages, you surely have added additional languages, as we shared in our previous guide:
How To Add/Remove Languages In Windows 10
Now in this article, we’ll show you how to add or remove keyboard layouts in your Windows 10 system. Adding the additional keyboard layout will help Windows to recognize language characters and symbols specifically. Usually, when you install Windows 10, the installation wizard asks you to add secondary keyboard layout. But if you skipped that, you can still add the keyboard layout of your choice. Below mentioned steps will show you how to add a keyboard layout and remove it, if not required.
Page Contents
How To Add/Remove Keyboard Layout In Windows 10
Part 1 – Add Keyboard Layout In Windows 10
1. Right click Start Button or press  + X keys and select Settings.
2. In the Settings app, navigate to Time & Language > Language.
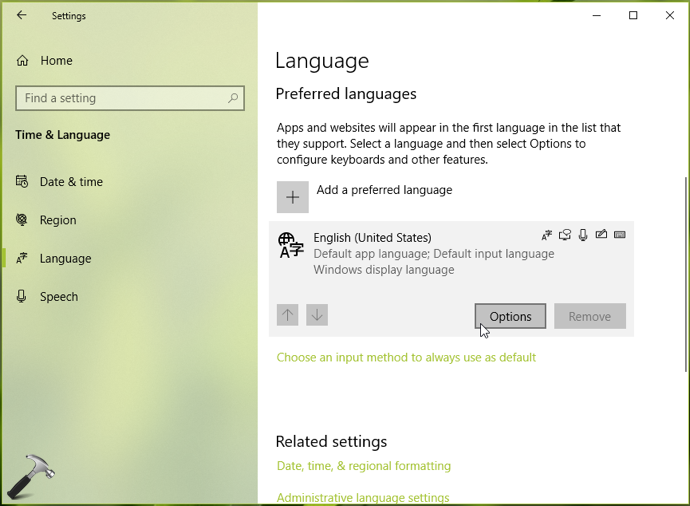
3. Now in right pane of Language, under Preferred languages, click on your primary language under which you want to add a keyboard layout. Click on the Options button appear then.
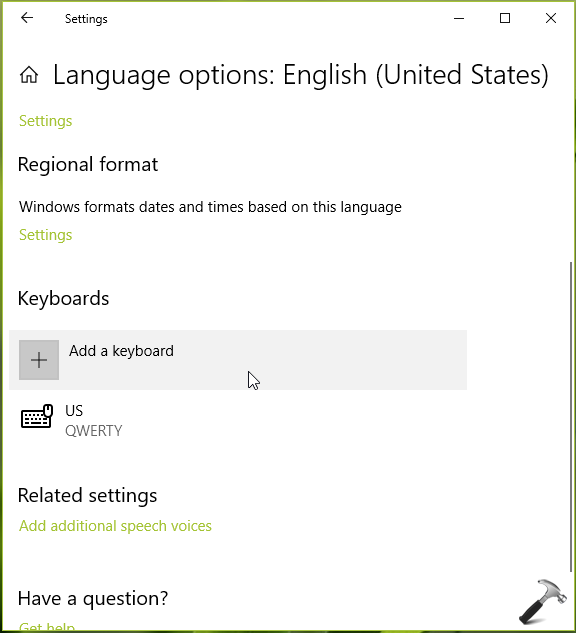
4. In next window, under Keyboards, click on Add a keyboard link.
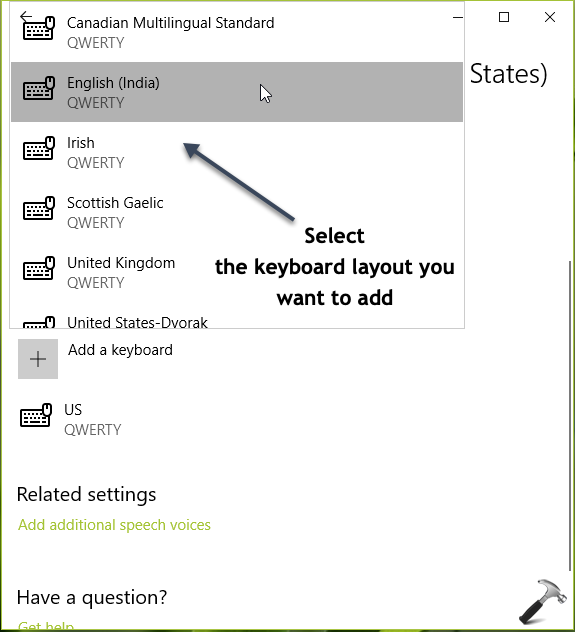
5. Select the keyboard layout you want. Once you selected the desired layout, it will immediately added to the system.
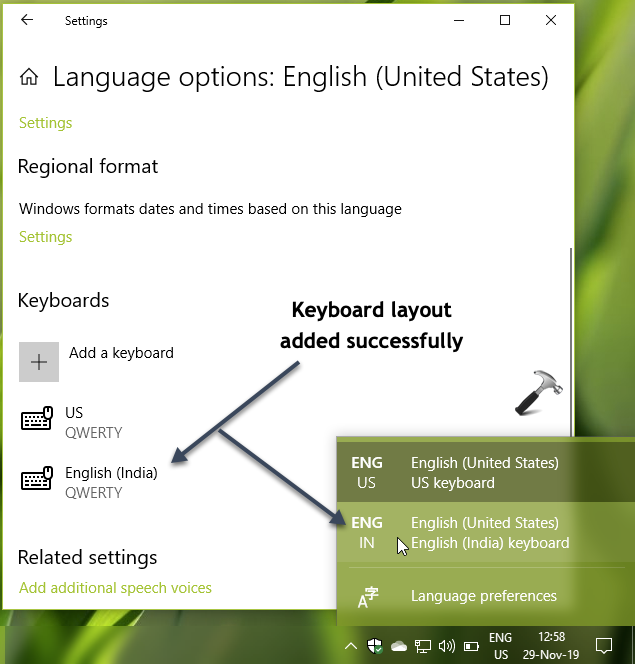
6. You can now see that keyboard layout is added. There must be language indicator/bar appearing in taskbar. Using it, you switch between multiple keyboard layouts and select the one you want to use at a time.
Part 2 – Remove Keyboard Layout In Windows 10
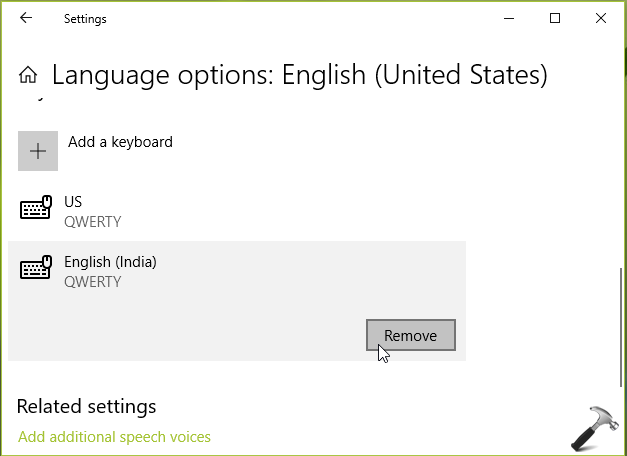
To remove previously added keyboard layout, simply go to Settings app > Time & Language > choose your language > click Options. In next screen, under Keyboards, select the keyboard layout you want to delete and select Remove. This will cut the keyboard layout on the go. You can then close Settings app and return to Desktop.
That’s it!
Related: Keyboard Not Working In Windows 10/8/7.