
There might be situations when you need to additional languages on your Windows 10. Most of users prefer English as the primary language, however they also like to install their local language.
This guide will show you how to add languages to your Windows 10 machine. We’ll also see how to set secondary languages as display language. The last part of this guide will show how to remove secondary languages.
So here’s how to manage languages in Windows 10.
Page Contents
GUIDE: How To Add/Remove Languages In Windows 10
PART 1 – How To Add Languages In Windows 10
1. Right click Start Button or press  + X keys and select Settings.
2. In the Settings app, navigate to Time & Language > Region & Language.
3. Then in Region & Language, under Preferred Languages, click on Add a language.

4. Next, type the language you want to add in the search bar. From search results, select it and then click Next.
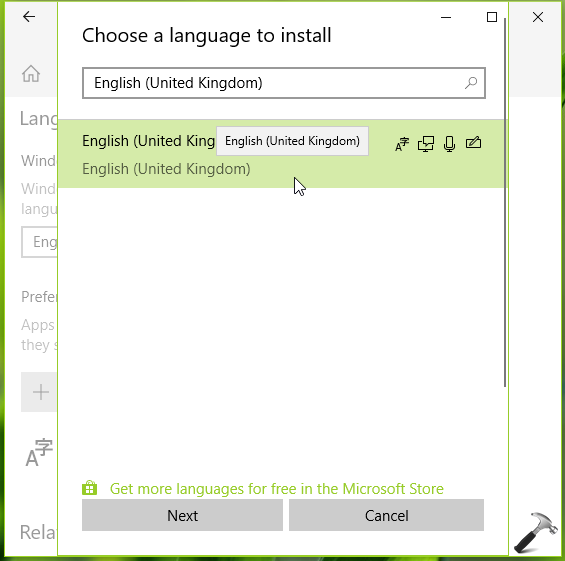
5. Moving on, under Install language features, choose if you want to set the language you’re adding as display language. You can also select optional features available for the language. Click Install, when you’re done with your choice.

6. The download and installation of language will be done via Microsoft Store and you’ll receive a notification about this. So meanwhile you can track the progress of language pack in Microsoft Store.

7. Now back in Settings app, you’ll find that the language is successfully installed. However, to make the added language as your display language, you necessarily need to reboot the machine.

You can now close Settings app and reboot.
That’s all about how to add new language(s) in Windows 10.
PART 2 – How To Remove Languages In Windows 10
Adding a secondary language introduces language input indicator on taskbar. Some users may not like it. In case if you want to remove secondary language and want to keep only one language, or the languages of your choice, try these steps:
1. Right click Start Button or press + X keys and select Settings.
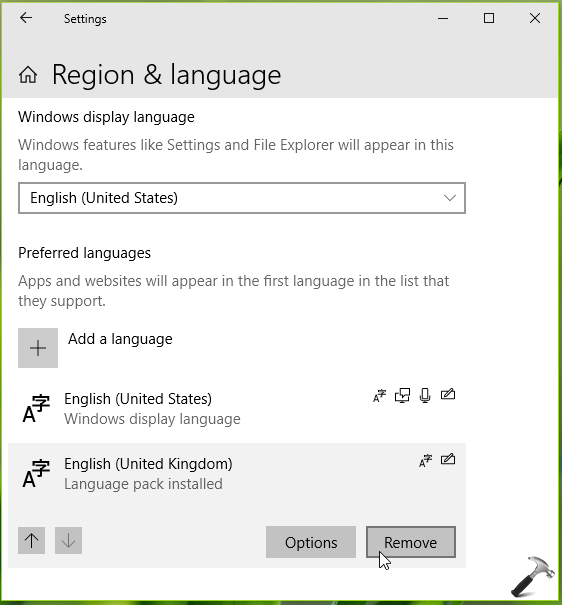
2. In the Settings app, navigate to Time & Language > Region & Language.
3. Then in Region & Language, under Preferred Languages, click on the language you want to remove and hit Remove button.
The language will uninstalled immediately however we recommended you to reboot once to make sure of language removal.
In this way, you can manage additional languages in Windows 10.
That’s it!
See this article, if you cannot install language packs in Windows 10.
Also check this if Windows 10 V1803 Update added additional language to your system which you can’t remove.
HOW CAN I INSTALL PHONETIC MALAYALAM KEYBOARD FOR TYPING
^^ Make sure you install optional features with your language. Also refer: https://www.kapilarya.com/how-to-add-remove-keyboard-layout-in-windows-10.