By default, Windows automatically turns off after you have been inactive for over a minute. This is called Timeout. Timeout is used to save power and battery life. It also protects computer from unauthorized use when you don’t want to use the computer. This article will show you how to automatically lock computer after inactivity in Windows 11.
The Interactive logon: Machine inactivity limit security policy setting allows you to specify an amount in seconds of user inactivity to wait before Windows will automatically lock the computer.
Page Contents
Automatically Lock Computer after Inactivity in Windows 11
Here, we have 3 options through which we can automatically lock computer after some specific time (seconds) for all users:
Option 1: Automatically Lock Computer after Inactivity using Screen Saver
This is the simplest method to lock computer automatically.
1. Go to Settings and select Personalization.

2. In Personalization, select Lock screen.
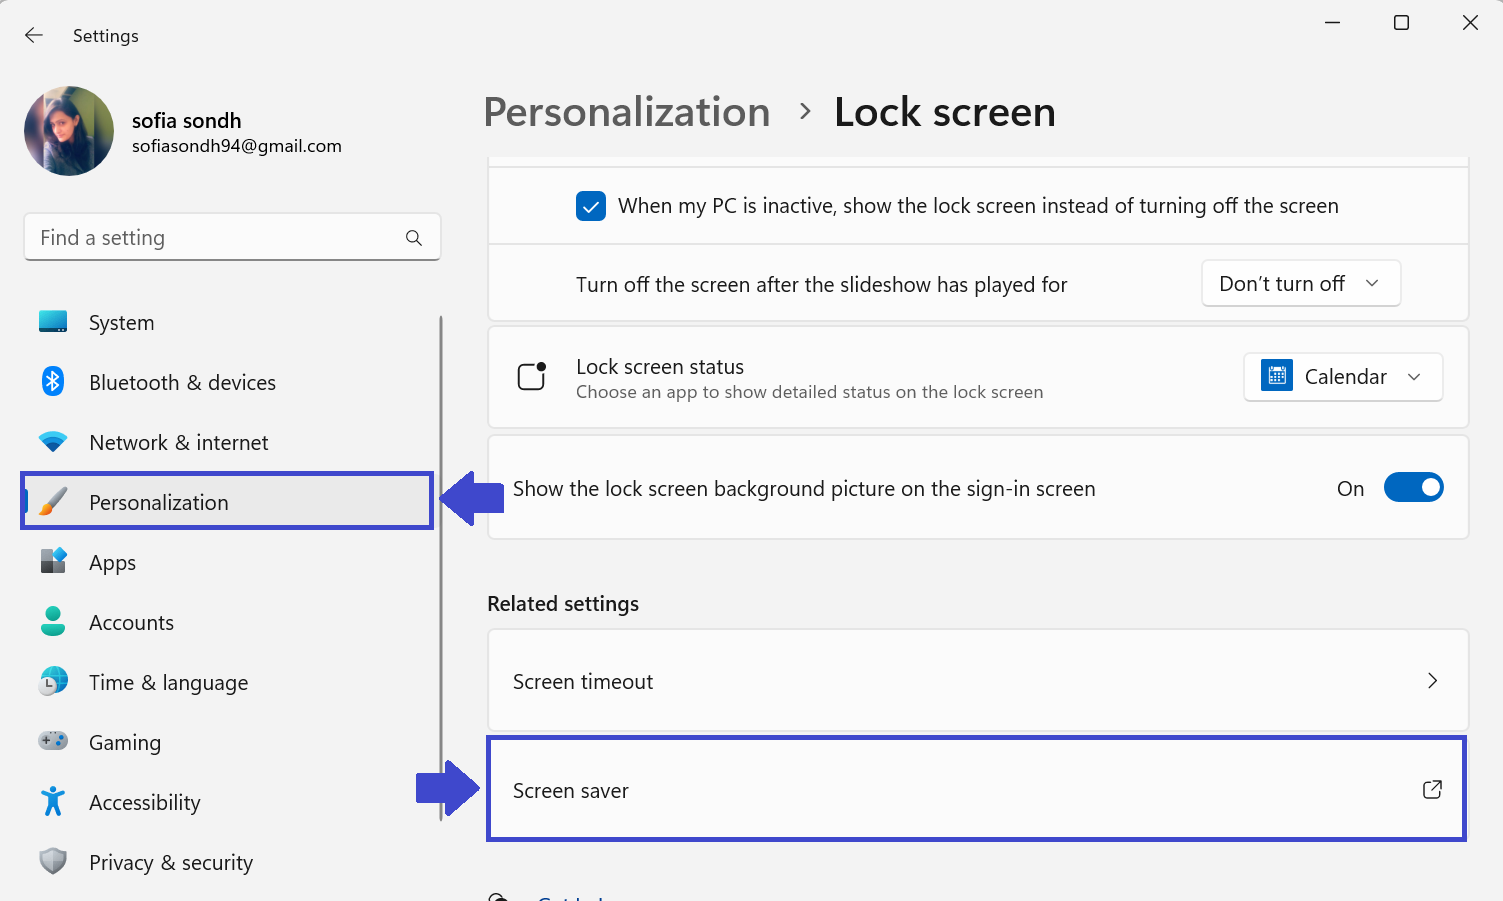
3. After that, go to Screen saver.
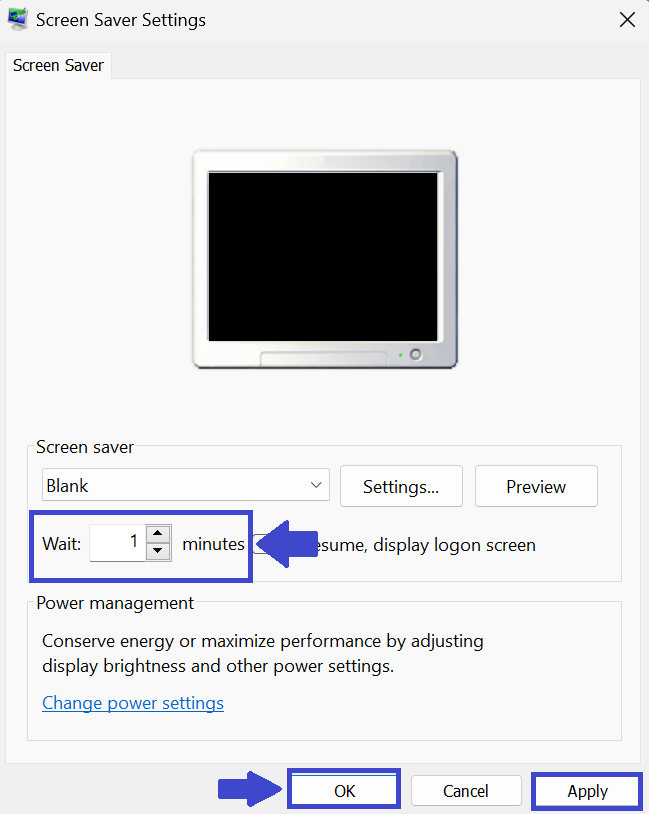
4. After clicking Screen saver, prompt box will appear.
5. Set the “Wait” time to how many minutes you want (see the above image).
6. Click OK followed by Apply.
Option 2: Automatically Lock Computer after Inactivity using Local Security Policy
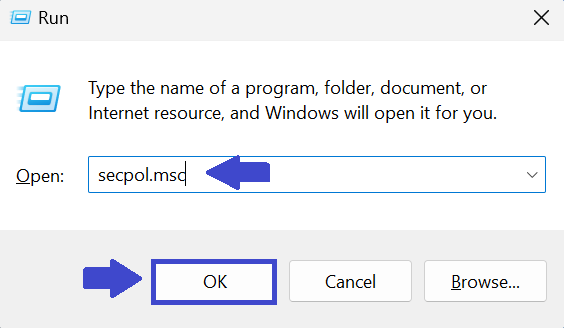
1. Press Windows key + R. Type Secpol.msc and click OK.
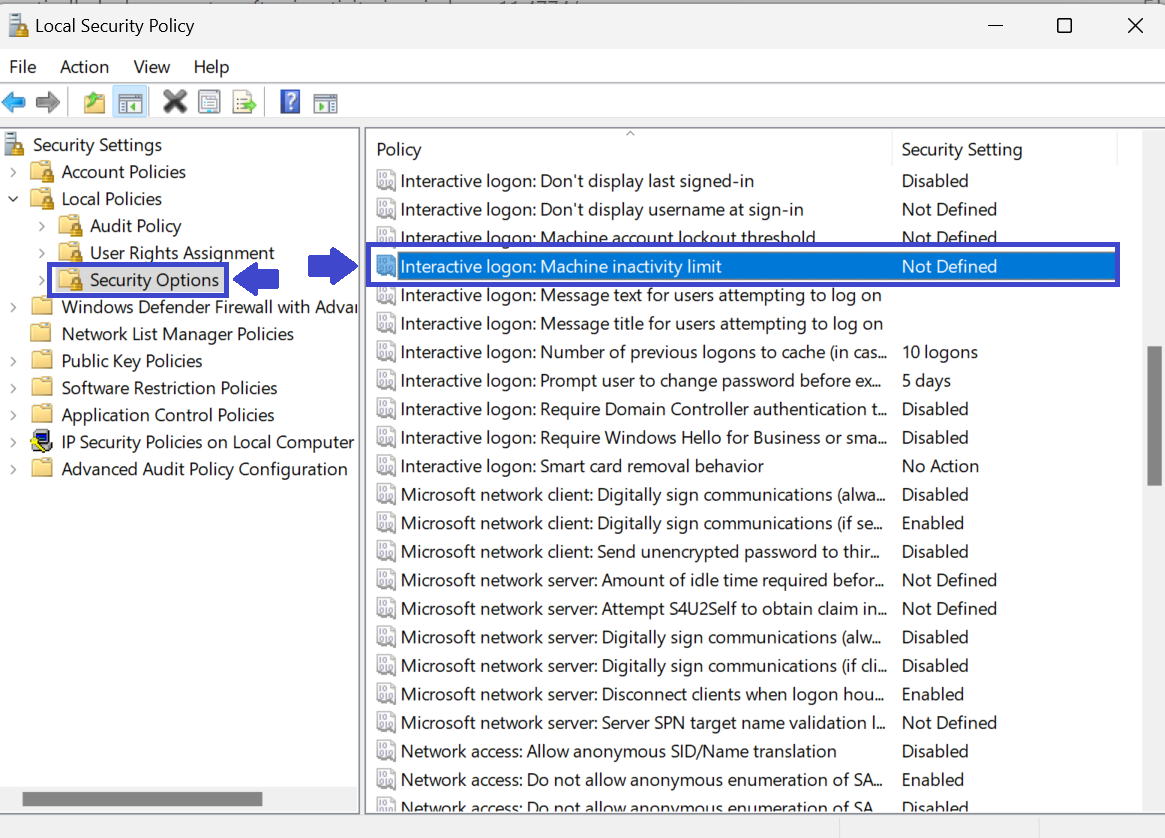
2. Go to Local Policies and select Security Options.
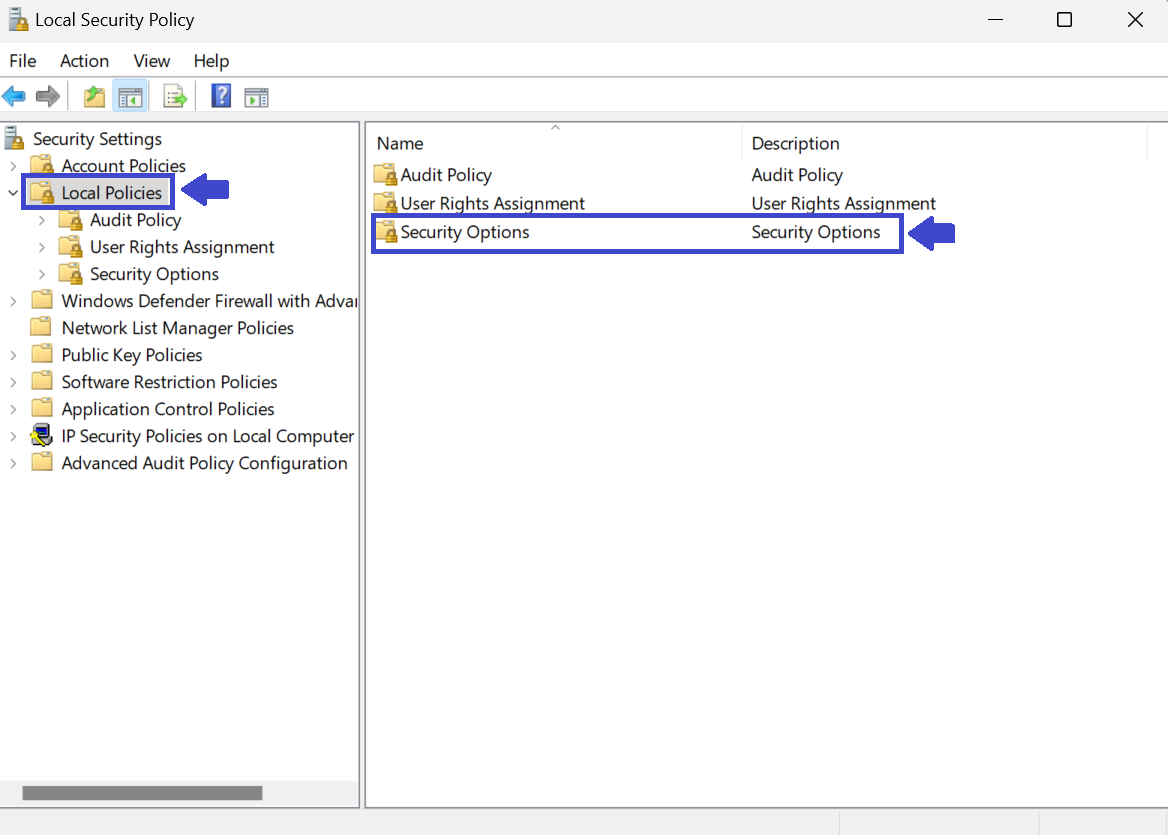
3. In the right-pane of Security Options, click on Interactive logon: Machine inactivity limit policy.
Here, enter time from 0 to 599940 seconds; for how many seconds of inactivity you want to automatically lock computer after.
In the below image, I have entered 300 seconds.
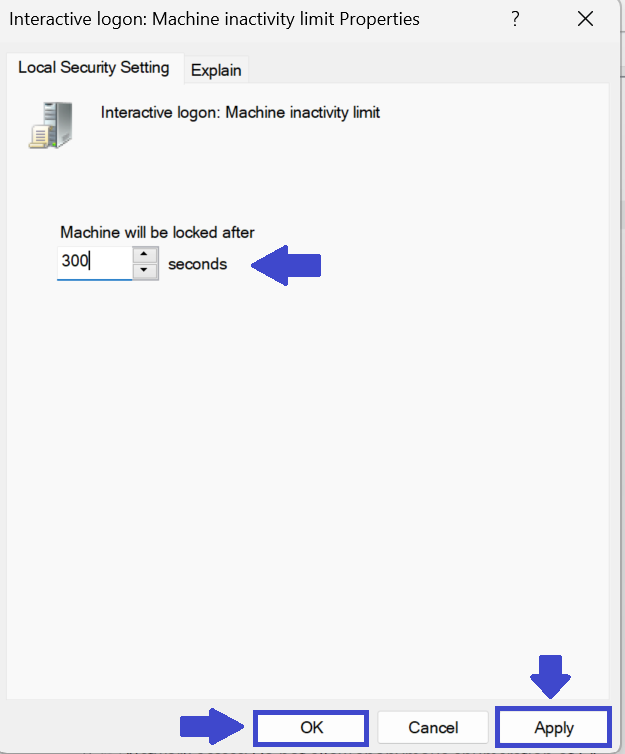
4. Click OK followed by Apply.
5. Close the Local Security Policy window and restart your computer.
Option 3: Automatically Lock Computer using Registry Editor
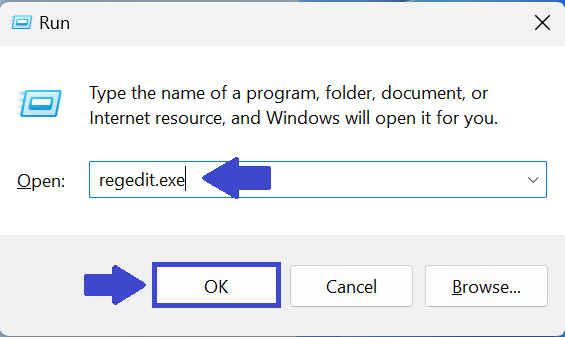
1. Press Windows key + R. Type regedit.exe and click OK.
2. Navigate the following path:
Computer\HKEY_LOCAL_MACHINE\SOFTWARE\Microsoft\Windows\CurrentVersion\Policies\System
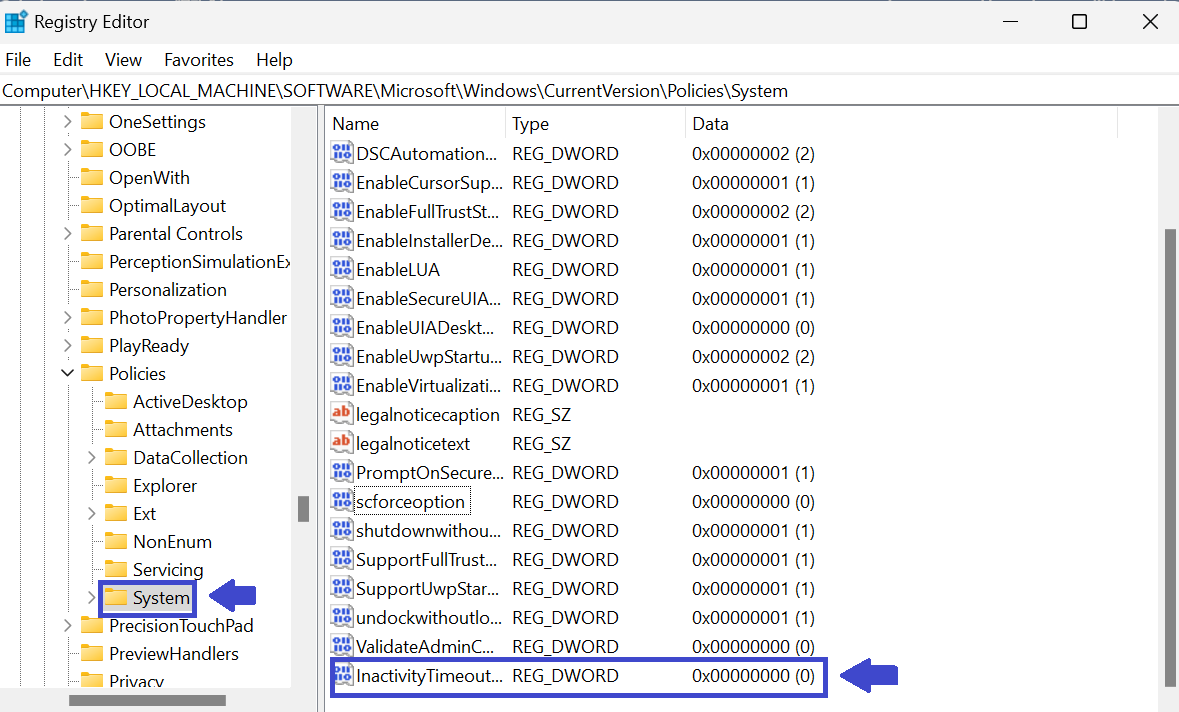
3. In the right pane of system key, click on InactivityTimeoutSecs key.
If you don’t have the key, then create it.
Right-click on system => New => DWORD (32-bit) value. Type “InactivityTimeoutSecs“. Click OK.
4. Double-click on “InactivityTimeoutSecs” key. Prompt box will appear (see the below image).

5. Select Decimal and enter the value as 300. You can enter the number from 0 to 599940 for how many seconds of inactivity you want to automatically lock computer after.
6. Click OK.
7. Close the Registry Editor windows and restart the computer to apply the changes.
That’s It!