As soon as you start your Windows machine, there are multiple processes running in the background. You can obviously spot these processes using Task Manager. These background processes will use system resources as per their need. Usually, these processes will run at a normal process priority level. However, if you want to promote a process and want to change it to a higher priority level, Windows allows you to do so. In this article, we’ll see how to change a process priority in Windows 10.
Changing a process priority becomes a need, when you want to allocate more system resources to the process. If you are developing an application, this might be very helpful for you to test the performance of your app at various process priority levels. In Windows, you can set following levels for a process priority:
- Realtime
- High
- Above normal
- Normal
- Below normal
- Low
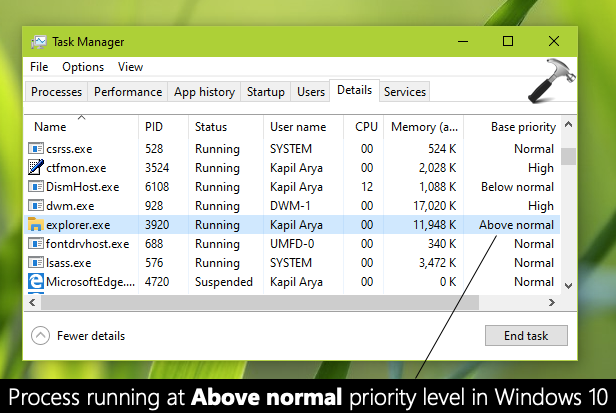
If you’ve Base priority column shown in the Details tab of Task Manager, you can see the exact level for a process. Below shown screenshot also illustrates this:
Here’s how you can change a process priority level. The priority level you set for a process is temporary. As soon as you restart the machine, the process will again have default or Normal priority level.
Page Contents
How to change a process priority in Windows 10
Method 1 – Set a process priority level using Task Manager
1. Right click on your taskbar and select Task Manager.
2. In the Task Manager, go to Details tab. On the Details tab, you will be able to locate all the processes currently on your system. Right click on the process for which you want to change priority level and go to Set priority and then select a level.
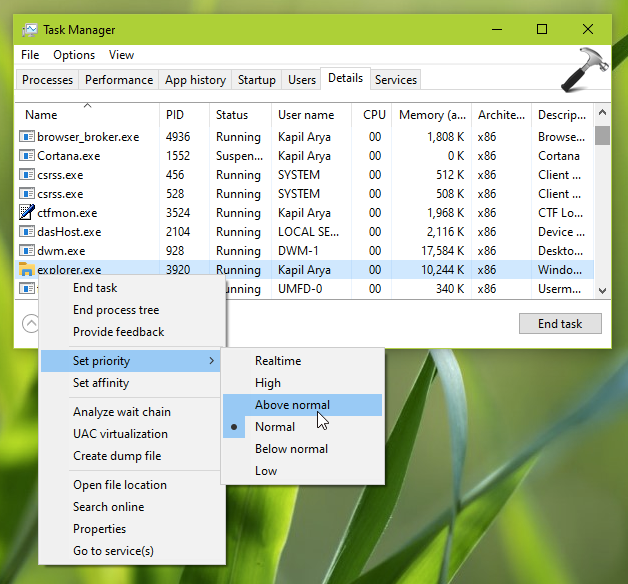
3. Close Task Manager.
Once you select a priority level, it should be applied to the process immediately. Note that setting the priority level to Realtime is often not recommended because it results in higher usage of system resources.
Method 2 – Set a process priority level using Command Prompt
1. Open Command Prompt.
2. Type following command and press Enter key:
wmic process where name="<PROCESS NAME>" CALL setpriority <PRIORITY LEVEL>
In above command, substitute <PROCESS NAME> with actual process name. And use the following numeric values for <PRIORITY LEVEL> you want:
- Realtime: 256
- High: 128
- Above normal: 32768
- Normal: 32
- Below normal: 16384
- Low: 64
For example, to set ‘explorer.exe’ process priority level to ‘Above normal’, one has to execute following command: wmic process where name="explorer.exe" CALL setpriority 32768. This result is shown in screenshot below.

3. Once you got ‘Method execution successful’ after executing the command, process priority level should be changed to what you’ve opted for. You can then close Command Prompt.
That’s it!
Read next: How to sign out other users in Windows 10.