Assigned access is the way to restrict a standard user account to a single Universal Platform App (UWP App) usage account. This means the standard user account can’t use any other app, but only the single app that is defined for assigned access mode. This feature is quite useful for the publicly used systems such as at cafe, trade places etc. It is thus also known by name of Kiosk mode.
Configuring the assigned access mode is quite easy in Windows 10. Here are the two ways you can use for this.
Page Contents
How To Configure Assigned Access In Windows 10
WAY 1 – Via Settings App
1. Right click Start Button or press  + X keys and select Settings.
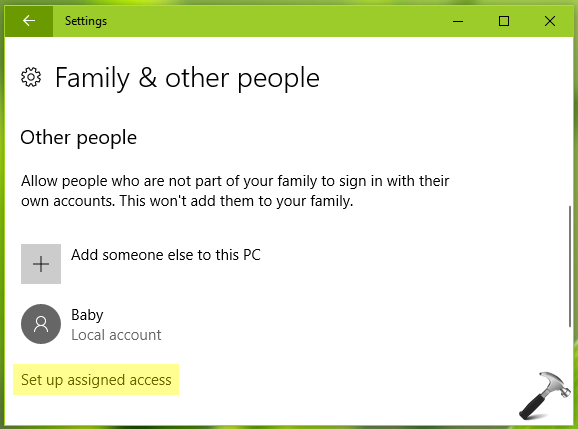
2. In the Settings app, navigate to Accounts > Family & other people.
3. Under Family & other people, click Set up assigned access.
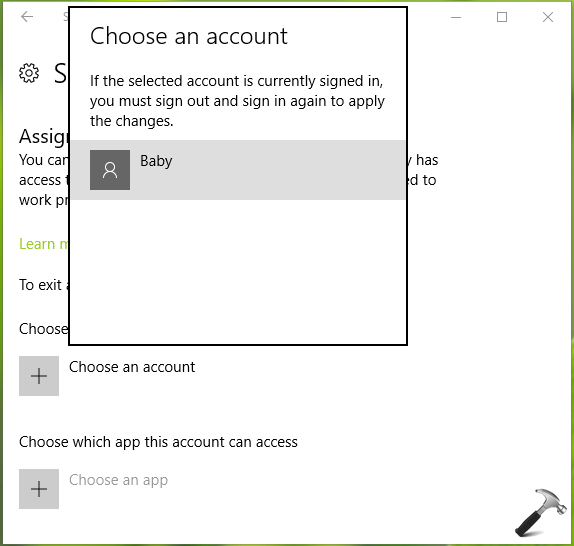
4. Next, click on Choose an account and select an user account to which you want to assign access.
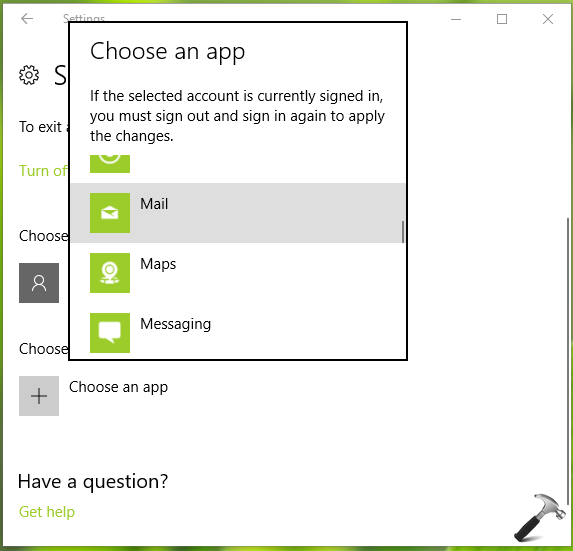
5. Moving on, click on Choose an app and then select the app to which you want to restrict above selected user account.
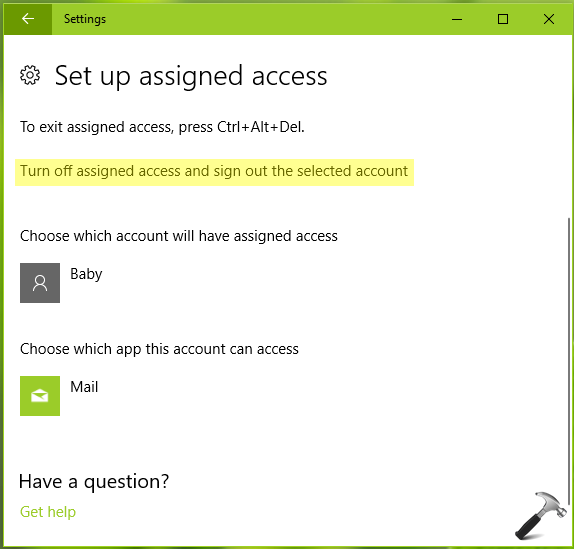
In this way, you’ve now configured assigned access.
To exit assigned access, you can simply press the Ctrl+Alt+Del key combination. Alternatively, you can click on Turn off assigned access and sign out the selected account link on the set up page itself.
WAY 2 – Via Windows PowerShell
1. In the search box on taskbar, type windows powershell and right click on Windows PowerShell from results, select Run as administrator.
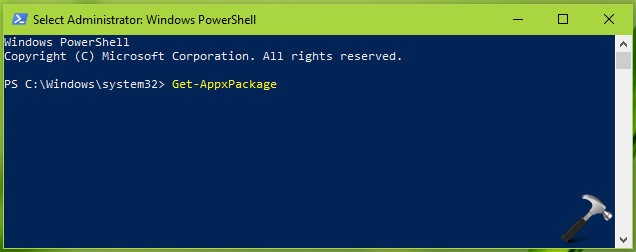
2. Next, in the elevated Windows PowerShell window, type following cmdlet and hit Enter key:
Get-AppxPackage
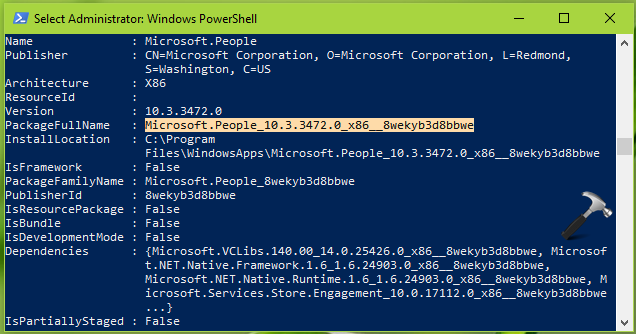
3. Now copy the PackageFullName value for the app you want to use for assigned access.
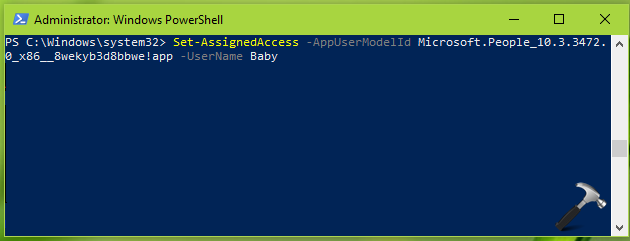
4. Then type following cmdlet and press Enter key:
Set-AssignedAccess -AppUserModelId <PackageFullName>!app -UserName <USERNAME>
*Replace <PackageFullName> with app package full name and <USERNAME> with user account you want to restrict.
This should configure the assigned access mode. To exit the mode, simply press Ctrl+Alt+Del key combination, as we mentioned earlier.
So this is how you can manage assigned access in Windows 10.
That’s it!