In today’s online world, security attacks are increasing at a challenging level. Attackers are developing new ways continually to target victims. On the other side of boat, tech giants are creating new solutions safeguard their customers. Windows Defender Application Guard (WDAG) is one of such solution which can help enterprise employees to remain safe from security breaches.
So the WDAG is a feature designed to help IT or enterprise admins to define trusted sites for their employees. Rest of the sites, which is not in the list defined by admins will be considered untrusted. This will prevent employees to visit untrusted website. When the employees hit untrusted site, they’ll be open in a virtualization based isolated container, which is independent of host operating system. In this way, the host operating system remains safe and couldn’t be compromised.
WDAG is disabled by default on Windows 10. Here’s how you can manage it.
Page Contents
How To Enable/Disable Windows Defender Application Guard
Windows Defender Application Guard System Requirements
WDAG have some basic requirements to operate. You can visit this Microsoft documentation to read about them.
How To Enable Windows Defender Application Guard
1. Open Control Panel > click Programs and Features.
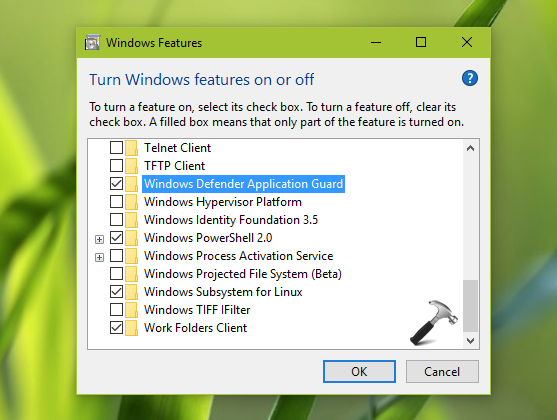
2. In left pane of Programs and Features, click Turn Windows features on or off link.

3. Under Windows Features box, scroll down and look for Windows Defender Application Guard option and check it. Click OK. In case if you see Turn Windows features on or off blank, see this fix.
4. Now open Microsoft Edge and from its menu, select New Application Guard window and thus Edge can then be used in protected mode leveraging power of this security feature.
How To Disable Windows Defender Application Guard
To disable this security feature anytime, you need to open Turn Windows features on or off and untick Windows Defender Application Guard option. This would immediately deactivate the feature.
That’s it!