Windows 10 is already best operating system (OS) of its series. But still there exists few tweaks that can help you to further increase the system performance of this OS. This article shares you one of those tweaks and help you to enhance productivity of your machine.
Page Contents
Disk Write Caching Feature In Windows 10
Disk Write Caching is an in-built feature in Windows which utilizes Random Access Memory and caches write commands sent to disks. This helps faster working drives to enhance performance by moving the slower links behind. As a result of this, the programs or apps using these disk resources works faster and provides great user experience. Hence, if you want to increase speed of your Windows 10, you must enable this feature.

Everything has its advantages and disadvantages and this applies to Disk Write Caching as well. Though it will help you to increase your system performance but it will also increase probability of losing data in case of system failures. If you believe that your system configuration is robust and there are less chances of failing system due to power loss and failing of hardware resources, you can enable Disk Write Caching as mentioned below.
How To Enable Disk Write Caching In Windows 10
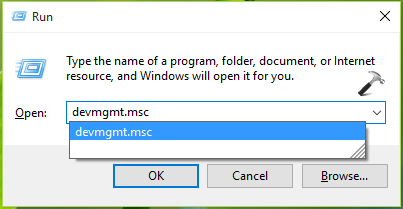
1. Press  + R and type devmgmt.msc in the Run, hit Enter key to open Device Manager snap-in.
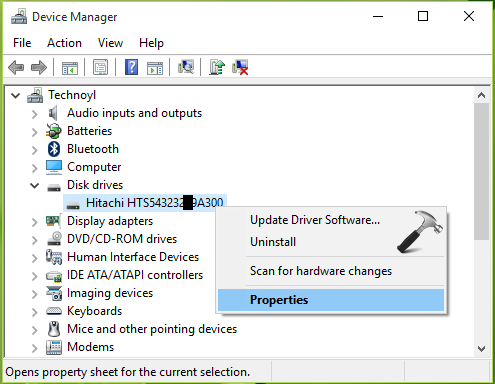
2. In the Device Manager window, expand Disk drives, right click over anyone of the disk listed there and select Properties.
3. Then in the drive’s property sheet, switch to Policies tab. Here, check the Write-caching policy option. Once you enabled this option, the Disk Write Caching starts working for the corresponding drive.
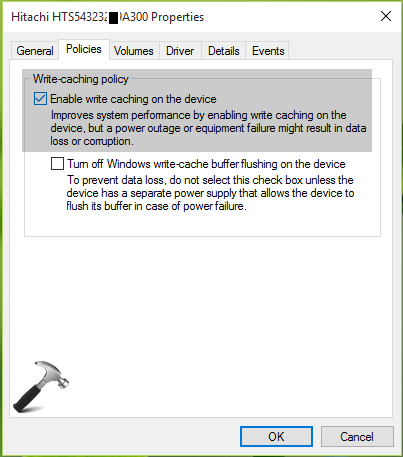
Click OK. You can now close Device Manager and return to desktop, if you like. If you later want to disable Disk Write Caching, then just uncheck the Write-caching policy option.
That’s it!