
The might be instances when you need to take ownership of registry keys. Without taking the ownership i.e. changing existing owner to yourself, you might not be able to edit registry data. In Windows, each object (such as file, folder, registry key etc.) has its owner. To edit the content under these objects, you need to take their ownership.
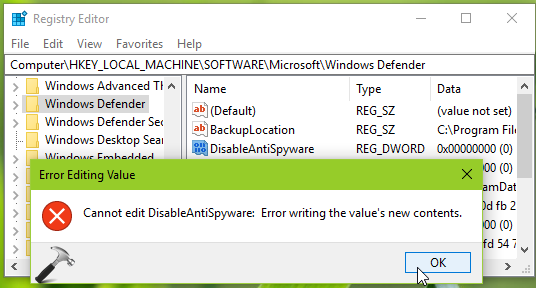
For example, a registry key is well protected by permissions and tied to SYSTEM as its owner. Now when you edit content for this registry key, you’ll see this error:
Page Contents
Cannot edit <object>: Error writing the value’s new contents.
So if you can’t figure out how you’d take ownership of registry keys, these steps will help you with that.
How To Manually Take Ownership Of Registry Key In Windows 10/8.1/8/7
Disclaimer: We recommend you to create a System Restore point first.
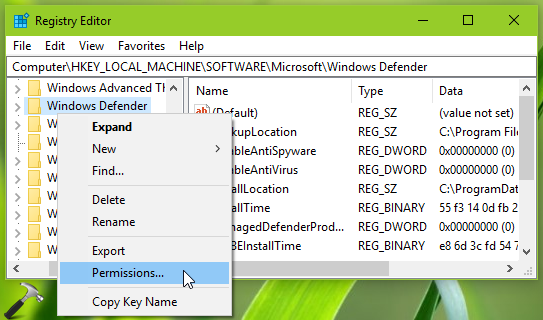
1. Right click on the registry key, ownership of which you want to take and select Permissions.
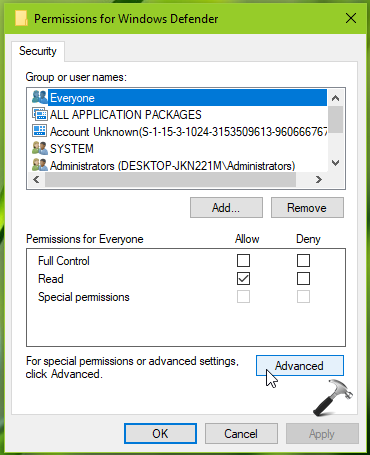
2. In the Permissions window, click Advanced button.
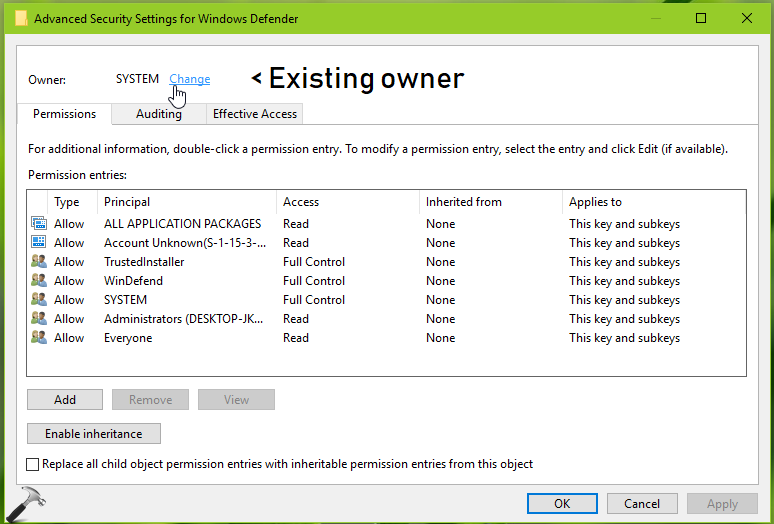
3. Now in Advanced Security Settings window, you’ll see that the existing owner for registry key is mentioned here. Click on Change link next to owner name.
4. Next, in Select User or Group window, click Advanced.

5. Moving on, in next window, click on Find Now. From Search results, pick the account you want to set as owner for the registry key and click OK then.
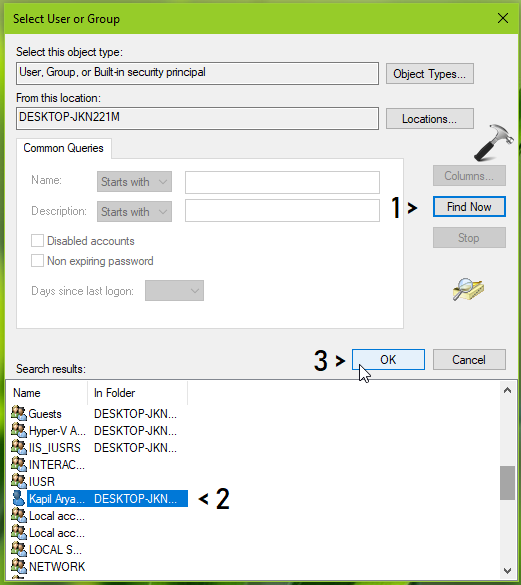
6. So you must have the select account name displayed on Select User or Group window, click OK.

7. In this way, you’ve now changed the owner and hence taken ownership. The new owner must be listed now on Advanced Security Settings window. To take ownership for all objects under the registry key, check Replace owner on subcontainers and objects option. Click Apply followed by OK.

Above mentioned steps are illustrated in this video:
BONUS TIP: If you need to give full control for registry key to your account, then try this.
1. Right click on the registry key, select Permissions.
2. In the Permissions window, click on Add button, if you can’t find your account under Group or user names. Follow steps similar to steps 4-6 mentioned above and add your account.

3. Finally, select your added account and under Permissions, check Allow box for Full Control and Read. Click Apply followed by OK.

Hope you find the guide useful!


I can change permissions in files and folder to everyone or administrator and when i try and delete said file it says i need permission from everyone or administrator. what am i doing wrong?
^^ Have you taken ownership already?