In Windows, sometimes taking ownership of files or folder becomes mandatory. Especially when you need to deal with objects that are well protected by permissions, taking ownership is the only way. In our past, we’ve shared you the guide to take ownership of registry key in Windows 10.
Now a little bit similar article, which will show you step-by-step process for taking ownership of files and folders in Windows 10. We’ve got the UI method and Command Prompt method, so try them out as per your convenience and take ownership of files or folder you need for.
Page Contents
Take Ownership Of Files Or Folders In Windows 10
Method 1 – Using Security Settings Of File Or Folder
1. Right click on the file or folder whose ownership you want to take and select Properties.

2. On the property sheet, switch to Security tab and click Advanced.
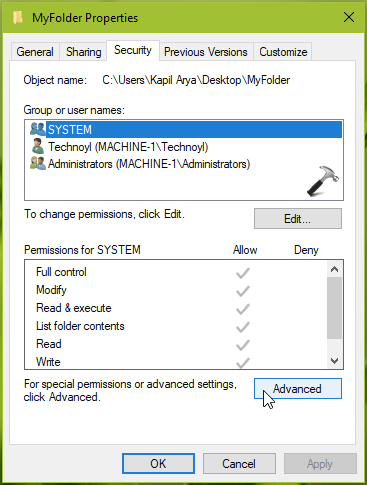
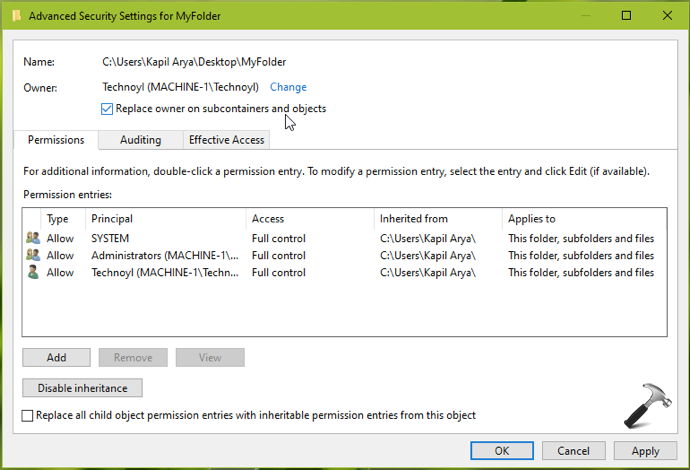
3. Next, under Advanced Security Settings window, click on Change link next to Owner. As you can see in the below screenshot, the current owner name mentioned is SYSTEM. When we will take ownership, it will be showing our user name.

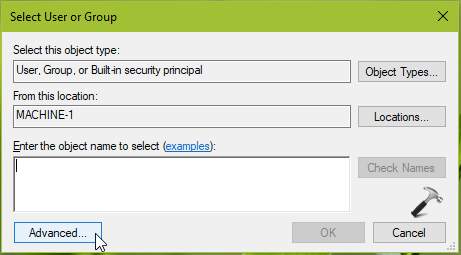
4. Then under Select User or Group window, click on Advanced button.
5. Moving on, in next window, click on Find Now first. Then from Search results, pick up the account you want to which you want to make the owner of content. Double click on that account name.
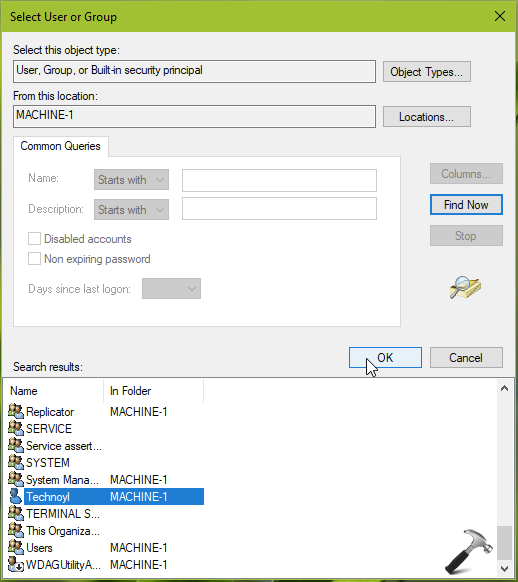
6. This will show you the account added back in Select User or Group window, so click OK.

7. Now back in Advanced Security Settings window, check Replace owner on subcontainers and objects. Click Apply, followed by OK.
8. In the Windows Security confirmation prompt, click OK. Click Apply, OK in rest of windows we opened so far and close them.

This completes the process of taking ownership. It is illustrated in following video:
Method 2 – Using Command Prompt
The UI method mentioned above is quite lengthy. So sometimes, if you want to quickly take ownership of files and files, prefer to use this method.
1. Open Command Prompt.
2. We’ll now use command to take ownership to currently logged user. So type below mentioned command and press Enter key.
For files, type this command:
takeown /F "<FILE-NAME-WITH-LOCATION>", for example takeown /F "C:\Users\Kapil Arya\Desktop\test.doc".
For folders, type this command:
takeown /F "<FOLDER-NAME-WITH-LOCATION>" /R /D Y, for example takeown /F "C:\Users\Kapil Arya\Desktop\MyFolder" /R /D Y.

3. If you’ve successfully taken ownership, you’ll be notified after command execution. Once done, close Command Prompt.
That’s it!
Read Next: Allow/Prevent Users To Take Ownership Of Files Or Other Objects.