Mapping a Network Drive helps to access all the devices on the same network that have network discovery enabled. Whatever files or folders are shared in the networked drive, will be accessible to all the devices. This tutorial will show you How to Map a Network Drive in Windows 11.
Page Contents
How to Map a Network Drive in Windows 11
Using a USB every time to share files or folders is time-consuming because there are more efficient solutions to share files and folders across the same network.
Enable the Network Discovery
To Map a Network Drive, we have to enable Network Discovery on the devices to access the networked drive. This feature is essentially a feature that allows your PC to be detected by other devices that are on the same network. Follow the below steps to enable the Network Discovery:
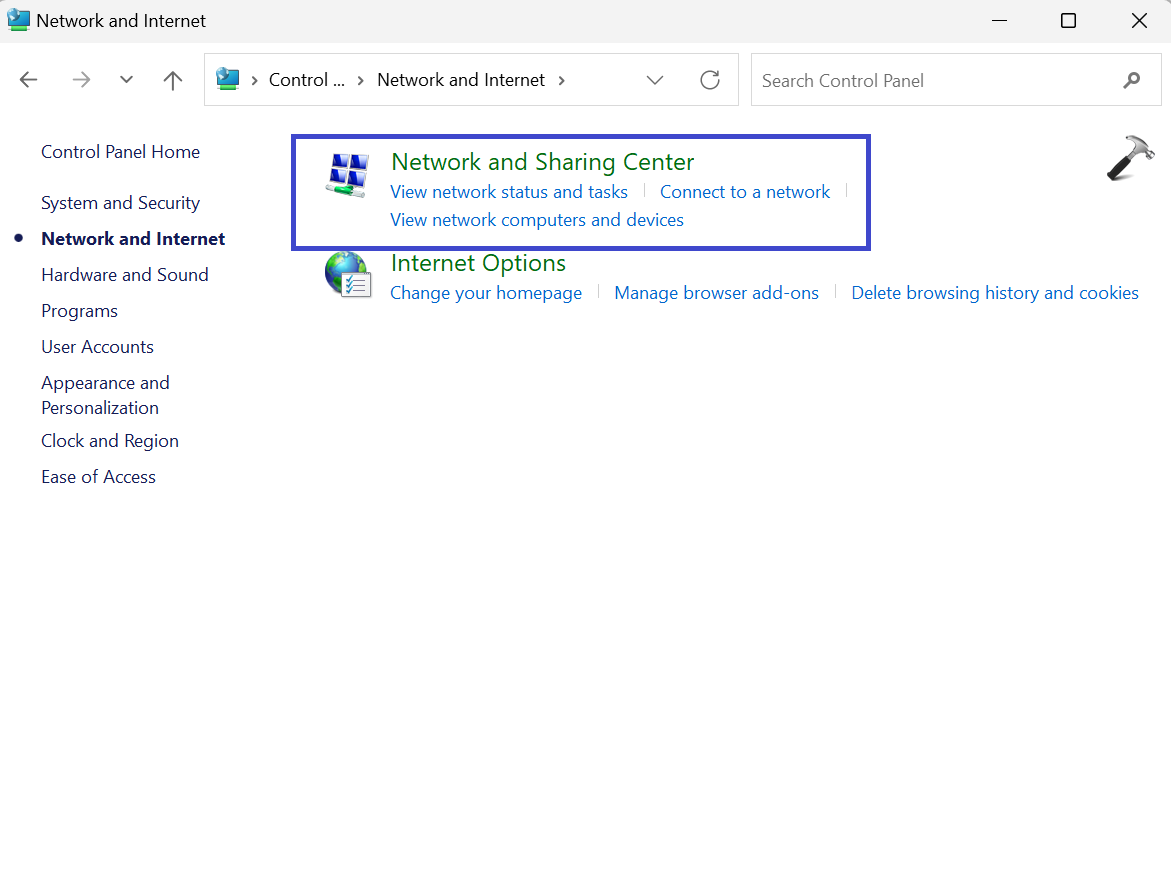
1. Open Control Panel and click on the “Network and Internet” option.

2. Now, click on “Network and Sharing Center”.
3. In the left pane, click on the “Change advanced sharing settings” option.

4. Now, you will go to the “Network & internet” in the Settings App.
Turn on “Network discovery” option.
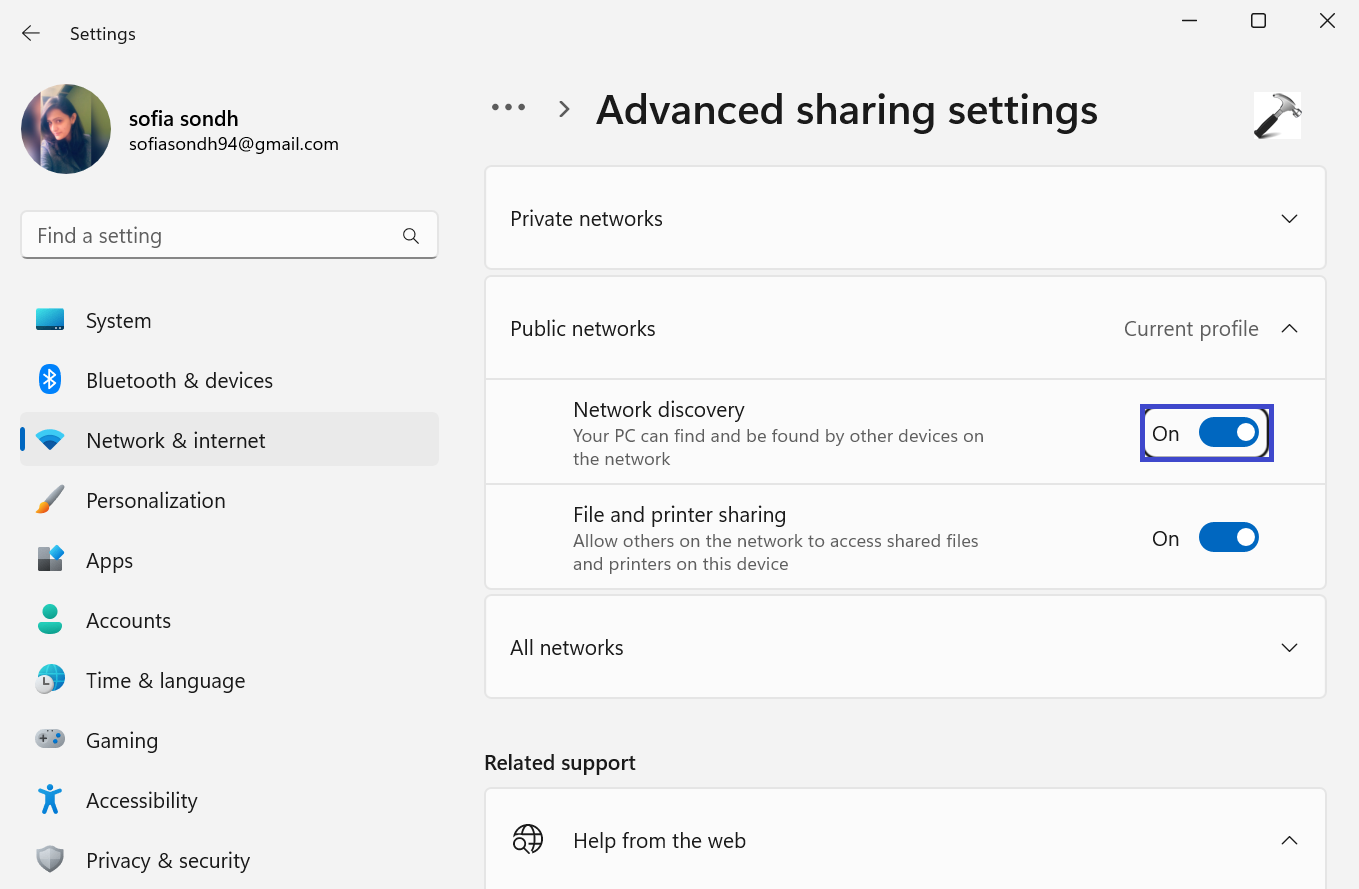
5. If you want to share files from your computer to network, then also select the turn on “File and printer sharing” option.

6. Close the Window and restart your PC to apply the settings.
Map a Network Drive
When you Map a Network Drive, the files and folder in that location will be available to all the PCs on the network. If you don’t wish to share, you can enable password protected sharing from the Control Panel. Follow the below steps to Map a Network:
1. Open File Explorer.
2. Click on three dots (…) and select “Map network drive” option from the drop-down menu.

3. In the folder option, select “Drivers” and click on “Browse..”

4. Click on the network name to show a list of devices that are present on the network.

5. Navigate to the location that you wish to map.
Click OK.
6. If you Windows to reconnect to the mapped network drive every time you sign-in in your account, then select “Reconnect at sign-in” option.

7. Click on Finish.
8. Close the Window and restart your PC to apply the settings.
Now, you will able to see your network drive in the File Explorer under the Network Locations.
Video guide
Check live demonstration with this video guide:
That’s It!