
The best and foremost thing about Windows is its customization ability. It is already evident that we can’t directly change the device names in the Device Manager because Windows doesn’t provides us the native options to rename the entries there. Today in this article, I’d like to share you the one and only approach that is via registry modification to modify the device names.
Prior to making any changes in the registry, I suggest you to make a System Restore point. This will help you in case if you’ve done any mistakes in the registry manipulation procedure which is described as follow:
How To Rename Devices In Device Manager For Windows 10/8/7
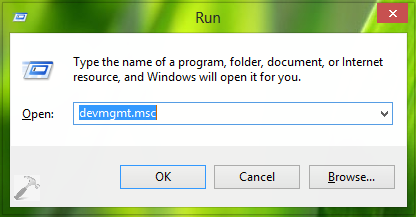
1. Press  + R and put devmgmt.msc in Run dialog box and hit Enter to open Device Manager.
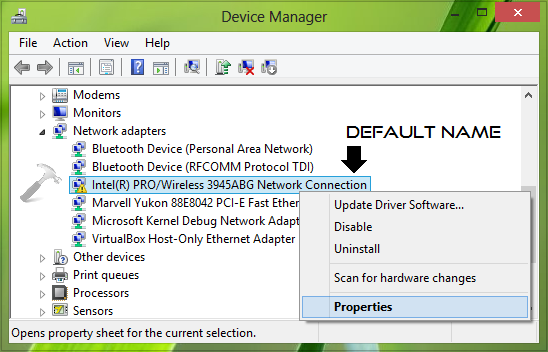
2. Here look for the device name you’d like to rename, for instance, we pick the Intel(R) PRO/Wireless 3945ABG Network Connection which is basically the WiFi driver on the system. Now right click over it and select Properties.
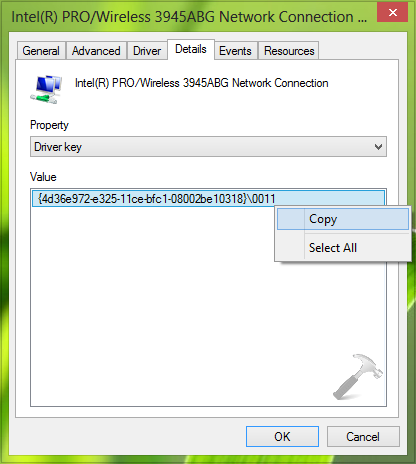
3. In the Properties window, select the Driver key property from drop-down list. Copy the Value as shown in below image.
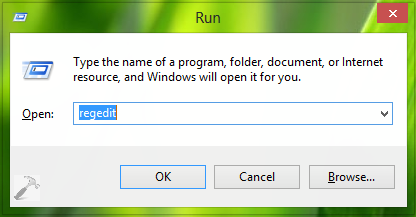
4. Press + R and put regedit in Run dialog box to open Registry Editor (if you’re not familiar with Registry Editor, then click here). Click OK.
5. Navigate here:
HKEY_LOCAL_MACHINE\SYSTEM\ControlSet001\Enum
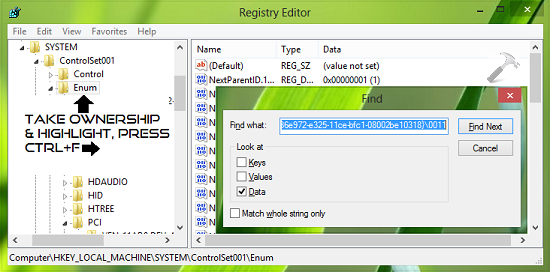
6. In the left pane of this location, take the ownership of Enum key as per method of this article or using RegOwnershipEx. Make sure you have full control on the key as far as permissions are concerned. Now highlight the same key i.e. Enum and press Ctrl+F, in Find window so appears; paste the driver key value we’ve copied in step 3 and hit Enter.
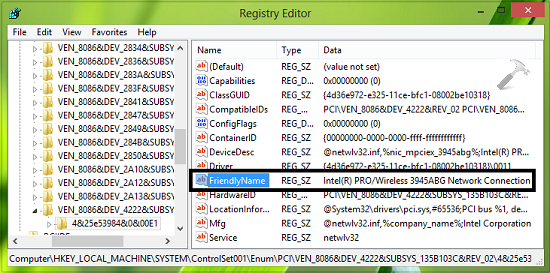
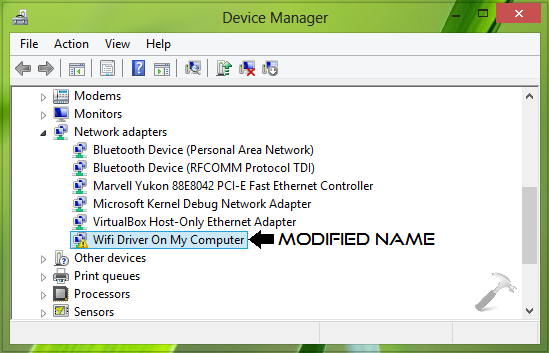
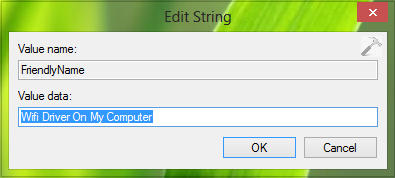
7. For the location so resulted, in the right pane look for the FriendlyName named registry string (REG_SZ), it must be having the same name for the device we’re looking to rename. Double click on the same string to modify and put your desired name under the hood of Value data, suppose we put Wifi Driver On My Computer. Click OK.
Finally, close the Registry Editor and get back to Device Manager window. As shown in the step 2, right click the device entry for which we changed the name and this time select Scan for hardware changes. The name you inputted in step 7 should appear now as shown in first screenshot of the article.
Here is the live illustration of this trick:
That’s it!

thanks and how delete Local Area Connection *2 *6 *7 *8 *13 ?
Haha.. too smart man! Keep writing these article :)
^_^ AwSoMeeee
Nice find Kapil!
Hello Kapil,
Very interesting indeed! I have a question (or two).
1 – In which order does the ClassEnumerator (in my case, for CLSID_VideoInputDeviceCategory) list the devices?
2 – Is there a way to change this order? I have a piece of legacy software, that always uses “the first” device. So if I have two, how can I change the place of the second one to become first?
How i keep the changes?? i restart my laptop and everything is like before
Yes . same problem here. After a reboot everything comes back to as it was before.
^^ Which Windows OS you’re on?
What if there is no “FriendlyName” listed for the device in the Regeditor?
^^ You can create one instead.
Lifesaver article. Thanks a ton!
^^ Glad it helped!
sadly this doesn’t work on GPU’s
This no longer works on windows 8.1