In Windows 11, Microsoft Defender is an in-built antivirus software. This tool helps in protecting your system from malware, viruses and other such threats. While the real-time protection is on, Microsoft Defender prompts users to take actions on detecting malware. Users can even manually scan with Microsoft Defender in Windows 11.
In this post, learn how to scan your system manually using Microsoft Defender. So, let’s get started without further ado.
Page Contents
Manually scan with Microsoft Defender in Windows 11
Method 1: Scan the System Manually Through Windows Security
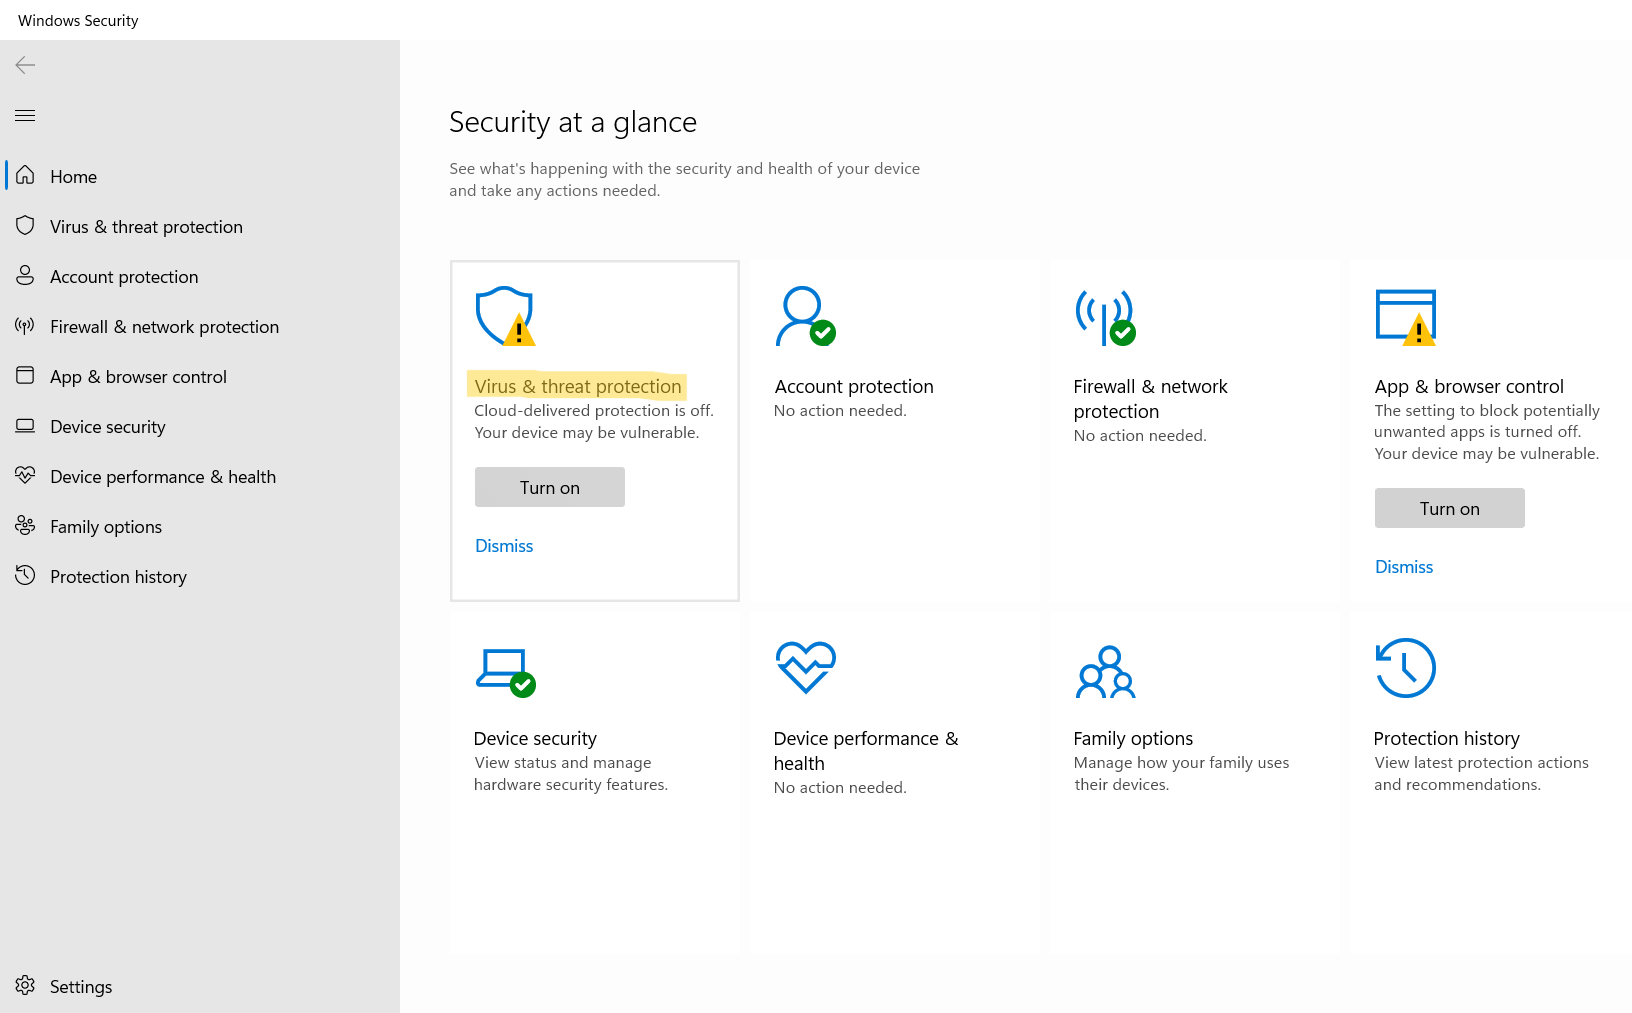
1. Open Windows Security and then, select Virus & threat protection.
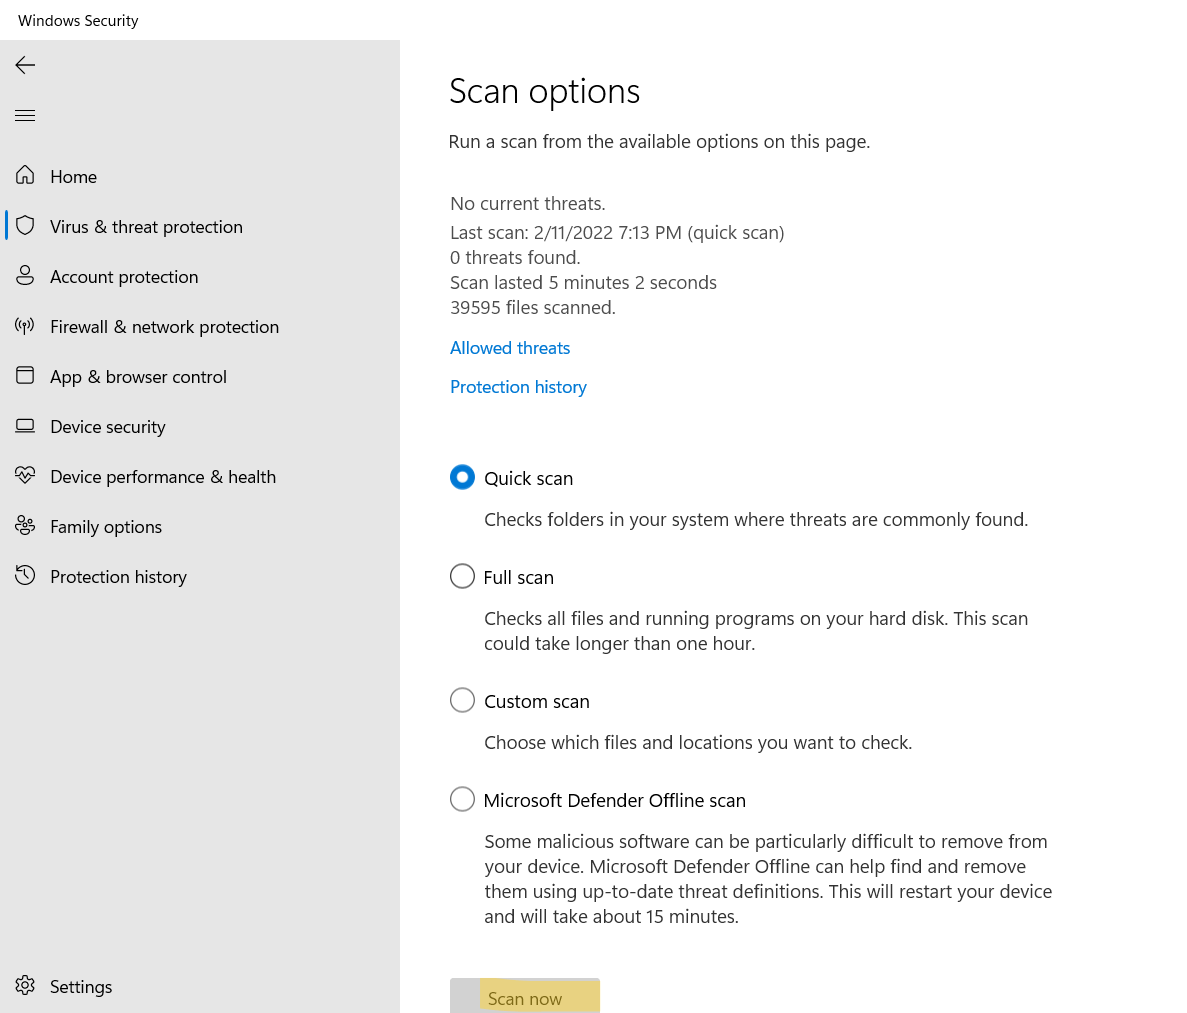
2. In the Current threats section, click on Scan options.
3. Now, you need to choose one option from the given options – Quick scan, Full scan, Custom scan and Microsoft Defender Offline scan. Once selected, click on Scan now.
Method 2: Manually Scan the System Through Context Menu
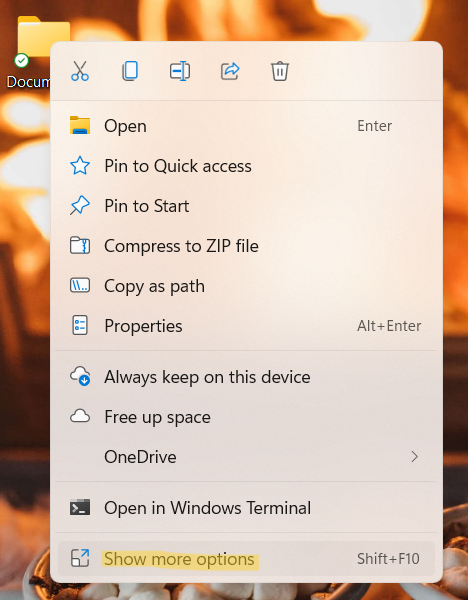
1. Firstly, select files, folders or drives that you like to scan manually on your system.
2. Now, right-click on the chosen files and choose Show more options from the menu.
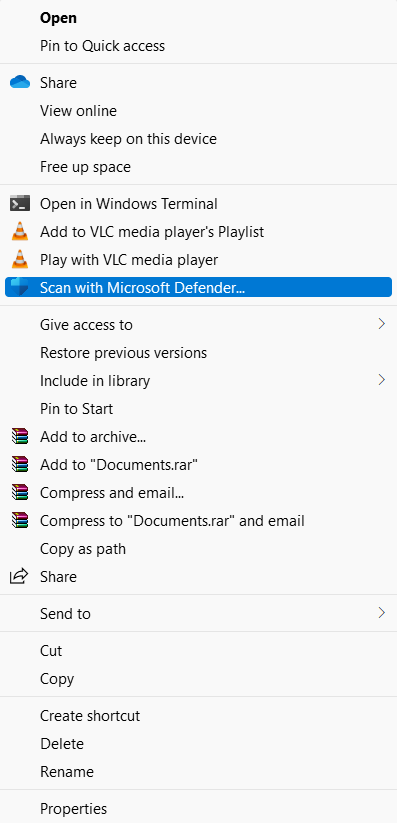
3. After that, click on Scan with Microsoft Defender.
Next, you will come across the scan results.
Method 3: Scan your PC Through Windows PowerShell
1. Open Windows Terminal and choose Windows PowerShell.
2. After that, copy-paste the following command:
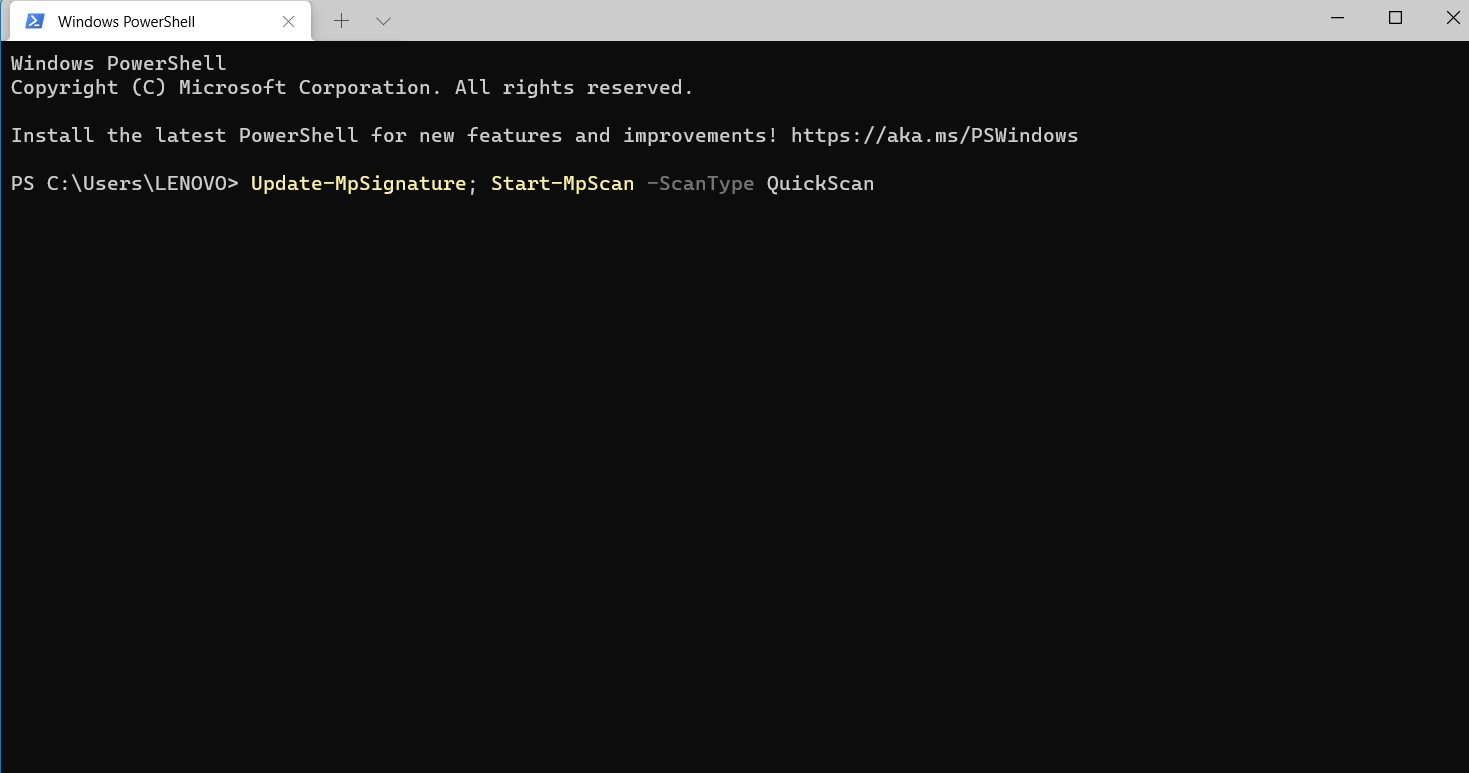
a) Update and Quick scan
Update-MpSignature; Start-MpScan -ScanType QuickScan
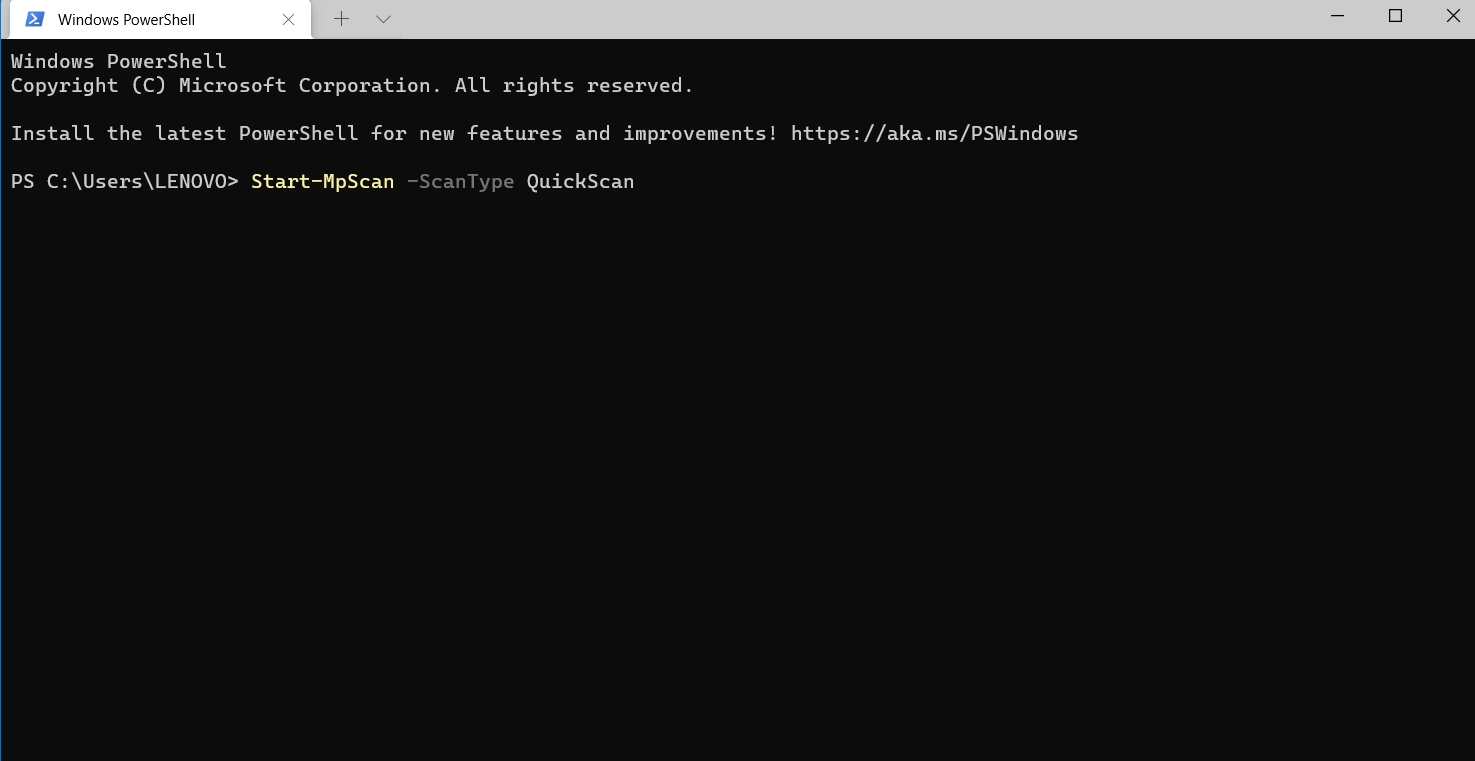
b) Quick scan
Start-MpScan -ScanType QuickScan
c) Full scan
Start-MpScan -ScanType FullScan

d) Custom scan
Start-MpScan -ScanType CustomScan -ScanPath "Full Path"
In this command, replace Full Path with the full path of the file, folder or drive that you like to scan.
For reference:
Start-MpScan -ScanType CustomScan -ScanPath "C:\Users\LENOVO\OneDrive\Desktop\Documents"

Method 4: Manually Scan your Windows PC through Command Prompt
1. Open Windows Terminal and choose Command Prompt.
2. After that, copy-paste one of the following commands:
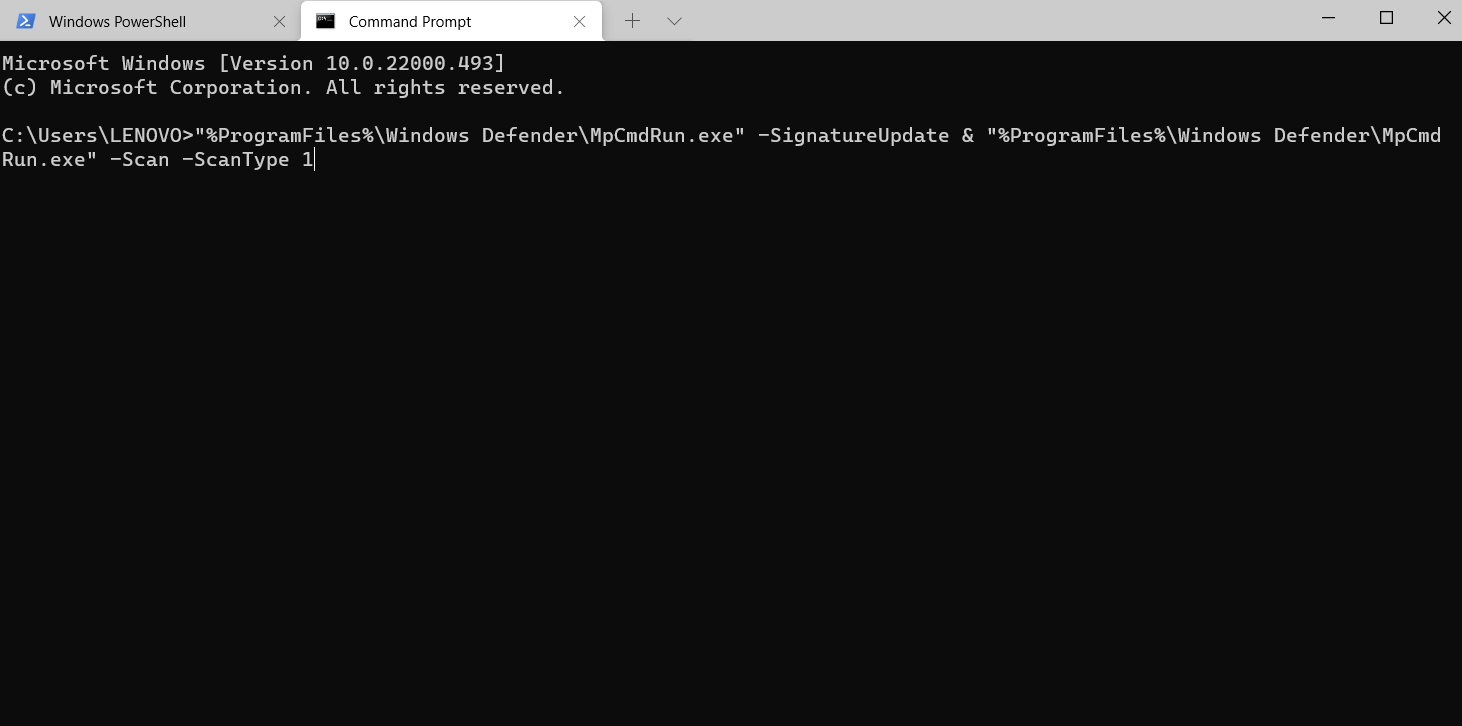
a) Update and Quick scan
"%ProgramFiles%\Windows Defender\MpCmdRun.exe" -SignatureUpdate & "%ProgramFiles%\Windows Defender\MpCmdRun.exe" -Scan -ScanType 1
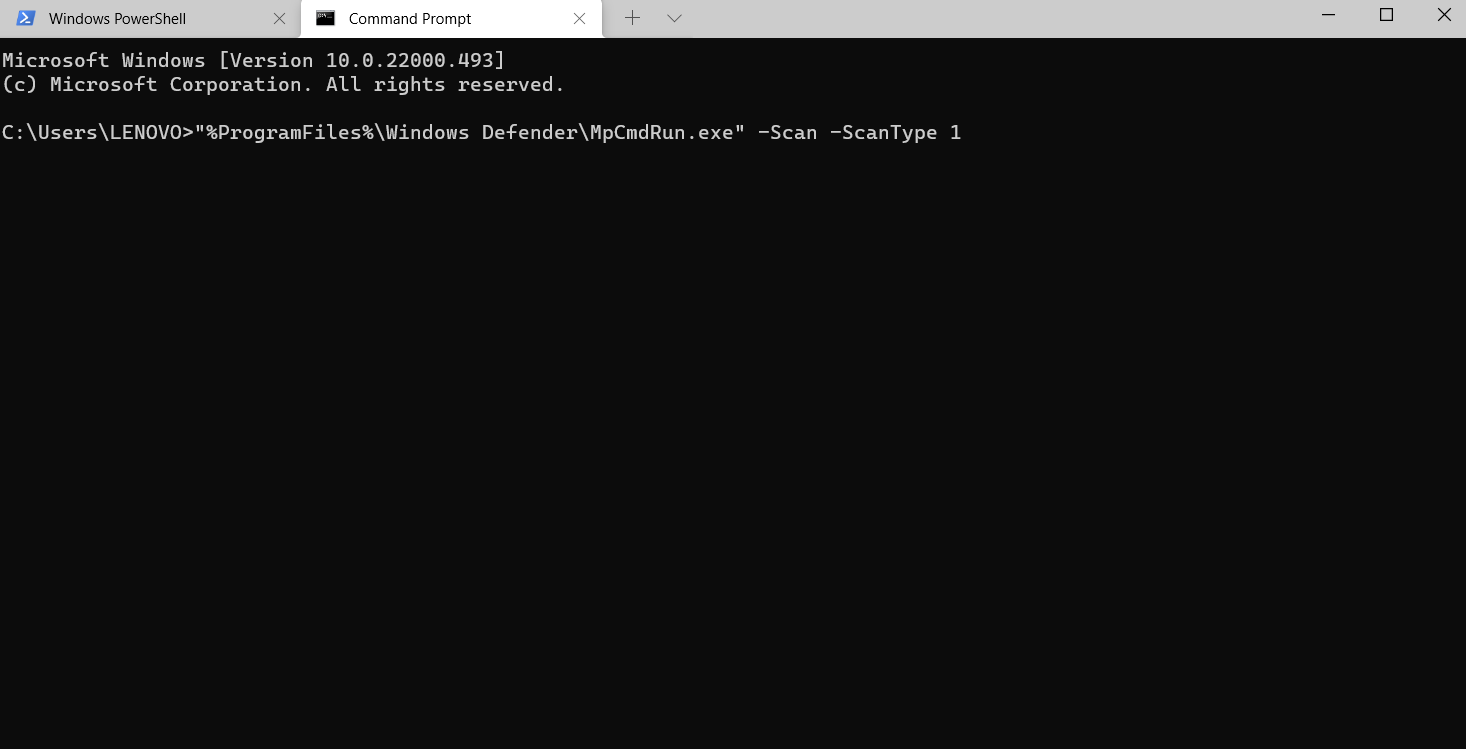
b) Quick scan
"%ProgramFiles%\Windows Defender\MpCmdRun.exe" -Scan -ScanType 1
c) Full scan
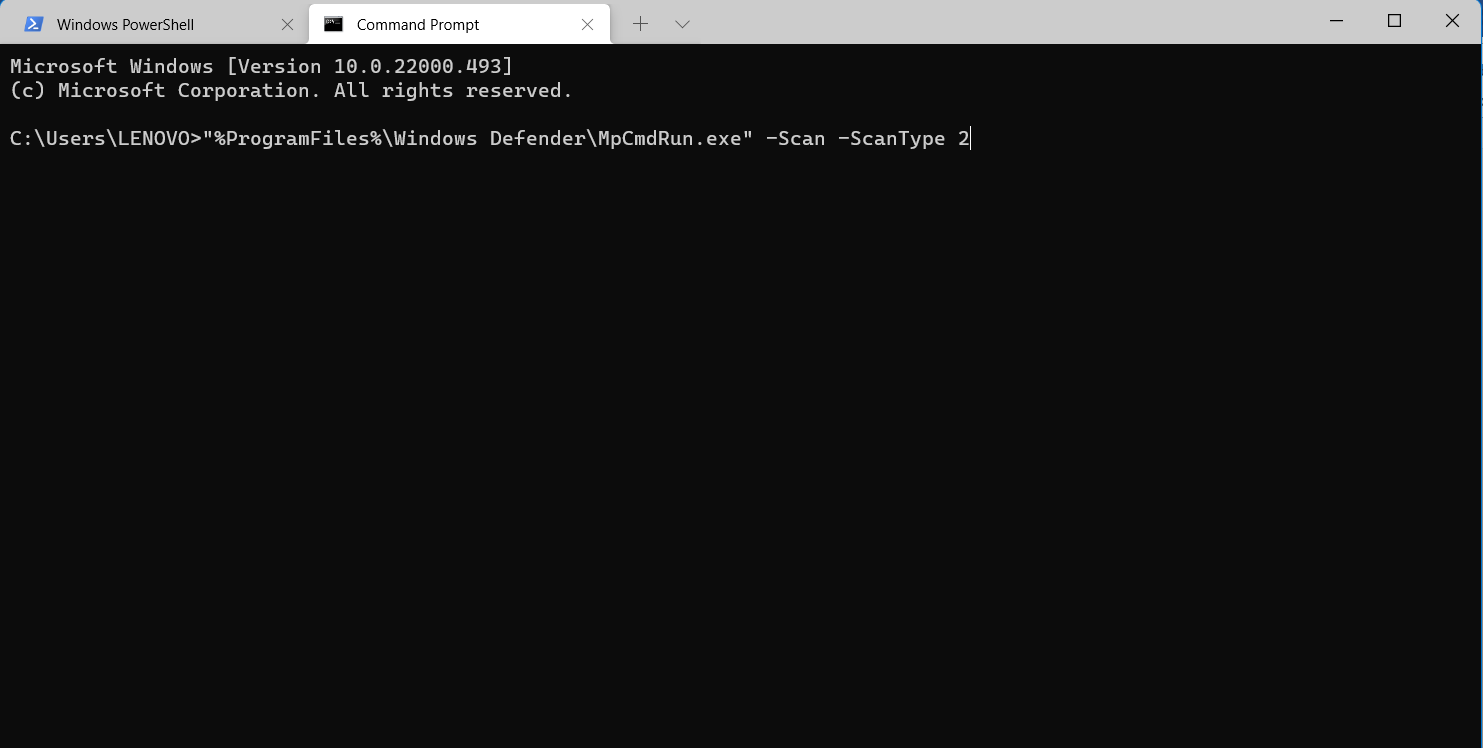
"%ProgramFiles%\Windows Defender\MpCmdRun.exe" -Scan -ScanType 2
d) Custom scan
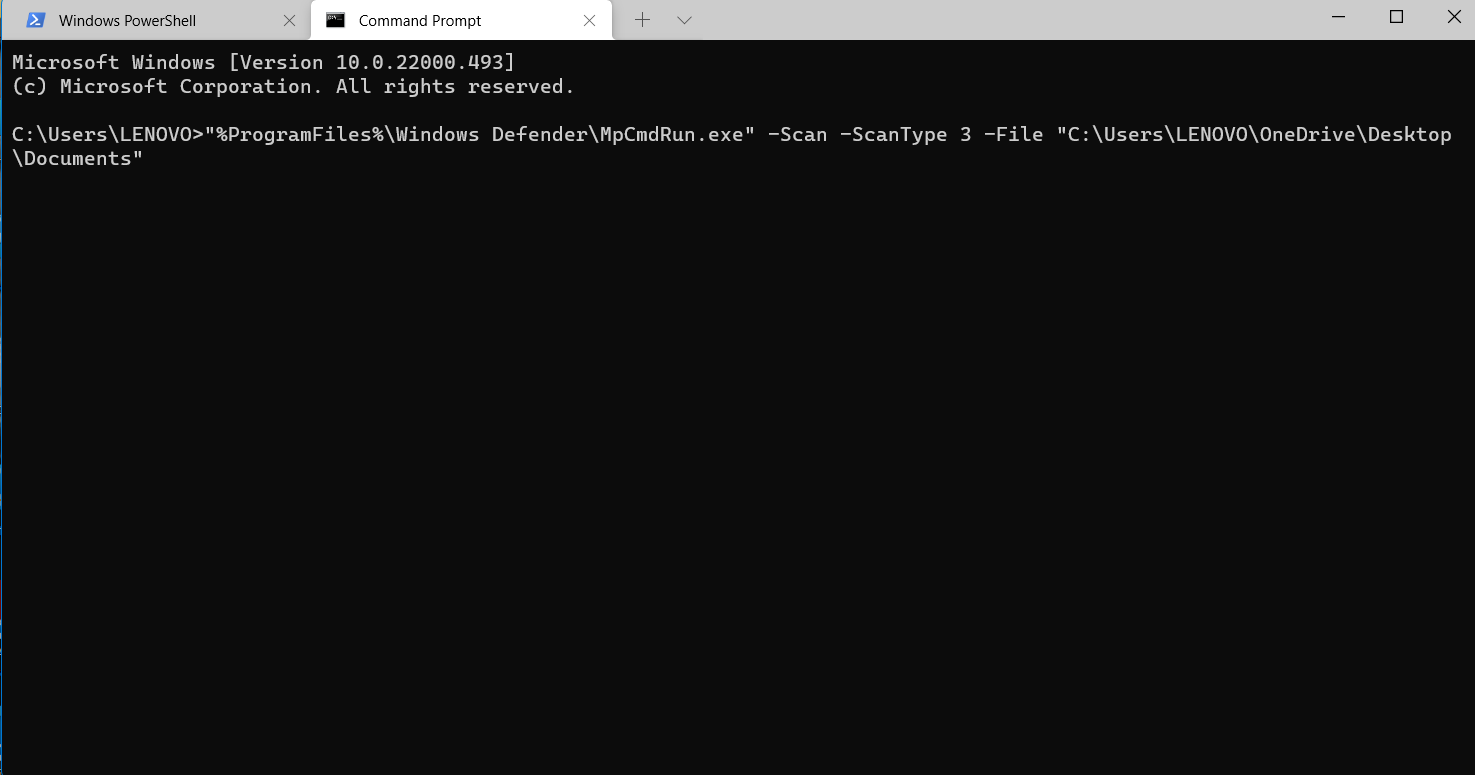
"%ProgramFiles%\Windows Defender\MpCmdRun.exe" -Scan -ScanType 3 -File "Full Path"
In this command, replace Full Path with the full path of the file, folder or drive that you like to scan.
For reference:
"%ProgramFiles%\Windows Defender\MpCmdRun.exe" -Scan -ScanType 3 –File "C:\Users\LENOVO\OneDrive\Desktop\Documents"
3. Once executed, you will be notified from Windows Security to take necessary actions.
So, these are some ways to manually scan with Microsoft Defender in Windows 11.