

Windows 8 differs the previous editions in many ways, that’s for sure. Some features of previous editions are still available in this OS, but hidden by default. Sometimes normal users can’t point out such features and they seek for help from others.
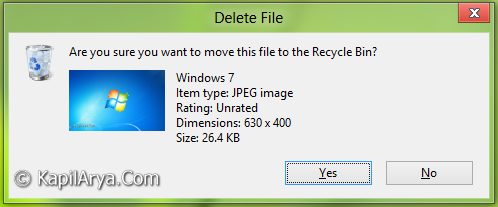
We all know that previous editions provide the above shown delete confirmation prompt, so that we can avoid mistakes to delete non-deletable files. But in Windows 8, no such confirmation prompt is given. However the feature is still there. Here is how to configure this:
Page Contents
Manual FIX : No Delete Confirmation Dialog In Windows 8.1
1. Right click on Recycle Bin desktop icon and pick Properties.
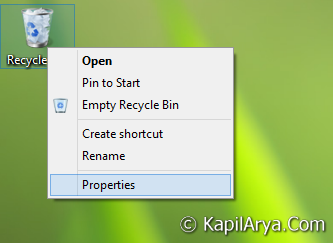
2. In the Recycle Bin Properties window, apply check mark against Display delete confirmation dialog.

3. Click Apply followed by OK. You’ll got the confirmation prompt before every delete, now onwards. That’s it.
Here are the other ways to do this:
Using Registry Editor
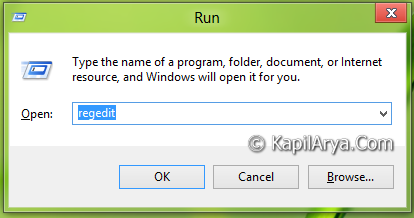
1. Press  + R and put regedit in Run dialog box to open Registry Editor (if you’re not familiar with Registry Editor, then click here). Click OK.
2. Navigate here:
HKEY_CURRENT_USER\Software\Microsoft\Windows\CurrentVersion\Policies
3. In the left pane, create a new key named as Explorer.
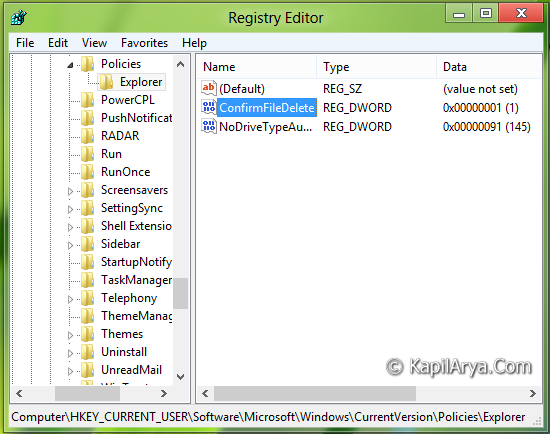
4. Now in the right pane of above created key, create a DWORD named ConfirmFileDelete.

5. Right click on above created DWORD, select Modify. Use following values in Value data section:
To NOT Display Delete Confirmation Prompt, Put 0 (Default)
To Display Delete Confirmation Prompt, Put 1
6. Repeat step 3 and step 4 for following location as well:
HKEY_LOCAL_MACHINE\SOFTWARE\Microsoft\Windows\CurrentVersion\Policies
Don’t make changes to Value data section of this DWORD.
7. Close Registry Editor and reboot to get results.
Download Direct Registries
To made the work easy, we’ve created direct registries. All you need to do is to open these files with Registry Editor. Click Yes for prompts.
Reboot and get results.
Using Group Policy Editor
1. Press +R and put gpedit.msc in Run dialog box.

2. Navigate here:
User Configuration -> Administrative Templates -> Windows Components -> Windows Explorer
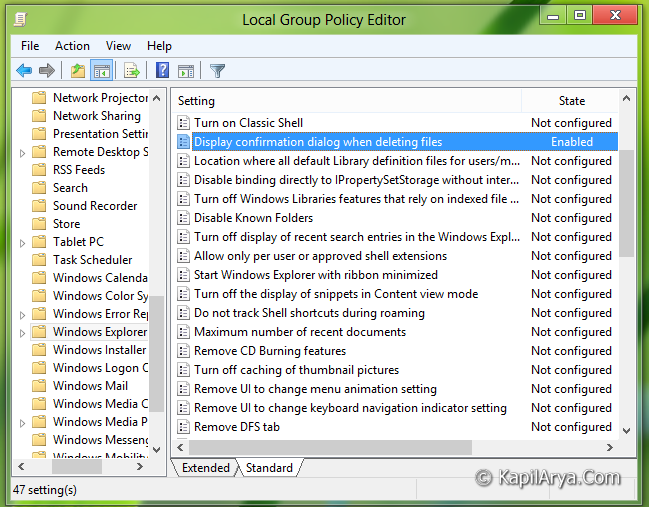
3. In the right pane, click on policy Display confirmation dialog when deleting files. You will get this window:

4. Choose as per:
To NOT Display Delete Confirmation Prompt, Select Not Configured or Disabled (Default)
To Display Delete Confirmation Prompt, Select Enabled
Click Apply followed by OK after selection.
5. Close the Group Policy Editor and reboot to get results.
P.S. : After using method for Registry Editor or Group Policy Editor, the option for manual method is greyed out, like this:

That’s it!



AwEsOmEEEE ^_^
manual method is gud toattempt
Good point selected for registry….
Is there any method to customize the delete confirmation dialog???
^^ Why do you want to do that?
Just asking !!!!!!!!!!!!!
^^ Not impossible, and not have enough idea right now to tell you about this. I’ll post a tutorial if I got the way to do that :)