
In our past, we’ve posted many articles that require you to make changes in registry. Though, IT professionals mostly prefer to deploy Group Policy settings but sometimes they need to deal with registry only. For such cases, deployment of registry using Group Policy becomes a prime concern.
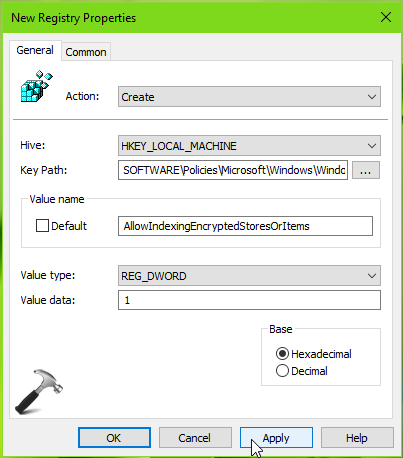
This article will show you step-by-step approach to deploy a registry key or item using Group Policy. To illustrate this process, we’ll create AllowIndexingEncryptedStoresOrItems registry DWORD at HKEY_LOCAL_MACHINE\Software\Policies\Microsoft\Windows\Windows Search and set it to 1. This registry DWORD is created to allow Windows 10 to index encrypted files.
Deploy A Registry Key Using Group Policy
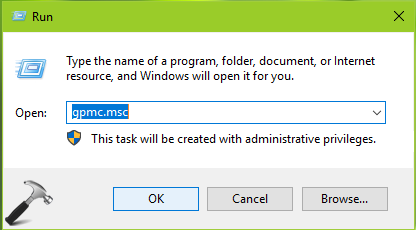
1. Press  + R and type
 gpmc.msc in Run dialog box to open Group Policy Management snap-in. Click OK.
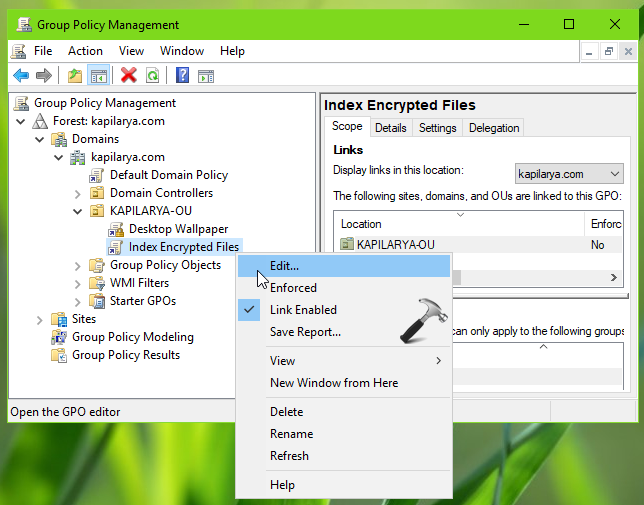
2. In Group Policy Management window, right click on your preferred domain/OU and select Create a GPO in this domain, and Link it here. If you already created a GPO, then you can use Link an Existing GPO instead. Then right click on GPO Object created so far and select Edit.
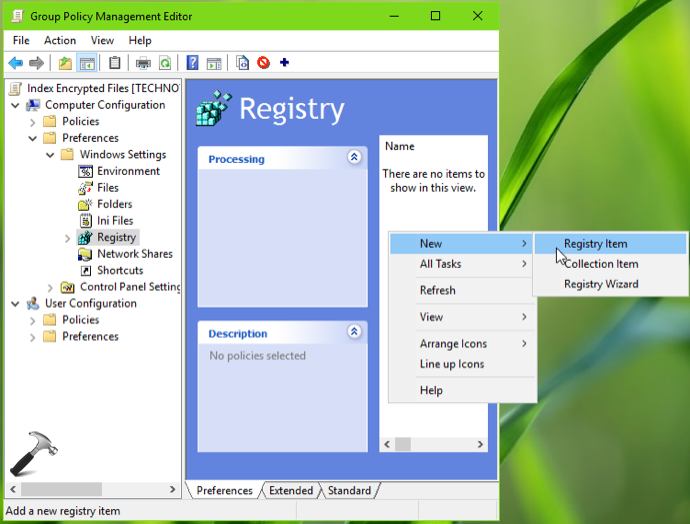
3. This will open Group Policy Management Editor window. If the registry key you want to deploy is machine based, simply go to Computer Configuration > Preferences > Windows Settings > Registry. Else, if it is user based, go to User Configuration, Preferences and proceed to Registry folder. In right pane of Registry, right click and select Registry Item.
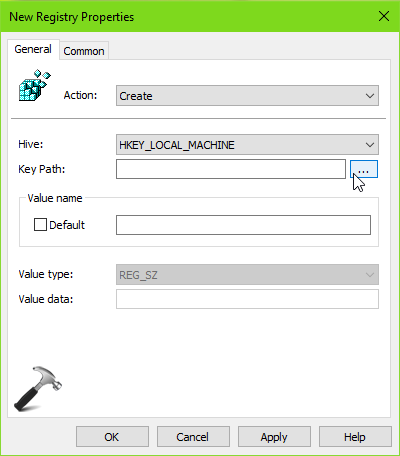
4. Then under New Registry Properties, select Action as Create to deploy new registry key. Select Hive and then click on browse button.
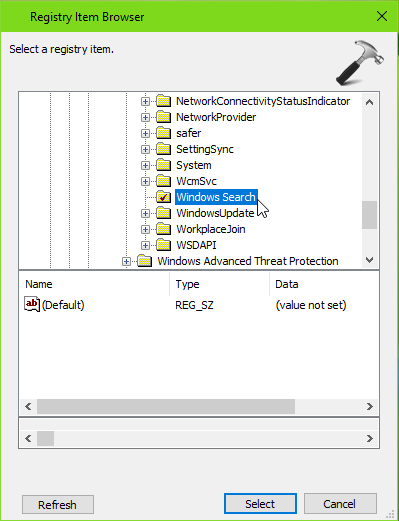
5. Moving on, in Registry Item Browser, locate the registry key and click Select.
6. Next, back in registry property window, create the registry item such as registry DWORD, string etc and set its preferred Value data. Click Apply.
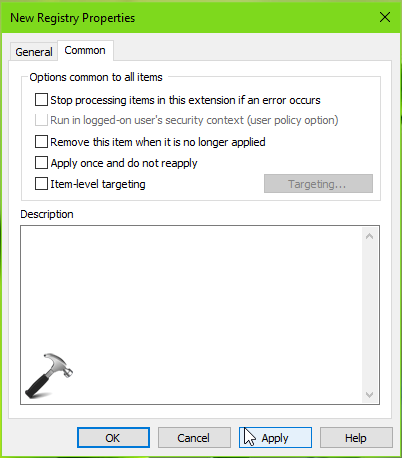
7. On this property window, you can switch to Common tab which allows to manage additional options for this registry item. Select your option and click OK.
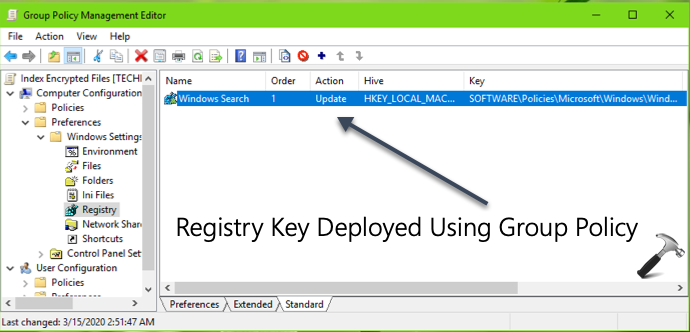
8. Now when you return to Group Policy Management Editor window, you will see that registry is finally deployed. Clients will be updated on next GP engine update or you can use gpupdate /force to update GP engine instantaneously.
To illustrate this guide, checkout following video:
That’s it!


Kapil, how do you set the permission for the key once it’s been created via GPO?
^^ You need to initially create registry in the level you can allow permissions for. If you want to set it at User level, you need to go to User Configuration registry section and add registry key in HKEY_CURRENT_USER hive.
Hello Kapil, if I have a need to amend the value name and I just update it via GPO, will it create a new string?
^^ Can you share your question with an example?