In Windows 11, you can run the troubleshooter from the command line to diagnose and resolve various system issues. A troubleshooter is a built-in tool that can automatically detect and fix common problems related to hardware, network connections, Windows updates, and more. Running the troubleshooter from the command line provides an alternative method to initiate the troubleshooting process.
Page Contents
Run troubleshooter from the command line in Windows 11
To run the troubleshooter from the command line in Windows 11, you can follow these steps:
- Open the Command Prompt: Press the Windows key on your keyboard, type “Command Prompt,” and then press Enter.
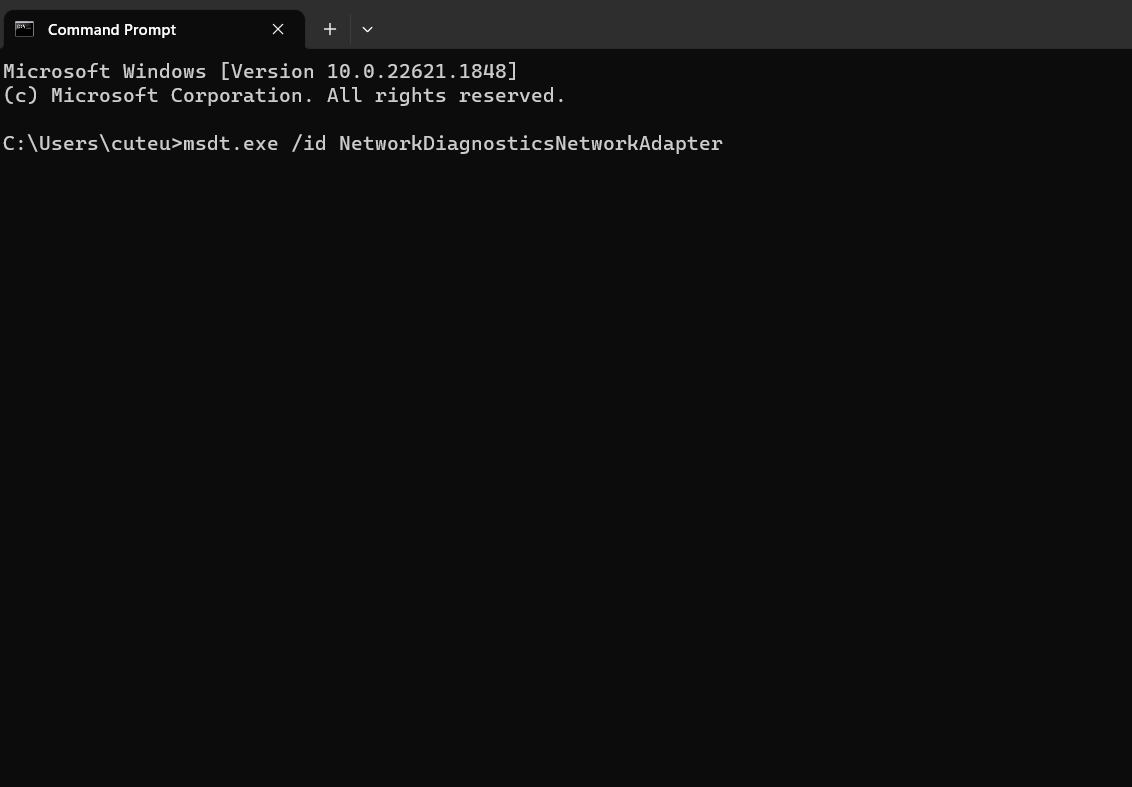
- Run the troubleshooter command: In the Command Prompt window, type the following command and press Enter:
msdt.exe /id <troubleshooterID>Replace <troubleshooterID> with the ID of the specific troubleshooter you want to run. The troubleshooter ID is a unique identifier for each troubleshooting pack. For example, if you want to run the Network Adapter troubleshooter, the command would be:
msdt.exe /id NetworkDiagnosticsNetworkAdapter

- Follow the troubleshooter prompts: Once you execute the command, the troubleshooter corresponding to the provided ID will start running. It will guide you through a series of steps to diagnose and fix the issue. You may need to provide additional information or perform certain actions as instructed by the troubleshooter.
- Review the troubleshooter results: After the troubleshooter completes its analysis, it will display the results on the screen. It will indicate whether any issues were found and whether they were resolved. Additionally, it may provide further instructions or recommendations based on the findings.
List of Troubleshooting Pack IDs for some common troubleshooters in Windows 11
To run a troubleshooter which is in a .diagcab file format, use this:
msdt.exe /cab <path_to_diagcab>Network Adapter:
msdt.exe /id NetworkDiagnosticsNetworkAdapter
Internet Connections:
msdt.exe /id NetworkDiagnosticsInbound
Windows Update:
msdt.exe /id WindowsUpdate
Bluetooth:
msdt.exe -id BluetoothDiagnostic
Background Intelligent Transfer Service:
msdt.exe -id BITSDiagnostic
DirectAccess:
msdt.exe -id NetworkDiagnosticsDA
Devices and Printers:
msdt.exe -id DeviceCenterDiagnostic
Program Compatibility:
msdt.exe -id PCWDiagnostic
Speech:
msdt.exe -id SpeechDiagnosticCalibrate
Video Playback:
msdt.exe -id VideoPlaybackDiagnostic
Printer:
msdt.exe /id Printers
Hardware and Devices:
msdt.exe /id WindowsHardware
Audio Playback:
msdt.exe /id AudioPlaybackDiagnostic
Power:
msdt.exe /id PowerDiagnostic
Display:
msdt.exe /id Display
Windows Store Apps:
msdt.exe /id WindowsStoreDiagnostic
System Maintenance:
msdt.exe /id MaintenanceDiagnostic
Windows Media Player:
msdt.exe /id WindowsMediaPlayerConfigurationDiagnostic
Windows Network Diagnostics:
msdt.exe /id NetworkDiagnosticsDiagPackage
Windows Security:
msdt.exe /id WindowsSecurityDiagnostic
Incoming Connections:
msdt.exe /id NetworkDiagnosticsInbound
Outgoing Connections:
msdt.exe /id NetworkDiagnosticsOutbound
Network Adapter Settings:
msdt.exe /id NetworkDiagnosticsDirect
Shared Folders:
msdt.exe /id SharedFoldersDiagnostic
Internet Explorer Performance:
msdt.exe /id IePerfDiagnostic
Windows Media Player Library:
msdt.exe /id WindowsMediaPlayerLibraryDiagnostic
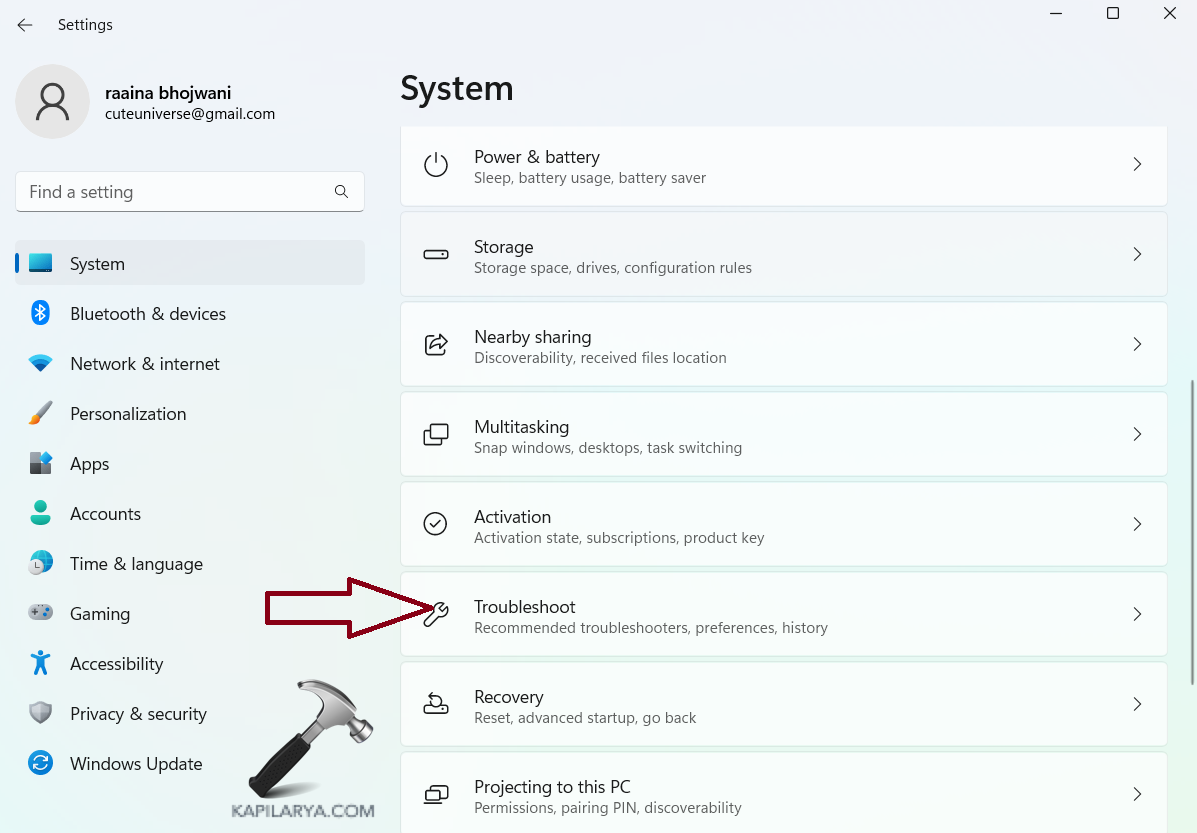
Run Troubleshooters using Settings app
1. Open Settings by pressing the Windows + I keys.
2. Click on “Systems” > then click “Troubleshoot”.
3. Click on “Other troubleshooters”.
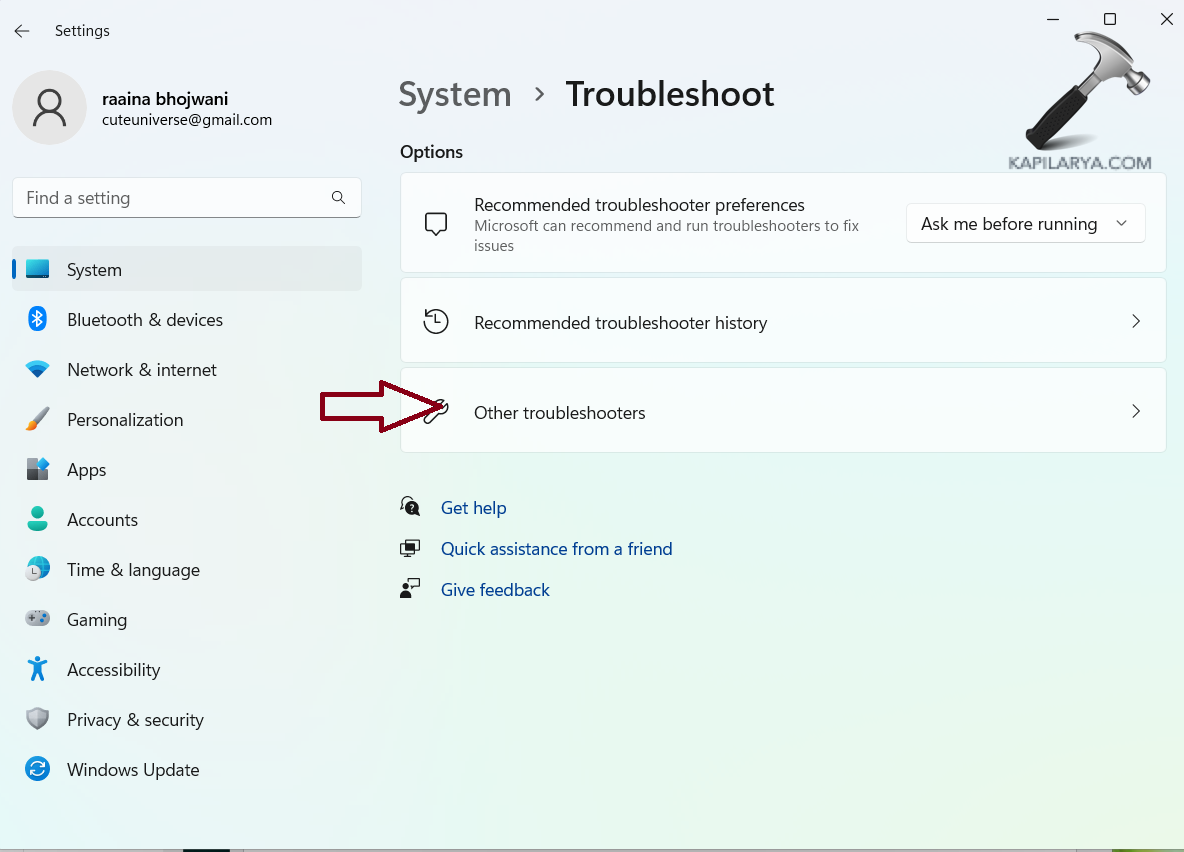
4. Here you will see all the troubleshooters. Click on “Run” to run a particular troubleshooter.

That’s it!