
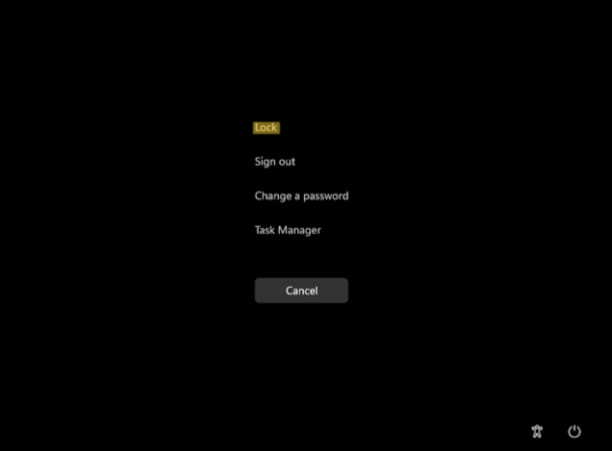
Windows 11 users lock their PCs to protect them against unauthorized use when they have to step away from the system. It also helps them to avoid signing out and shutting down that closes everything open on the system. When you lock your system, you get directed to the lock screen by default. This allows you to continue where you left off. However, other users can sign in to their user accounts from the lock screen. Now, do you know how to allow or prevent users to lock Windows 11 system?
In this post, learn how to disable the feature to lock the system completely in different ways. This can be done either by signing out or shutting down instead. If you disable the lock system, you will not see this option at the Start menu, Ctrl+Alt+Del screen, Alt+F4 shut down and Power menus.
Now, let’s see how to allow or prevent users to lock Windows 11 system below!
Page Contents
Allow or Prevent Users to Lock Windows 11 System
Method 1: Allow All Users to Lock Windows 11 System
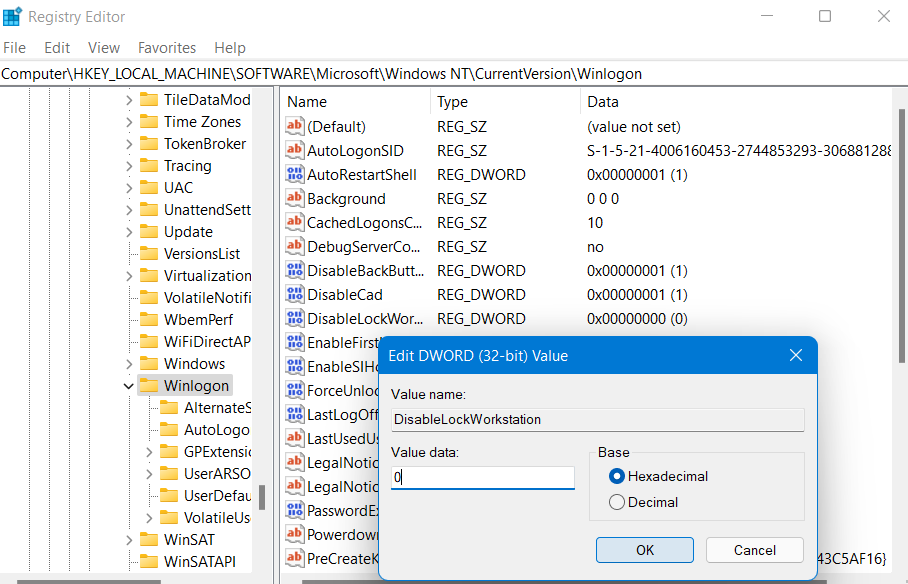
1. In the first place, you need to open the Run dialog box. For this, press the Windows + R keys simultaneously on your keyboard. Once opened, type regedit in the Run dialog box to open Registry Editor.

2. After that, navigate to the following location:
HKEY_LOCAL_MACHINE\SOFTWARE\Microsoft\Windows NT\CurrentVersion\Winlogon
3. After that, double-click on DisableLockWorkstation and change its value data to 0 for enabling Lock Computer for all users. Lastly, click OK.
4. Once done, you can close Registry Editor.
Method 2: Prevent All Users to Lock Windows 11 System
1. In the first place, you need to open the Run dialog box. For this, press the Windows + R keys simultaneously on your keyboard. Once opened, type regedit in the Run dialog box to open Registry Editor.
2. After that, navigate to the following location:
HKEY_LOCAL_MACHINE\SOFTWARE\Microsoft\Windows NT\CurrentVersion\Winlogon
3. After that, double-click on DisableLockWorkstation and change its value data to 1 for disabling Lock Computer for all users. Lastly, click OK.

4. Once done, you can close Registry Editor.
So, this is how you can enable or disable the Lock Computer feature in your Windows 11 system hassle-free!


