To control your Windows 11 and author text using your voice, Microsoft introduced Voice access feature. You can use Voice access for opening and switching between apps, browsing the web, and reading and authoring mail. This newly introduced feature leverages modern, on-device speech recognition to accurately recognize speech and is supported without an Internet connection. In our previous guide, I shared you how to enable Voice in Windows 11. Now in this article, you’ll read how to automatically start Voice access after login in Windows 11,
You can activate Voice access on sign in either using Settings app or by modifying registry. Either ways are mentioned below for your convenience.
Page Contents
Automatically start Voice access after login in Windows 11
Method 1: Using Settings app
1. Press  + I keys to open Settings app.
2. Go to Accessibility. In the right pane, click on Speech.
3. Under Speech, make sure Voice access is turned On. Check the Start voice access after you sign in to your PC option.

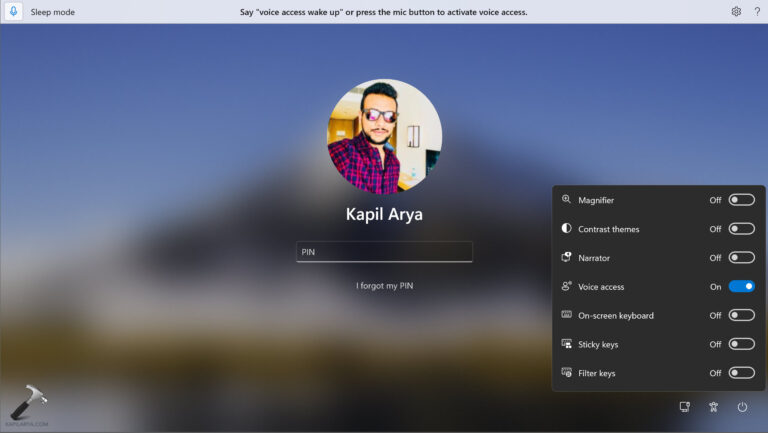
The changes you’ve made are applied now. You can sign out and then sign in back to check if Voice access is enabled after login.
Method 2: Using registry
 Registry Disclaimer: It is recommended to create a System Restore point first, if you’re not familiar with registry manipulation.
1. Run regedit command to open Registry Editor.
2. In left pane of Registry Editor window, navigate to:
HKEY_CURRENT_USER\Software\Microsoft\Windows NT\CurrentVersion\Accessibility
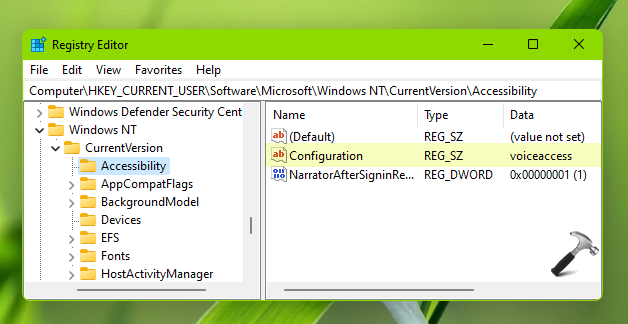
3. In the right pane of Accessibility registry key, create a new registry string (REG_SZ) named Configuration. Double click on the registry string and set its Value data to voiceaccess. This will enable Voice access at login.
4. Close Registry Editor, sign out and sign in back to make changes effective.
If you ever need to turn off Voice access at sign-in later, you can uncheck Start voice access after you sign in to your PC option or remove Configuration registry string.
That’s it!
Read next: How to view update history in Windows 11.