Windows Ink Workspace is a hub for pen-enabled tools like Snipping Tool and Microsoft Whiteboard in Windows 11.
Page Contents
Disable Windows Ink Workspace on Windows 11
While useful for some, it can interfere with professional drawing tablets or pop up unexpectedly. Below are the best methods to disable it, ranging from simple UI toggles to deep registry edits.
Fix 1: Hide the Windows Ink Workspace Icon on the Taskbar
If you want to remove the workspace button without disabling the underlying feature:
1. Right-click a blank area on the taskbar.
2. Click Taskbar settings.
3. Scroll to System tray icons.
4. Find Windows Ink Workspace or Pen Menu toggle and switch it Off.

This stops the icon from showing up but doesn’t disable pen support entirely.
Fix 2: Disable via Group Policy Editor
This officially prevents Windows Ink Workspace from running on Pro, Enterprise, or Education editions:
1. Press Win + R, typegpedit.msc, and press Enter.
2. Navigate to:
Computer Configuration, then Administrative Templates, and then Windows Components, then go to Windows Ink Workspace.
3. Double-click Allow Windows Ink Workspace.
4. Set the policy to Enabled.
5. In the “Options” box below, select Disabled from the dropdown menu.
6. Click Apply and Restart your PC.
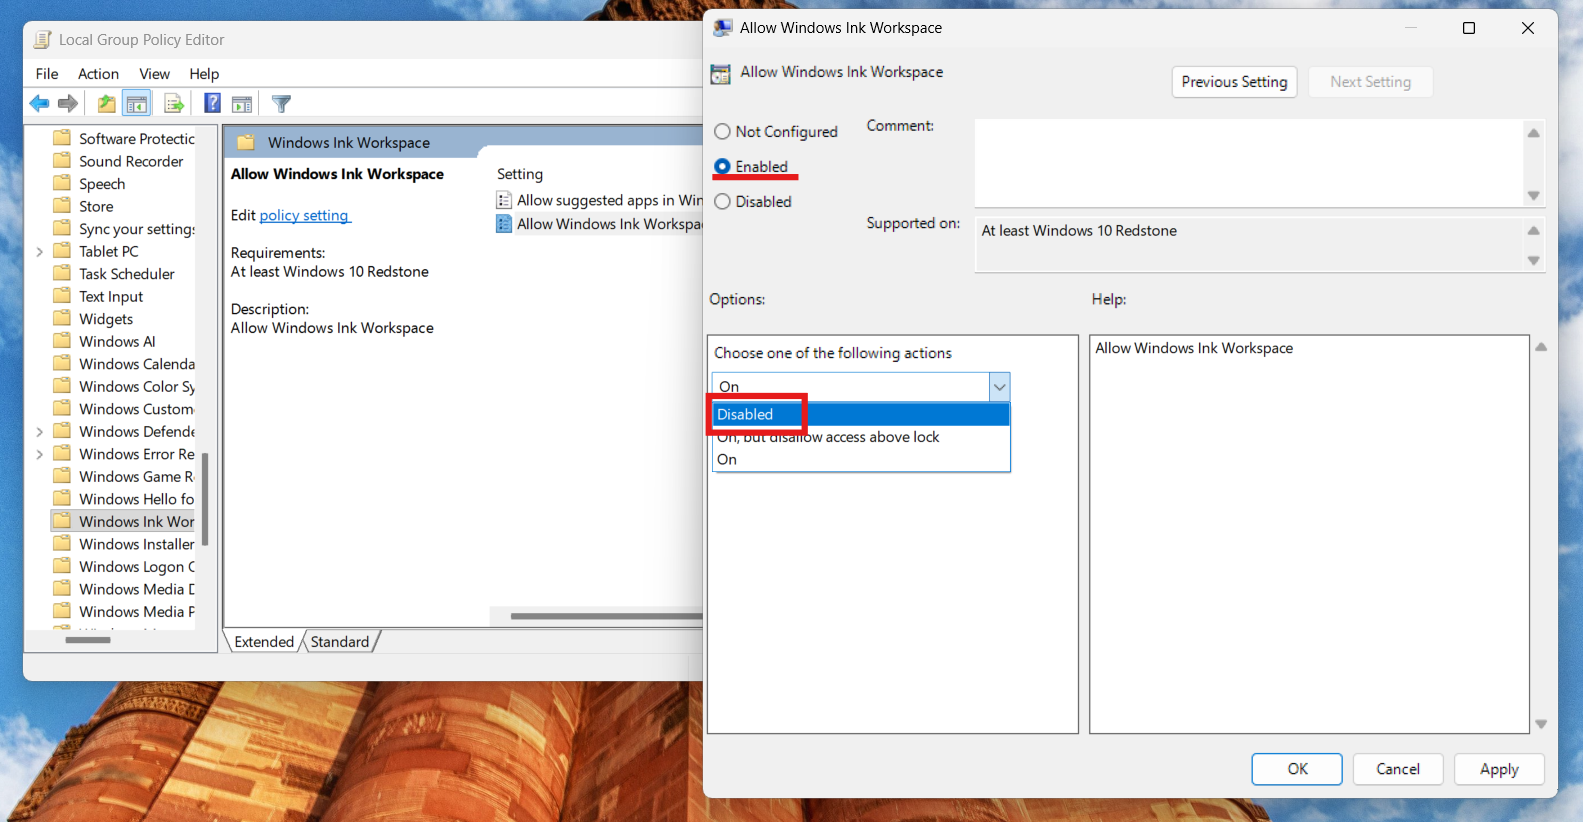
Disabling this policy stops Windows from activating the Ink Workspace feature.
Fix 3: Disable Using Registry Editor
Since the Home edition lacks the Group Policy Editor, you must manually tell Windows to block the workspace. If you don’t have Group Policy:
1. Press Win + R, typeregedit, and press Enter.
2. Go to:
HKEY_LOCAL_MACHINE\SOFTWARE\Policies\Microsoft\WindowsInkWorkspace.
3. If the WindowsInkWorkspace key doesn’t exist, right-click Microsoft and then New > Key and name it WindowsInkWorkspace.
4. Inside it, right-click and go to New > DWORD (32-bit) Value and name it AllowWindowsInkWorkspace.
5. Double-click it and set the Value data to 0.
6. Restart your PC.
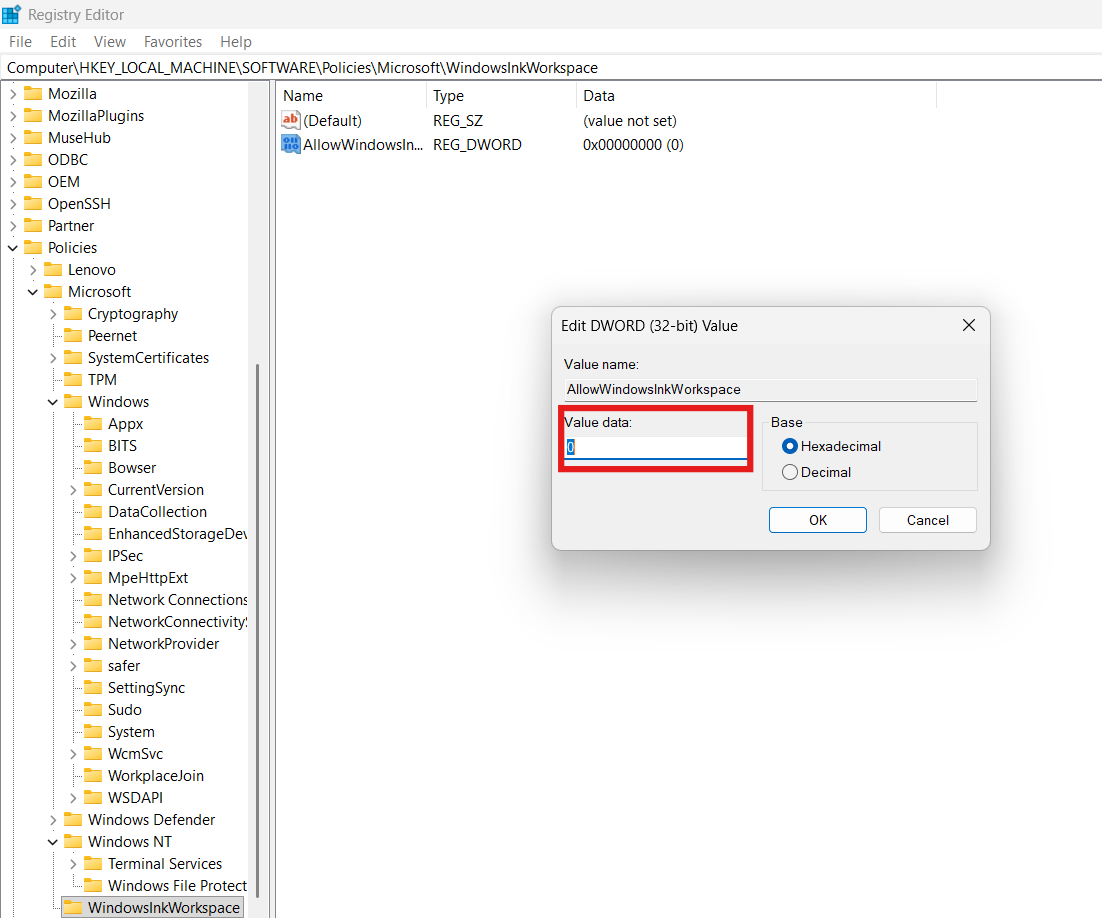
This registry policy blocks the workspace feature system-wide.
Fix 4: Adjust Pen Support Service Configuration
Instead of fully disabling the Touch Keyboard and Handwriting Panel Service (which breaks the on-screen keyboard and emoji panel), adjust its startup behavior:
1. Press Win + R, typeservices.msc, and press Enter.
2. Find Touch Keyboard and Handwriting Panel Service.
3. Right-click it and select Properties.
4. Set Startup type to Manual (not Disabled).
5. Click Apply and then OK, and restart.

Manual startup allows the system to call the service only when necessary without breaking other input features.
Fix 5: Disable Windows Ink in Tablet/Pen Driver Settings
Third-party tablet drivers like Wacom often include their own Windows Ink switch:
1. Open your tablet driver app (like Wacom Center).
2. Select your device and look for Use Windows Ink or similar.
3. Turn it Off.
This stops driver-level invocation of Windows Ink features that can conflict with workspace behavior.
Fix 6: Disable Shell Handwriting in Pen Settings
Windows 11 has a dedicated toggle to stop auto handwriting panels that can be confused with the workspace:
1. Open Settings and go to Bluetooth & devices and then Pen & Windows Ink.
2. Find Use your handwriting to enter text or related handwriting panel settings.
3. Turn that setting Off.
4. Restart your PC.
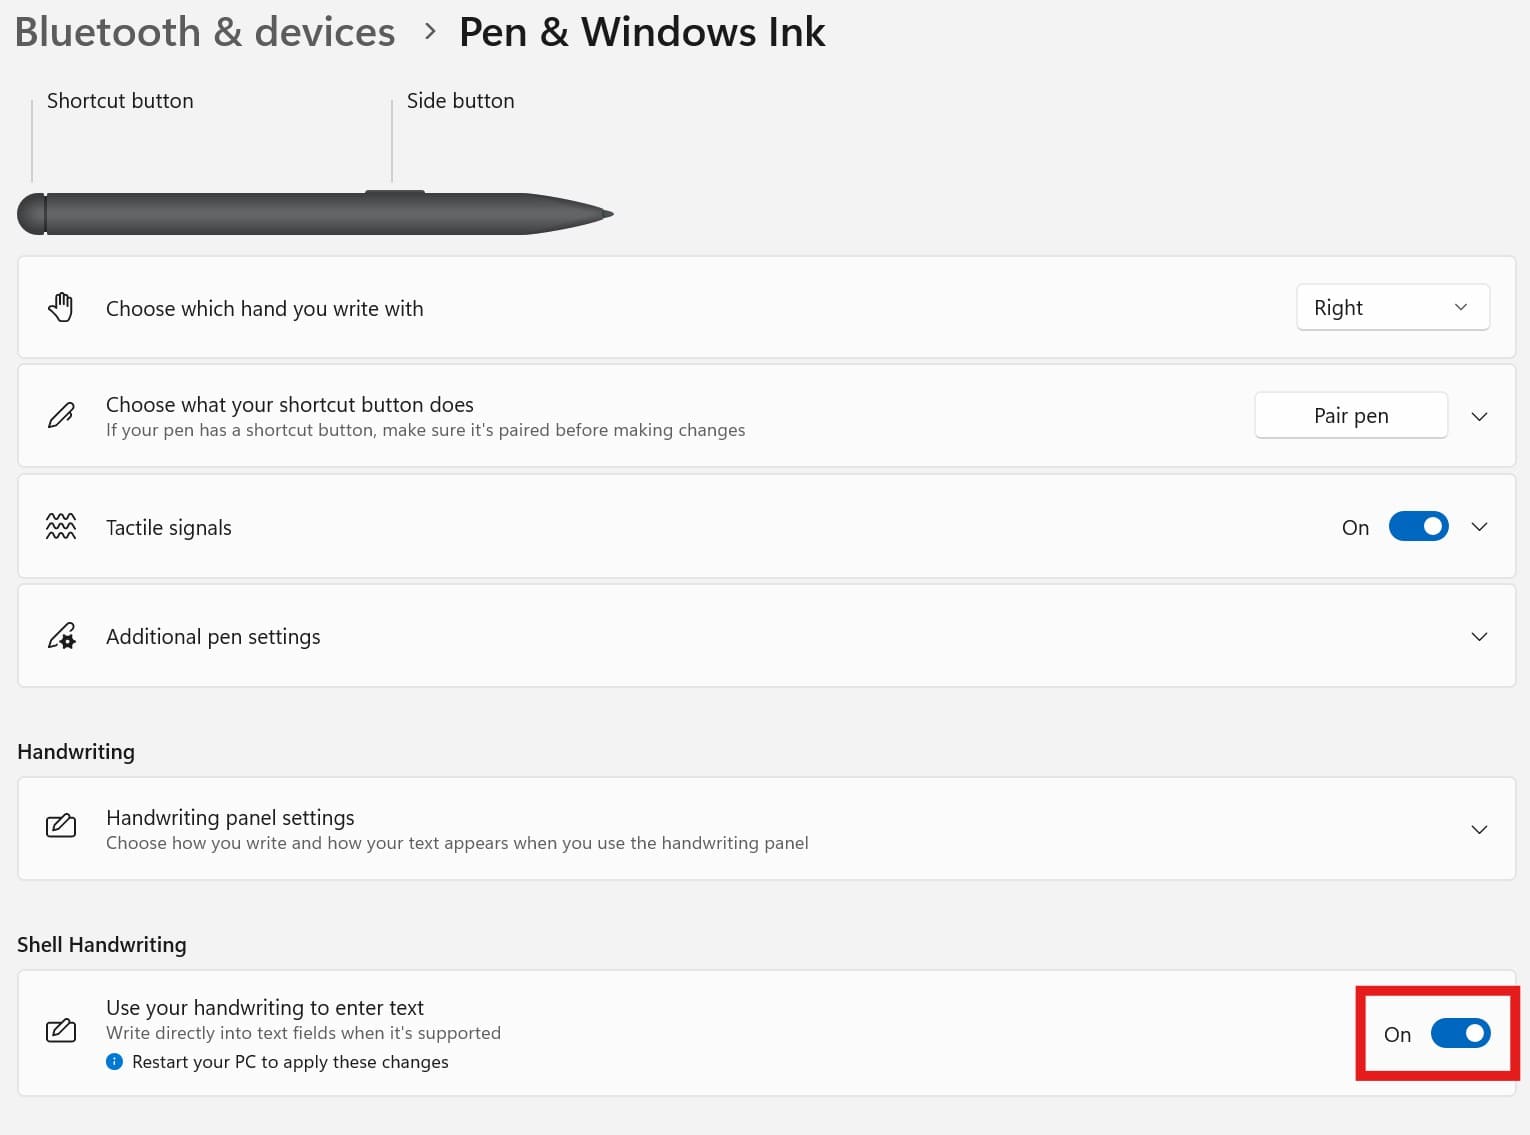
This prevents the system from automatically opening handwriting input boxes when using a pen or touch in text fields, often mistaken for Ink Workspace interference.
Wrap-Up
Disabling Windows Ink Workspace on Windows 11 can be done at multiple levels, from simply hiding the icon to enforcing policies that prevent it from running at all. Choose the method that matches your goals.