
Basically, a network adapter is a hardware component that connects a system to LAN (Local Area Network) or Internet. In some cases, you may like to enable/disable Network Adapters in Windows 11.
In this post, you will learn how you can enable or disable a network adapter on your Windows 11 PC. So, let’s get started!
Page Contents
Enable/disable Network Adapters in Windows 11
Method 1: Using the Settings App
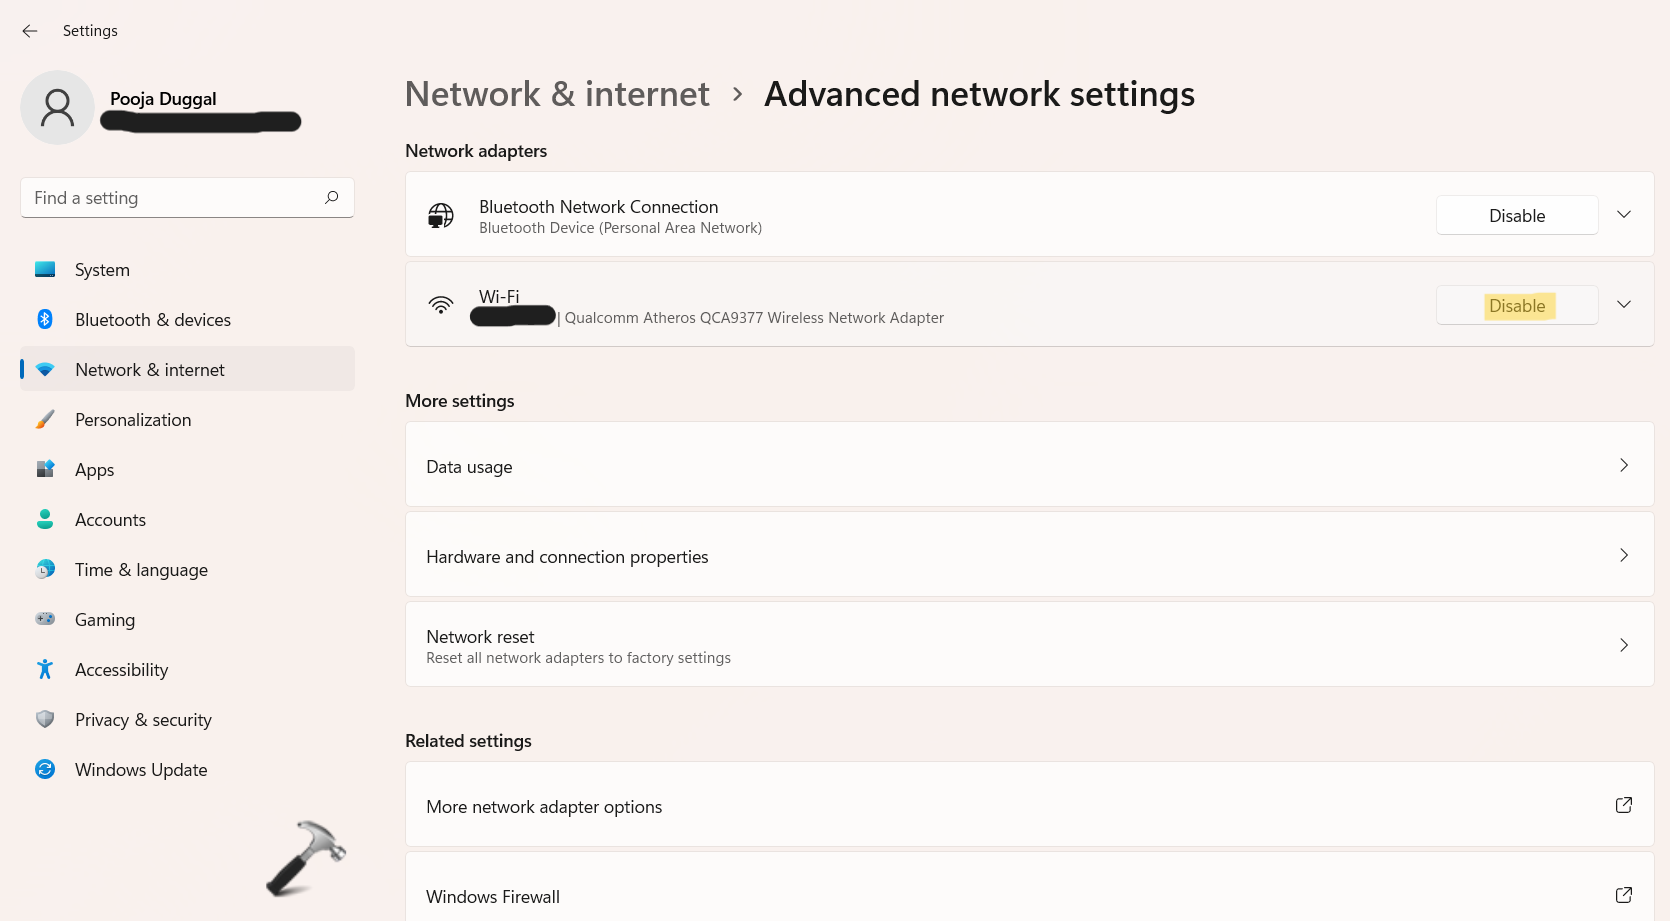
1. Firstly, open the Settings app and then, go to the Network & internet tab. Once there, choose Advanced network settings present on the right side.
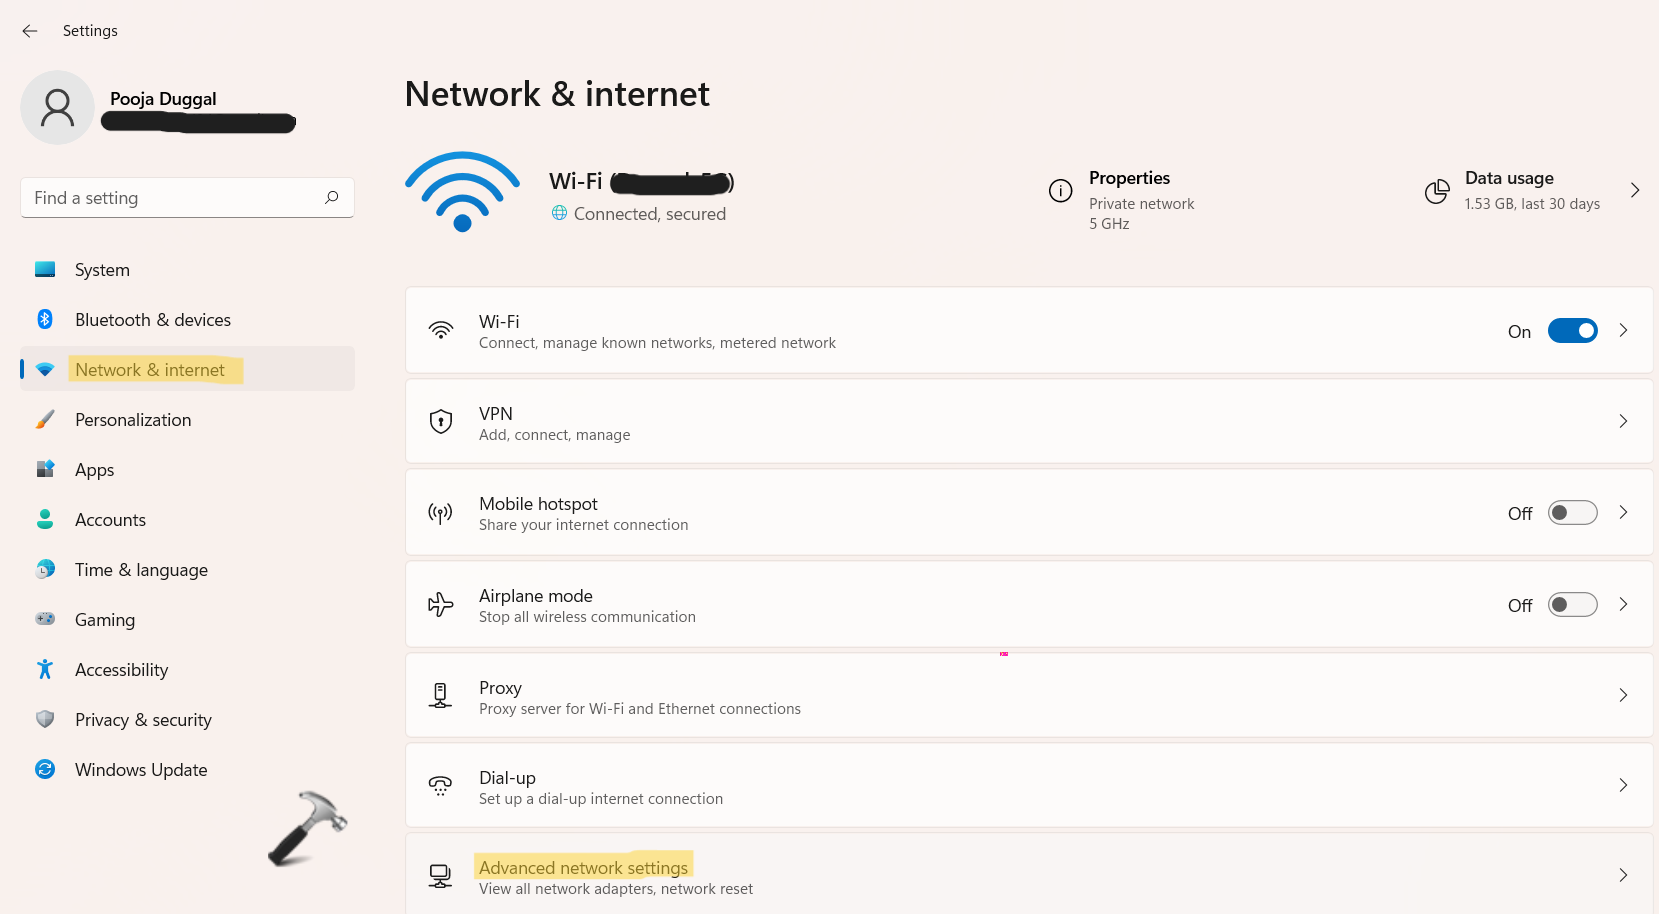
2. Now, you can enable or disable the network adapters as you like.
Method 2: Using the Device Manager
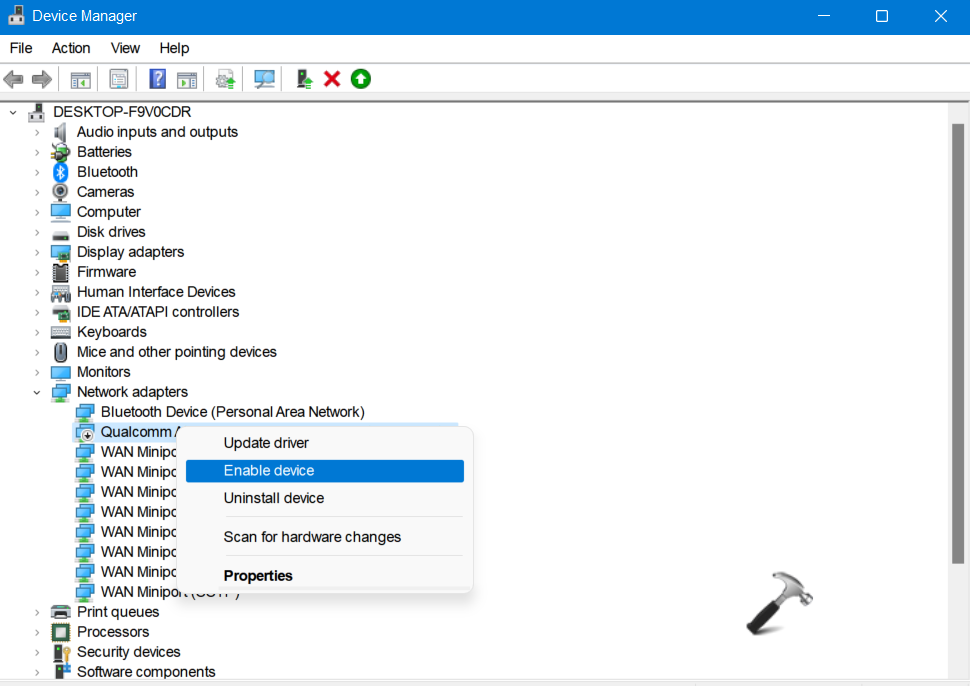
1. Open Device Manager by typing devmgmt.msc in the Run dialog box.
2. Next, expand Network adapters and right-click on the network adapter you like.
3. Now, you can enable or disable the device here.
Method 3: Using the Network Connections
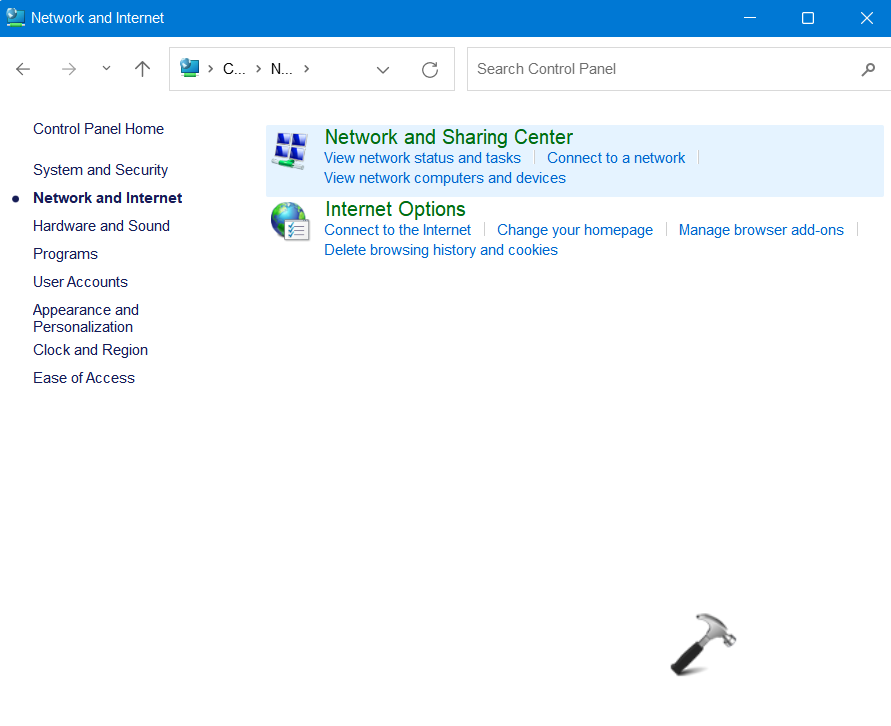
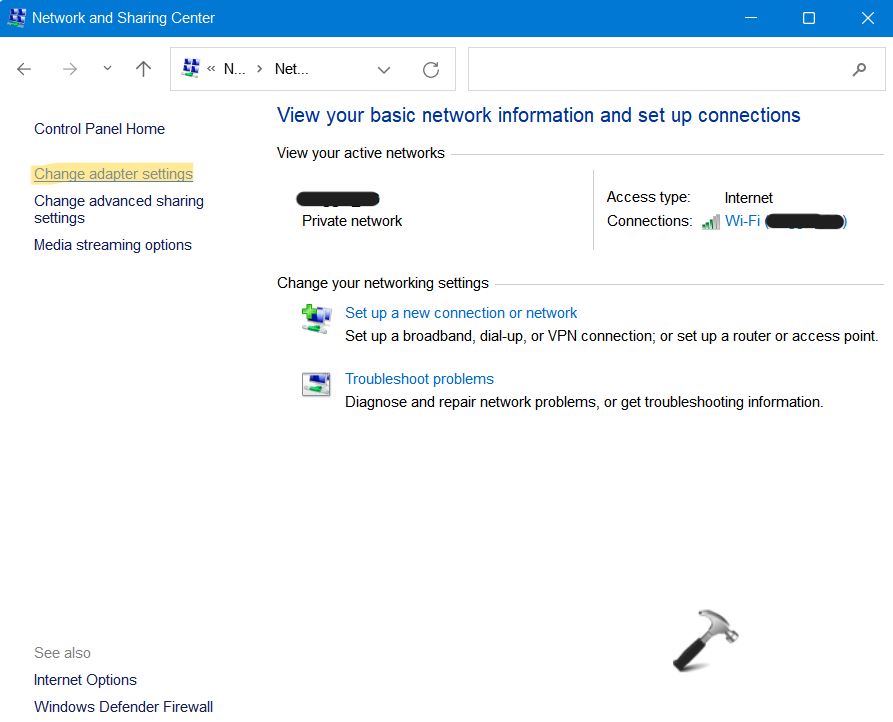
1. In the first place, open Control Panel and select Network and Internet.

Then, click on Network and Sharing Center.
2. After that, click on Change adapter settings present on the left.
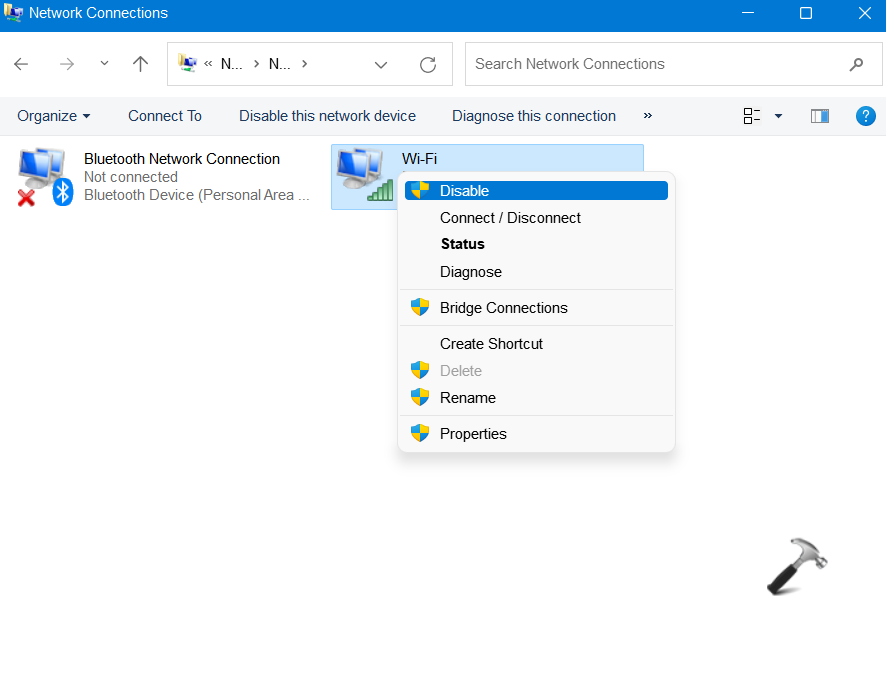
3. Now, right-click on the network adapter you like to enable or disable. Once opened, you can enable or disable it.
Method 4: Using the Windows PowerShell
1. Initially, open Windows PowerShell with admin privileges.
2. Now, copy-paste the following command and hit Enter:
Get-NetAdapter | format-list
Now, you will come across a list of all the network adapters.
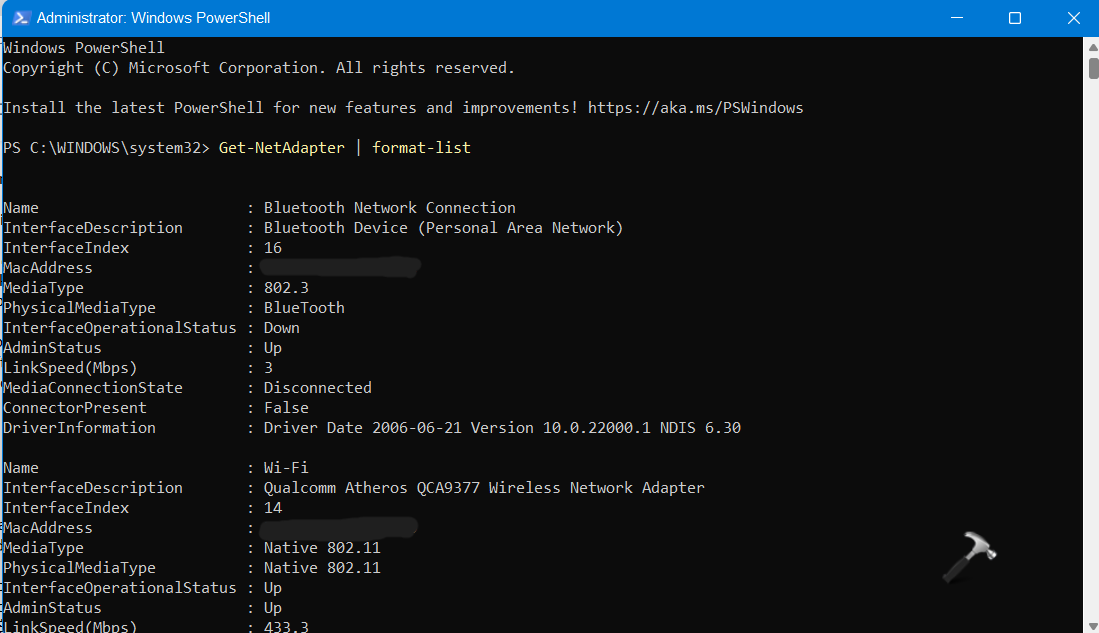
3. Keep note of the Name of the network adapter you like to enable to disable.
To enable the network adapter, execute the following command:
Enable-NetAdapter -Name "Network Adapter Name" -Confirm:$false
Note: Replace the Network Adapter Name with the noted network adapter’s name. For example:
Enable-NetAdapter -Name "Wi-Fi" -Confirm:$false

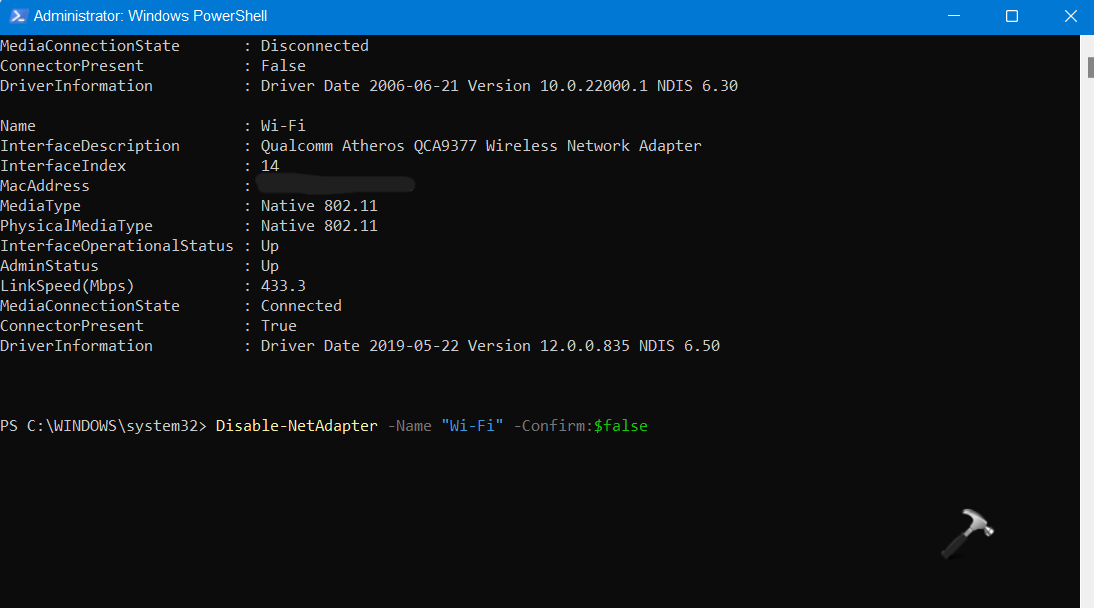
To disable the network adapter, execute the following command:
Disable-NetAdapter -Name "Network Adapter Name" -Confirm:$false
Note: Replace the Network Adapter Name with the noted network adapter’s name. For example:
Disable-NetAdapter -Name "Wi-Fi" -Confirm:$false
4. Once executed, close Windows PowerShell.
Method 5: Using the netsh command
1. In the first place, open Windows PowerShell or Command Prompt with admin privileges.
2. Next, copy-paste the following command and hit Enter:
netsh interface show interface
This will show you a list of the network adapters.
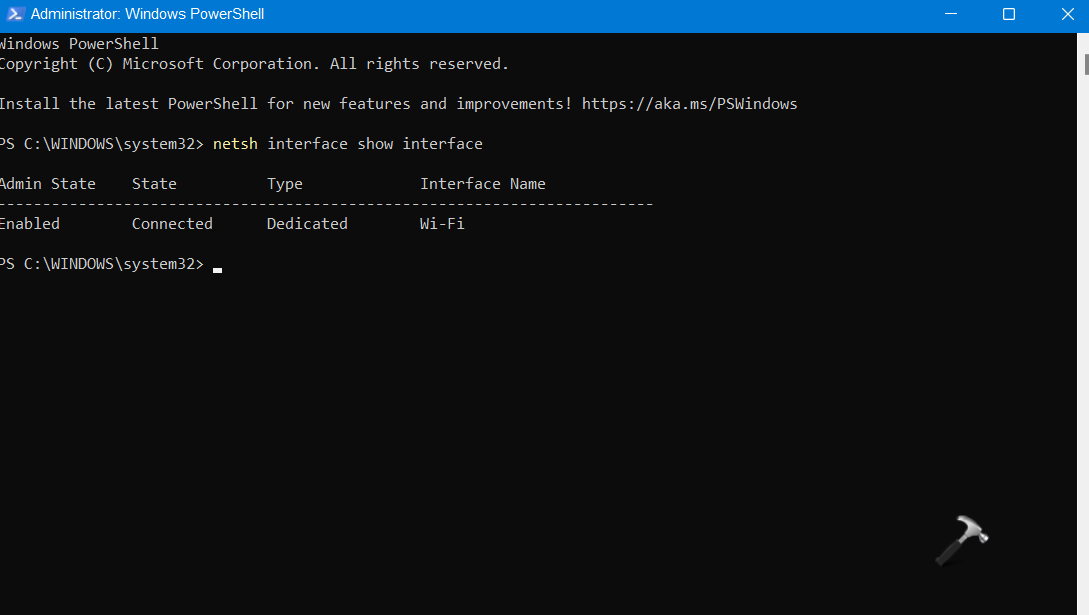
3. Keep note of the Interface Name (network adapter) you like to enable to disable.
To enable the network adapter, execute the following command:
netsh interface set interface "Interface Name" enable
Note: Replace the Interface Name with the noted network adapter’s name. For example:
netsh interface set interface "Wi-Fi" enable

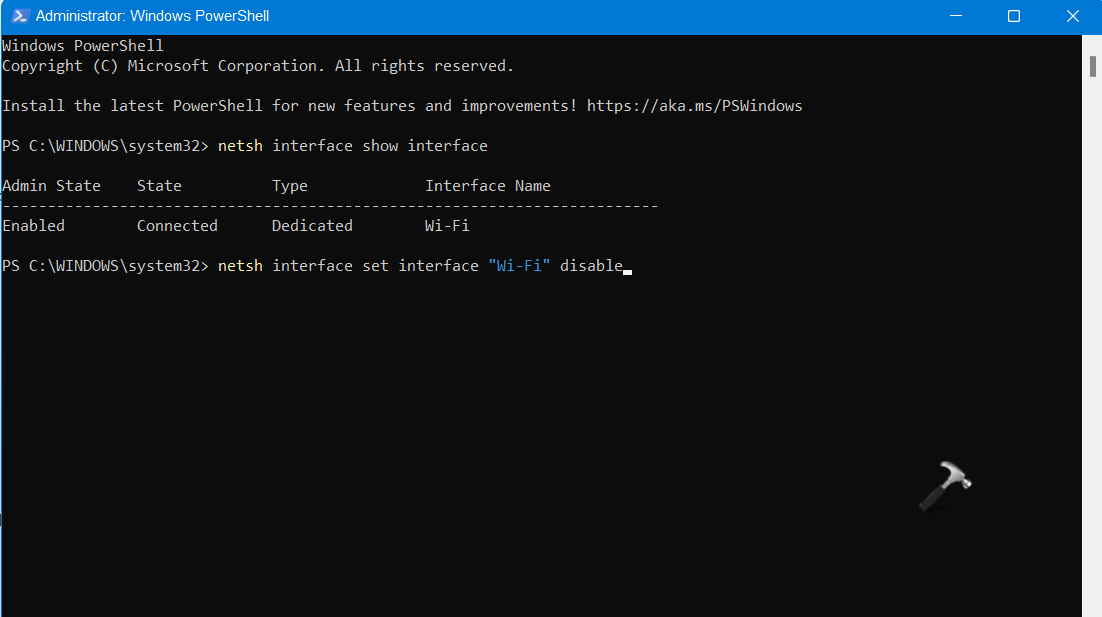
To disable the network adapter, execute the following command:
netsh interface set interface "Interface Name" disable
Note: Replace the Interface Name with the noted network adapter’s name. For example:
netsh interface set interface "Wi-Fi" disable
4. Once executed, close it.
So, this is how you can enable/disable Network Adapters in Windows 11.
Related: How to rename wireless network adapter in Windows 11.


![The mapped network drive could not be created [Detailed fix]](https://www.kapilarya.com/assets/Network-Drive-768x511.jpg)

![Stop sharing a folder in Windows 11 [Guide]](https://www.kapilarya.com/assets/Network-768x522.png)