
Basically, a network adapter is the computer hardware component connects a computer to a computer network. On your Windows system, when you use network connections, they’re established with the help of network adapter. Your system can have a different network adapters present at a time. In this article, we will see how to rename wireless network adapter in Windows 11.
To rename a wireless network adapter, there are several methods possible. The most common and easiest methods are mentioned here for your convenience. You can follow them and rename your wireless network adapter in a minute.
Page Contents
How to rename wireless network adapter in Windows 11
Method 1 – Using Settings App
1. Press  + X keys and select Settings to open the app.
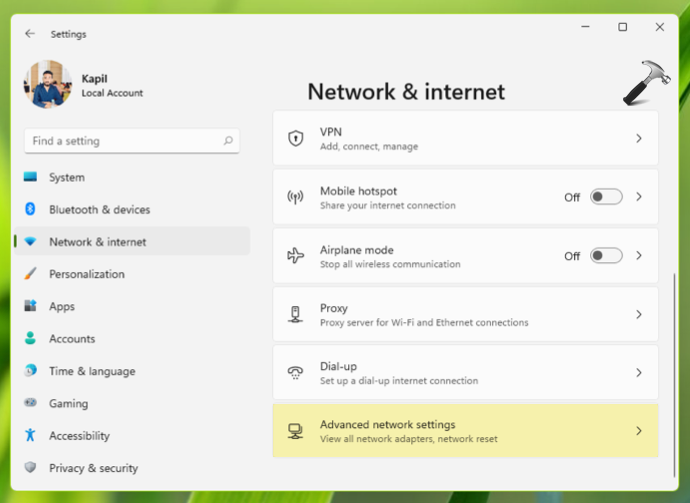
2. In the Settings app, go to Network & internet.
3. In Network & internet section, scroll down, locate and hit Advanced network settings.
4. Under Advanced network settings, you’ll find the network adapters present on your system. Select the network adapter you want to change name. Then click Rename button against Rename this adapter heading.

5. Finally, in Rename your hardware pop-up, type in the new name for your wireless adapter and click Save.

Once done, you can close Settings app.
Method 2 – Using Registry
1. Run regedit command to open Registry Editor.
2. In Registry Editor window, go to:
HKEY_LOCAL_MACHINE\SYSTEM\CurrentControlSet\Control\Network
3. Press Ctrl+F and type the current name of your adapter and click Find Next. You can get current name with Method 1.

4. Now you’ll be landed to exact registry key for your network adapter. Double click on the Name registry string (REG_SZ) in the right pane.

5. Replace its Value data with the new name you want for your wireless adapter. Click OK.

6. Close Registry Editor and reboot your system to make changes effective.
That’s it!
Read next: How to switch to local account in Windows 11.


![The mapped network drive could not be created [Detailed fix]](https://www.kapilarya.com/assets/Network-Drive-768x511.jpg)

![Stop sharing a folder in Windows 11 [Guide]](https://www.kapilarya.com/assets/Network-768x522.png)