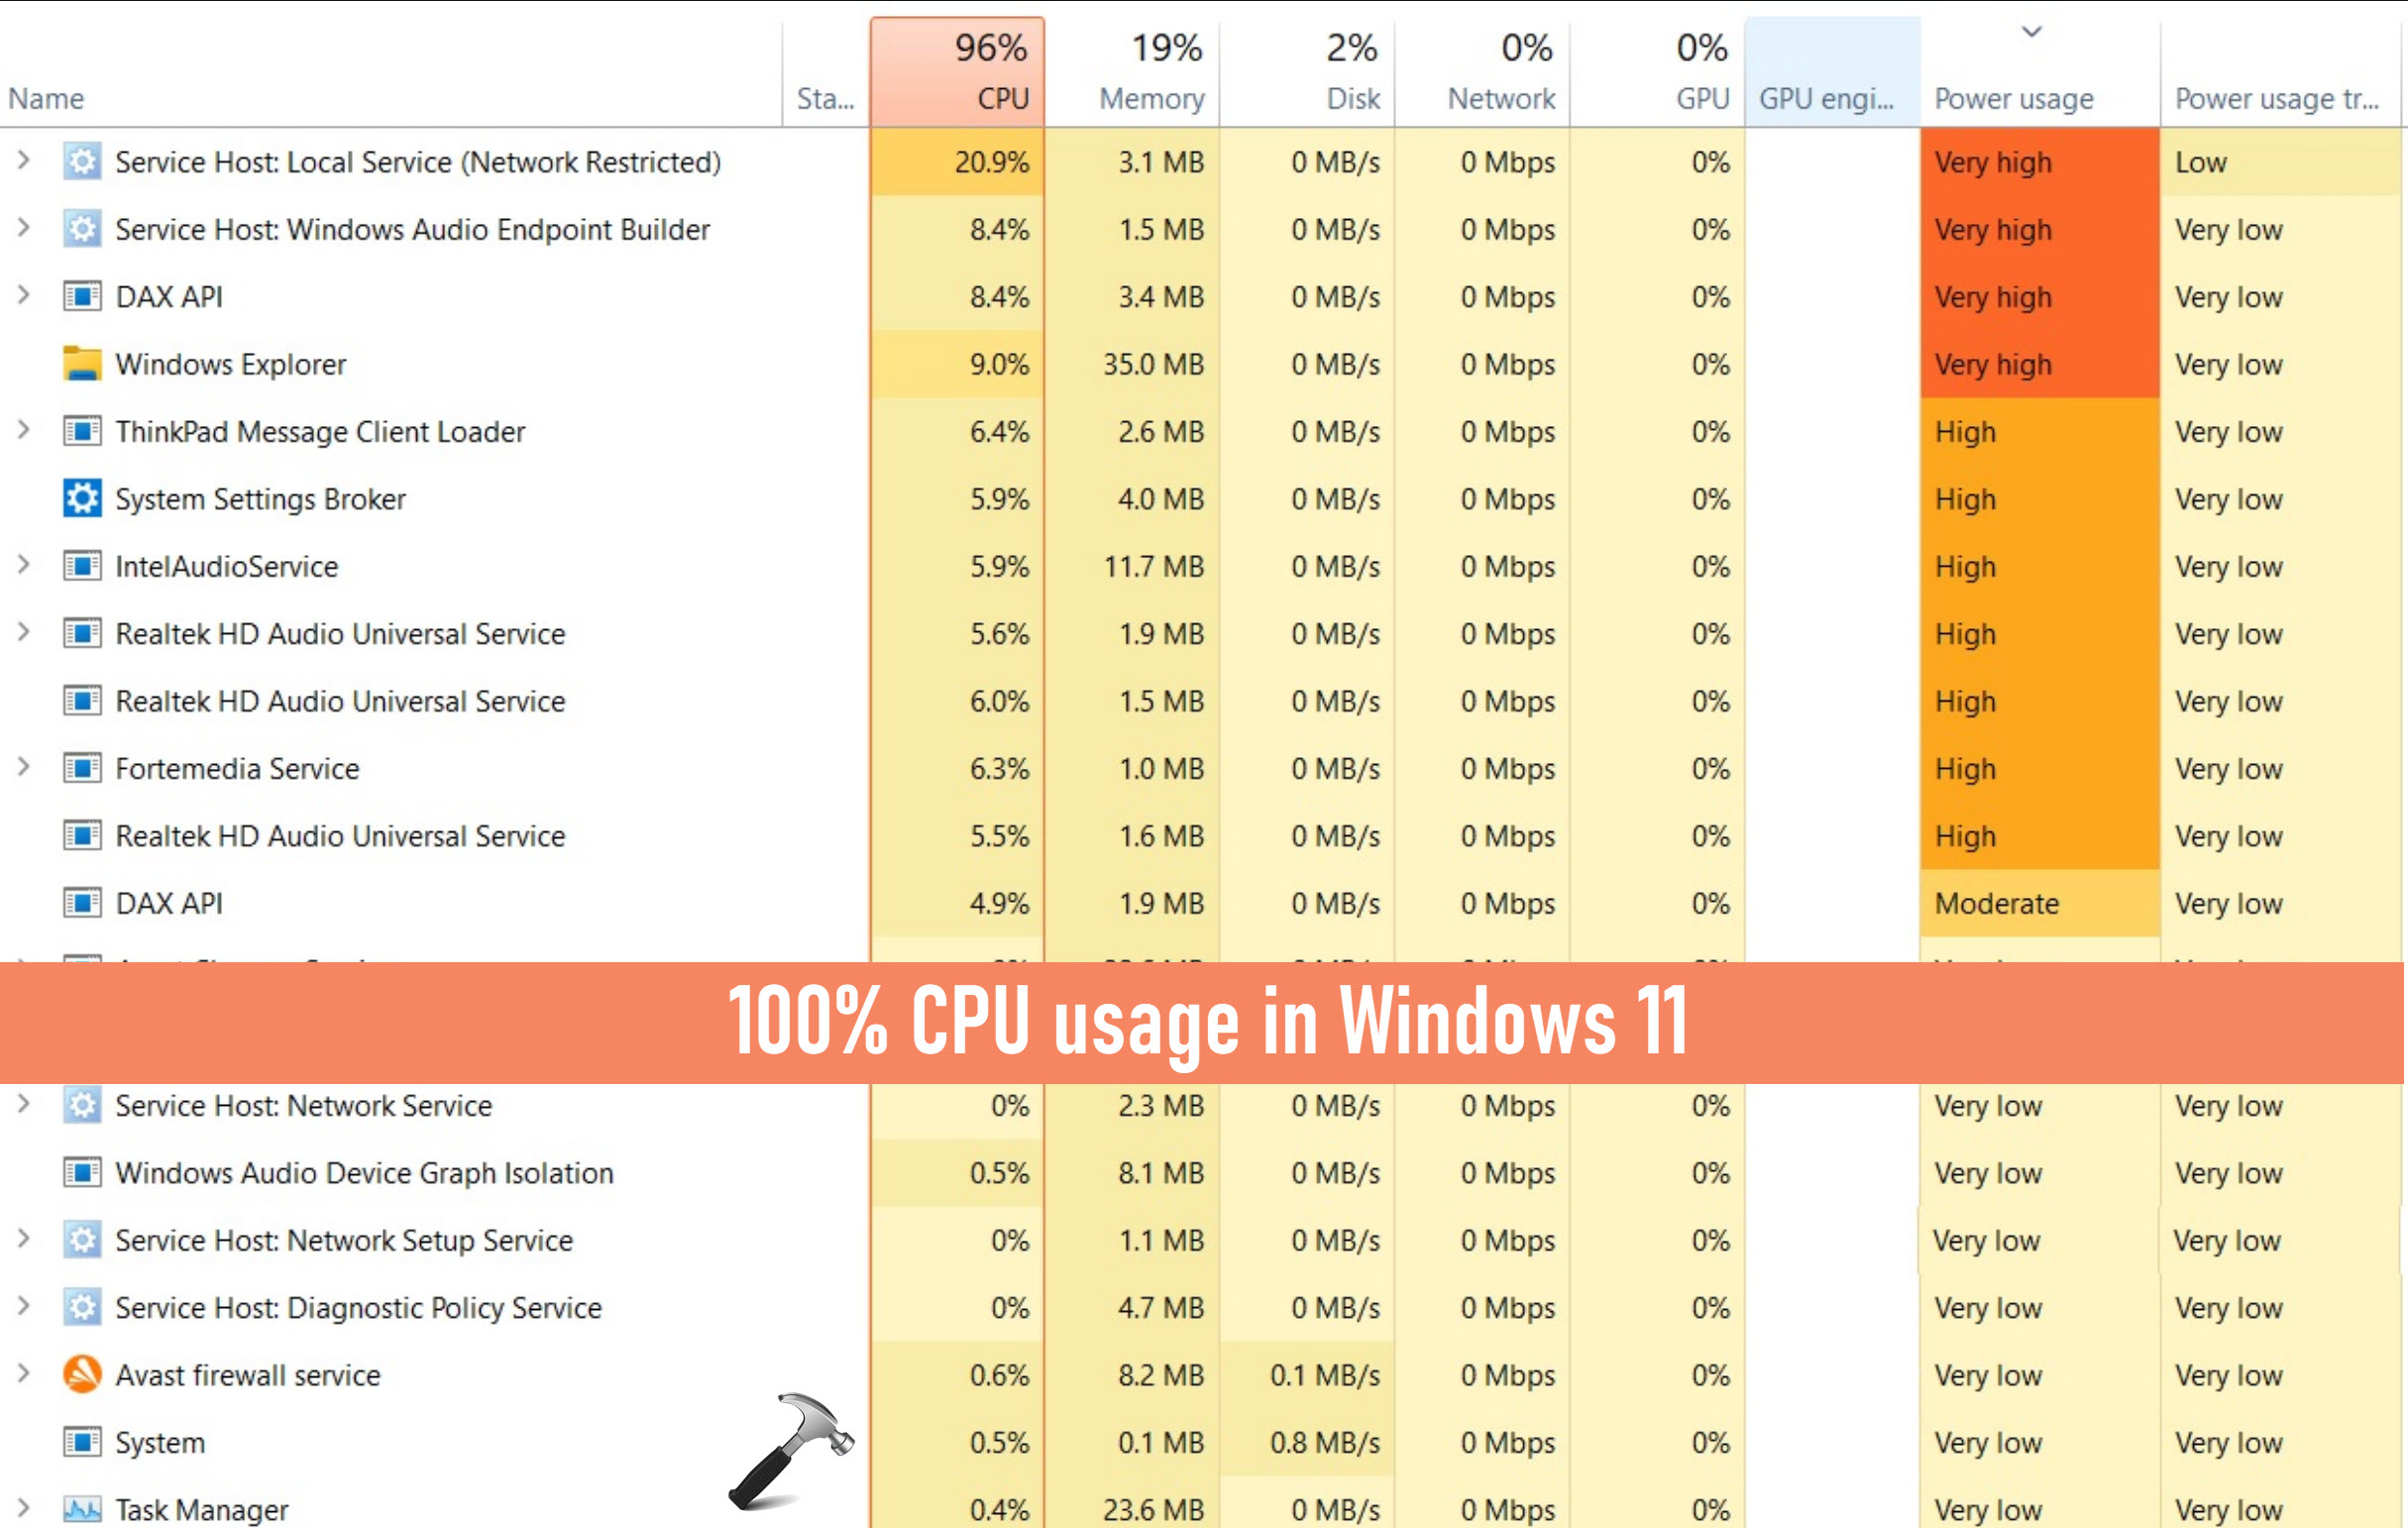
High CPU usage is a common issue experienced by many Windows 11 users, which can lead to slow system performance, excessive heat, and reduced battery life. This problem can be particularly frustrating, as it can make using your computer nearly impossible. Thankfully, there are several methods available to fix 100% CPU usage in Windows 11, which can help to restore normal system functionality.
Page Contents
Fix: 100% CPU usage in Windows 11
Fix 1: Disable runtime broker
1. Go to Settings > System > Notifications > Scroll down and click Additional Settings.
2. Uncheck Suggested ways to get the most out of Windows and finish setting up this device and Get tips and suggestions when using Windows options.

3. Restart your computer to bring changes.
If issue still persists, carry on.
Fix 2: Update your device driver
Click on Start > Device Manager > Action > Scan for hardware changes.

Update device drivers if it is required.
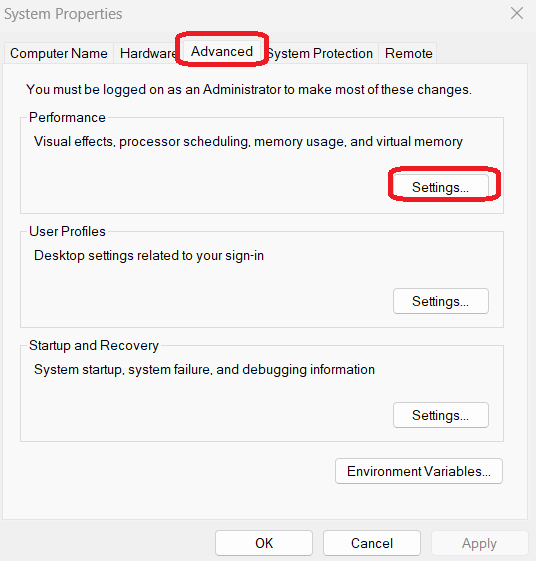
Fix 3: To get good CPU performance set up visual effects
Go to the Start button. Next, click Run. In the Run prompt write SystemPropertiesAdvanced and click OK.

Then tap on Advanced and click on Settings in the Performance box.

Tap on Visual Effects and click on Adjust for best performance.

Click Apply then OK.
Fix 4: Disable startup programs
Right-click on the Start button and select Task Manager. In the window that appeared click on Startup Apps. Right-click on any one program from the list and click Disable.
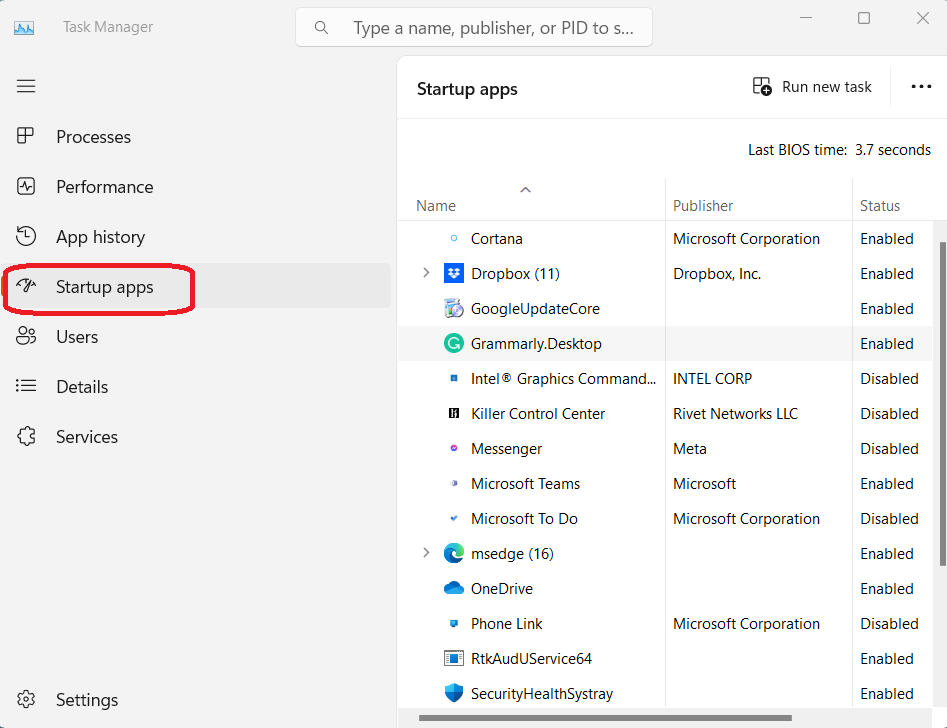
You can repeat the same steps for other not required apps for your computer.
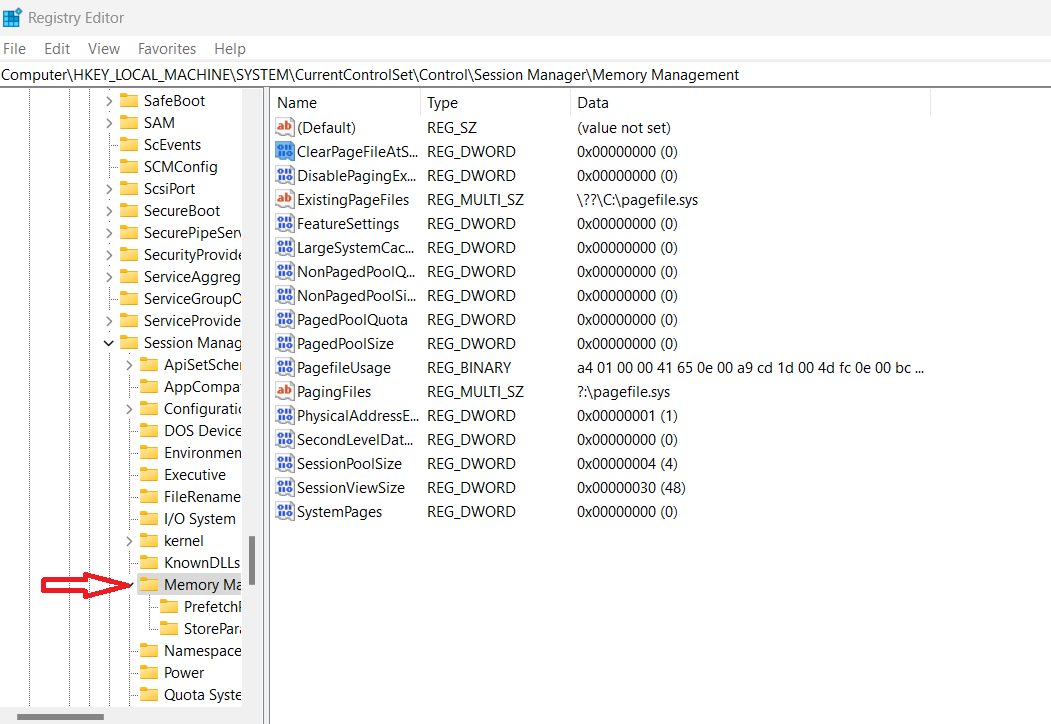
Fix 5: Modify memory management
Open the Run prompt by right-clicking on the Start button. Type regedit and hit enter.

On the Registry Editor window, navigate to the path:
Computer\HKEY_LOCAL_MACHINE\SYSTEM\CurrentControlSet\Control\Session Manager\Memory Management
Click on the Memory Management folder. Right-click on the ClearPageFileAtShutdown option and select Modify.
In the Value data field change the value from 0 to 1.
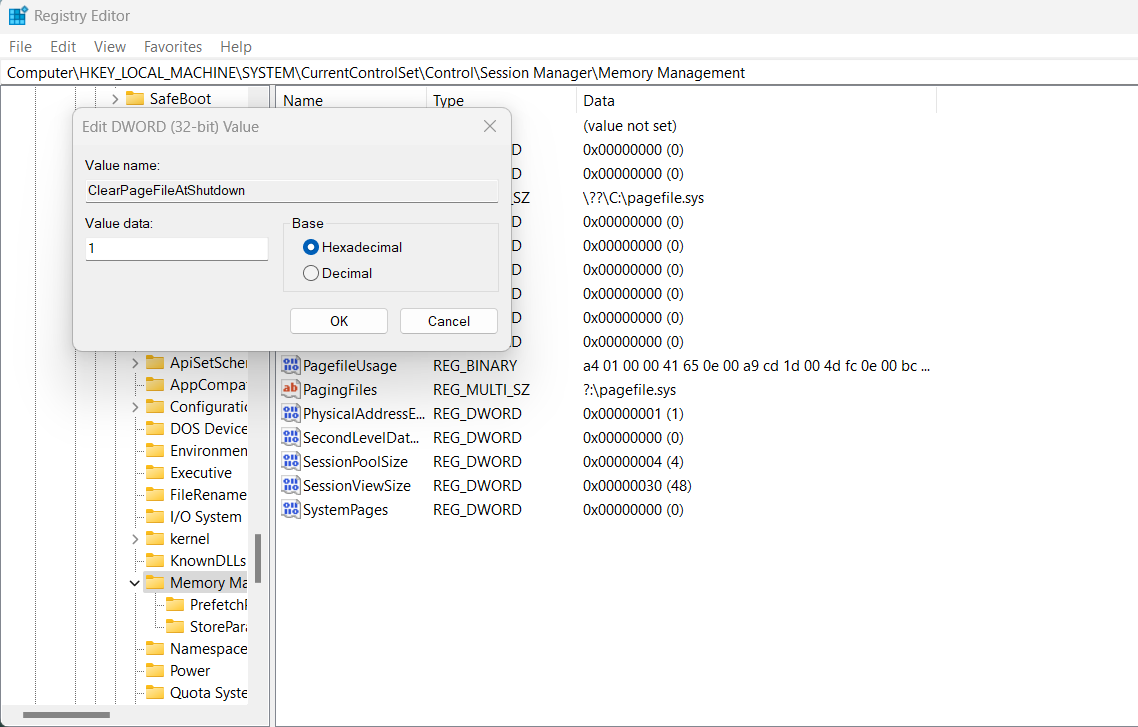
Click OK and restart your computer.
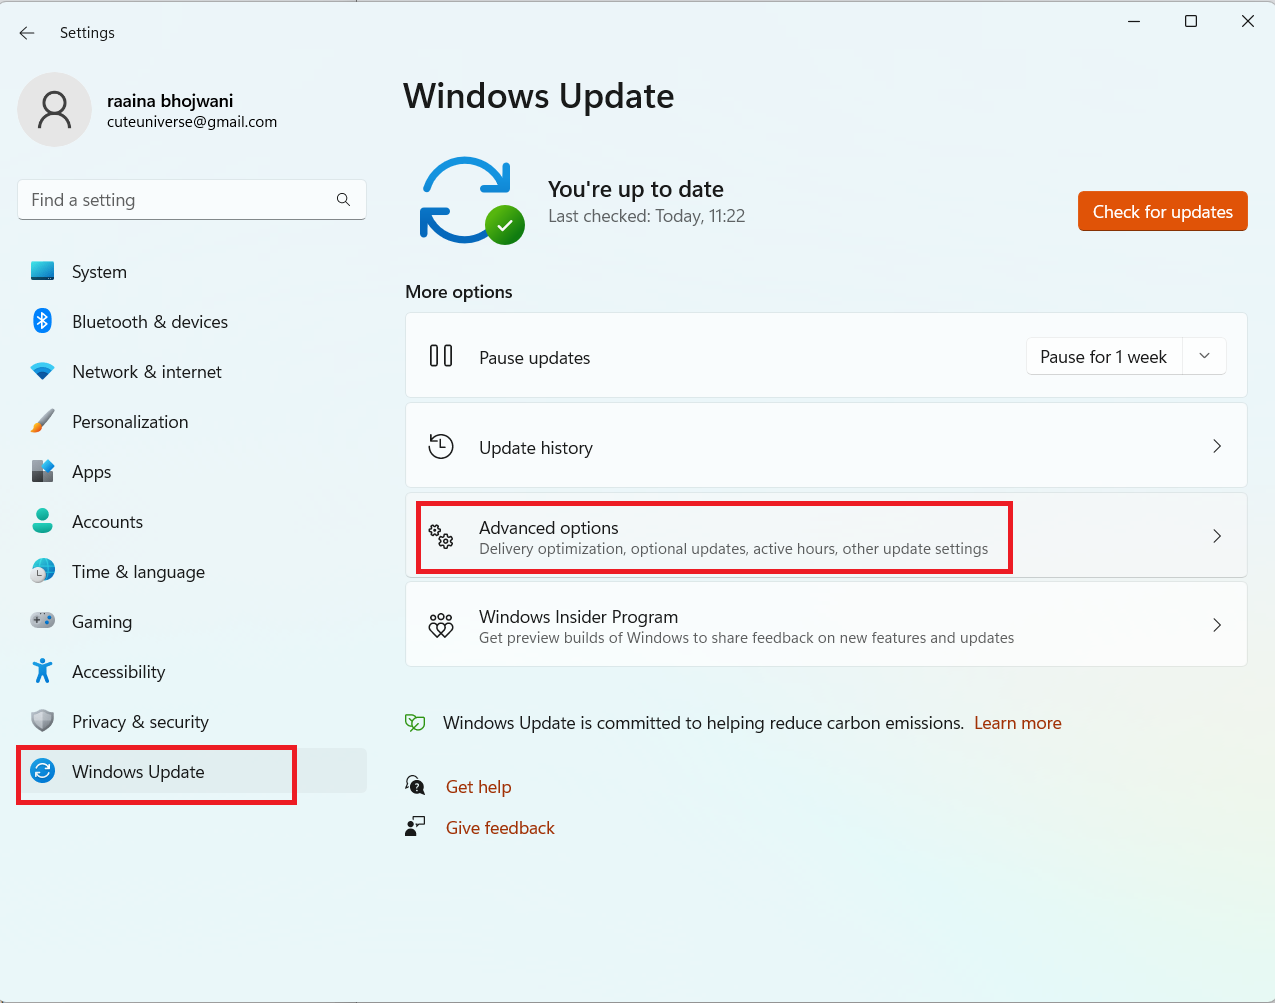
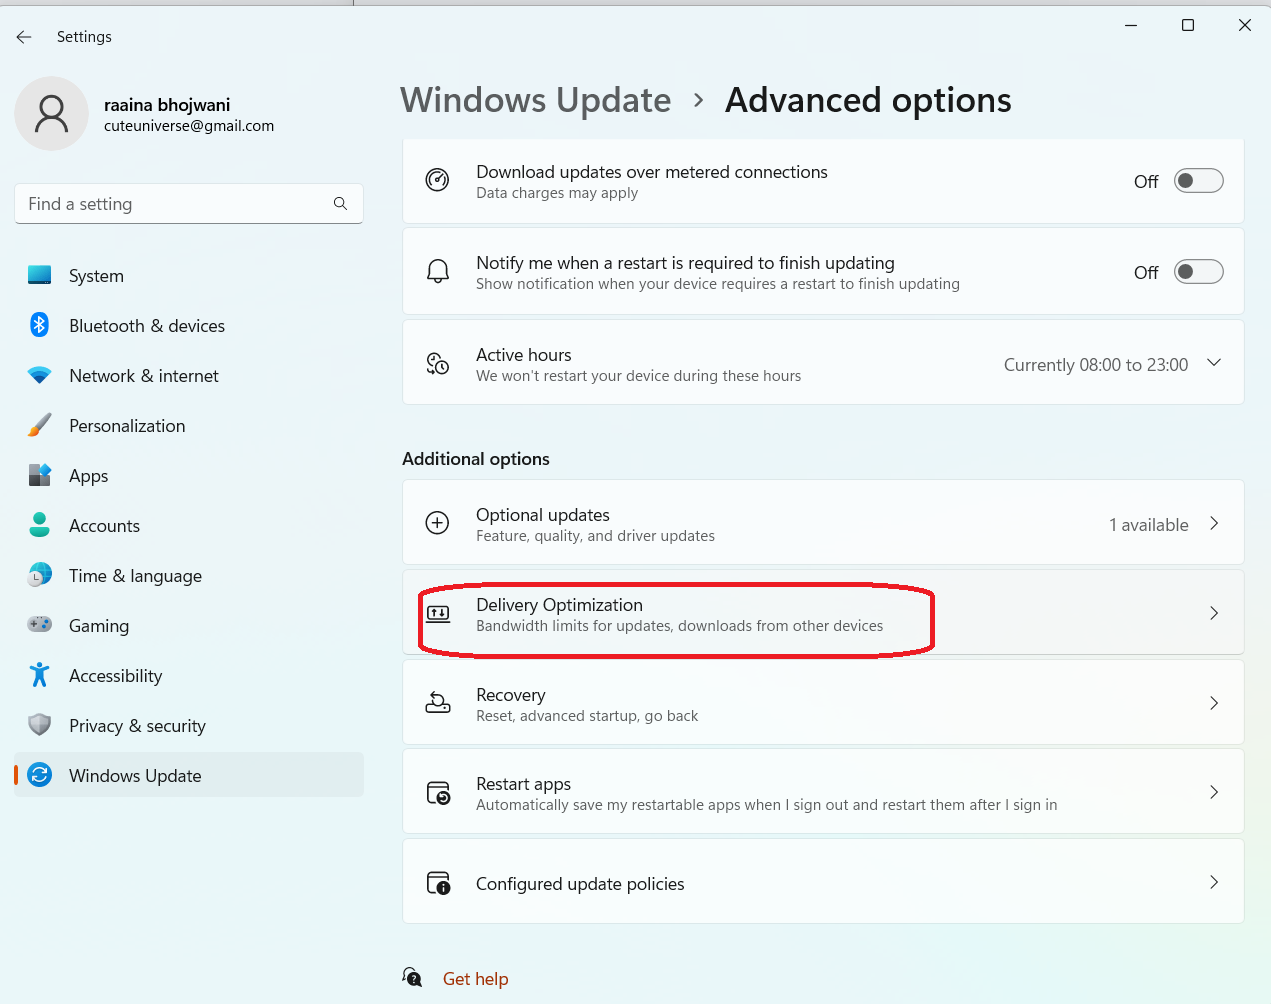
Fix 6: Disable Updates from more than one place
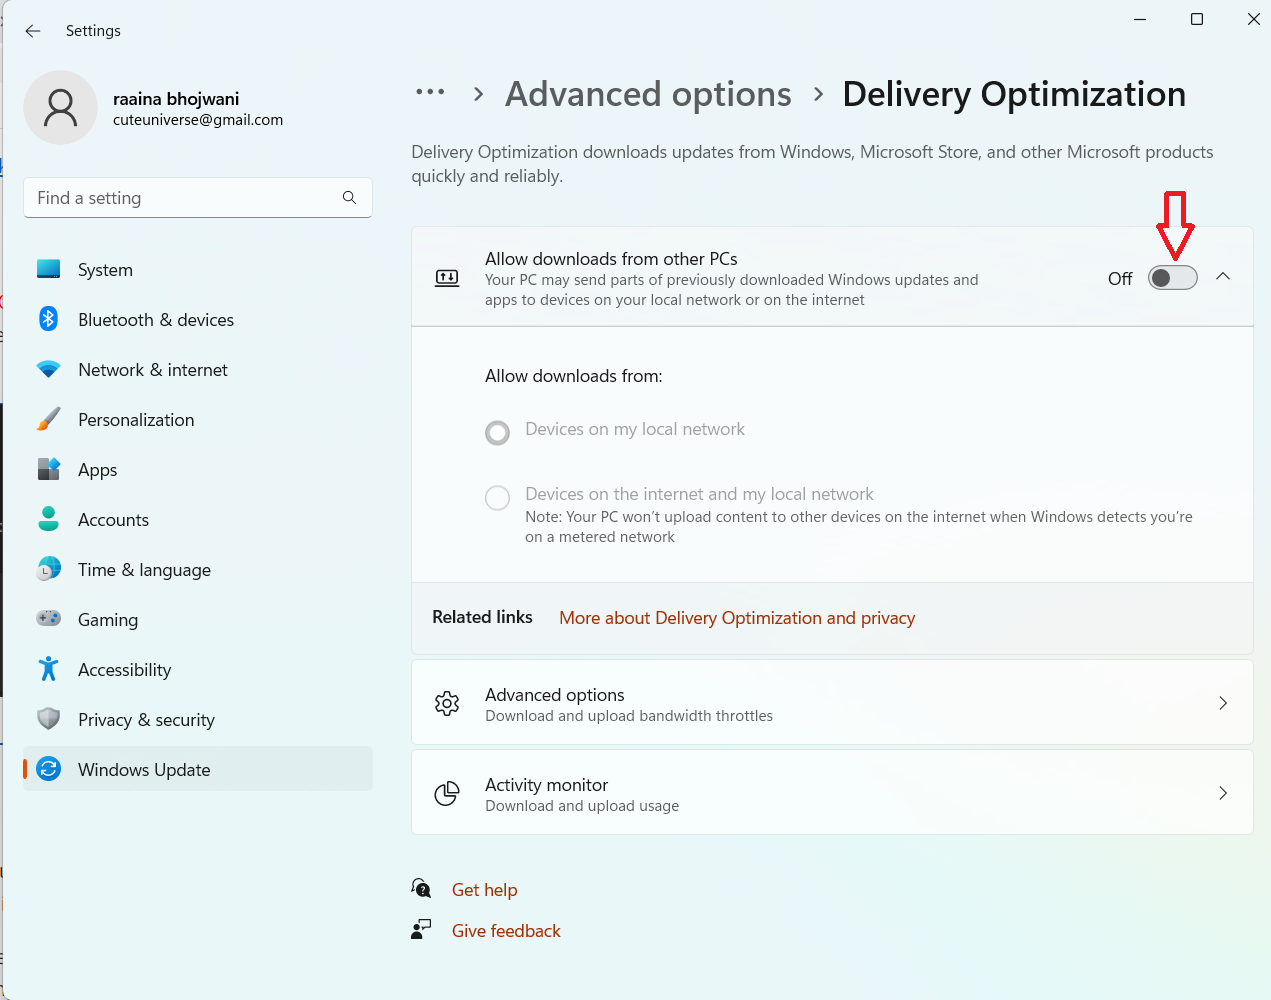
Navigate to the path Settings > Windows Update > Advanced options > Delivery Optimization.
A screen will appear on which disable Allow downloads from the PCs option.
Fix 7: Scan for malware and uninstall unwanted programs
To get 100% CPU usage scan your system with antivirus/malware software. The Antivirus software will automatically detect viruses and clean your system.
Fix 8: Allow the system to manage virtual memory
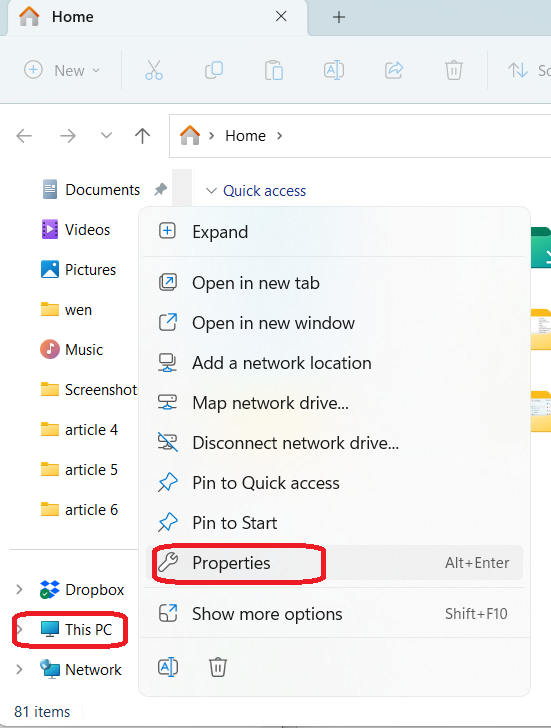
Open File Explorer > right click on This PC > Properties
Click Advanced system settings > advanced > settings.
Tap Advanced tab > Change > uncheck Automatically manage paging file size for all drives > System Managed size > OK.

Fix 9: Defragment hard drives
Open Control Panel. Click on System and Security. Then in Windows tools click on Defragment and Optimize your drives.

Select the drive to optimize it. Click Optimize.
Fix 10: Delete and Uninstall Unwanted programs
Lastly, removing unnecessary apps, files, and data from your computer can release some storage space and can fix 100% of CPU usage.
Hope this is helpful!