Are you struggling to sign in to your favorite websites and applications on Windows 11 because your Credential Manager isn’t working? Don’t waste your valuable time by re-entering passwords repeatedly. This guide will walk you through several troubleshooting steps to fix Credential Manager not working in Windows 11 and running smoothly in Windows 11.
Page Contents
What is a Credential Manager?
A Credential Manager is a built-in Windows feature that securely stores login information for websites, applications, and network connections. It remembers usernames, passwords, and other credentials so you don’t have to enter them manually every time you need to access them.
There are several reasons why your Credential Manager might not be working correctly in Windows 11:
- Corrupted Files
- Incorrect Settings
- Third-Party Security Software
- Outdated System
- Malware Infection
Fix: Credential Manager not working in Windows 11
Fix 1: Enter Credential Manually in Credential Manager
1. Open Credential Manager. Select “Windows Credentials“.

2. After that click the “Add a generic credential” option.
3. Enter the internet or network address, username and password.

4. Click OK.
Fix 2: Use Microsoft Edge to change saved passwords in Credential Manager
1. Open Microsoft Edge. Click the “…” menu button and select “Settings“.

2. Go to Profiles. Scroll down and click “Passwords“.

3. Click “Password security check“.
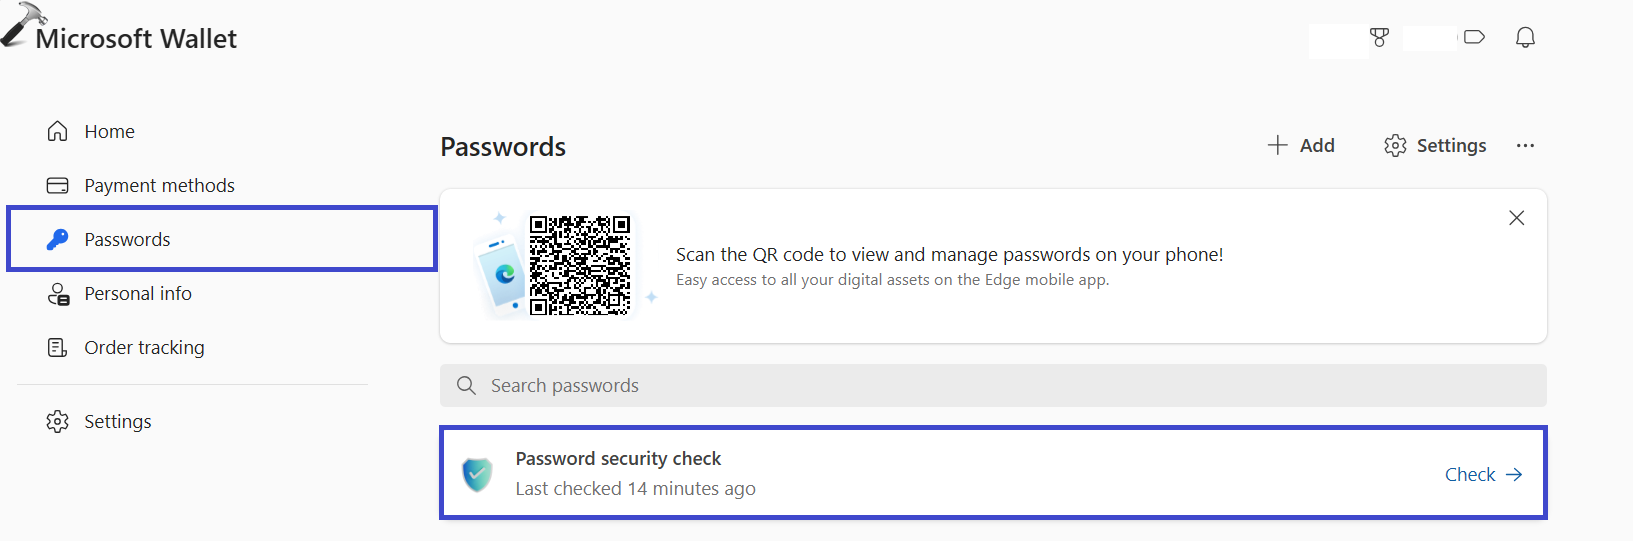
4. A list of saved passwords will appear. Click on “change” to change the password.

5. Click Save.
Fix 3: Change Internet Options
1. Press the Windows key + R. Type “inetcpl.cpl” and click OK.
2. An Internet Properties window will appear. Go to the “Content” tab and click “Settings” under the AutoComplete section.

3. Uncheck all the options and click OK. After that, enable all the options and click OK to save the changes.

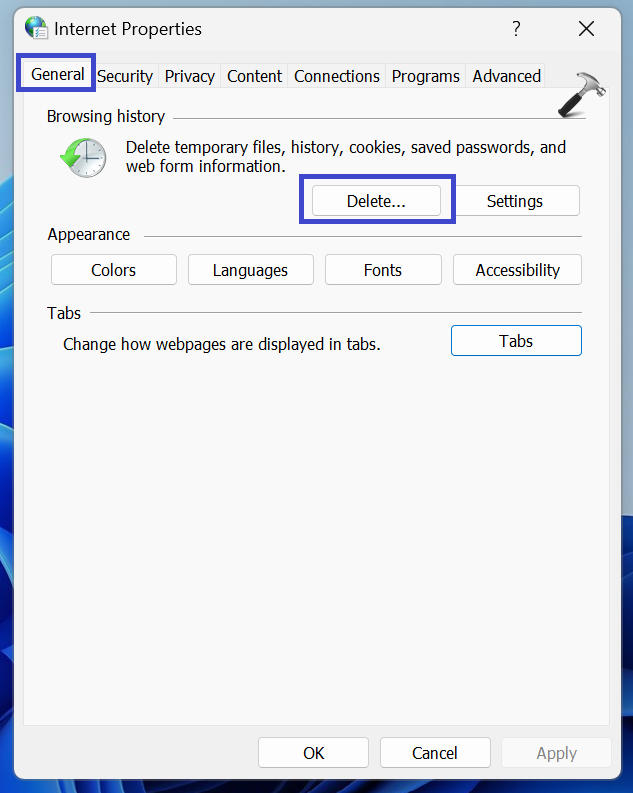
4. Now, go to the “General” tab. Under the Browsing history section, click the “Delete…” button.
Close all the Windows and restart the PC.
Fix 4: Use Registry Editor
1. Press the Windows key + R. Type “regedit.exe” and click OK.
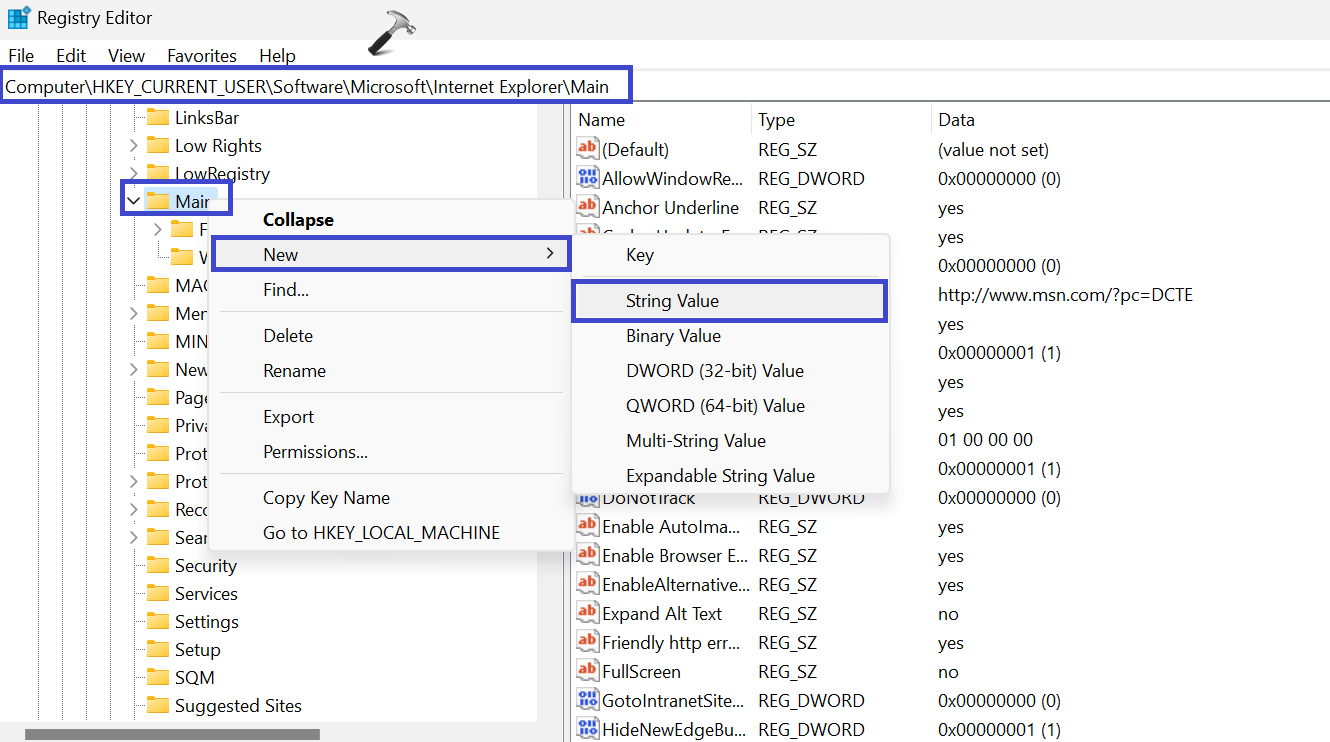
2. Navigate to the following path:
HKEY_CURRENT_USER\Software\Microsoft\Internet Explorer\Main
3. In the right panel, double-click “FormSuggest PW“. Enter the Value data and click OK.

You can create if you don’t have the “FormSuggest PW” string. Follow the below steps:
Right-click on “Main” and select “New => String Value“. Type “FormSuggest PW” and click OK.
4. Close all the registry windows and restart the PC.
Fix 5: Delete Protect Directory
1. Press the Windows key + R. Type “%appdata%” and click OK.
2. Click on “Microsoft” and then “Protect“.

3. Select all the files and delete them.
Fix 6: Set the Credential Manager Service to Automatic
1. Press the Windows key + R. Type “Services.msc” and click OK.
2. Double-click on “Credential Manager“.

3. A Credential Manager Properties (Local Computer) window will appear. Set the Startup type to “Automatic”.
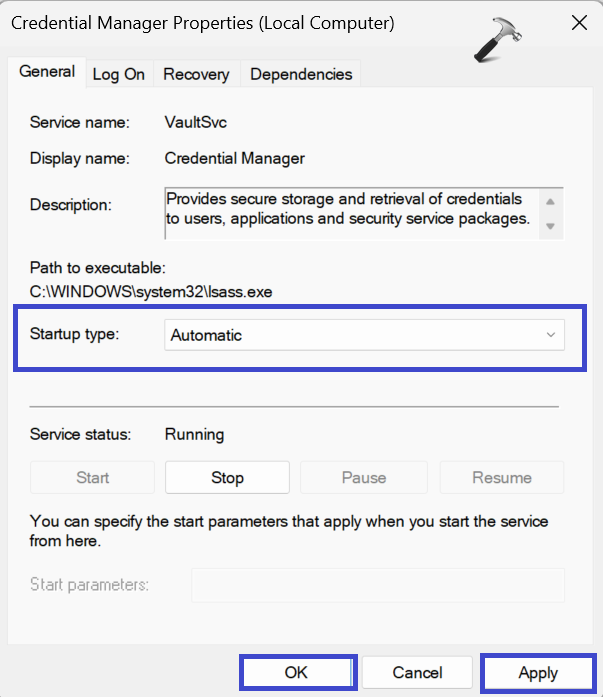
4. Click OK followed by Apply.
Fix 7: Change Ownership for Vault Directory
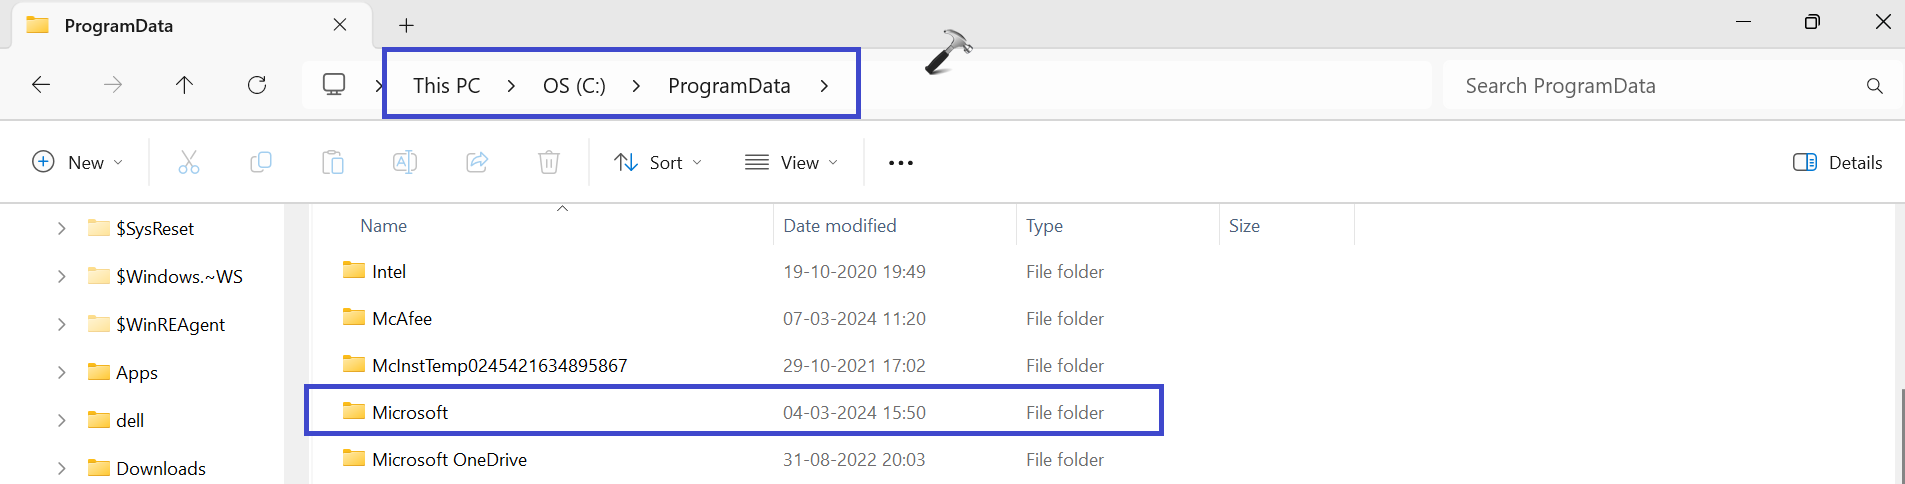
1. Open File Explorer and navigate to the “C: ProgramData” directory.

2. Click on the Microsoft directory.
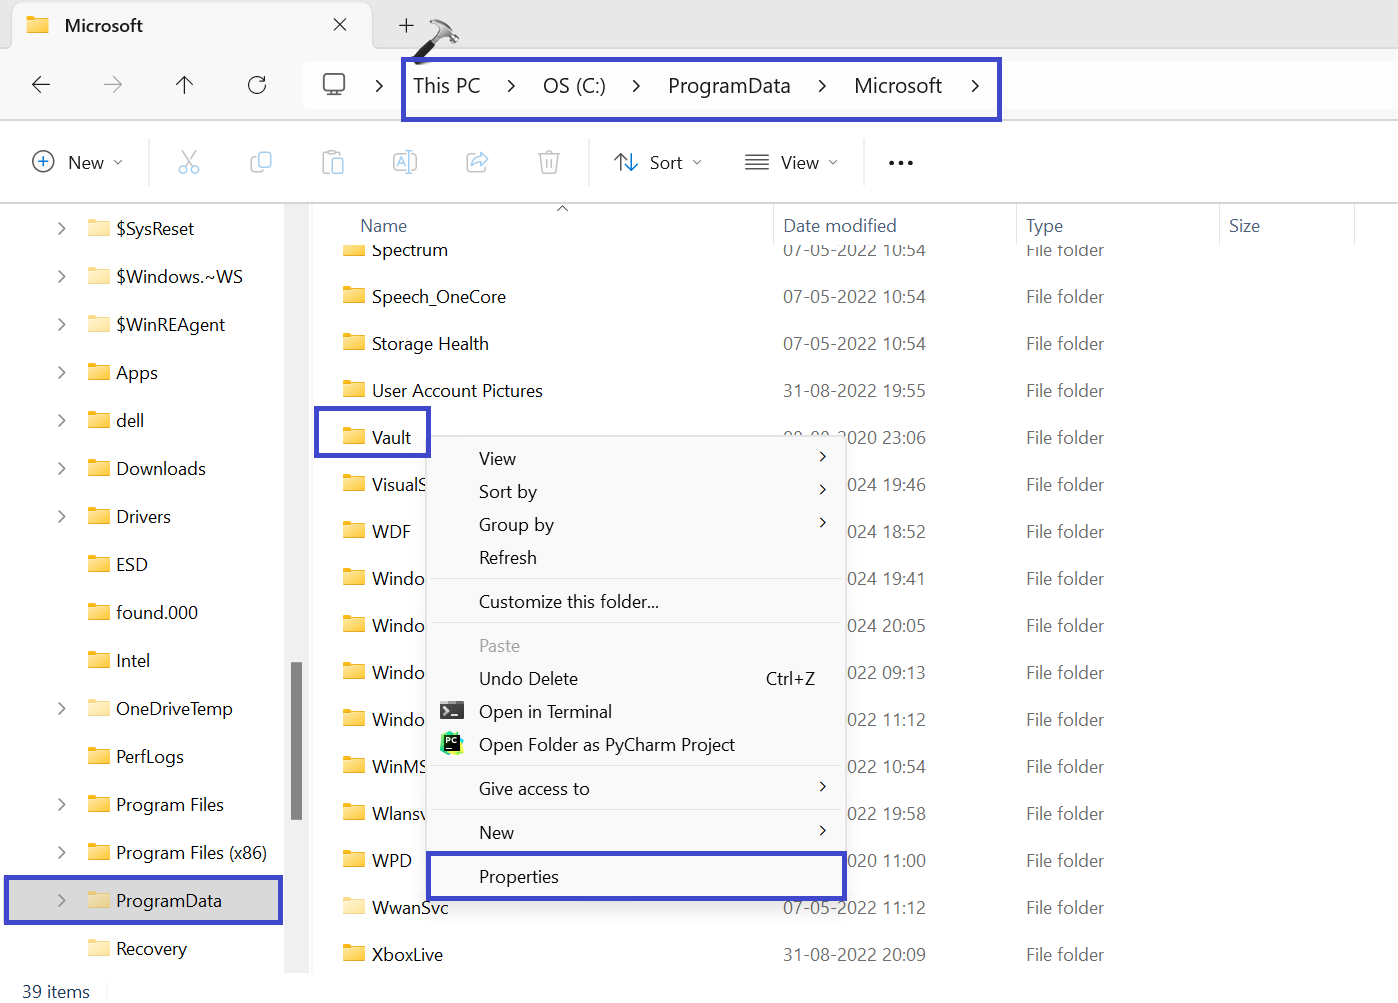
3. Now, right-click on Vault and select “Properties“.
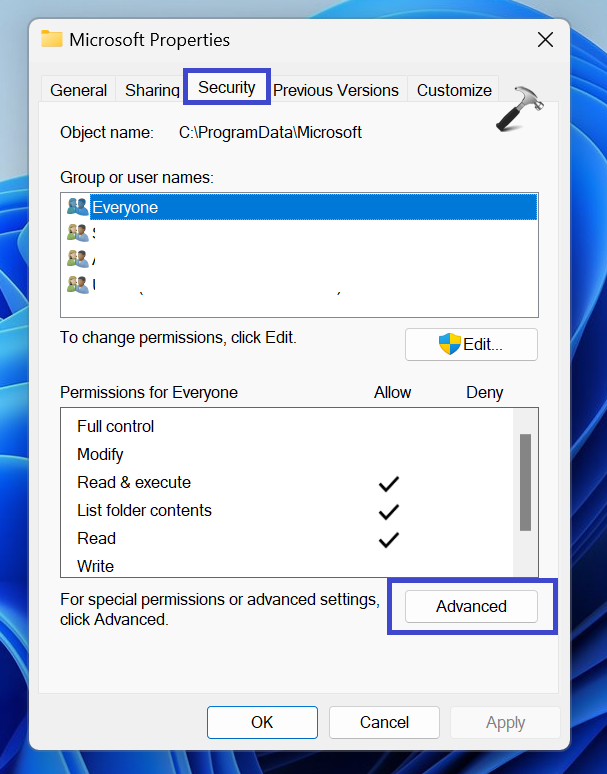
4. A dialog box will appear. Under the Security tab, click the “Advanced” option.
5. After that, click “Change permissions“.
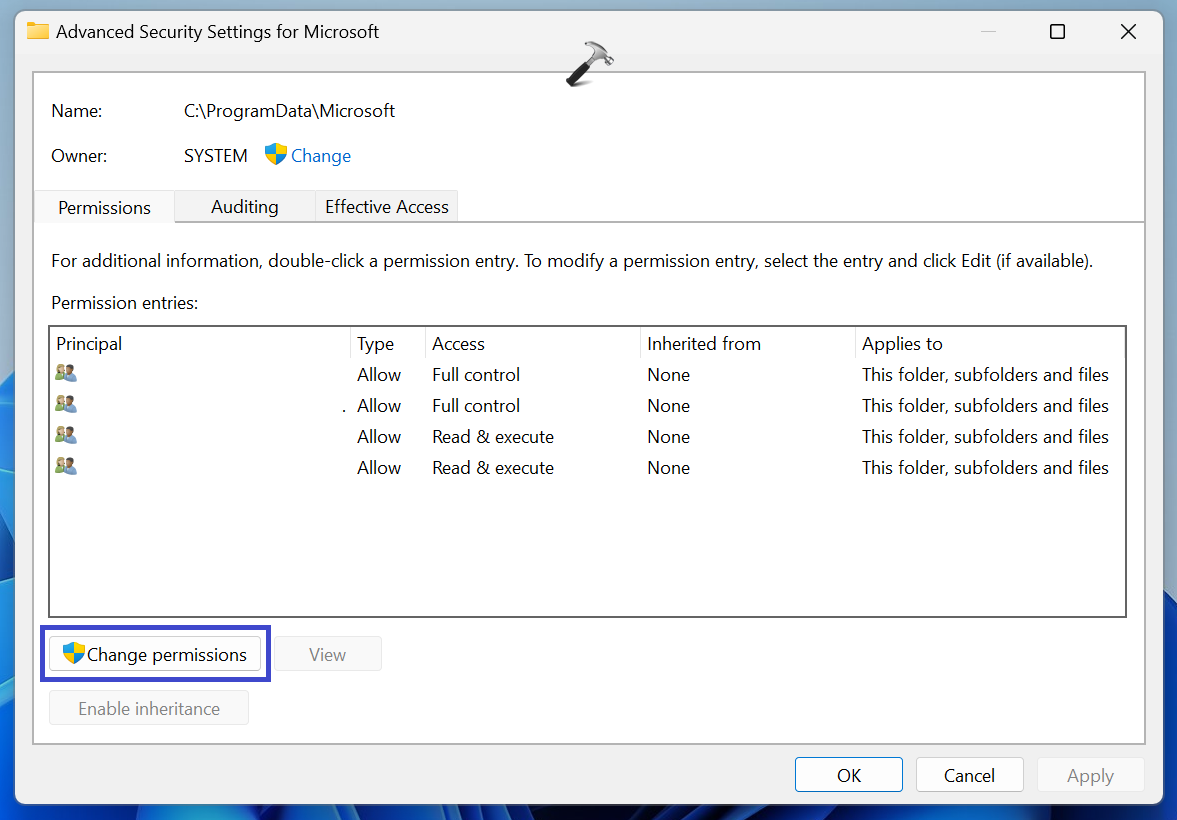
6. Finally, check the “Replace all child object permissions entries” box. Click OK followed by Apply.

Sometimes, Credential Manage is not working because the Vault directory is missing certain permissions. For that, follow the below steps:
1. In the Vault, right-click on the “AC658CB4-9126-49BD-B877-31EEDAB3F204” folder and select “Properties“.

2. Go to the Security tab and click the “Advanced” button.

3. In the Owner section, click “Change”.

4. Enter Administrators under the “Enter the object name to select” section.

5. Now, click on the “Check Names” option. If it is in order then click OK.
6. Finally, Check the “Replace owner on sub containers and objects” and “Replace all child object permission entries” boxes.

Click OK followed by Apply.
Fix 8: Use the IP address of the device
If you cannot access the network drive, adjusting the settings in Credential Manager might be necessary.
Identify and Remove Conflicting Credentials:
Open the Credential Manager and search for credentials associated with the problematic network drive. Once identified, remove the conflicting credential entry.
Create a New Credential with Device IP:
The second option is to create a new credential. Enter your device’s IP address instead of the network driver name. After that, enter your username and password for accessing the network drive.
That’s It!