
Having issues with mouse sensitivity? We know its frustrating especially if you are playing video game or working on some project. In this article, we will explain How Mouse Sensitivity keeps changing in Windows 11.
If Mouse Sensitivity keeps changing or changes its DPI randomly, the first you should remove the mouse and connect it to a different port. If the issue is resolved after plugging the mouse into a different port, you need to consult a technician and get the port repaired.
Page Contents
Fix: Mouse sensitivity keeps changing in Windows 11/10
Option 1. Click on the DPI button on your Mouse
DPI is the standard used to measure the mouse sensitivity, expressed as the number of DPIs (dots per linear inch) that a device can detect. By changing the DPI, you can instantly adjust pointer speed for precision tasks, such as in-game targeting or photo editing.
There is a small button on your mouse between the left and right clicks. This button is used to control the DPI of your mouse, if you click on that button, your pointer became more or less sensitive as it switches to a different DPI profile.
Option 2. Turn off Enhance Pointer Precision
Enhance Pointer Precision works perfectly on a lot of software, especially Microsoft apps, but it can fail to work on a non-Windows app. We will recommend you disable Enhance Pointer Precision. Follow the steps to do the same.
STEP 1: Open Settings => Bluetooth & devices => Mouse
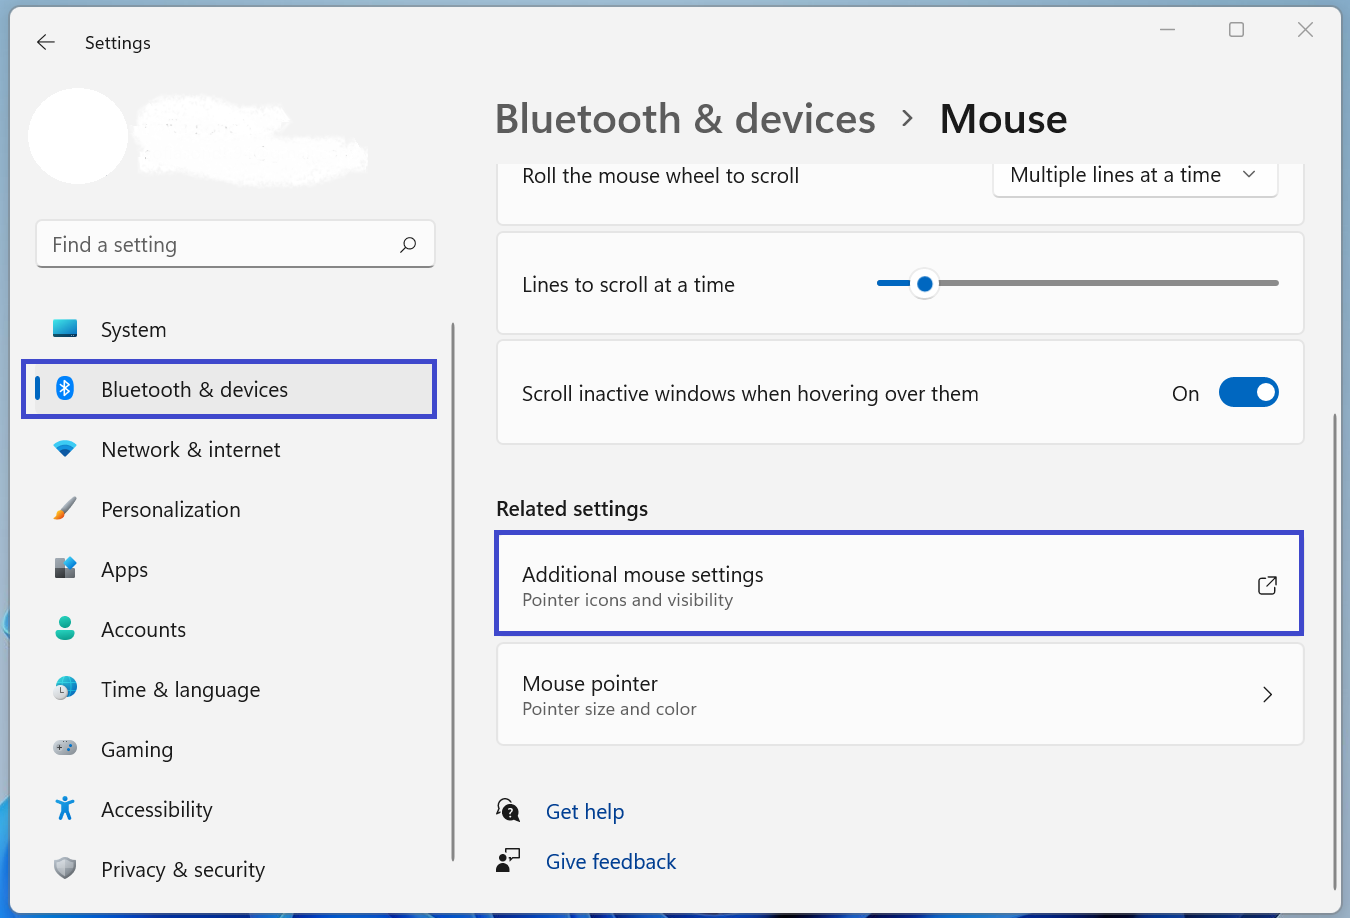
STEP 2: Click on Additional mouse settings, it will launch Mouse Properties.
STEP 3: Go to the Pointer Options tab.
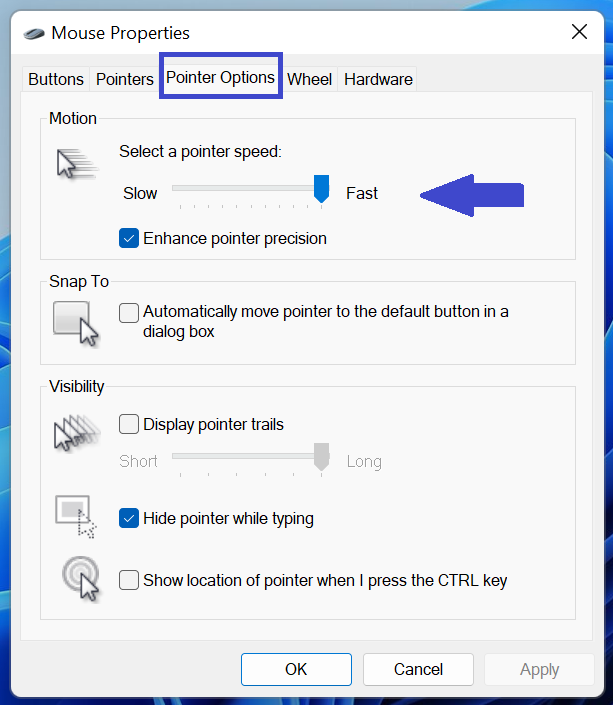
STEP 4: Uncheck Enhance pointer precision box.
STEP 5: Click Apply=> Ok.
Option 3. Run Hardware and Device Troubleshooter
Hardware and Device Troubleshooter can automatically detect what’s wrong with your hardware (mouse) and give you the suitable solution. Follow the steps:
STEP 1: Open ‘Command Prompt’. You can search it out from the Start Menu or by Win + R, type “Cmd”, and hit Enter.
STEP 2: Once Command Prompt window is open, paste the following command and hit Enter.
msdt.exe -id DeviceDiagnostic

It will open the Hardware and Device troubleshooter, just follow the on-screen instructions to run the troubleshooter.
Option 4. Reinstall the mouse driver
It is common for a driver to get corrupted or face some issues. Windows has a Device Manager that lets you uninstall a driver easily. First remove the Mouse driver and then reinstall it.
Follow the given steps to uninstall device:
STEP 1: Open Control Panel => Device Manager.

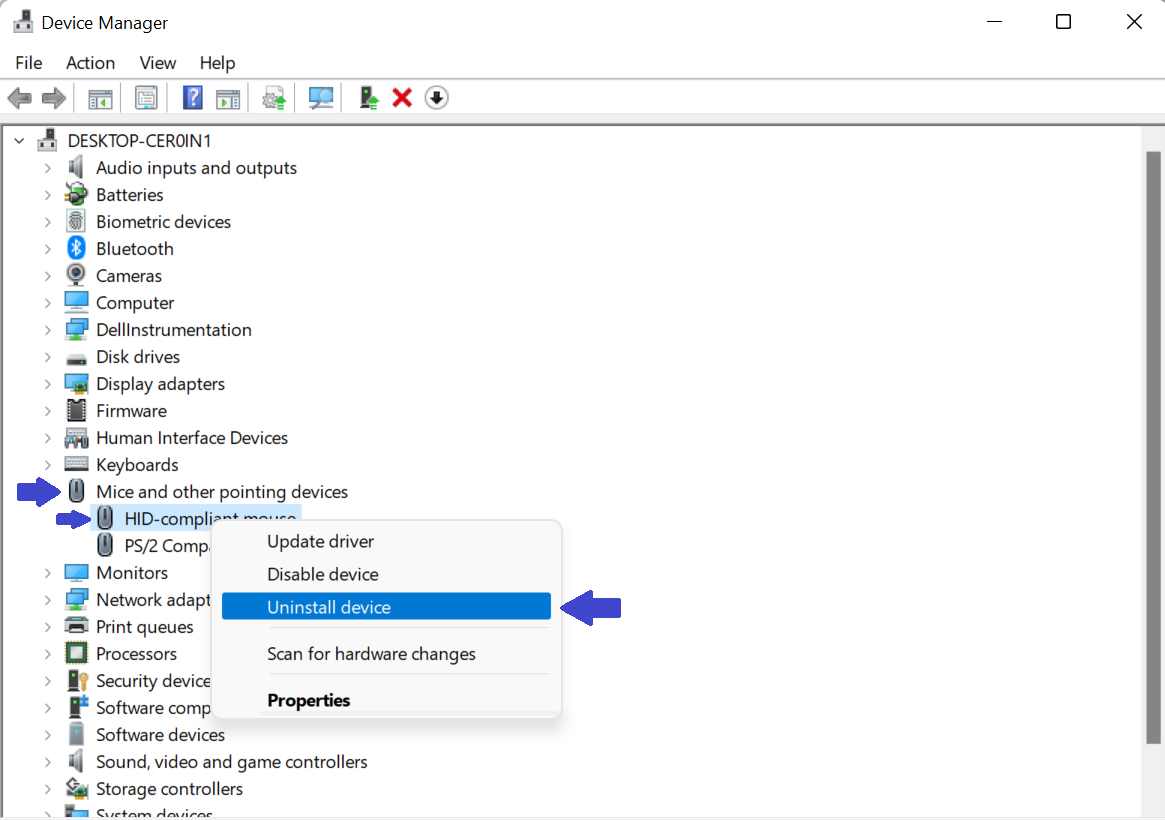
STEP 2: Expand Mice and other pointing devices.
STEP 3: Right-click on your mouse’s driver (manufacturer’s name) and select Uninstall device from the context menu.
STEP 4: Click on Uninstall again when prompted.
Now the driver is removed. To reinstall it follow the steps:
STEP 1: Right-click on Mice and other pointing devices and select Scan for hardware changes.
STEP 2: Windows will detect connected hardware and install software. You can also unplug and re-plug the dongle if that’s easier.
Option 5. Troubleshoot in Clean Boot
If nothing worked, your last solution is to perform Clean Boot and find out the issue. There is a lot of third-party software causes trouble to the user, booting the OS in a Clean Boot state will disable all non-Windows processes, which you can disable manually.


