Your Windows operating system’s Recycle Bin is the digital safety net where deleted files await their final exit. But what do you do when you find that your Recycle Bin icon on the desktop has mysteriously turned gray, becoming inaccessible? In this guide, we explore a series of solutions to fix Recycle Bin grayed-out in Windows 11/10 issue in Windows 11/10. We’ll explore the underlying causes, diagnose the problem, and provide step-by-step instructions to restore your Recycle Bin’s functionality.
Page Contents
Fix: Recycle Bin grayed out in Windows 11/10
The “Recycle Bin grayed out” issue in Windows 11 and Windows 10 can have various causes, including:
- Corrupted System Files: System files related to the Recycle Bin or the desktop icons may become corrupted, leading to the grayed-out icon.
- User Account Issues: Problems with user accounts, such as incorrect permissions, may prevent the Recycle Bin from functioning correctly.
- Third-Party Software Interference: Installed third-party software or applications can sometimes interfere with the Recycle Bin’s functionality.
- Windows Updates: System updates or changes, including Windows updates, can sometimes affect the desktop icons, including the Recycle Bin.
Below we have the best solutions to fix this error:
Fix 1: Check for Updates
If you haven’t installed the latest Windows updates, it’s possible that this is causing the Recycle Bin to be grayed out. To check for updates:
1. Open the Settings app and click “Windows Update“.
2. Click “Check for updates“.
If there are any updates available, install them. Once the updates have been installed, restart your computer.
Fix 2: Empty Recycle Bin
If you’ve noticed that your Recycle Bin is overflowing with unnecessary files, it’s time for some spring cleaning. Let’s address this issue with a simple fix:
1. Go to the Recycle bin.
2. Click “Empty Recycle bin“.

You can also remove the temporary files to solve this issue. To do so:
1. Open the Settings App. Select “System” and click on “Storage“.
2. This will take a few seconds to load. Now, click on “Temporary files“.
3. Now, select the “temporary files” box and other boxes (accordingly) to remove all the temporary files from your PC.
Fix 3: Re-add the Recycle Bin
Re-adding the Recycle Bin icon is a way to restore the default desktop configuration and ensure that you have easy access to the Recycle Bin for managing deleted files. It’s a common troubleshooting step when the icon goes missing for any reason.
Follow the below steps to re-add the recycle bin:
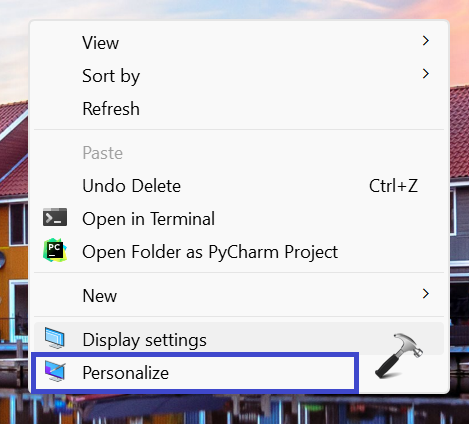
1. Right-click on the desktop screen and select “Personalization“.
2. Now, select “Themes“.
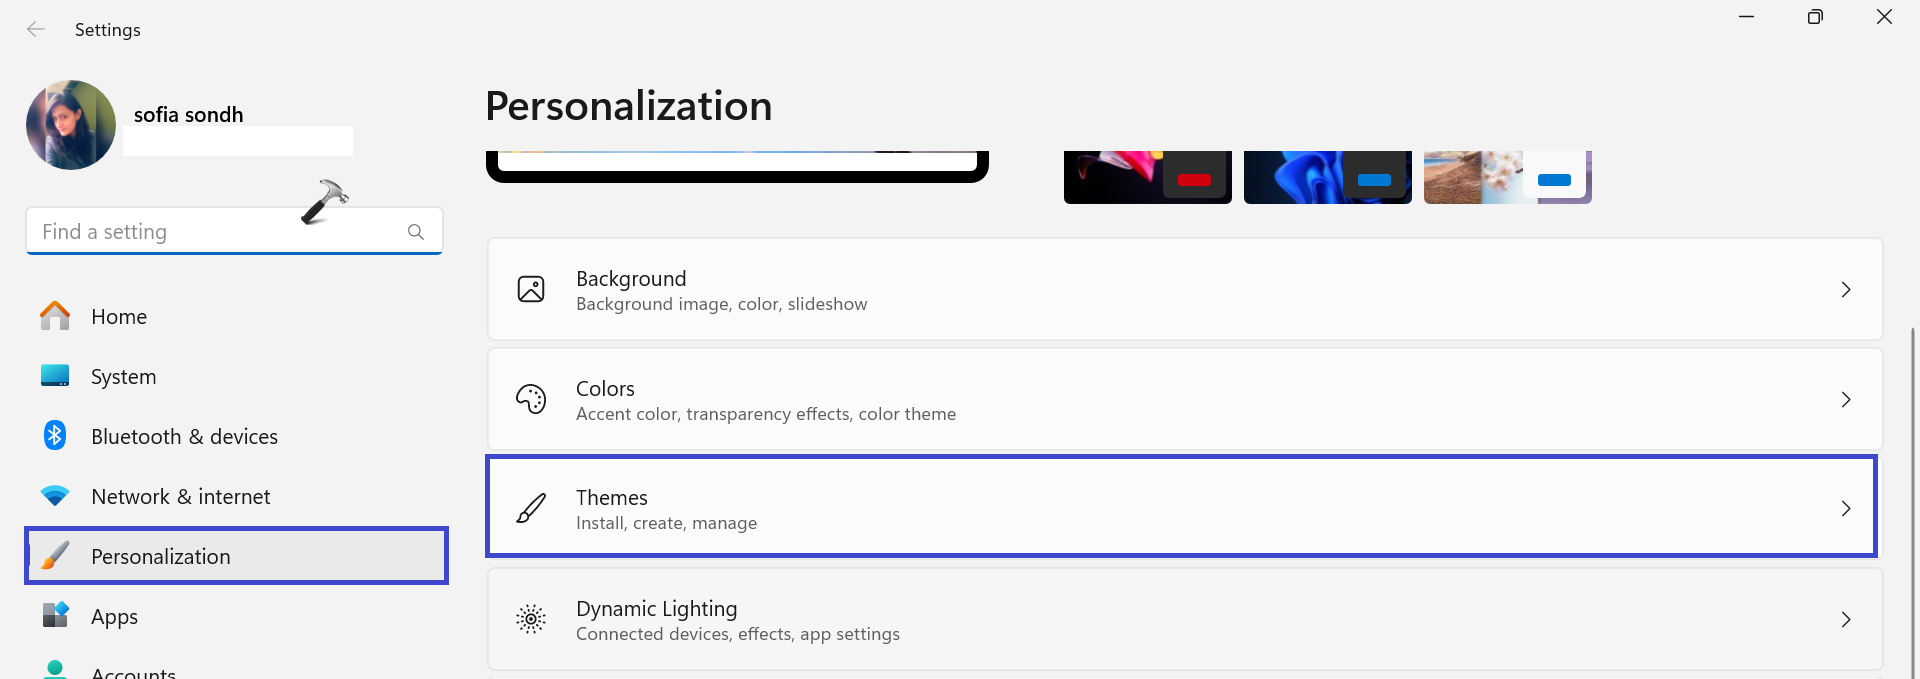
After that, click on “Desktop icon settings“.

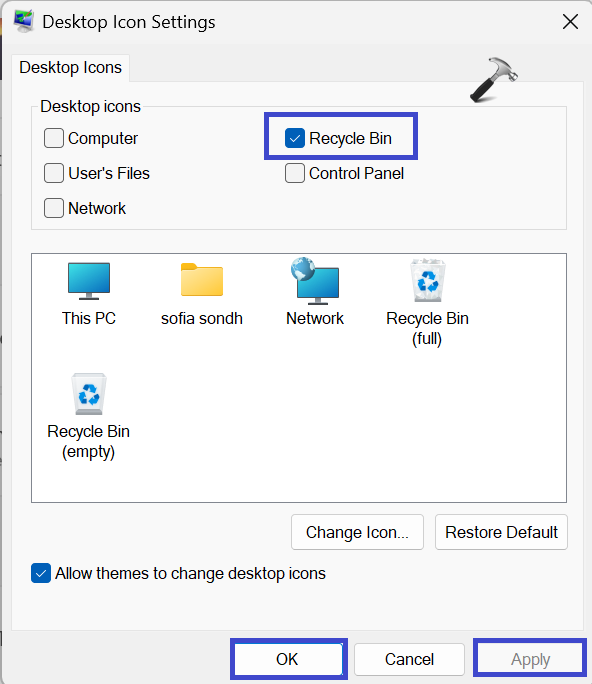
3. A prompt box will appear.
Uncheck the box of the “Recycle bin” and click OK followed by Apply.
Now, check whether the recycle bin icon is grayed out on the desktop or not.
Fix 4: Switch to guest user account
In some cases, the Recycle Bin issue may be related to user account permissions or corruption. If switching to the guest user account doesn’t resolve the problem, creating a new user account with administrative rights can be an effective solution. Here’s how to do it:
1. Open the Settings App and go to “Accounts“.
2. Now, click on “Family“.

3. Select the “Add someone” option.

4. Now, click on “Create one for child“.

5. Follow the on-screen instructions to create a new account and make sure to give admin rights.
Fix 5: Registry Editor
If you’re facing issues with the Recycle Bin, you can attempt to resolve them by making changes in the Windows Registry. Here’s how to do it:
1. Press the Windows Key + R. Type “regedit.exe” and click OK.
2. Navigate to the following path:
HKEY_CURRENT_USER\Software\Microsoft\Windows\CurrentVersion\Policies\NonEnum
3. If the “NonEnum” key does not exist, then you can create a new registry key.
To create a registry key, right-click on Policies and select “New => key”.
Type “NonEnum” and click OK.

4. Now, right-click on the “NonEnum” registry key and select “New => DWORD (32-bit) value“.
Type “{645FF040-5081-101B-9F08-00AA002F954E}” and click ok.

5. Right-click the “{645FF040-5081-101B-9F08-00AA002F954E}” and select “Modify“.
A prompt box will appear. Set the value to 0 and click OK.

5. Close all the registry windows and restart the PC to save the changes.
Fix 6: Local Group Policy Editor
Follow the below steps to configure the display settings using Local Group Policy Editor:
1. Press the Windows Key + R. Type “gpedit.msc” and click OK.
2. Navigate to the following path:
User Configuration > Administrative Templates > Desktop
3. From the list, double-click on the “Remove Recycle Bin from Desktop” option.

4. A prompt box will appear.
Select “Enable” to remove the recycle bin from the desktop.
If you want to see the recycle bin on the desktop, then select “Disable” and click OK followed by Apply.
5. Restart the PC to save the changes.
Fix 7: Malware scan
Malware may have infected your computer, causing the Recycle Bin error. To fix a corrupted Recycle Bin caused by malware, I recommend downloading and using Microsoft Safety Scanner and Malwarebytes. Both tools are free and highly recommended by experts.
To use Microsoft Safety Scanner (https://learn.microsoft.com/en-us/microsoft-365/security/intelligence/safety-scanner-download?view=o365-worldwide):
- Download and run the tool.
- Click Scan now.
- Follow the on-screen instructions to remove any malware that is found.
To use Malwarebytes (https://www.malwarebytes.com):
- Download and install the tool.
- Click Scan now.
- Follow the on-screen instructions to remove any malware that is found.
If neither tool finds any malware, try the next fix.
Fix 8: Disable or Uninstall third-party apps
If you are using Rainmeter or another app to manage or access the Recycle Bin, try disabling or uninstalling it to see if that resolves the issue. Some users have reported accessibility issues with these apps.
If you have tried both of these fixes and the Recycle Bin is still corrupted, you may need to restore your system to a previous restore point or reinstall Windows.
That’s It!