
In Windows 11, some users report an issue with their Wi-Fi network. This issue could arise due to various reasons, such as incompatible Wi-Fi drivers, fault registry, etc. In this post, learn how to fix WiFi not working in Windows 11 issue.
Now, let’s get started without further ado!
Page Contents
Fix: WiFi not working in Windows 11
Fix 1: By Enabling the Network Driver
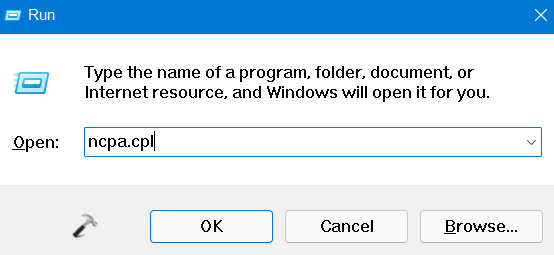
1. Open Run by pressing the Windows + R tabs together on your keyboard. Type ncpa.cpl in the Run dialog box and hit Enter to open Network Connections.
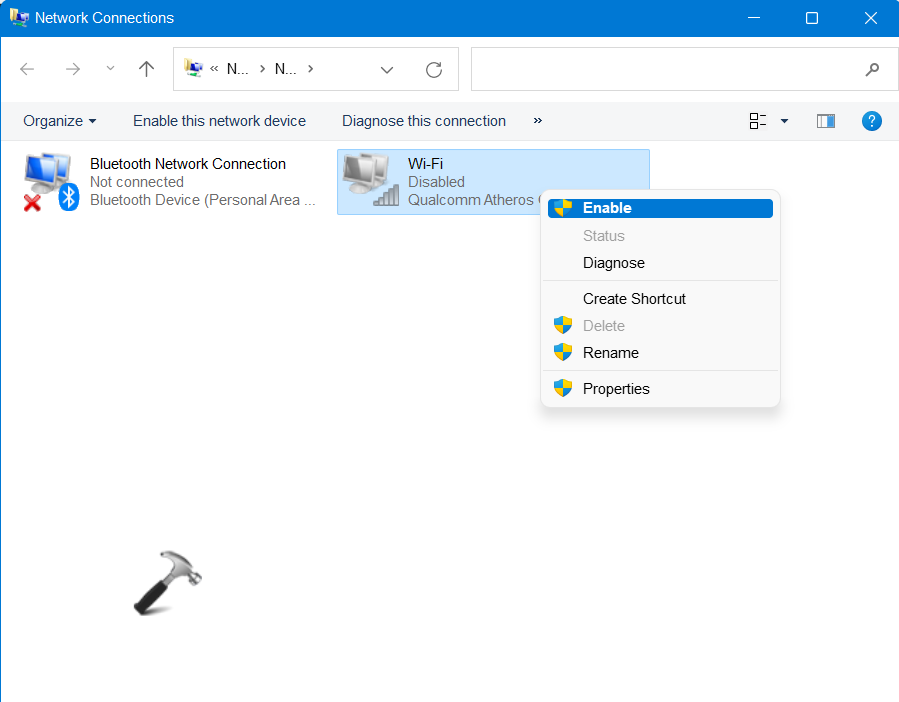
2. Next, right-click on the Wi-Fi driver you want to enable and then, click on Enable.
3. Lastly, reboot your system.
Fix 2: By Updating the Wi-Fi Network Adapter
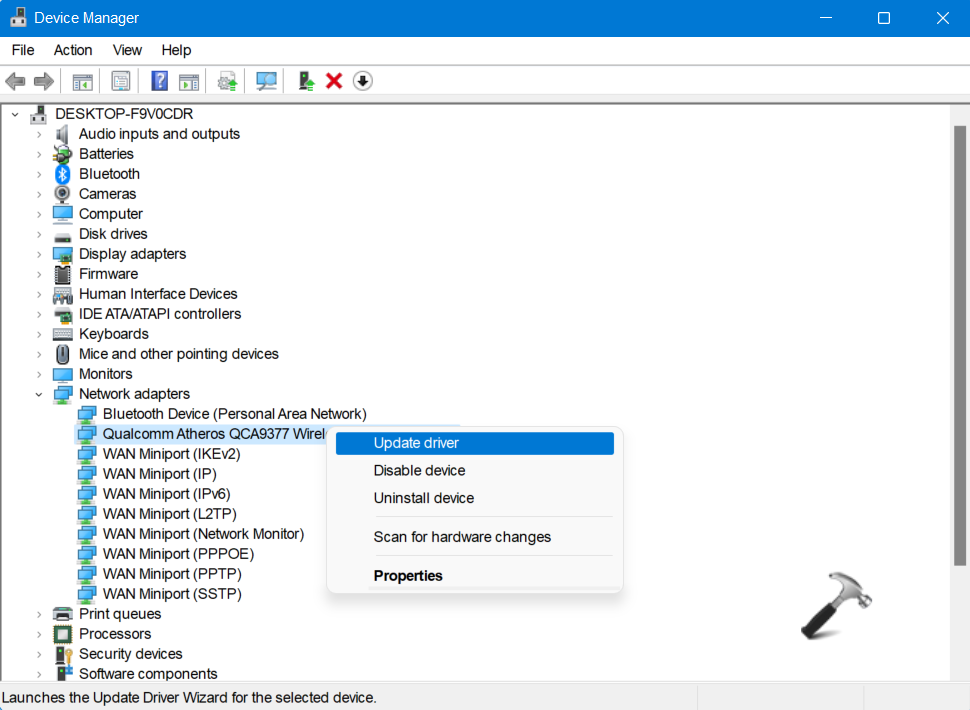
1. Firstly, right-click on the Windows icon and choose Device Manager.

2. After that, choose Network adapters. Once expanded, right-click on your network adapter and then, choose Update driver.
3. In the next window, select Search automatically for drivers. Windows will automatically look for the latest driver and update it.

Fix 3: By Automating the WLAN AutoConfig Service
1. Open Run by pressing the Windows + R tabs together on your keyboard. Type services.msc in the Run dialog box and hit Enter to open Service Manager.

2. Next, double-click on WLAN AutoConfig to open its Properties window.
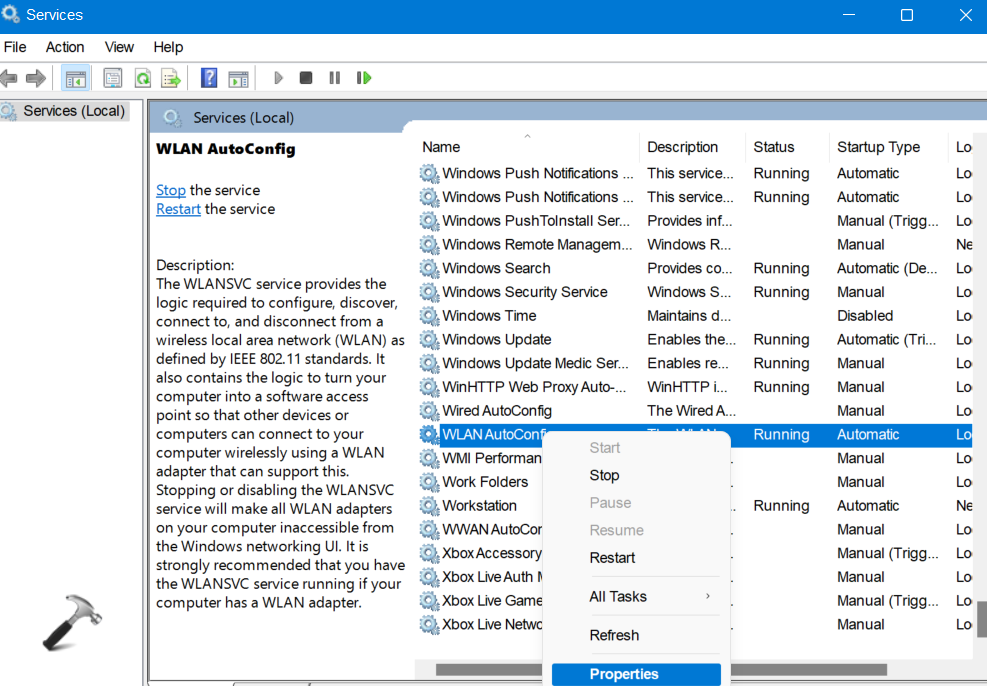
3. Now, go to Startup type and choose Automatic from the dropdown menu. Once done, select Apply and then, OK.
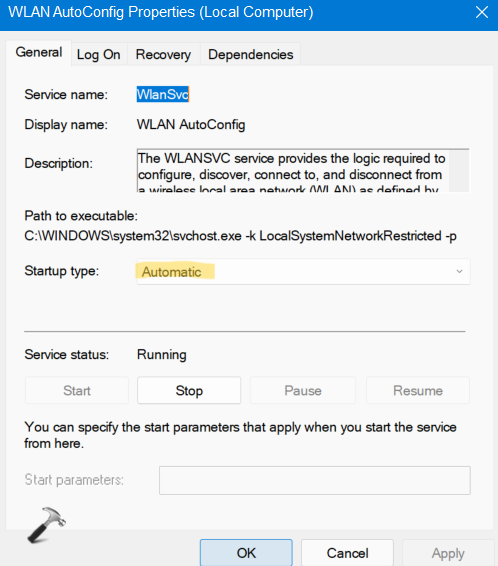
4. Now, reboot your system and check if your Wi-Fi is working now.
Fix 4: By Turning Off and On your Router
1. Turn your router off with the manual switch.
2. Now, unplug the router from your electric socket.
3. After two or more minutes, plugin the router and then, switch it on.
Now, check if the issue has been resolved.
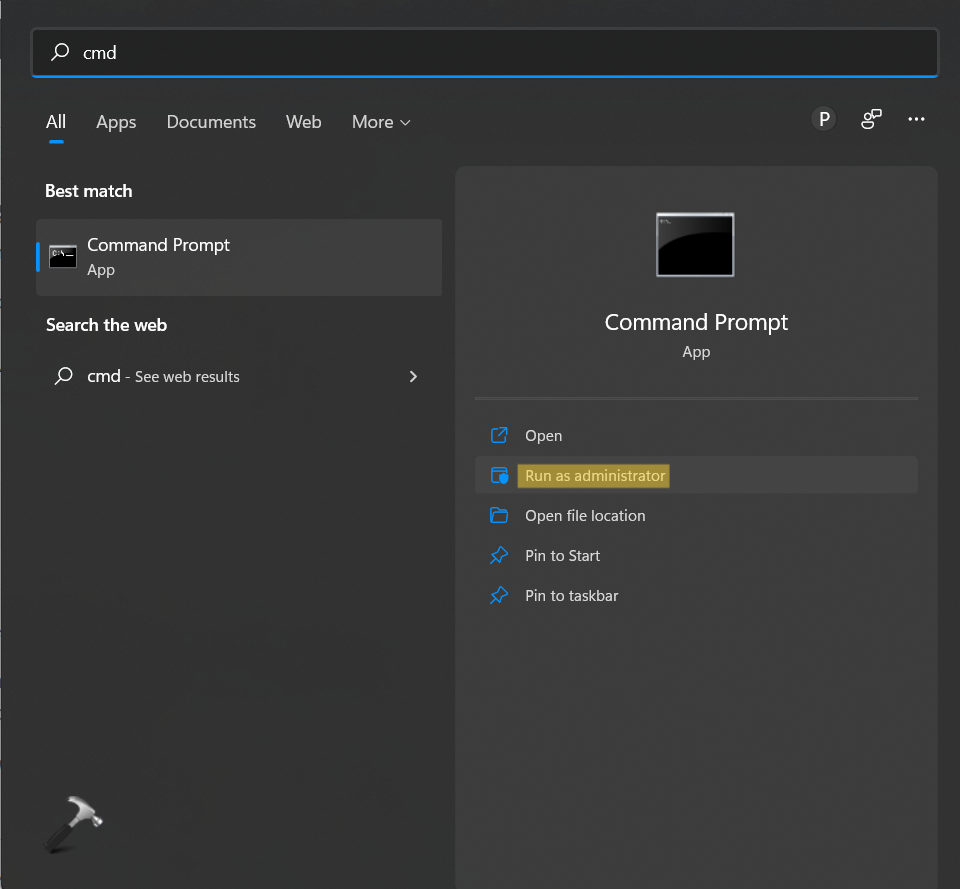
Fix 5: By Deleting Registry Entries Using Command Prompt
 Registry Disclaimer: It is recommended to create a System Restore point first, if you’re not familiar with registry manipulation.
1. Open Command Prompt with admin privileges through Windows Search.
2. Now, copy-paste the following command and hit Enter:
reg delete HKCRCLSID{988248f3-a1ad-49bf-9170-676cbbc36ba3} /va /f

3. After this, copy-paste the following command and hit Enter:
netcfg -v -u dni_dne
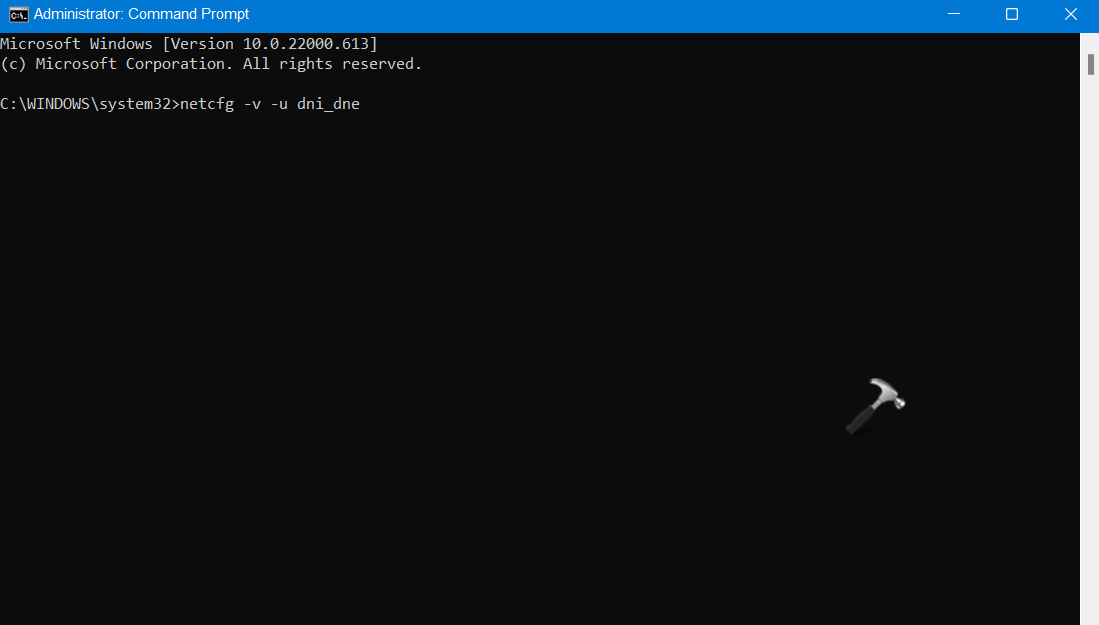
4. Once executed, reboot your system.
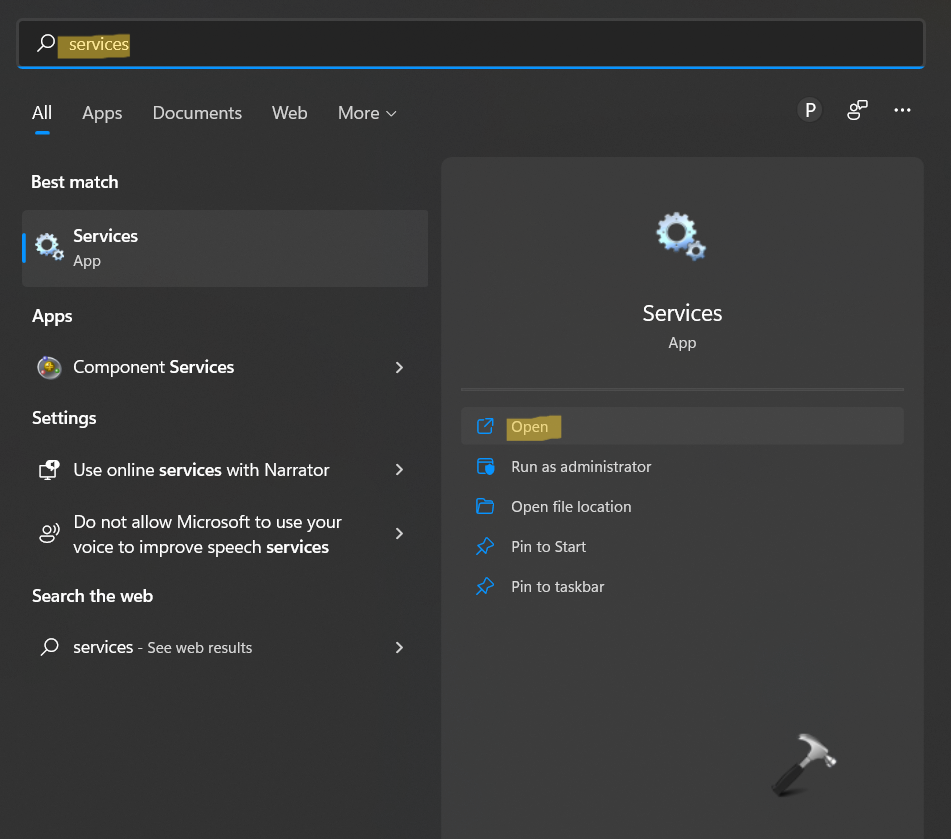
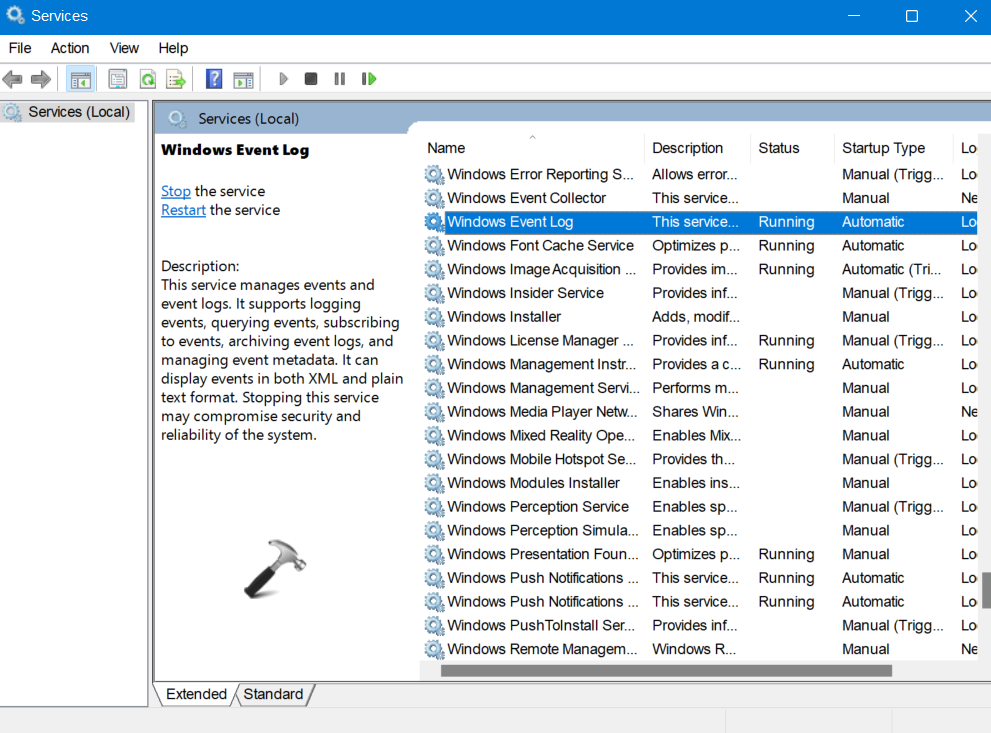
Fix 6: By Examining if the Necessary Services are Running
1. In the first place, open the Services utility through Windows Search. Type Services in the search column and click on Open.
2. Now, look for Windows Event Log and check if its status is Running.
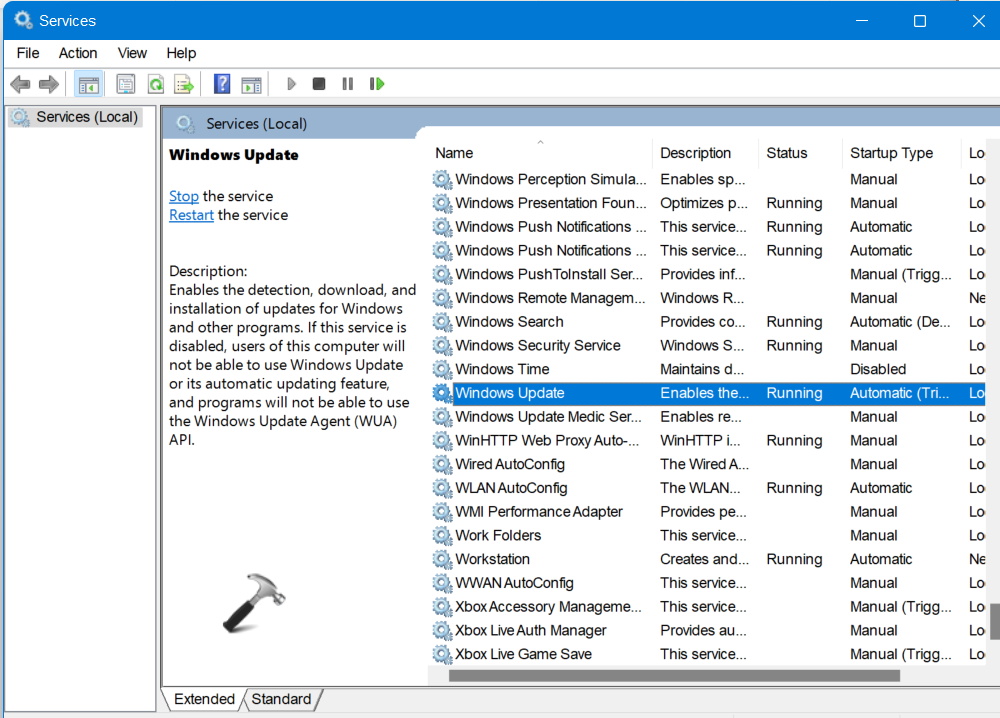
3. After that, look for Windows Update and check if its status is Running.
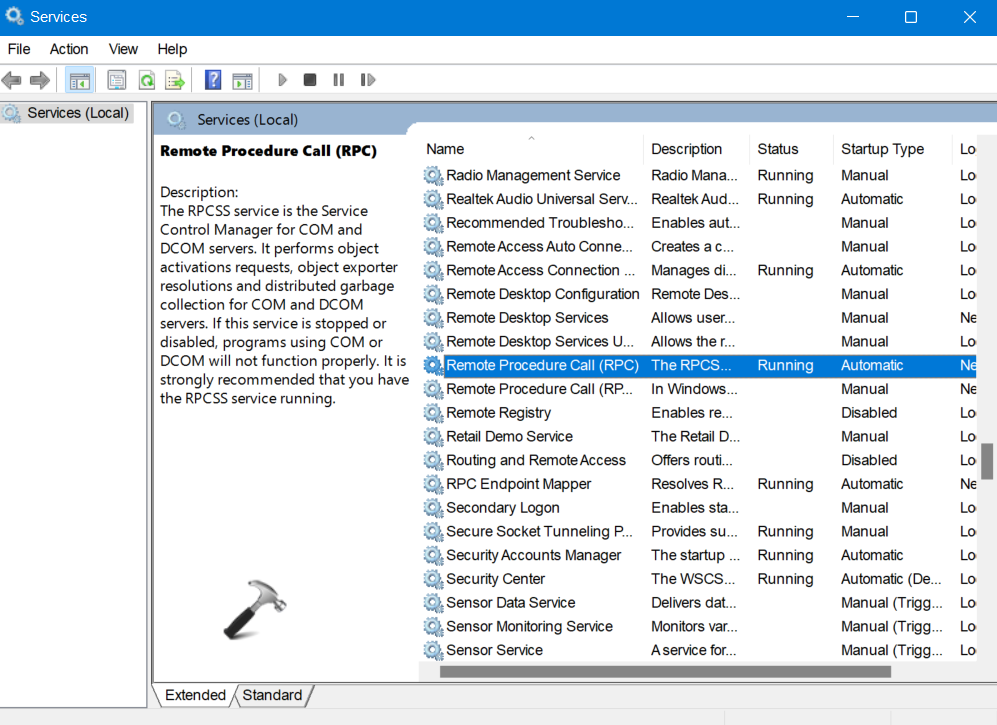
4. Lastly, look for Remote Procedure Call (RPC) and check if its status is Running.
5. If any of these services is not running, then right-click on it and then, choose Start.
Video fix
You can also refer this detailed video guide for further help:
Hope this helps!


thank you for the solution i have solve the issue of wifi driver getting disabled after every restart. thank you so much
^^ Glad to help sumit!
I am disappointed. I could not resolve the problem. The solution was not helpful. Please let me know if there is any other solution.
Get rid of Windows. Too many problems.