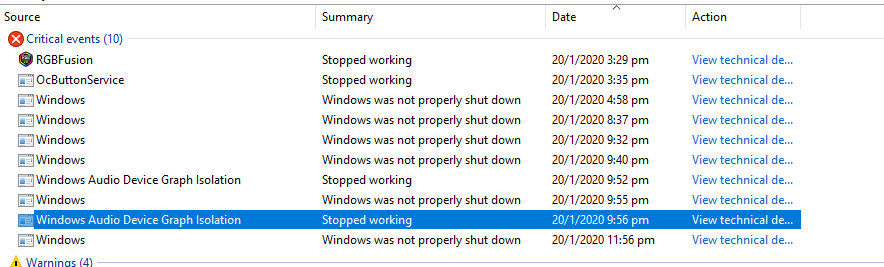
Windows Audio Device Graph Isolation (AUDIODG.EXE) is an essential process in the Windows 11 operating system responsible for managing audio tasks and ensuring smooth playback of sound. However, it is not uncommon for users to encounter an issue where the Windows Audio Device Graph Isolation stops working, leading to disrupted audio playback or no sound at all. This problem can be frustrating and hinder the overall user experience. In this article, we will provide effective solutions to fix the Windows Audio Device Graph Isolation stopped working problem, allowing you to regain control over your audio settings and enjoy uninterrupted audio playback on your Windows device.
Page Contents
Fix: Windows Audio Device Graph Isolation stopped working
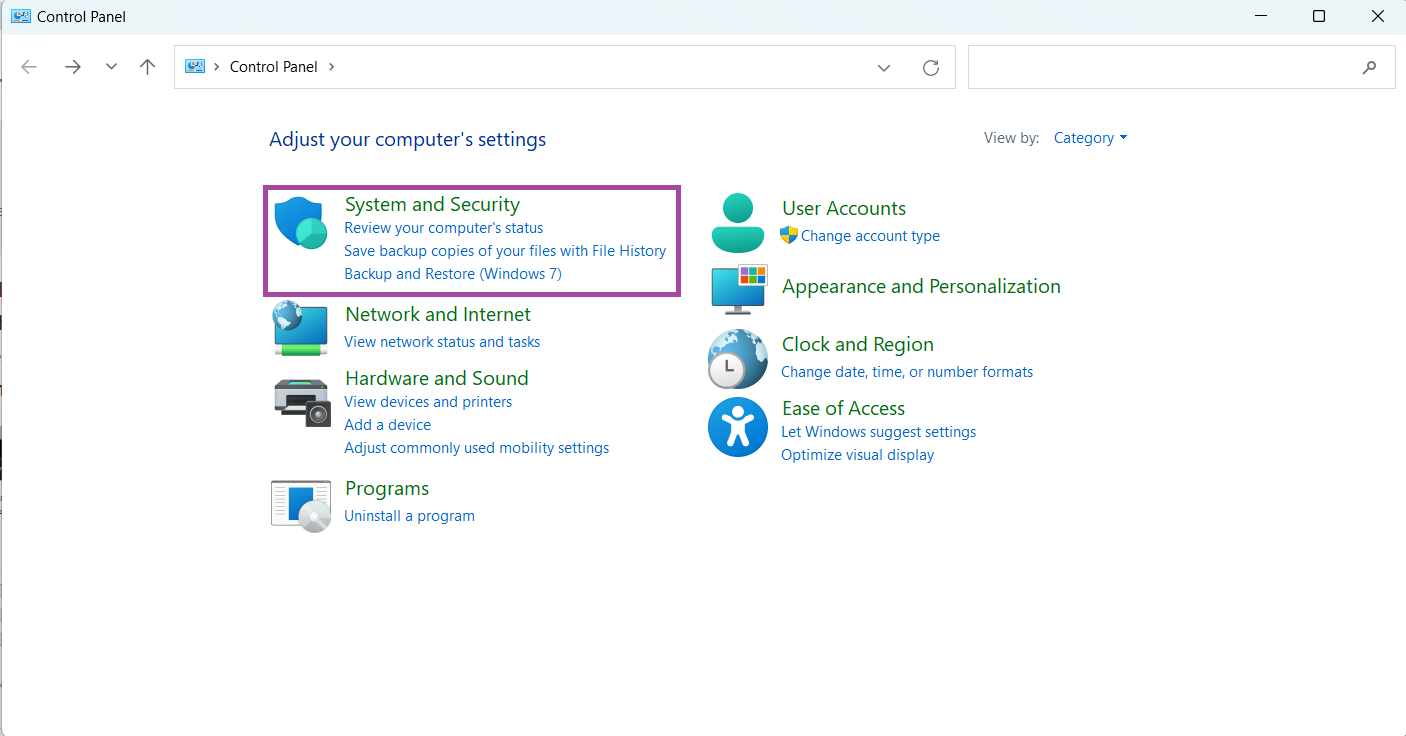
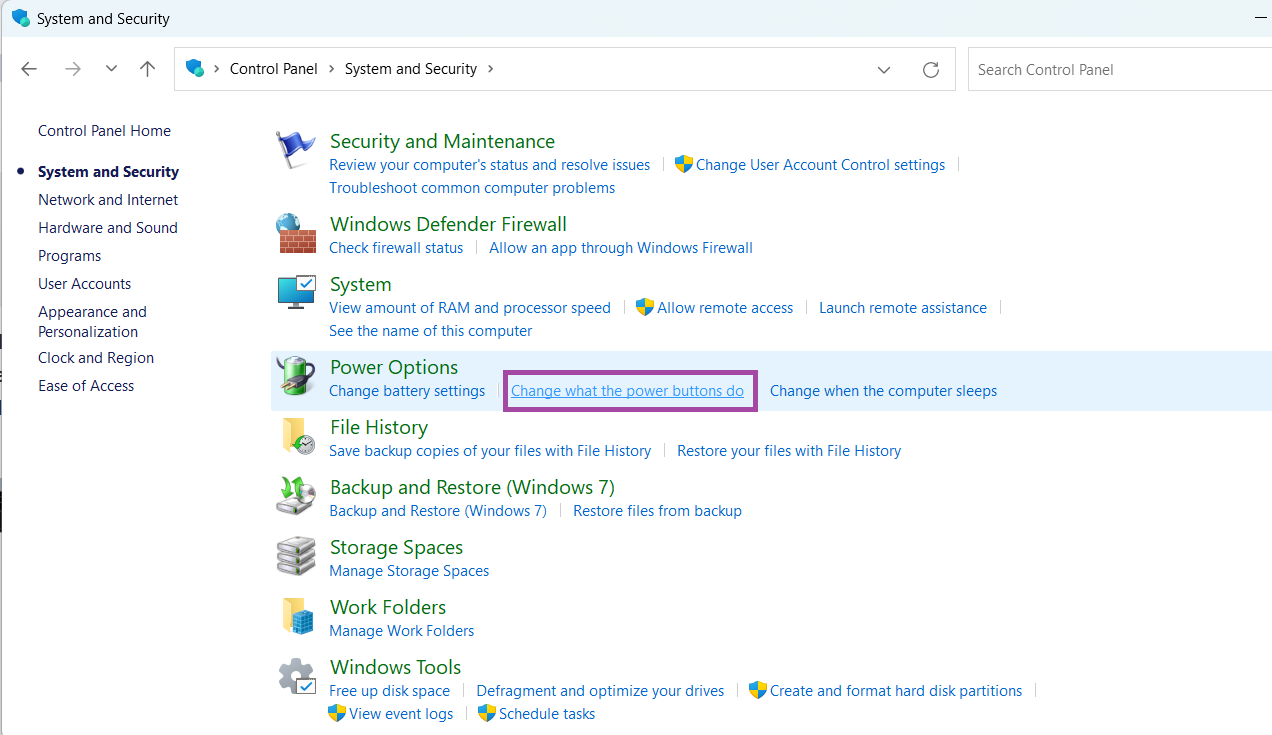
Fix 1: Turn off Fast Startup
You can temporarily turn off Fast startup and see if it helps:
1. Open Control Panel.
2. Click on System and Security.
3. Click on Check what the power button does.
4. Then click Change settings that are currently unavailable.
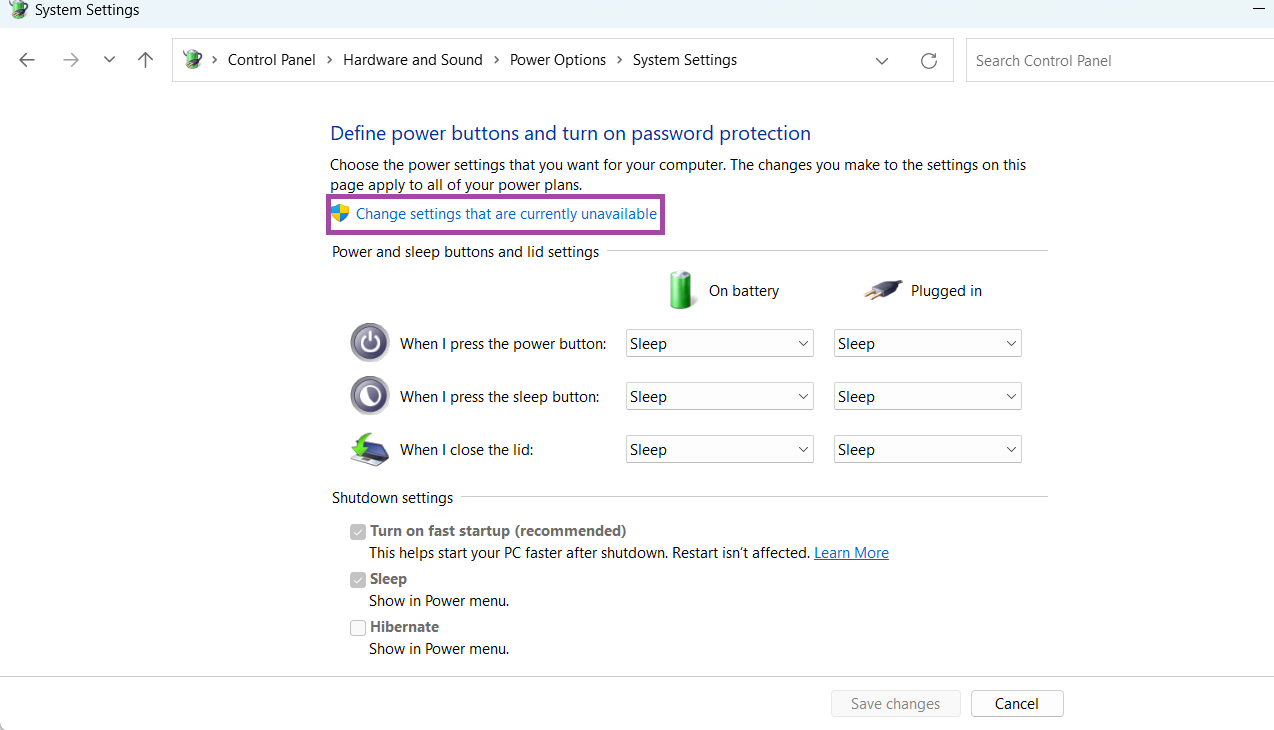
5. Uncheck Turn on fast startup (recommended).

Fix 2: Reinstall the Realtek Audio Driver
The steps to reinstall the Realtek Audio Driver are:
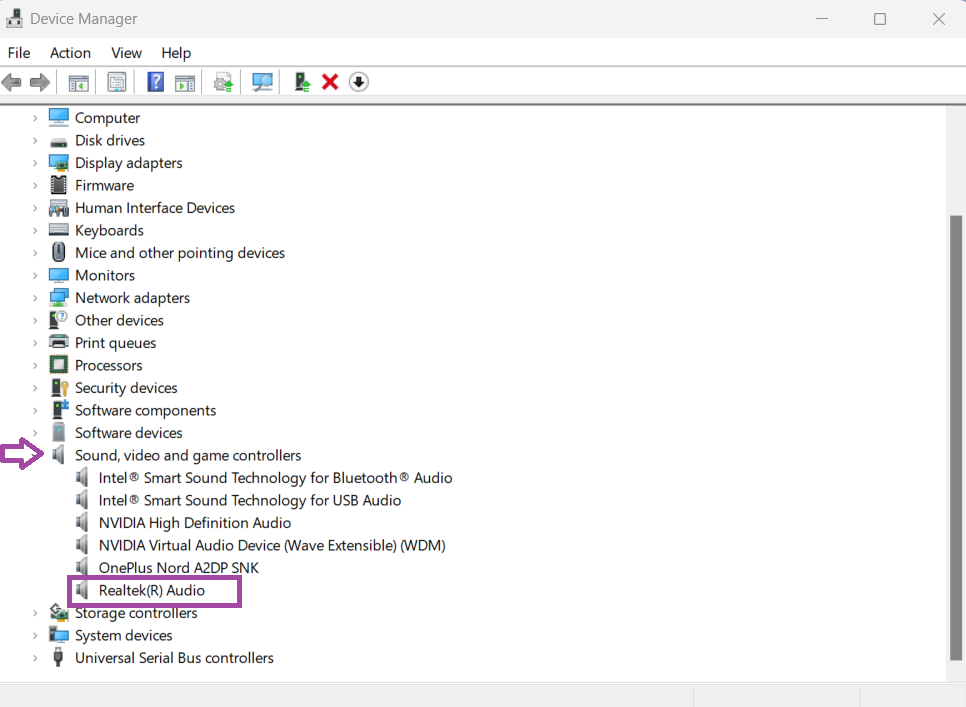
1. Open Device Manager.
2. Expand Sound, video, and game controllers.
3. Right-click on Realtek(R) Audio.
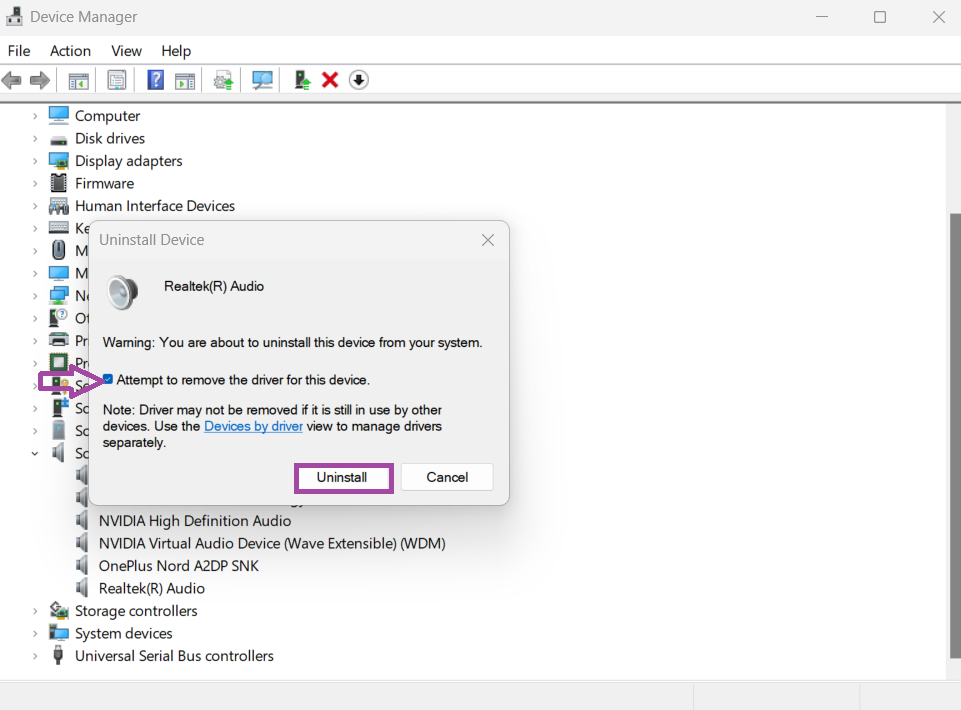
4. Click on Uninstall device option.
5. Check on Attempt to remove the driver for this device and click Uninstall.
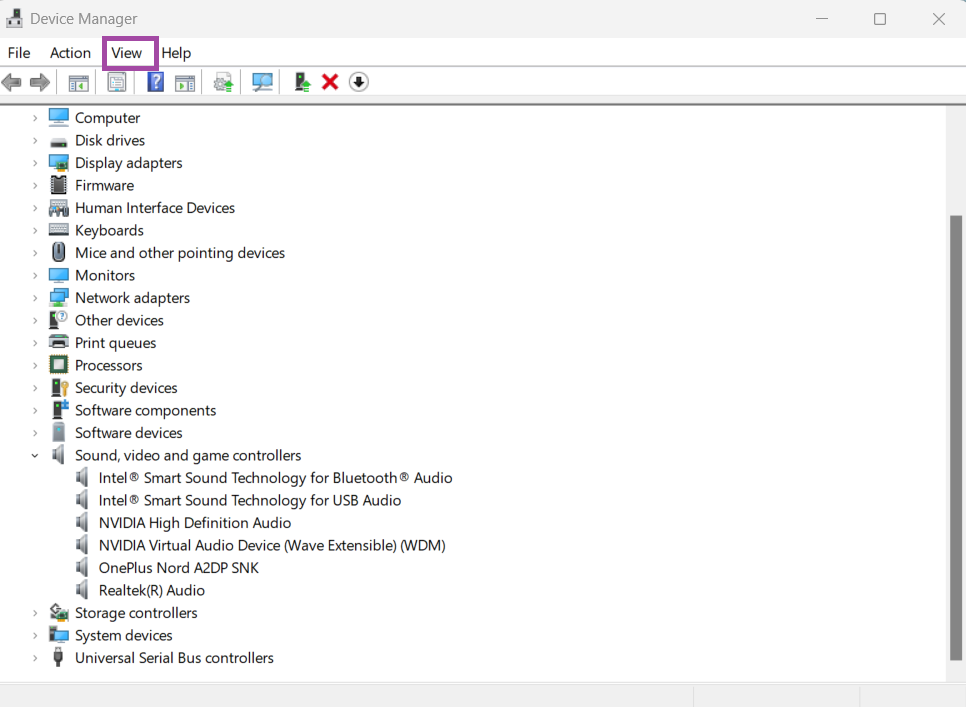
6. Click on the View tab > select Show hidden devices.
7. Search for duplicate audio drivers and right-click on them, then choose Uninstall option.
8. Restart your computer.
Fix 3: Use System Restore to fix Windows Audio Device Graph Isolation stopped working
The steps to use System Restore are:
1. Open Create a restore point by typing restore in the Search bar.
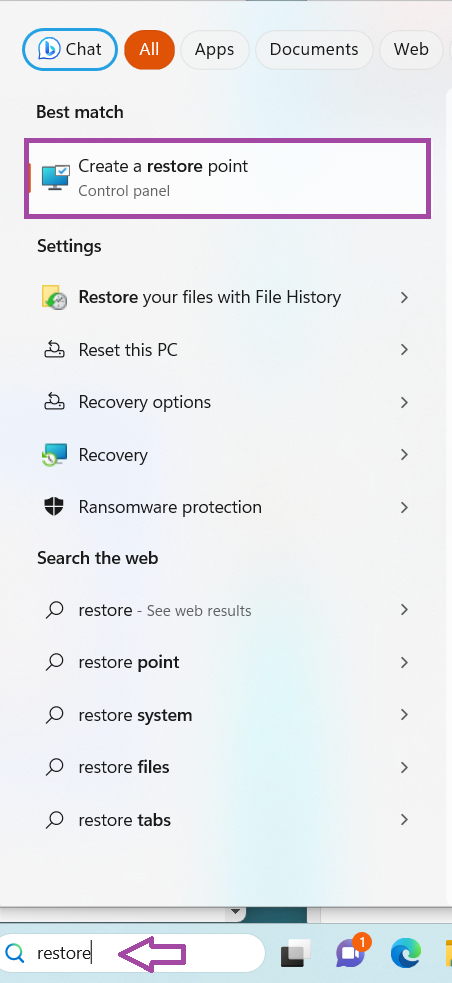
2. Click on System Restore.
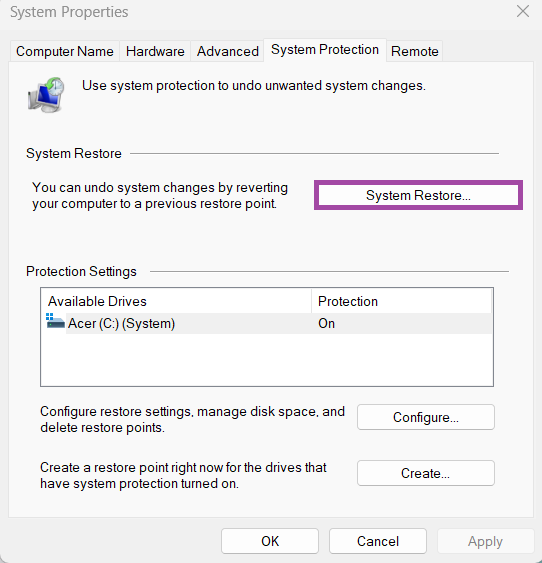
3. Click Next.

4. Select the restore point that you want to enable and then click Next.
5. Your system will start initiating the process and will reboot.
Fix 4: Uninstall RGB Fusion
The steps to uninstall RGB Fusion are:
1. Open Control Panel.
2. Click on Uninstall a program.

3. Find Gigabyte RGB fusion in the list > right-click and select Uninstall.
That’s it!