
If you’re much possessive about what processes are running on your system and how your system is behaving, this article may interest you.
Sometimes, specific processes may take much of your CPU resources and system can behave abnormal. In this article, we’ll take the case study of Windows Audio Device Graph Isolation process which may cause high CPU usage on your system. We will see how you can stop that high CPU usage. Also, we’ll see what purpose this process serves and why it is even running?
Page Contents
Windows Audio Device Graph Isolation Process
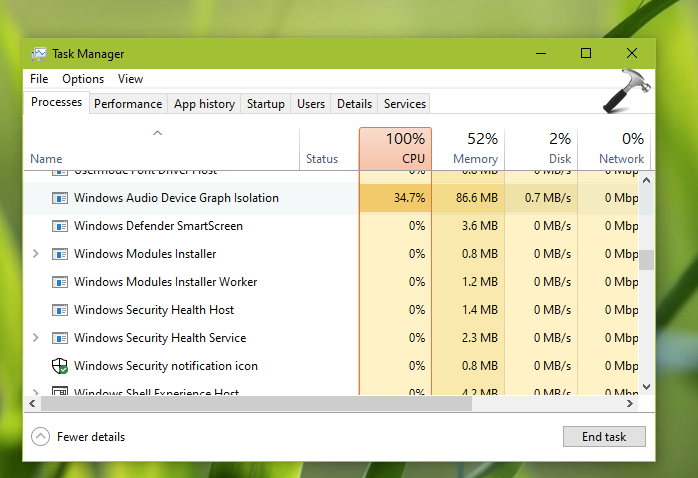
So first, we’ll introduce you Windows Audio Device Graph Isolation process. This is a genuine system process and obviously related to audio. The executable for this process is named as audiodg.exe, located at %windir%/System32 folder.
The main purpose of this process is to run Windows audio engine. It commands the sound device on system to run under separate session, irrespective of the user currently logged in. As the audio services are automatically started when you login, this process follows the same pattern.
This process is responsible to allow third-party sound application codes plus audio device driver codes to run audio on your system. If this process is not running or gets corrupted, audio on your system may not work efficiently. It is advisable that you do not end this process and let it run in background.
Fix Windows Audio Device Graph Isolation High CPU Usage
If you spot high CPU usage with Windows Audio Device Graph Isolation process, you can fix it with these suggestions.
FIX 1 – General Suggestions
1. Restart your system.
2. If you’ve USB device headset plugged in, unplug it and plug in back.
3. Scan your system with Microsoft Defender or third-party AV software present on system.
4. Update or reinstall your audio drivers.
5. Disable Cortana temporarily, as it has helped many users to fix up this issue.
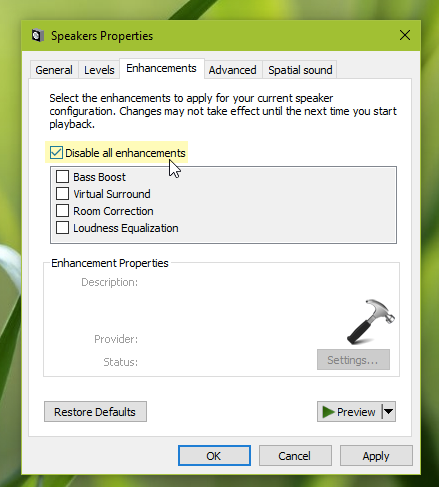
FIX 2 – Disable Enhancements
1. Right click on volume icon on taskbar and select Sounds. If volume icon is missing, see this fix.
2. In Sounds window, choose your default sound device or the device which you suspect for high CPU usage and click Properties.
3. In the property sheet, on Enhancements tab, check Disable all enhancements option. Click OK.
This should resolve the problem. In case if you still face this issue, drop us comment.
See this video, to illustrate this fix:
That’s it!
Also check: Diagnostic Policy Service High CPU Usage In Windows 10.


no option to “Disable all enhancements ” i m using windows 10 2004
^^ Make sure you selected correct sound device.
I also do not have the option to disable all enhancements.