Remote Desktop Services is an important Windows service that allows you to connect to remote computers. This service ensures that the Remote Desktop and Remote Desktop Session Host Server operate properly. But sometimes, this service is not working for many users and shows the error “Windows could not start the Remote Desktop Services”. This tutorial will help you to fix Windows could not start the Remote Desktop Services issue.
Page Contents
Fix: Windows could not start the Remote Desktop Services
Here we have some of the methods that will help you to resolve the problems with Remote Desktop Services:
Method 1: Ensure Remote Desktop is Enabled
Make sure the Remote Desktop is enabled on your computer. Do the following:
1. Open the Settings App and go to System.
2. Now, click on “Remote desktop” on the right panel.

3. Here enable the toggle to “Remote Desktop”.
4. Click Confirm on the confirmation box.
Method 2: Reset Remote Desktop Connection Credentials
Issue can appear due to corrupt or changed credentials. Follow the below steps to reset the saved credentials:
1. Open Search menu and type Remote Desktop Connection.
2. Click on the drop-down menu icon next to Computer and select your remote PC from the list.
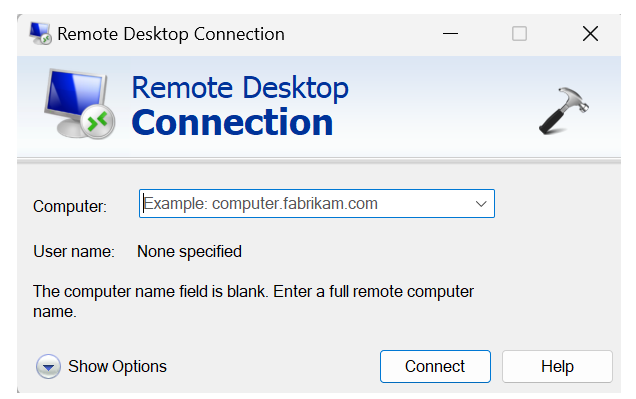
3. Now, select Delete link under the Username section.
4. Click OK.
Method 3: Whitelist Remote Desktop in Windows Firewall
Windows Firewall allows you to block or unblock different applications and inbound and outbound communications. Follow the steps:
1. Open Search menu and type “Allow an app through Windows Firewall”.
2. Now, click on “Change settings”.
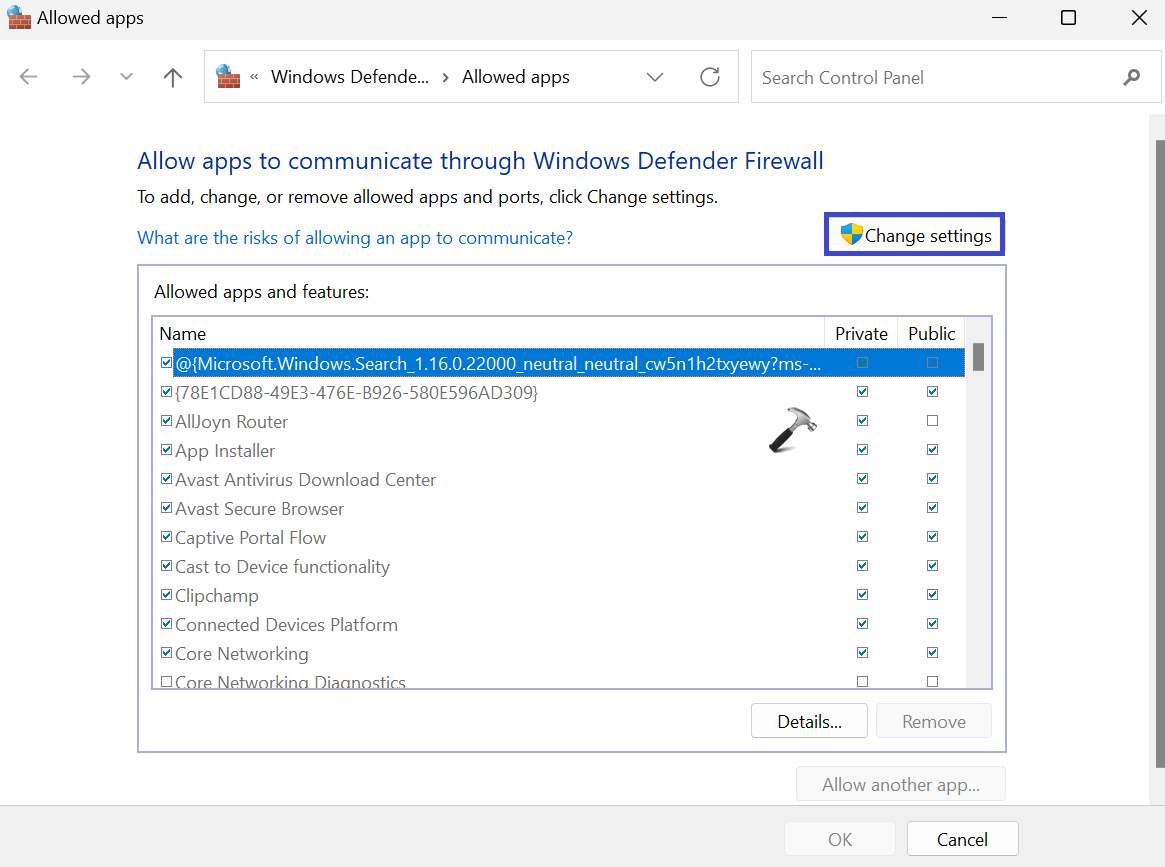
3. In the Apps and features, locate “Remote Desktop”.
4. Check “Public and Private” box.
5. Click OK.
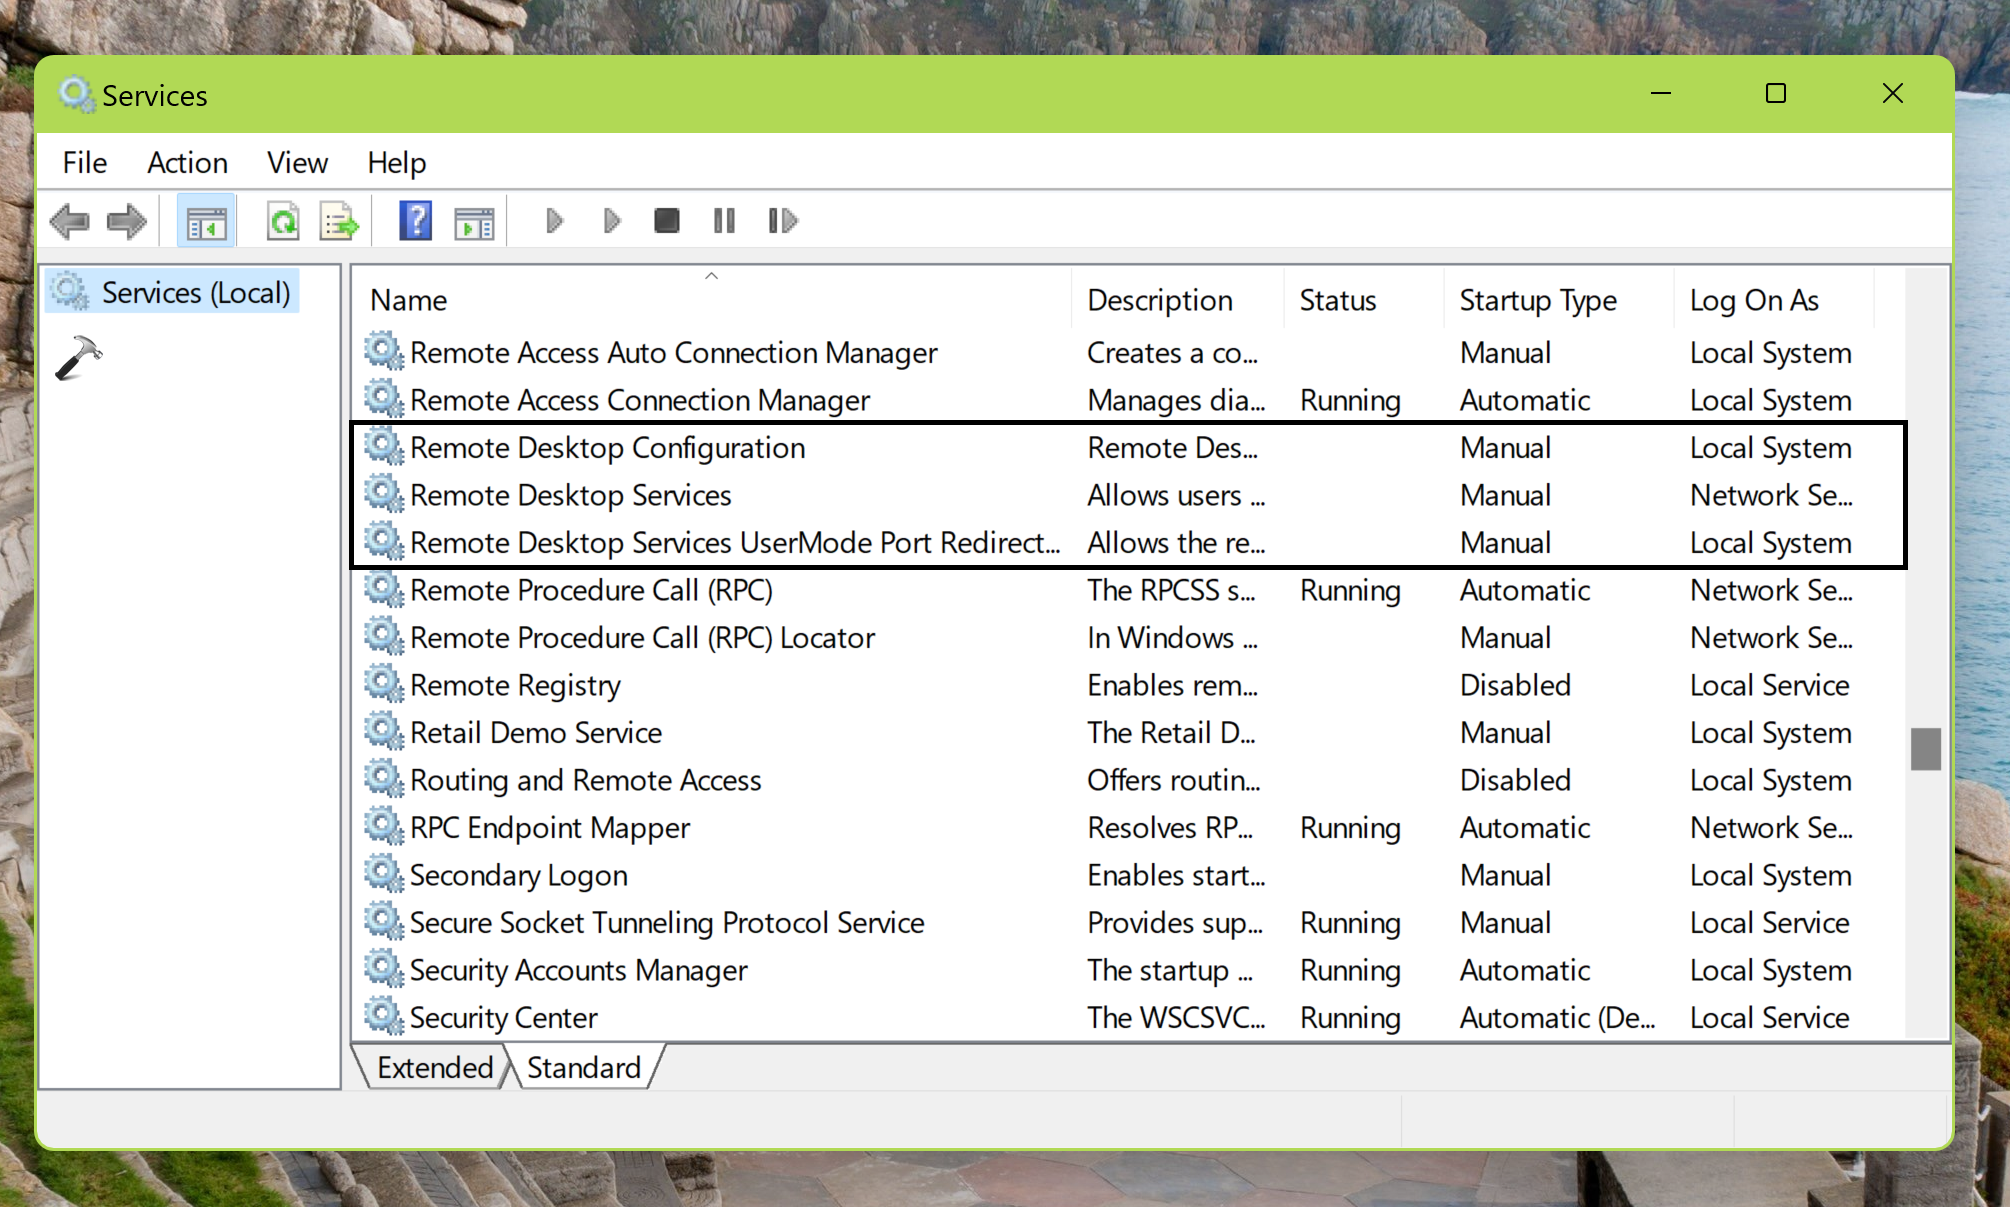
Method 4: Check RPD Services Status
For Remote Desktop Service to work properly, the RDP Services must be running in the background. Follow the steps:
1. Open Search menu and type “Services”.
2. Right-click on “Remote Desktop Services” and select “Properties”.
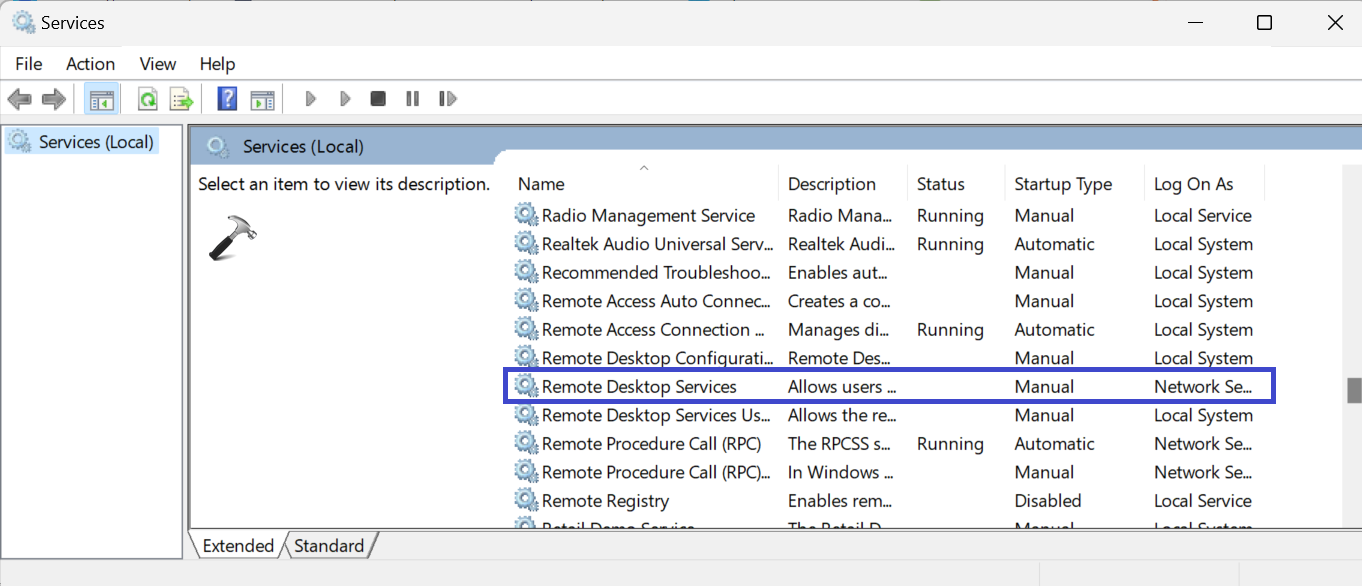
3. If the service status is “Stopped”, you will have to restart the service to use the remote desktop.
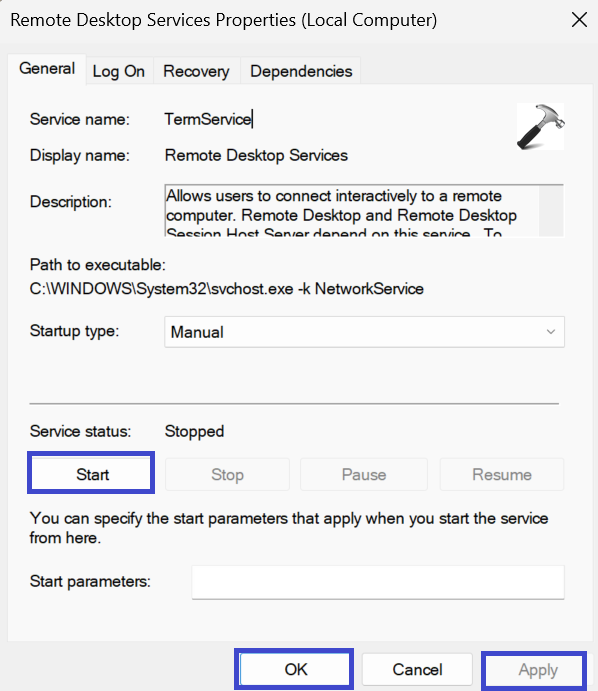
4. Click on Start.
5. Click OK followed by Apply.
Method 5: Configure the RDP Listen Port
See the steps below to configure the RDP Listen Port:
1. Press the Windows Key + R. Type regedit.exe and click OK.
2. Navigate the following path:
Computer\HKEY_LOCAL_MACHINE\SYSTEM\CurrentControlSet\Control\Terminal Server\WinStations\RDP-Tcp
3. Now, click on RDP-Tcp.
In the right panel, double-click on PortNumber.

4. A prompt box will appear.
Select decimal value and set the value to 3389. Click OK.

5. Close the Registry Editor Windows and restart the PC to save the settings.
Method 6: Enable RDP Protocol on Remote Computer
Follow the below steps to enable RDP Protocol using Registry Editor:
1. Press the Windows Key + R. Type regedit.exe and click OK.
2. Navigate the following path:
HKEY_LOCAL_MACHINE\SYSTEM\CurrentControlSet\Control\Terminal Server
3. Now, double-click on fDenyTSConnection.

4. A prompt box will appear.
Set the value to 1. Click OK.
5. Close the Registry Editor Window and restart the PC to save the settings.
Method 7: Disable IPv6 Protocol
IPv6 allow your computer to establish a connection and talk between all the connected networks. Sometimes, IPv6 make the network inconsistent which affect the Remote Desktop Services. Follow the steps to disable IPv6 Protocol:
1. Open Control Panel and go to Network and Internet.

2. Now, select “Network and sharing Center”.

3. Click on the link next to Connections and select “Properties”.

4. Uncheck Internet Protocol Version 6 (TCP / IPv6) box.

5. Click OK.
6. Close the Window and restart the PC to apply the settings.
Method 8: Turn Off Custom Scaling
The computer you are trying to connect remotely must be compatible with the scaling feature. Below are the steps to disable custom scaling on your computer:
1. Open Settings App and go to System.
2. Now, click on Display.

3. Click on the Scale option.

4. Now, click on “Turn off custom scaling and sign out”.
5. Here you will be signed out of your account. Wait and then again sign-in.
Method 9: Run SFC and DISM Scan
System File Checker (SFC) is diagnostic tool on Windows. Follow the below steps to run SFC to fix Remote Desktop Services:
1. Open Command Prompt.
2. Now, copy and paste the below command:
sfc /scannow
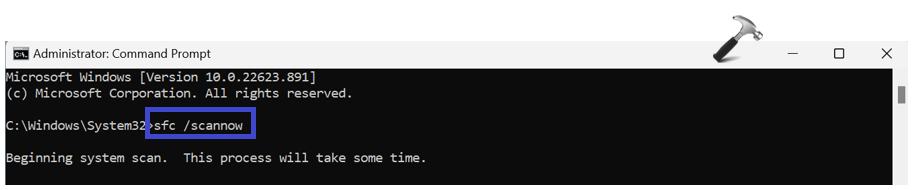
3. Hit Enter.
4. It will take some time to complete the scan. After scan is complete, check whether the issue is resolved or not.
To run DISM (Deployment Image Servicing and Management) Scan to fix Remote Desktop Service, do the following:
1. Open Command Prompt.
2. Now, copy and paste the below command:
DISM /Online /Cleanup-Image / RestoreHealth
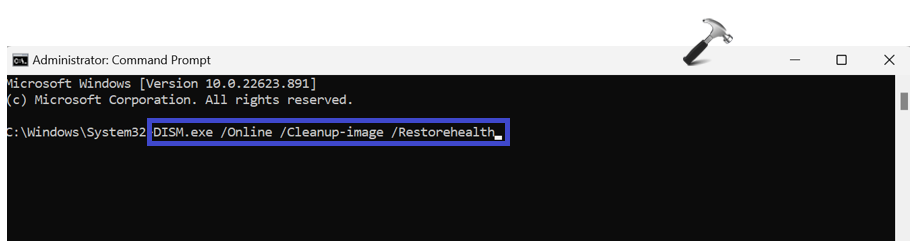
3. Hit Enter.
4. After completing the scan, check whether the issue is resolved or not.
That’s It!