Windows comes with an interesting feature called Remote Desktop Connection. Using this built-in feature, users can remotely connect to their Windows PC from other devices. In this post, we are going to cover different methods on how to enable Remote Desktop on Windows 11.
Page Contents
How to enable Remote Desktop on Windows 11
Method 1: Enable Remote Desktop Using Settings
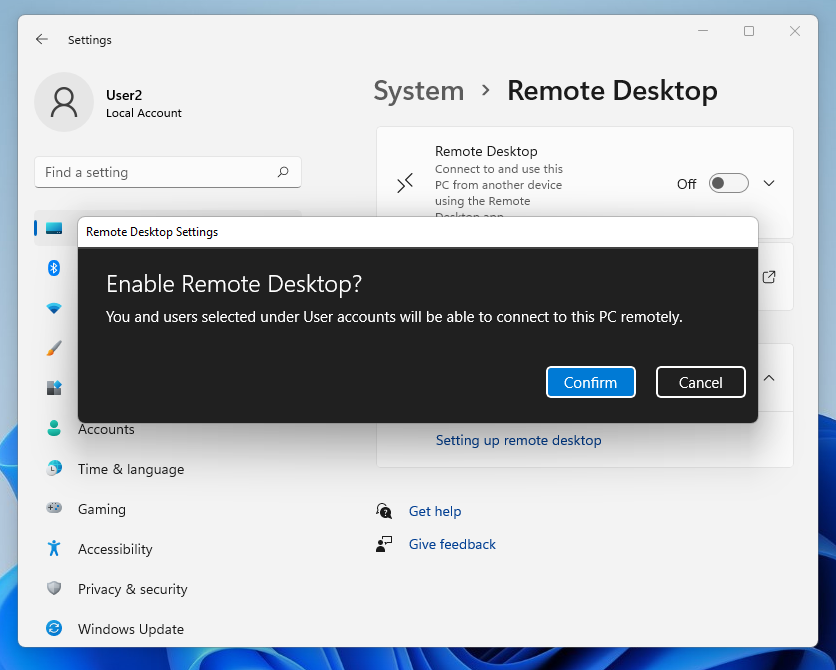
- Initially, open Settings by pressing Windows + I tabs on the keyboard. From there, select System and then, tap on Remote Desktop.
- Now, switch on the toggle present next to Remote Desktop.
- Once a pop-up shows up on the screen, tap on Confirm for proceeding further.
Now, tap on the arrow icon present next to the toggle button and tick the box against Require devices to use Network Level Authentication Connect (Recommended). This will secure the Remote Desktop connection.
 Note: When users are connecting to their Windows PC from Windows Vista or XP, keep this option unchecked. This is because older versions of Windows do not support Network Level Authentication.
All user accounts listed in the Administrators group could access the PC remotely. In order to allow remote access to non-administrations, tap on Remote Desktop Users. When a dialog box appears, tap on the Add tab for adding other user accounts.
Now, you have enabled the Remote Desktop on Windows 11 successfully.
Method 2: Enable Remote Desktop Using Registry
Registry Disclaimer: It is recommended to create a System Restore point first, if you’re not familiar with registry editing.- In the first place, you need to connect to Registry Editor. To open it, type regedit in the Run dialog box.
- After connecting to the registry of the remote machine, go to:
HKEY_LOCAL_MACHINE\SYSTEM\CurrentControlSet\Control\Terminal Server
Once there, double-tap on DWORD fDenyTSConnections and modify its value to 0 from 1.

- Lastly, reboot your Windows system. You will now be able to access Remote Desktop on Windows 11. In future, if you like to disable remote desktop, then set the value back to 1.
Method 3: Enable Remote Desktop Using Windows PowerShell
- Before you move further, users have to create a session with the remote desktop using Windows PowerShell.
- To enable Remote Desktop, run the following commands:
Set-ItemProperty -Path 'HKLM:\System\CurrentControlSet\Control\Terminal Server'-name "fDenyTSConnections" -Value 0
Enable-NetFirewallRule -DisplayGroup "Remote Desktop"

Here, the first PowerShell command will turn on the Remote Desktop feature, whereas the second one will activate firewall for allowing desktop connections.
So, using these three different methods, users can enable the Remote Device on Windows 11.
Related: Fixing Remote Desktop Connection Issues In Windows.